Archive for category bedroom
No longer a hole in the wall
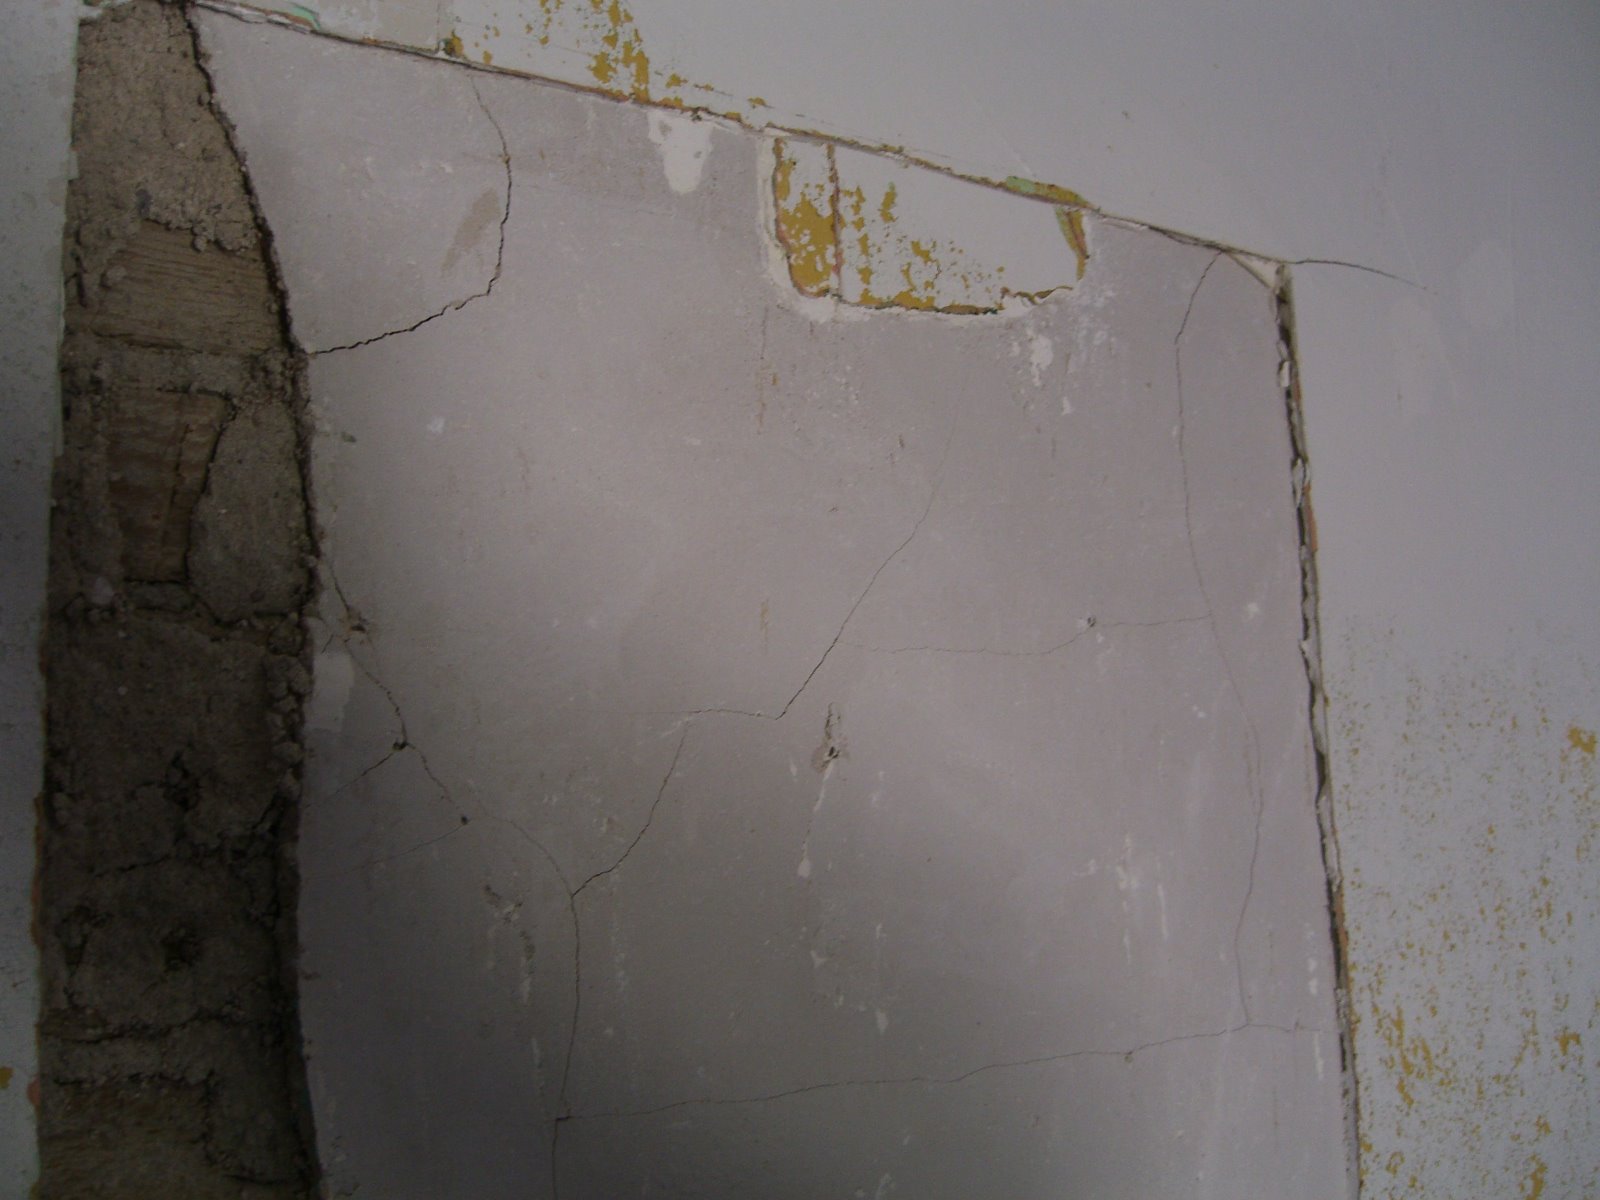
Readers may remember the section of wall in the back bedroom that needed repair and how locating a plug to match the old 1/4″ wallboard was proving difficult. I decided to just break out the plaster down to the lathe and plug it with drywall instead.
Fortunately I don’t think there are other sections of plaster/wallboard that are cracked and buckling, so I shouldn’t have to do this – or something smarter – again soon.
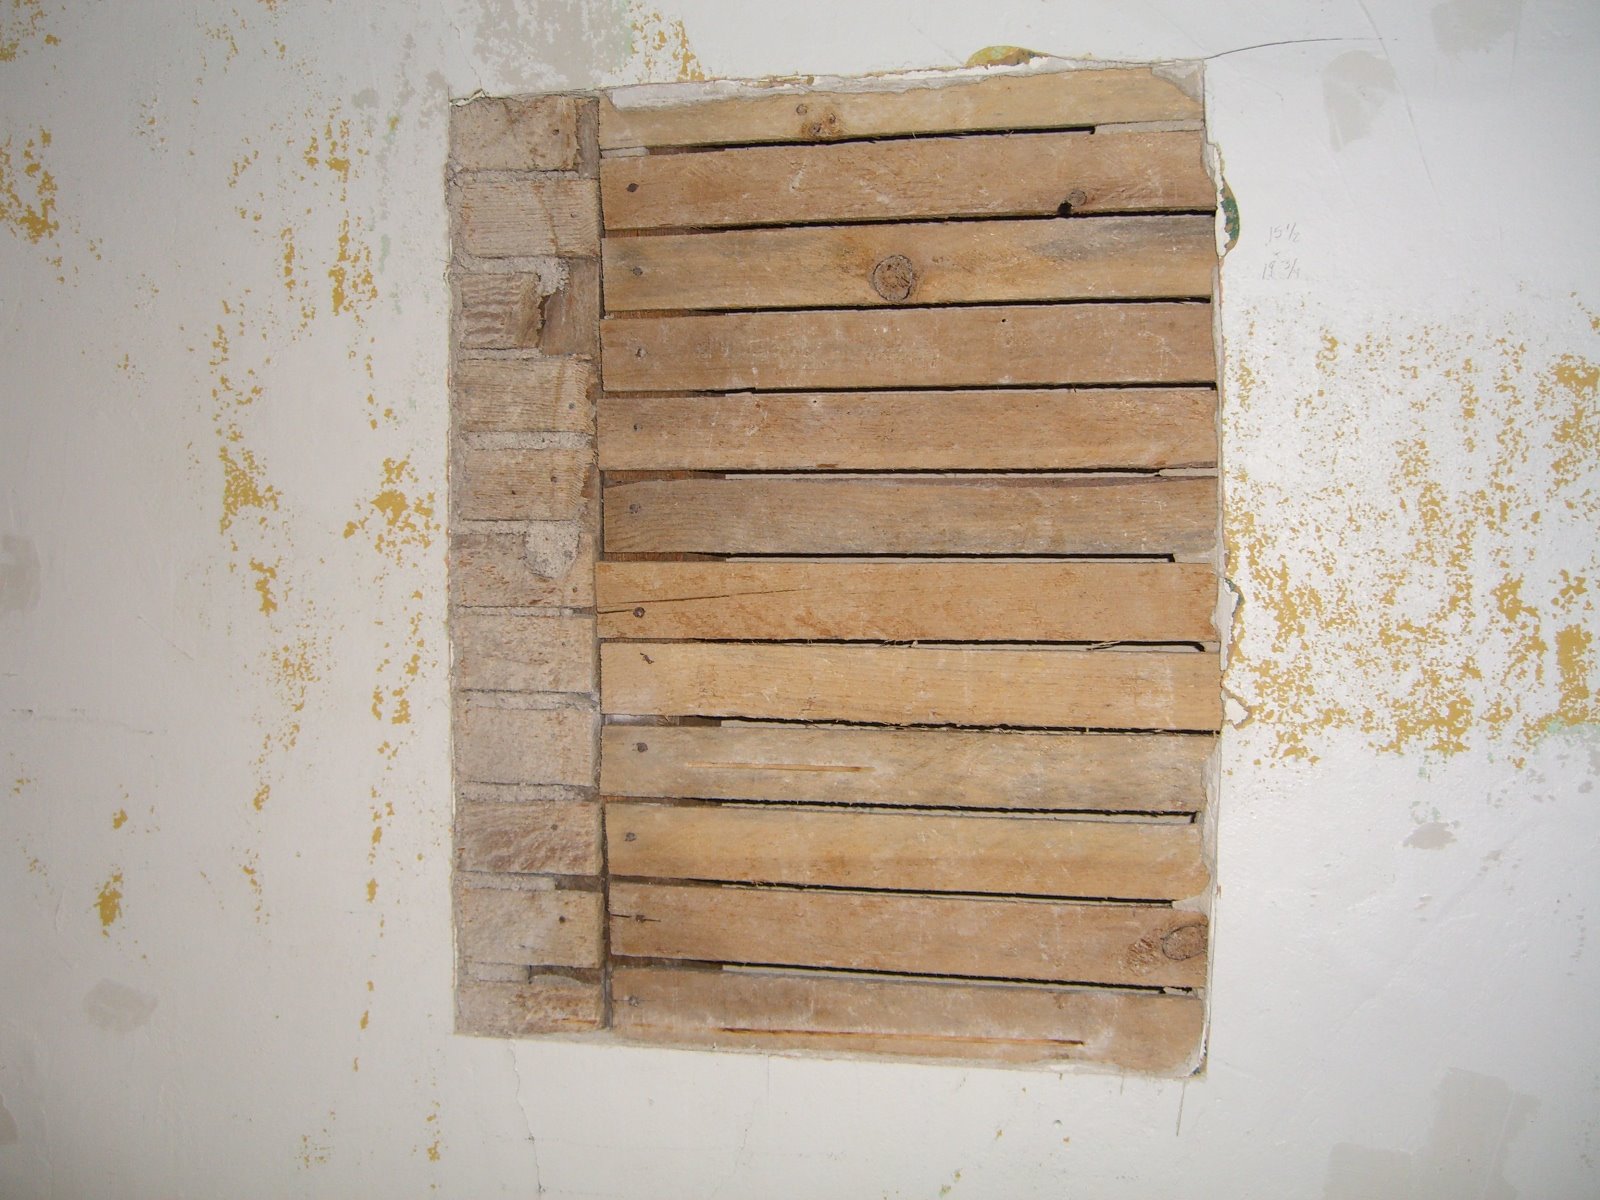 This section of wall was clearly redone at some point – we’re talking 40+ years ago no real idea if there was a door or different wall there, or if there was damage repaired, or what. If anyone knows when they stopped using horse-hair plaster (which covered the lathe on the left side) and started using the more uniform plaster (used to cover the right), that might give me a sense of whether this remodeling was connected to the back addition (circa 1920) or something else.
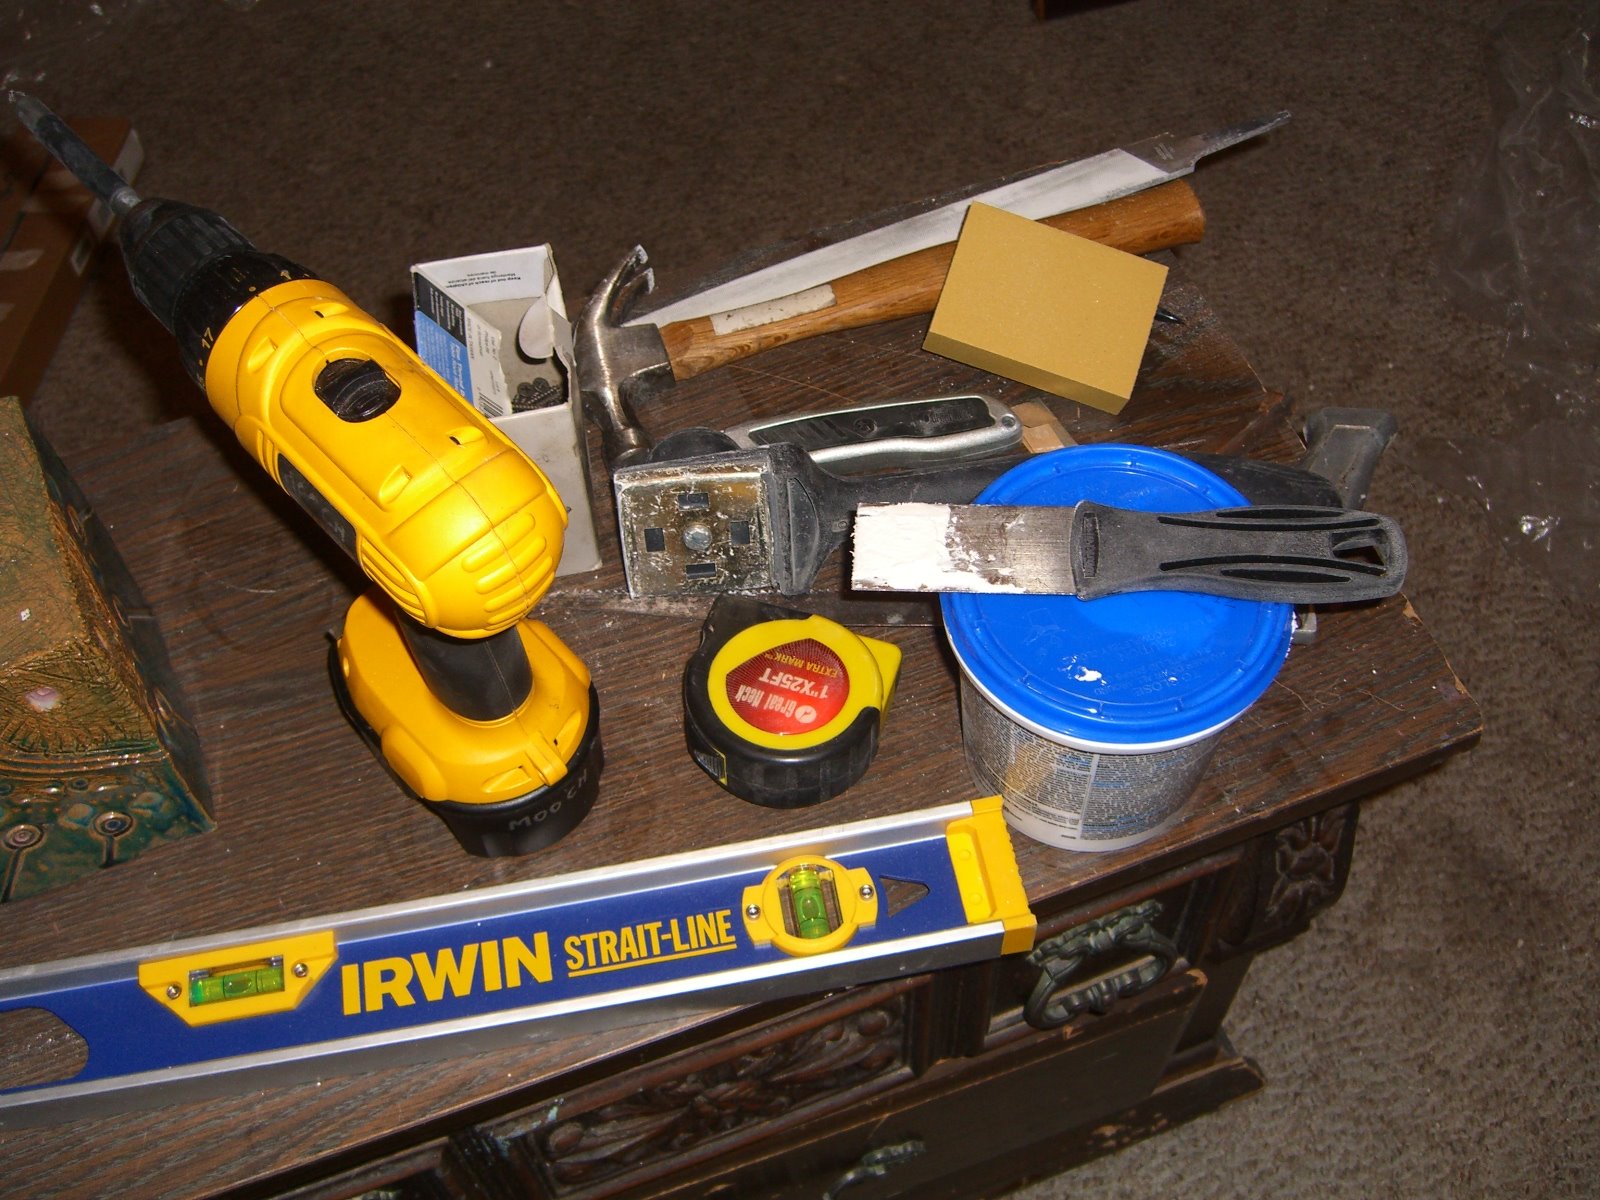
 In any event, clearing just this section of plaster(s) was an adventure, involving all the tools below plus an aborted attempt to use a circ saw. The ‘newer’ plaster was very disinterested in budging, which I suppose bodes well for the long term integrity of the house, but sucks for me trying to get this done in a day.
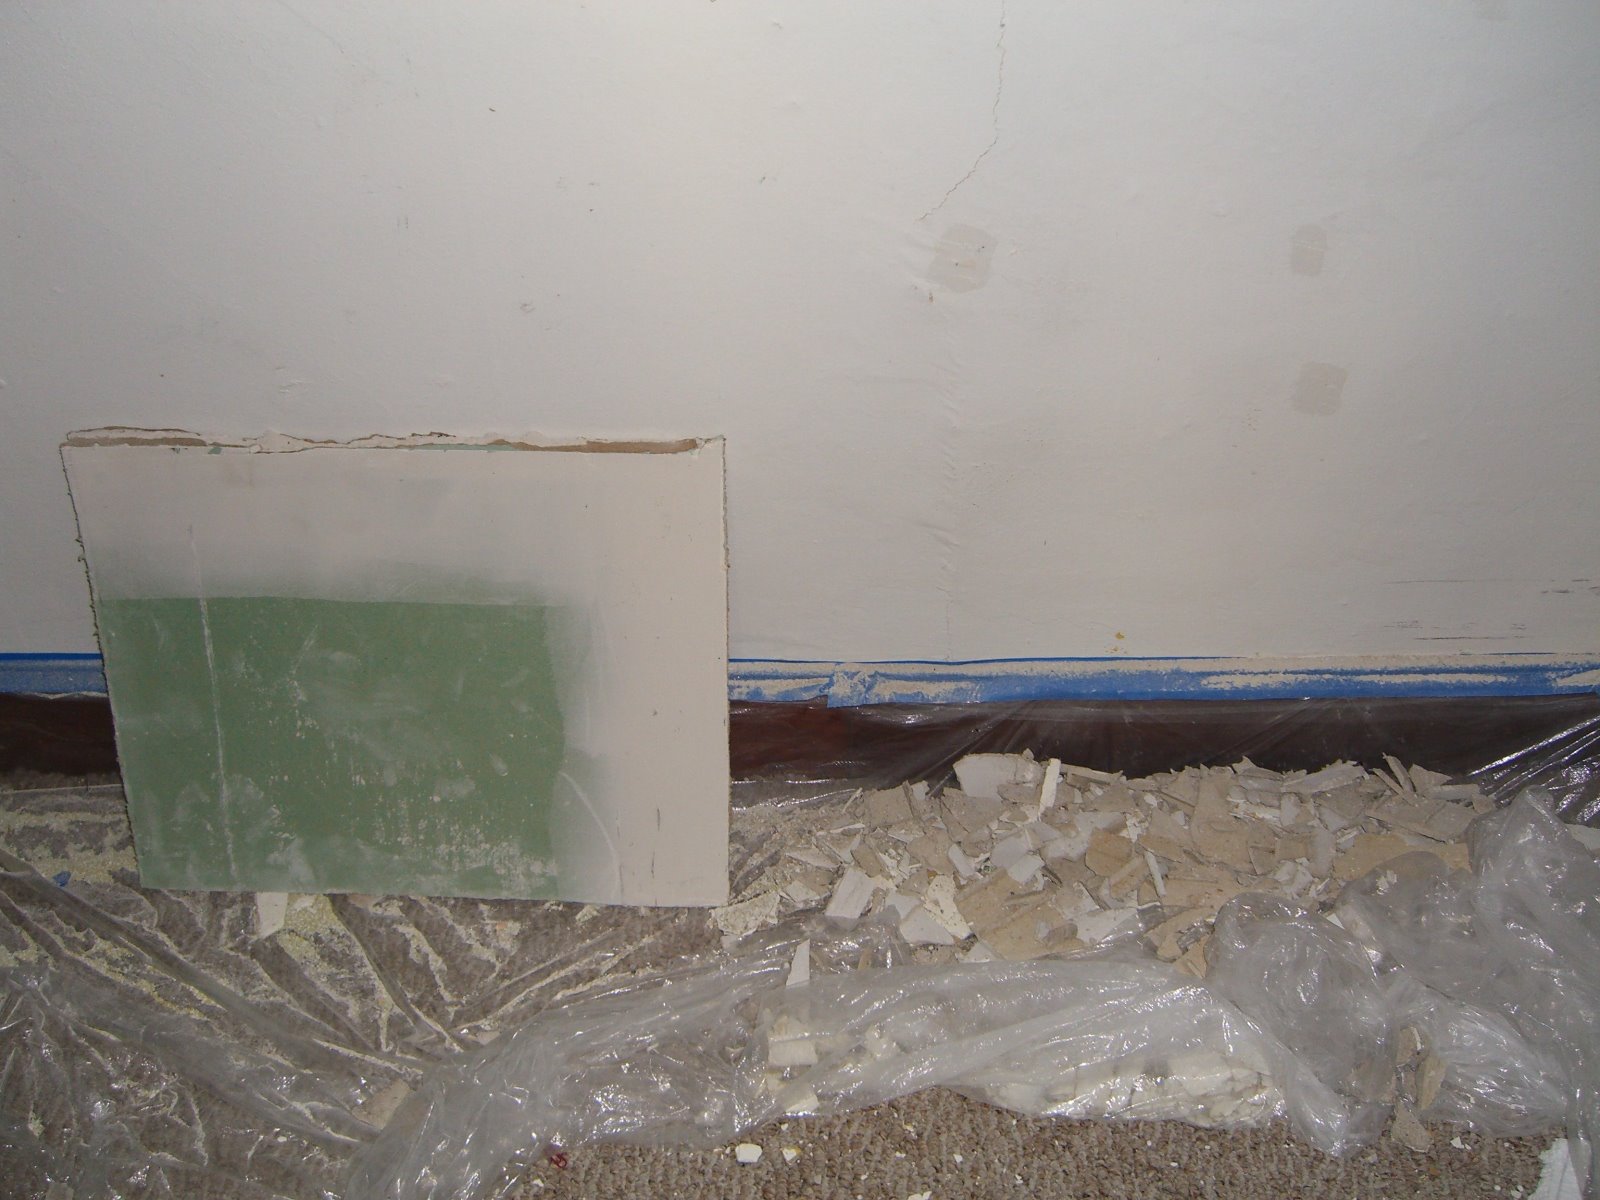
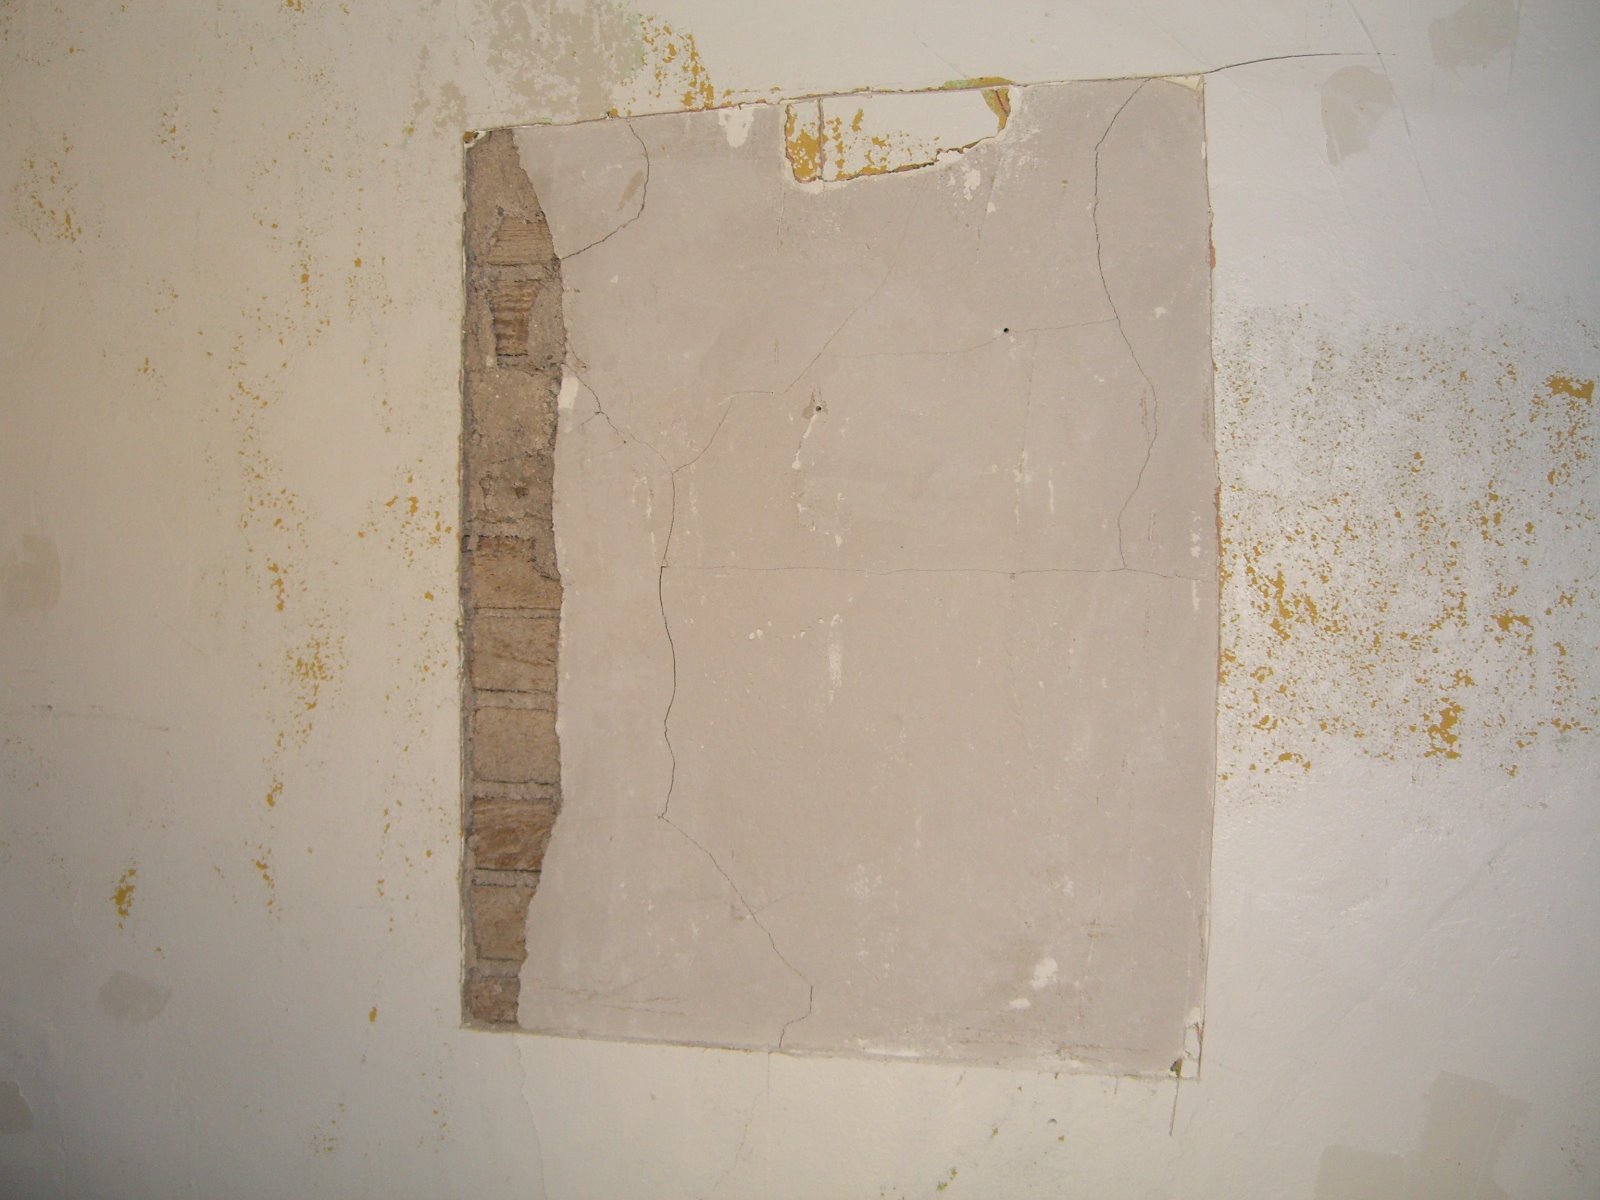
 On the left, the drywall plug set to replace all the plaster on the right:
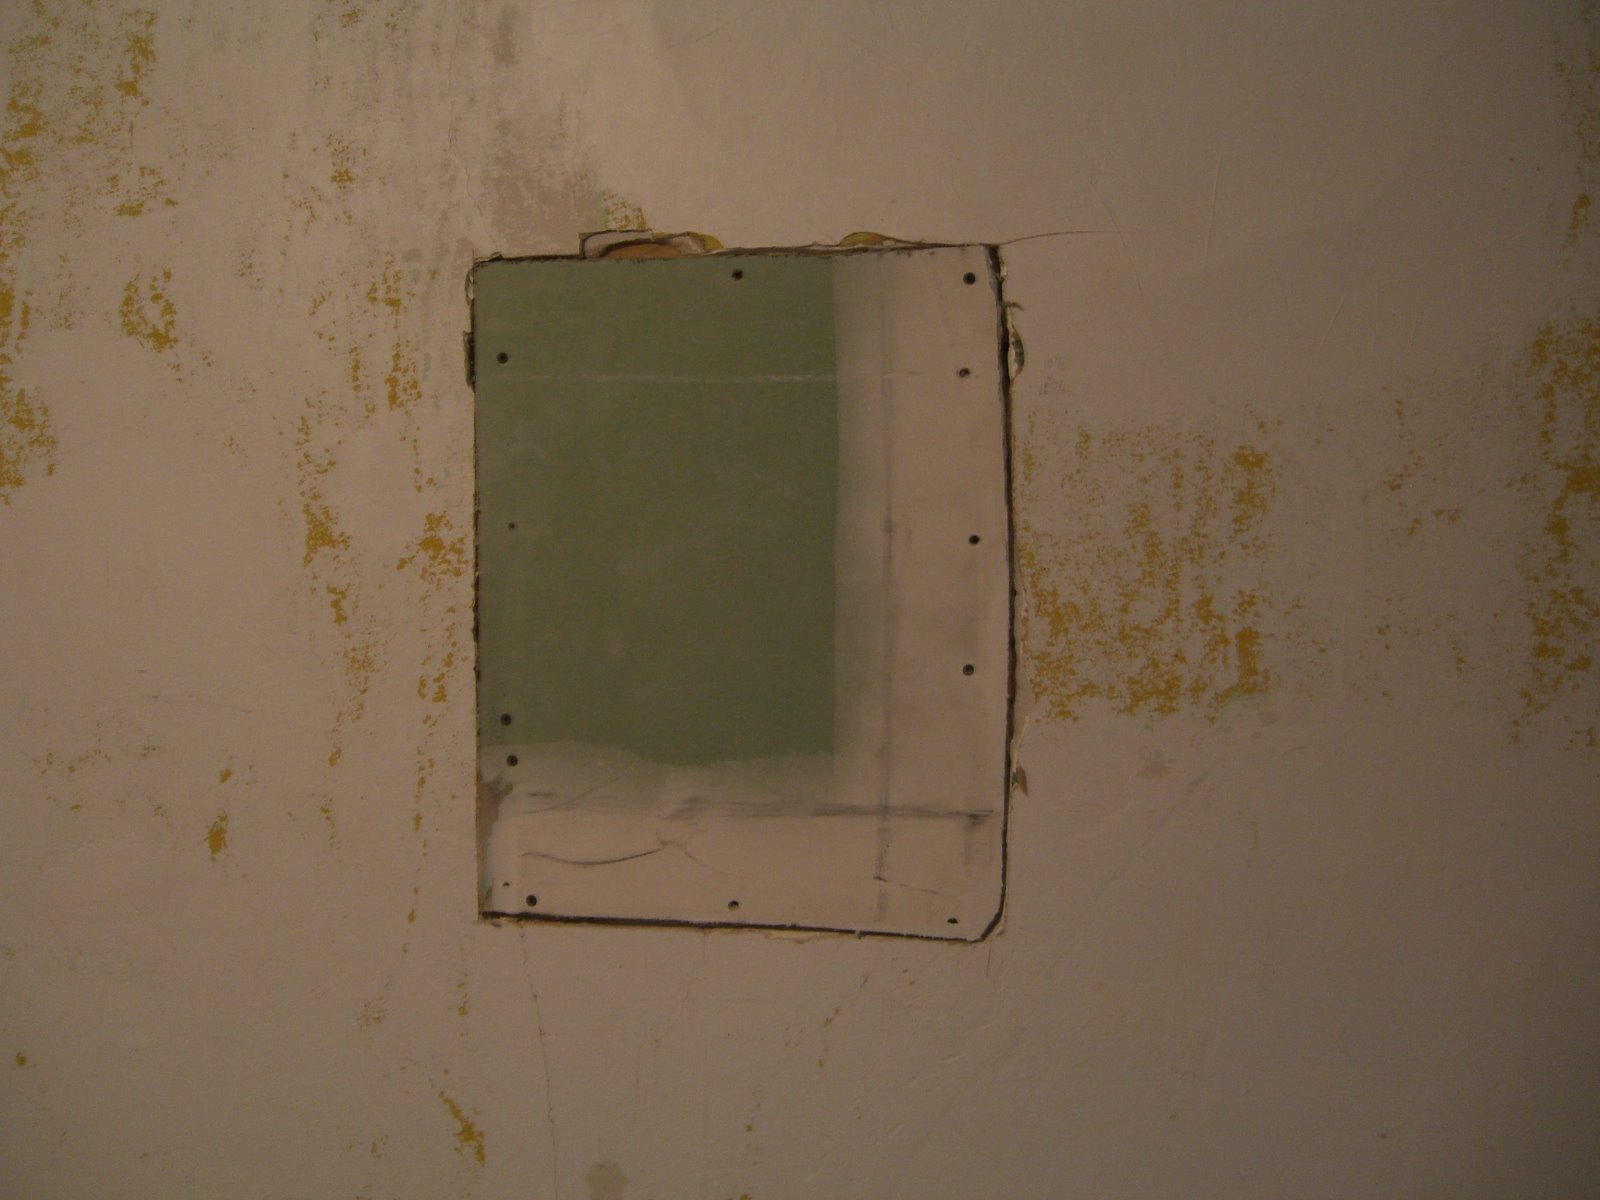 There’s some slight unevenness with the two sections of lathe, probably due to the studs not being perfectly aligned. The screws seem to be holding the plug in fine, and I filed the edges a little to create a better gradient. Then used up a quarter of my jug of spackle:
 After I was done I realized I’d missed a great opportunity to install a safe or secret compartment. Ah well – plenty of other walls in the house.
Scraping and painting, and problems with both (now with pictures!).
Plenty of both the last couple of days. I’ve got one renter moving in right now and am trying to get all the upstairs rooms painted (if they need it). This is mostly standard stuff – tape off, roller, brush, clean up (got an excellent selection of self-priming paints from Sherwin Williams so things go even faster) – but I have one problem in the back bedroom:
A section of the wallboard had cracked and buckled, probably from someone years ago putting their elbow through the other side of the wall. Whatever the reason, I needed to cut the section out down to the plaster. The plan was to buy some drywall or wallboard of the same thickness, tack it into the space, spackle the edges, and paint the whole wall. Unfortunately, this wallboard or whatever is just under a quarter inch thick and something like it probably hasn’t been manufactured in years, according to other people who know old buildings. Home Depot certainly doesn’t seem to have anything. I’m thinking about just spackling the entire hole, although that seems like a huge waste of spackle, or tacking luan or other wood into the space, although that seems like it will produce a wall with wildly different surfaces.
 I’m also continuing to hack at the porch. I finished the entire lower rail today, plan to get the entire ceiling done within the next couple of days, but am really not looking forward to dealing with the spindles which have thick paint that is either cracking or not moving.
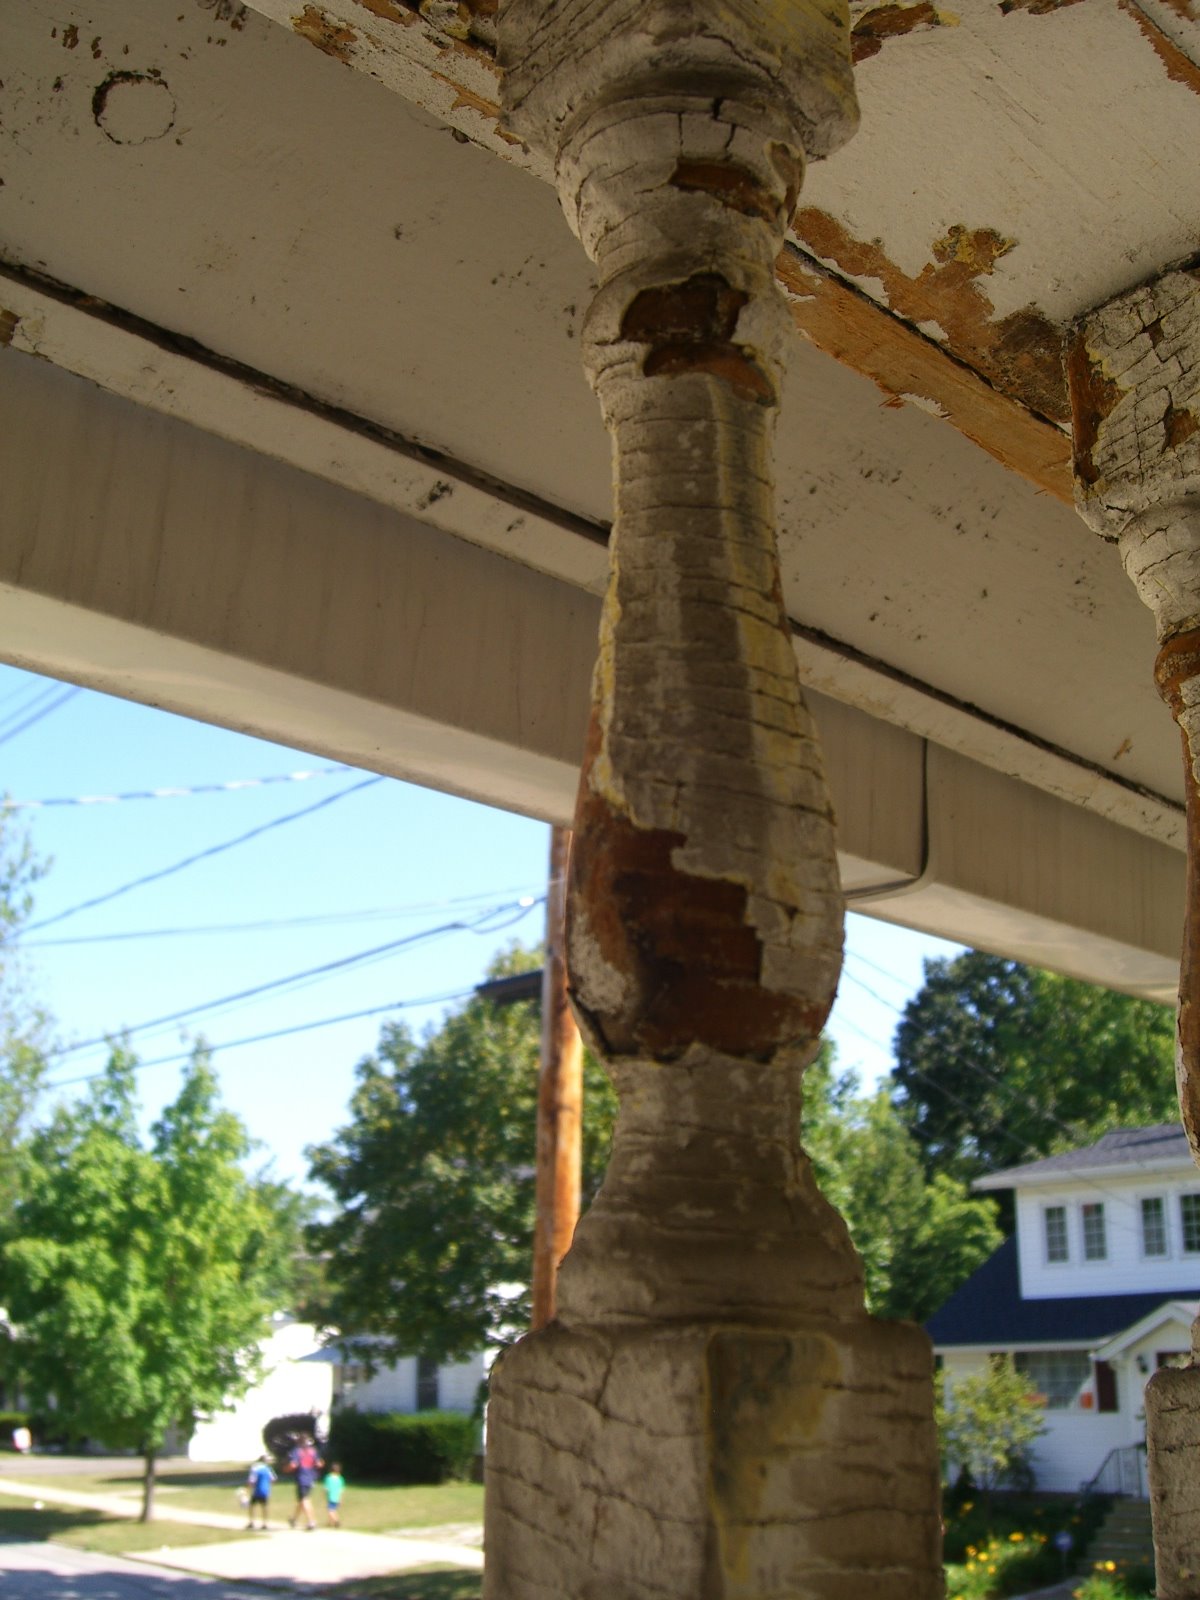

They’re unique, that’s for sure.
After staring at my closet for yet another day thinking how great it’ll be once I install some shelves and move the dresser inside, and get a bar of some kind to hand all my shirts on, I realized that I had all the prep work done and it was just pure procrastination preventing me from (alliterating apparently and) doing at least the first two items.
The custom shelf was pretty easy. It doesn’t have to support much weight, meaning the shelf supports themselves don’t have to support much weight, meaning this half-inch right angle piece I had in the back room would be fine tacked straight into the wall.

[Update 8/14 – should have mentioned all the steps here. First I pre-drilled the support at 4 places along its length; it makes the next several steps much easier, not to mention keeps you from splitting the support and teahcing your neighbors some new curse words. Then I tapped the nails into, but not through the wood – ‘porcupine’ boards also make the work go faster, assuming you didn’t pre-drill holes that are too big. Then: found my height, nailed one nail in part way to the wall, LEVELED the support (this is the sort of step I’d normally space on and have to pull out a nail), tapped in another nail, and then hammered all four nails in using a nail set to finish them off. Nail sets are wonderful, wonderful tools, especially when working with small nails and/or tight spaces.
You can try and measure from the floor to the support on both sides, or just use a piece of wood and the level to quickly find the right height. If you’re a little off for some reason, don’t sweat – these shelves are only 3’1″ wide, so a slight grade won’t even be noticeable.]
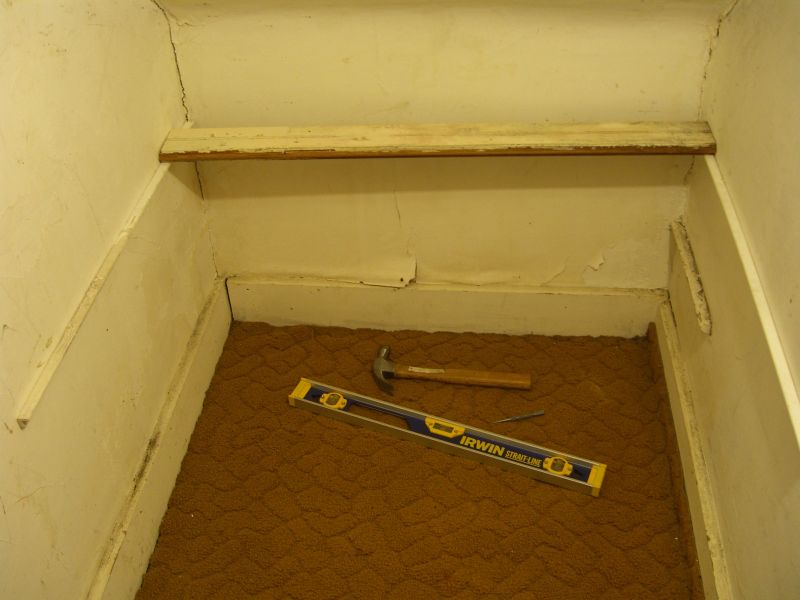 You can use whatever one-by wood makes sense for you – scrap is great if you sand or paint, or don’t mind how it looks. This is a bunch of old old tongue and groove that came out of a friend’s house and that I knew would be useful for something. In addition to having some character, it also comes apart in 3″ sections if, for some reason, I needed a little more clearance at the front.
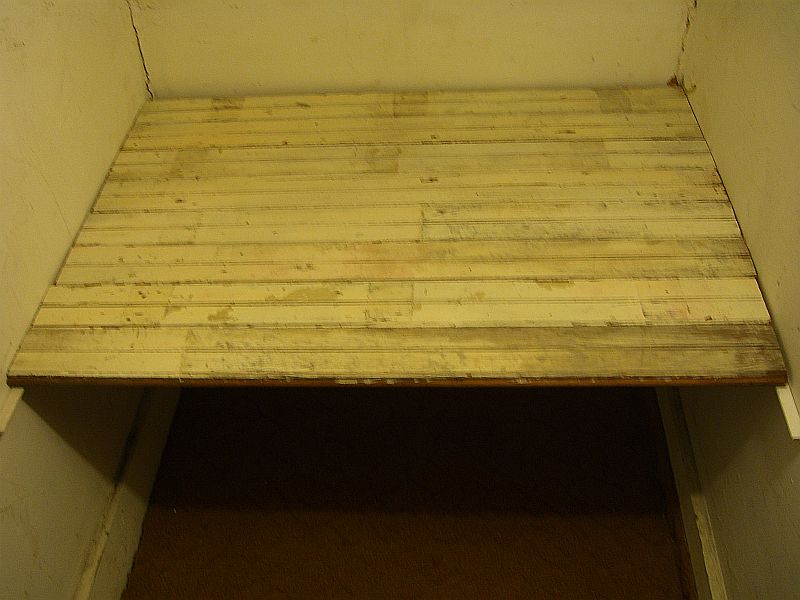 If you’re doing something like this in an old house like mine, make sure to take multiple measurements. For whatever reason this closet tapers slightly. The slats are all cut the same, but the two closest to you in the picture have probably 3/16″ wiggle room, whereas the very back slat is jammed in too tightly (you can see where I accidentally gouged some paint on the right while putting it in). Measuring the way back as well as the couple of runs I measured elsewhere would have prompted me to cut one board a hair shorter.
Doesn’t matter much at all – it works great and looks nice as is. I’m thinking of putting a small rolling shelf underneath this one for my shoes.
Sick day
The big plan for today was to take down my old rusted shed and pull up a few roots/stumps to make way for a new shed (one of these days). I got the barn-razing (har) email out a little late, though, and I was feeling under the weather (don’t worry – a nap and some food and I was fine by evening), so that plan has been postponed for a bit.
Instead:
– finally hung porch door; need to either adjust middle and top hinge or shave 1/8+” off the other side to get it fitting smoothly in the frame.
– leveled washer; now need to get a vibration dampener
– started prep on wall in back bedroom – there was a cracked section of drywall; I started cutting and have wound up expanding to about 18″ square to get around various cracks and warps. There’s more to one side, but I don’t want to rip out too much, and what remains is at least level. Plan is to cut a section of drywall (looks thinner than normal), screw into the gap, putty edges, paint entire wall.
Small Successes
More camera cleaning. Here are a variety of things I’ve actually done at the house over the last 2+ months.
 This was the first fully successful project in the house, actually, which is the only reason I’m bothering with posting it – minor surgery to remove a shard of what may have been the previous doorstop’s screw from the hole in the wall, then sinking the new stop into the barest sliver of good wood next to it.
 All I wanted to do was replace the two broken door guides for my shower doors. But the generic ones Home Depot required some… modifications. As in, there used to be another upright portion on the bottom edge there, and there wasn’t a screw hole in the originals. But hey, they both stay in place and guide the doors.
 I hung it myself. And it even turns on! Its sister at the other end of the hall is still not up, though, because the wires in the attic might as well be replaced before I attach anything to them.
 And now people don’t suffocate while working in the back bedroom.