Archive for category shelves
Tea shelves
Today on Well That Was… An Idea… a good idea to turn scrap wood into a useful kitchen organizer.
We’ll be back after these commercials.
(That’s your clue to click on all the banner ads on this site and make me millions.)
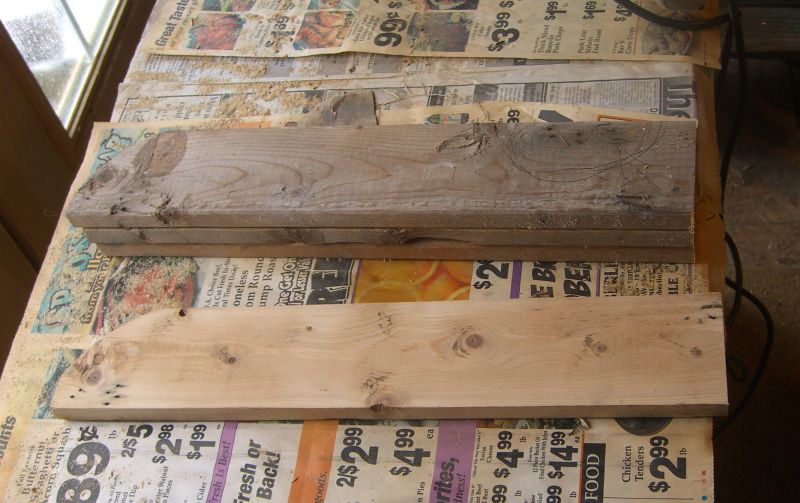
So I had a cabinet full of boxes and bags of tea. I also had a small gap between a door and a cabinet, and plenty of scrap wood just waiting to be project-ed.


The second problem is you’ll want a peg that goes all the way through the cabinet wall and sinks into the board; much easier to achieve this with a screw or nail.
There’s actually a third difficulty if you’re going into artificial surfaces (like the heavy particleboard of these cabinets) – it’ll be almost impossible to drill a hole of the exact right size so the peg can be tapped in yet won’t slide out over time. Natural woods will be slightly more forgiving. Regardless of your woods, skip this approach and just use the screws.
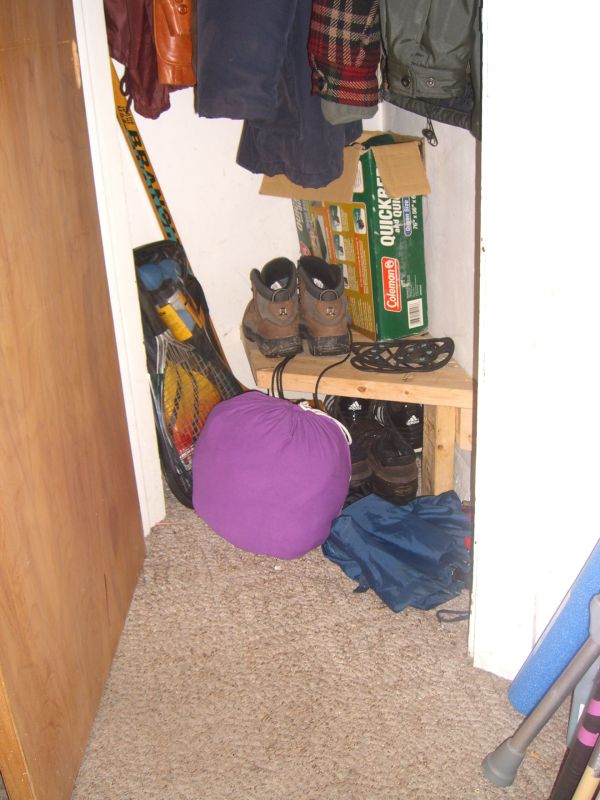
Oh look, there’s a closet in here…
This is why I don’t write for the IKEA catalog. Anymore. Curse you, Lars…
Lets skip to the end for a moment. Here’s what I built:
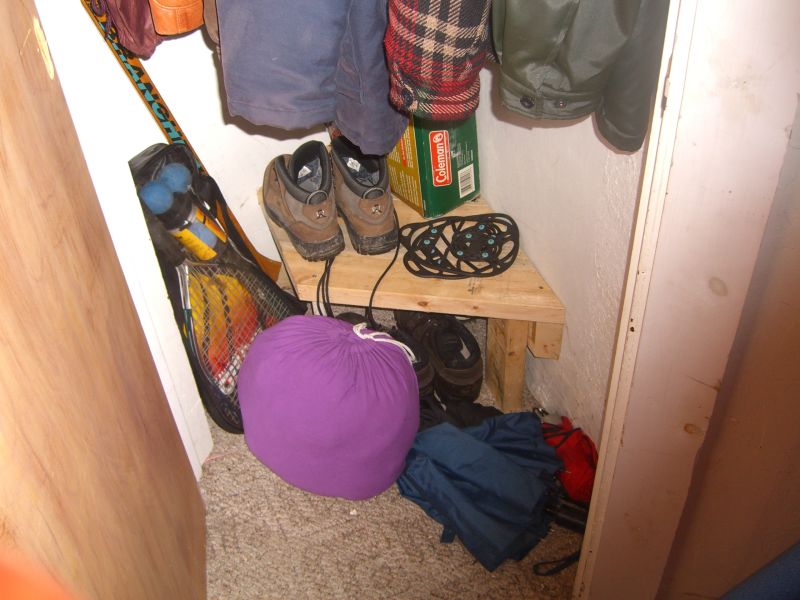
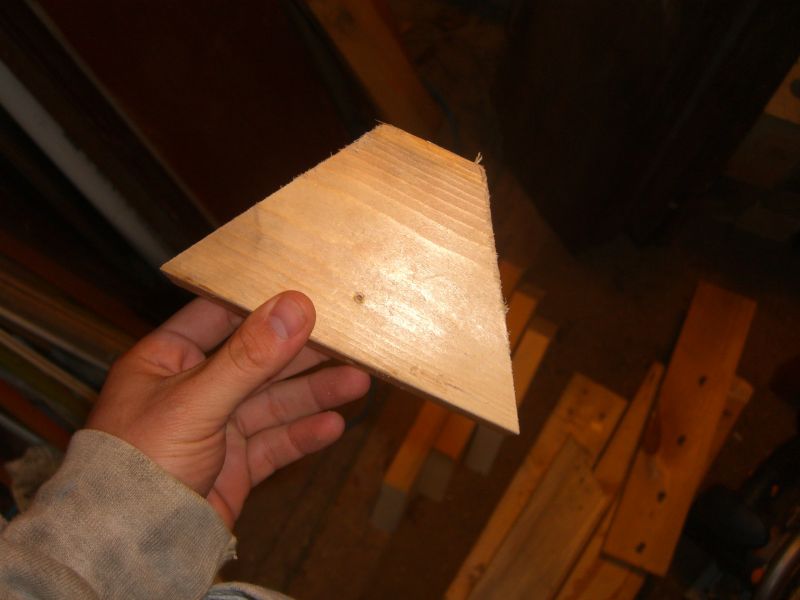
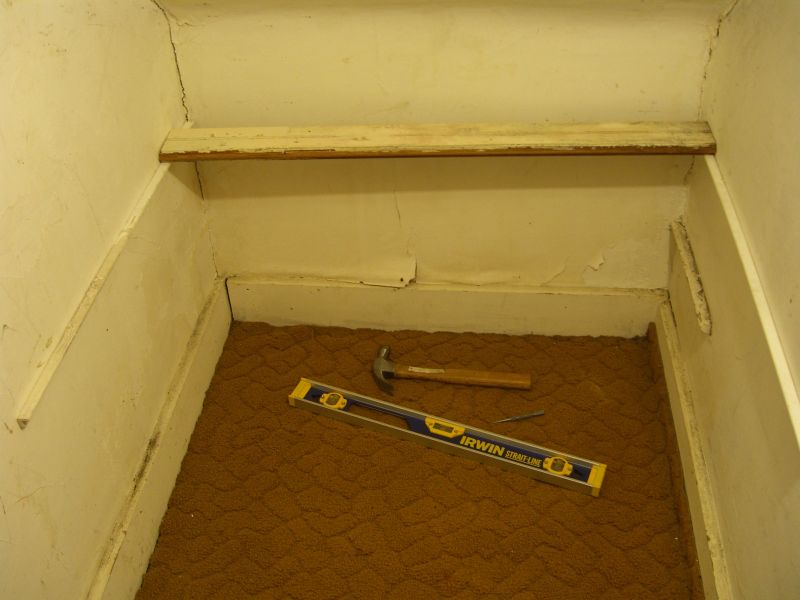
The closet in my foyer is a small triangle, the result of doorways being re-positioned in the 50’s or earlier. Its size and shape make it so even a few items on the floor rapidly became a messy pile. It also presented an interesting planning challenge, namely figuring out the angle of the triangle’s apex so the shelf could fit as cleanly as possible into the back.
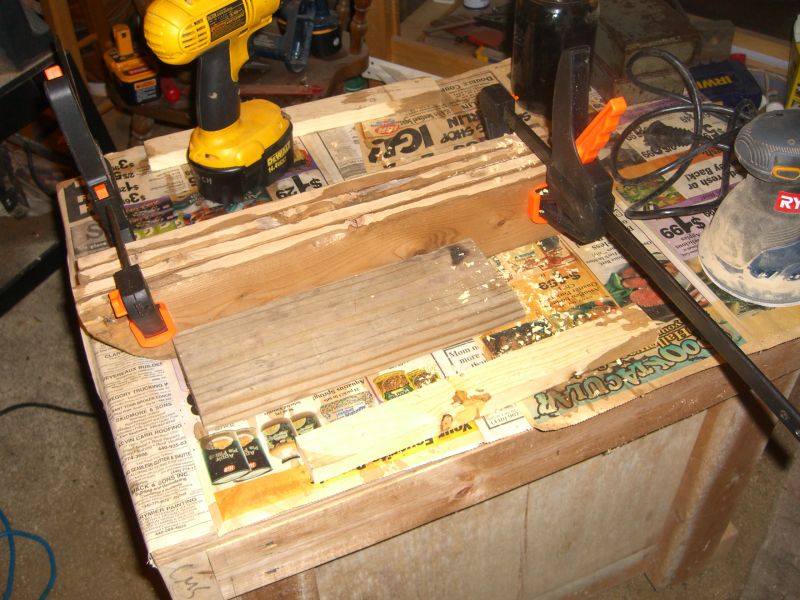
There’s probably a more technically-adept way of pursuing this, perhaps with calipers, or a degree in mathematics, but all my geometric scratchings just resulted in a worn pencil, so I went back to trial and error. I set the miter saw to what seemed like a good angle and made two cuts:
Then I trooped back and forth between the foyer and the workshop just fitting this one piece of wood into the back corner, and altering the angles needed until it fit ‘squarely’. I think I hit an acceptable fit on the third try – for many reasons, this is not an instance where extra time spent getting it justsoperfect gets you much of an improvement in end-quality.
With the angle noted, it was an easy job to knock out several more cuts using a tape measure and a combination square.
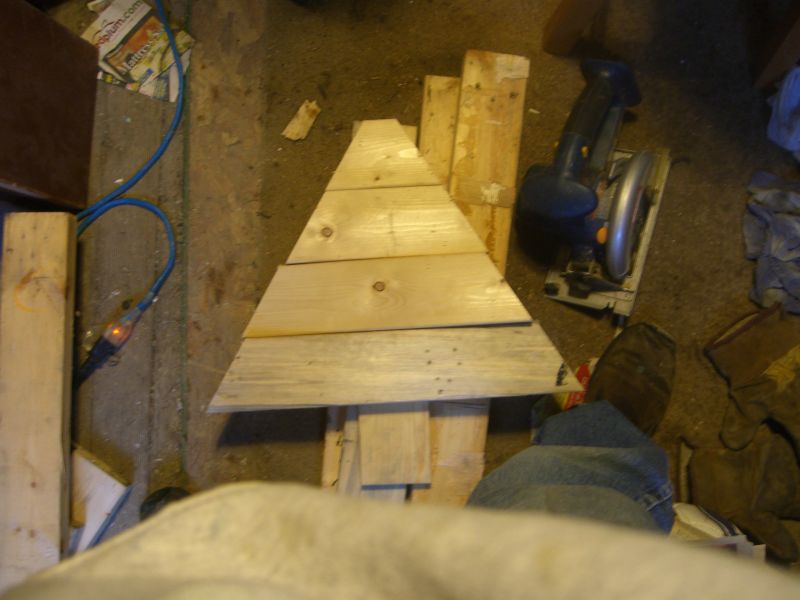
Same thing for the second grouping of boards, just without switching the miter back and forth:
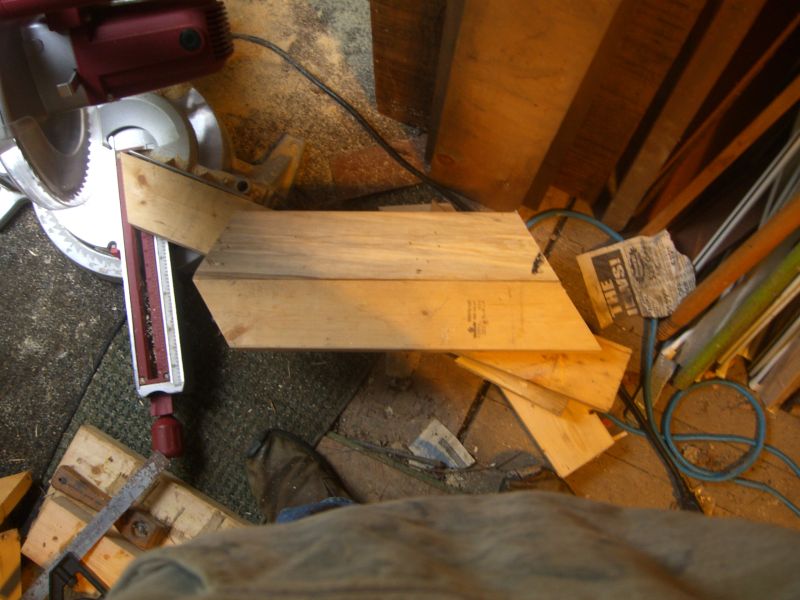
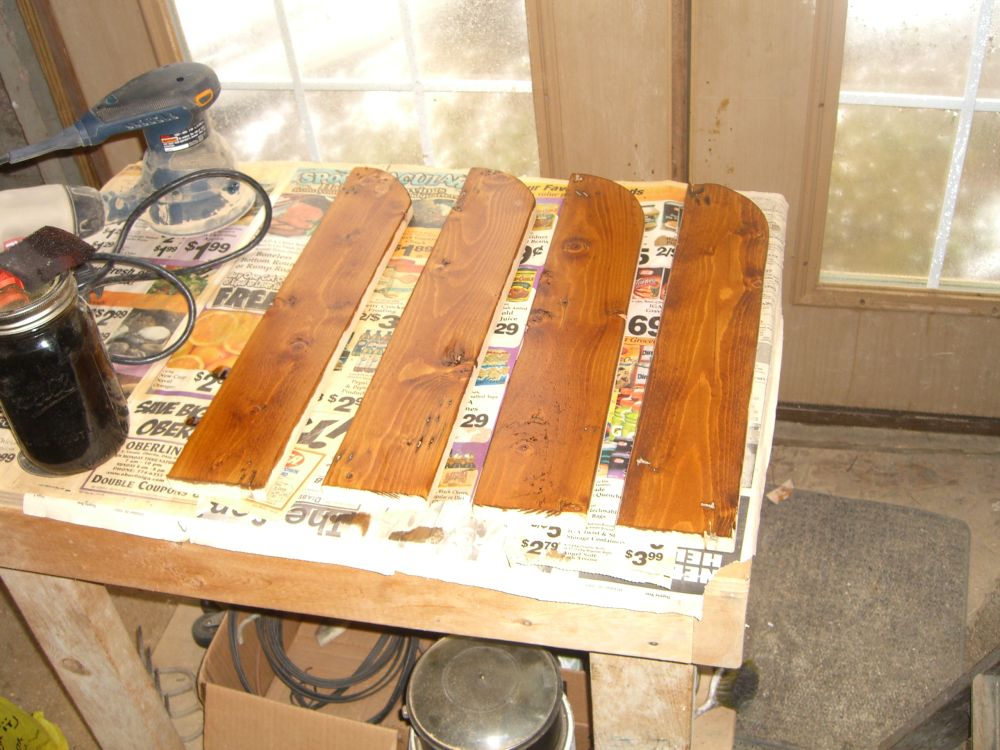
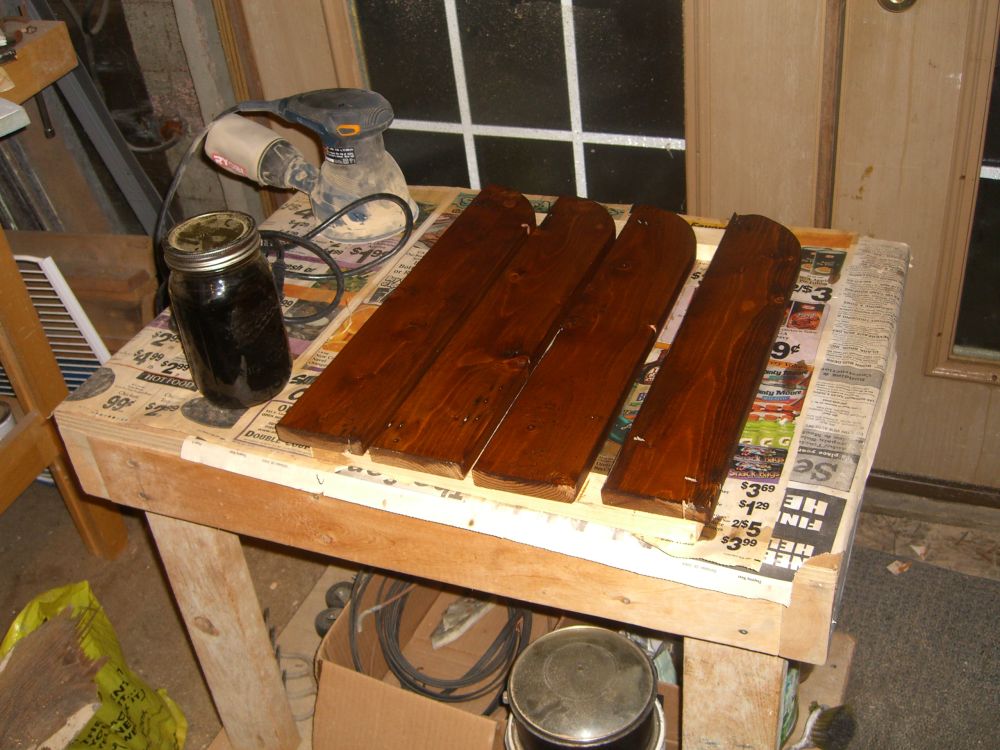
This project was done mostly with two-by scrap for durability (how careful are you with the things you toss into the front hall closet?), because I had it around, and it’s easy to work with and forgiving (assuming you have an accurate enough saw). The rail is an easy cut since we already know the angle; I added a piece of scrap one-by to hold the stack together more cleanly.

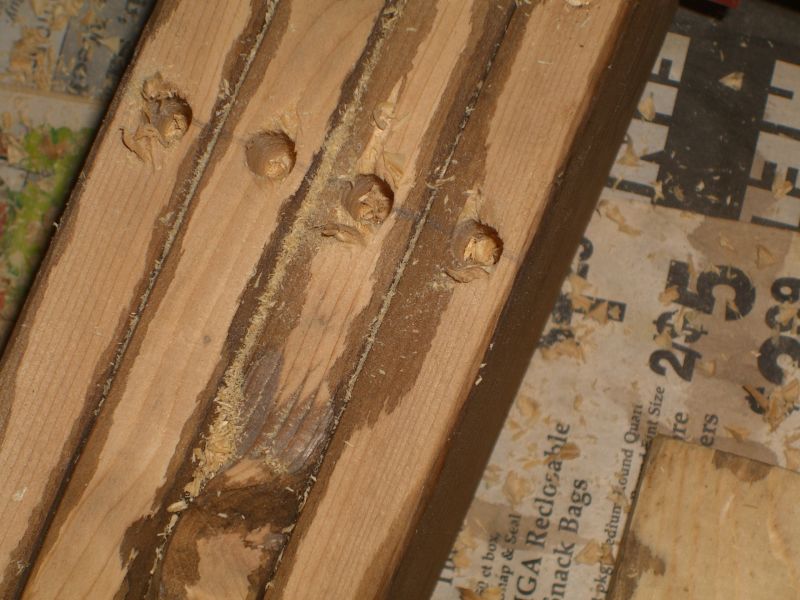
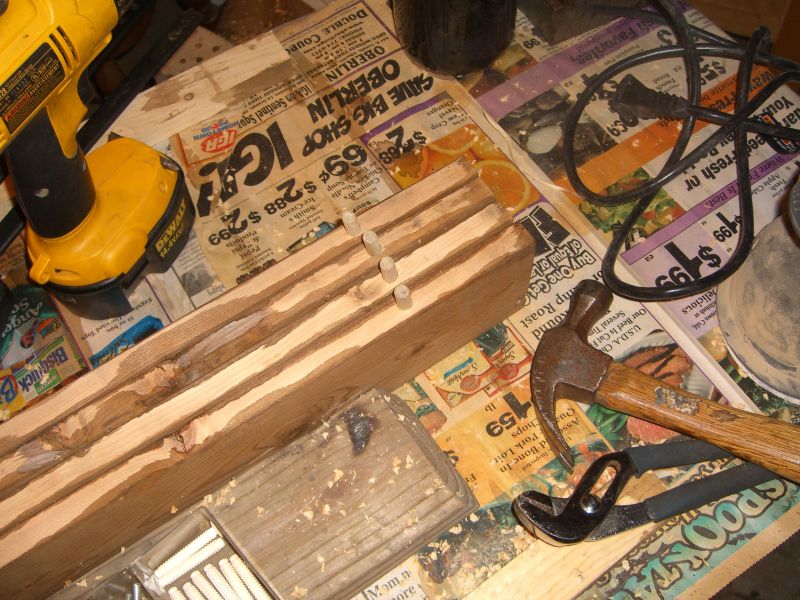
The two-by rail could screw directly into the wall (if I knew where the studs were), but I went with a couple of simple legs made of two-by, and a ‘fancier’ leg cut from an old broomstick. Using a paddle bit, I set the leg about a half-inch into the shelf…
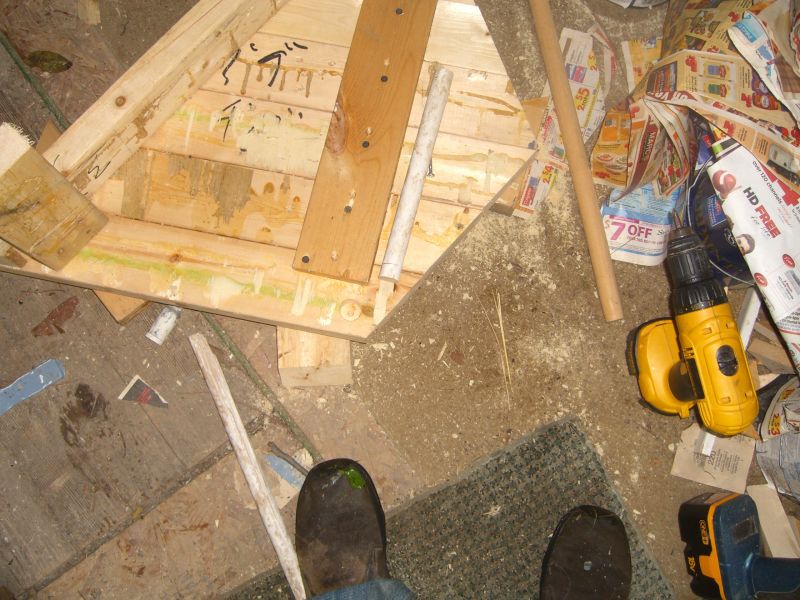
Then screwed in cleanly from the top:

Looks pretty, eh? This is why it’s nice to have piles of miscellaneous (sorted) fasteners, so you can find the right size and finish for the job.
Now I only planned on three legs – two two-bys on the long edge, and what turned out to be the broomstick – to maximize access under the shelf. I debated about the placement of the broomstick leg, ultimately deciding on the ‘front’ placement because I expected any unbalanced loads to be towards the front. Maybe this will prove completely wrong; if so, expect a lengthy report on the matter. In all likelihood, it won’t matter a lick – with the partial triangle shape, this is a stable design even though the leg isn’t placed at the center (if it was placed further ‘out’, tipping would be quite possible).

Next week: more projects that take longer to post than to complete.
They’re unique, that’s for sure.
After staring at my closet for yet another day thinking how great it’ll be once I install some shelves and move the dresser inside, and get a bar of some kind to hand all my shirts on, I realized that I had all the prep work done and it was just pure procrastination preventing me from (alliterating apparently and) doing at least the first two items.
The custom shelf was pretty easy. It doesn’t have to support much weight, meaning the shelf supports themselves don’t have to support much weight, meaning this half-inch right angle piece I had in the back room would be fine tacked straight into the wall.

[Update 8/14 – should have mentioned all the steps here. First I pre-drilled the support at 4 places along its length; it makes the next several steps much easier, not to mention keeps you from splitting the support and teahcing your neighbors some new curse words. Then I tapped the nails into, but not through the wood – ‘porcupine’ boards also make the work go faster, assuming you didn’t pre-drill holes that are too big. Then: found my height, nailed one nail in part way to the wall, LEVELED the support (this is the sort of step I’d normally space on and have to pull out a nail), tapped in another nail, and then hammered all four nails in using a nail set to finish them off. Nail sets are wonderful, wonderful tools, especially when working with small nails and/or tight spaces.
You can try and measure from the floor to the support on both sides, or just use a piece of wood and the level to quickly find the right height. If you’re a little off for some reason, don’t sweat – these shelves are only 3’1″ wide, so a slight grade won’t even be noticeable.]
 You can use whatever one-by wood makes sense for you – scrap is great if you sand or paint, or don’t mind how it looks. This is a bunch of old old tongue and groove that came out of a friend’s house and that I knew would be useful for something. In addition to having some character, it also comes apart in 3″ sections if, for some reason, I needed a little more clearance at the front.
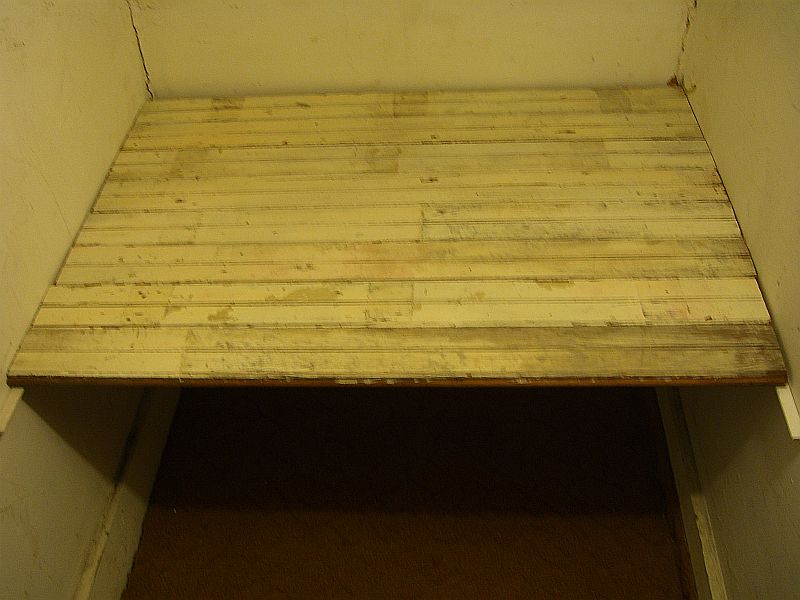 If you’re doing something like this in an old house like mine, make sure to take multiple measurements. For whatever reason this closet tapers slightly. The slats are all cut the same, but the two closest to you in the picture have probably 3/16″ wiggle room, whereas the very back slat is jammed in too tightly (you can see where I accidentally gouged some paint on the right while putting it in). Measuring the way back as well as the couple of runs I measured elsewhere would have prompted me to cut one board a hair shorter.
Doesn’t matter much at all – it works great and looks nice as is. I’m thinking of putting a small rolling shelf underneath this one for my shoes.