Archive for category foyer
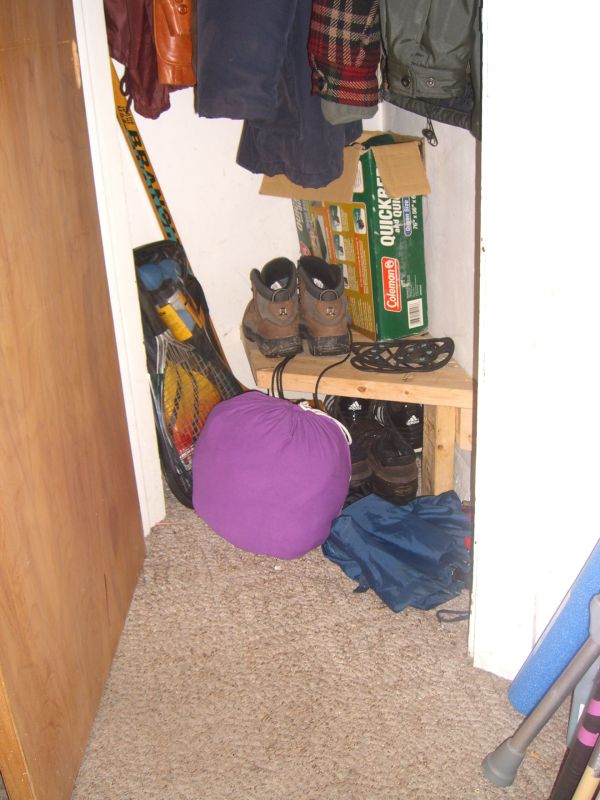
Oh look, there’s a closet in here…
This is why I don’t write for the IKEA catalog. Anymore. Curse you, Lars…
Lets skip to the end for a moment. Here’s what I built:
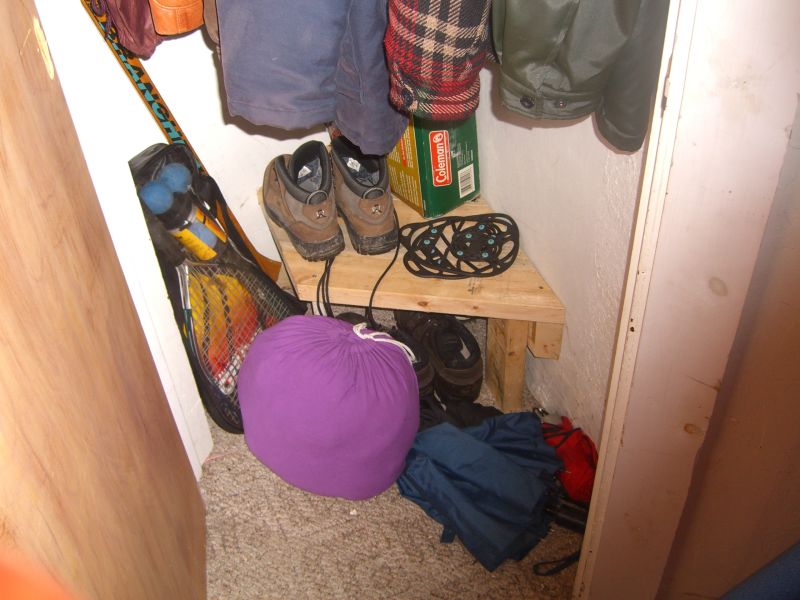
The closet in my foyer is a small triangle, the result of doorways being re-positioned in the 50’s or earlier. Its size and shape make it so even a few items on the floor rapidly became a messy pile. It also presented an interesting planning challenge, namely figuring out the angle of the triangle’s apex so the shelf could fit as cleanly as possible into the back.
There’s probably a more technically-adept way of pursuing this, perhaps with calipers, or a degree in mathematics, but all my geometric scratchings just resulted in a worn pencil, so I went back to trial and error. I set the miter saw to what seemed like a good angle and made two cuts:
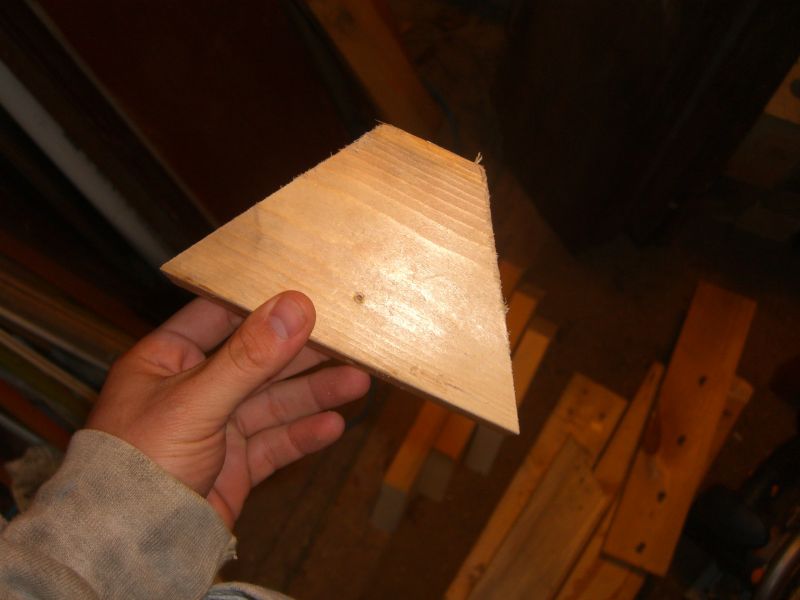
Then I trooped back and forth between the foyer and the workshop just fitting this one piece of wood into the back corner, and altering the angles needed until it fit ‘squarely’. I think I hit an acceptable fit on the third try – for many reasons, this is not an instance where extra time spent getting it justsoperfect gets you much of an improvement in end-quality.
With the angle noted, it was an easy job to knock out several more cuts using a tape measure and a combination square.
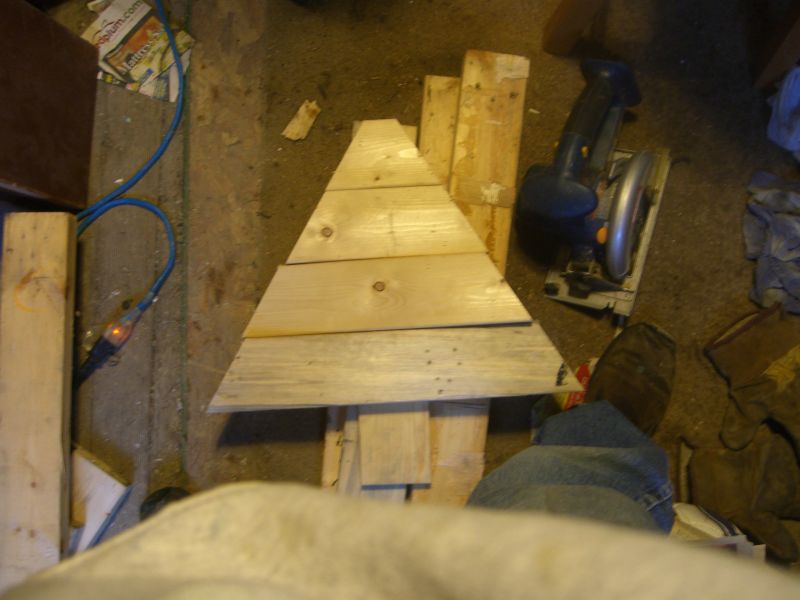
Same thing for the second grouping of boards, just without switching the miter back and forth:
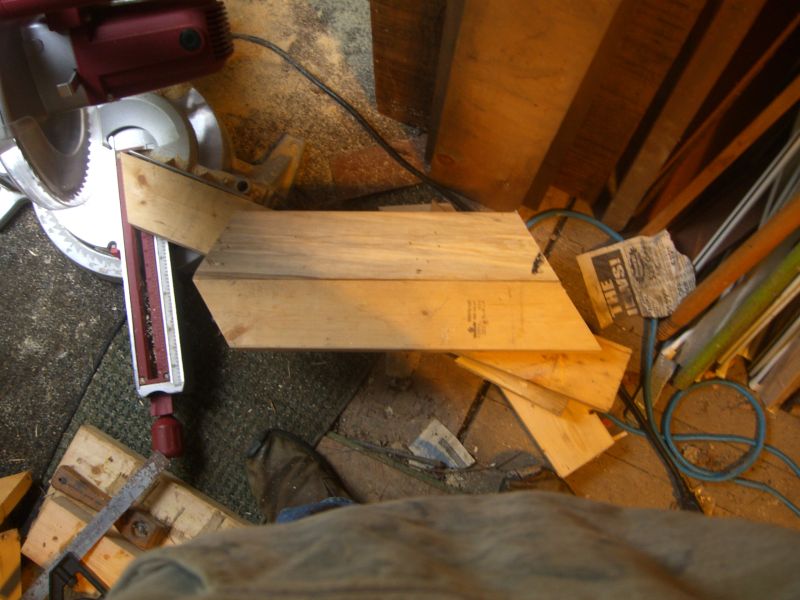
This project was done mostly with two-by scrap for durability (how careful are you with the things you toss into the front hall closet?), because I had it around, and it’s easy to work with and forgiving (assuming you have an accurate enough saw). The rail is an easy cut since we already know the angle; I added a piece of scrap one-by to hold the stack together more cleanly.

The two-by rail could screw directly into the wall (if I knew where the studs were), but I went with a couple of simple legs made of two-by, and a ‘fancier’ leg cut from an old broomstick. Using a paddle bit, I set the leg about a half-inch into the shelf…
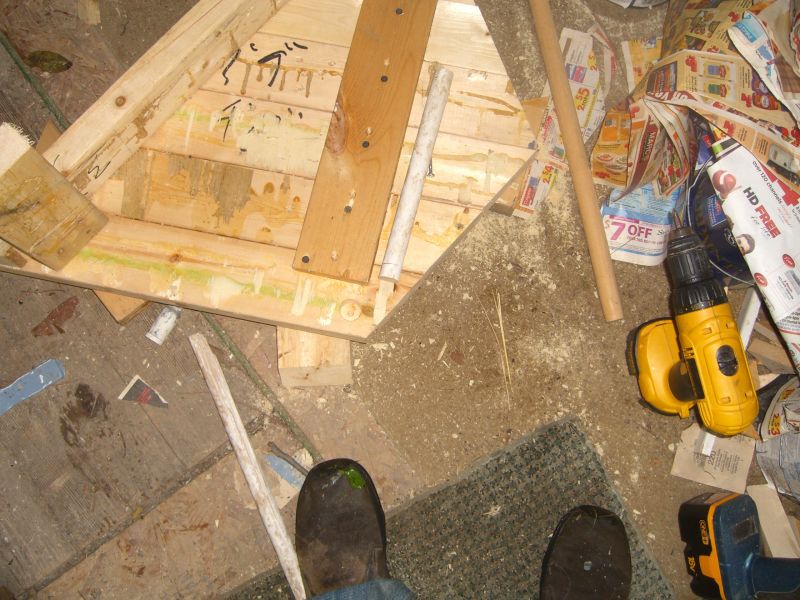
Then screwed in cleanly from the top:

Looks pretty, eh? This is why it’s nice to have piles of miscellaneous (sorted) fasteners, so you can find the right size and finish for the job.
Now I only planned on three legs – two two-bys on the long edge, and what turned out to be the broomstick – to maximize access under the shelf. I debated about the placement of the broomstick leg, ultimately deciding on the ‘front’ placement because I expected any unbalanced loads to be towards the front. Maybe this will prove completely wrong; if so, expect a lengthy report on the matter. In all likelihood, it won’t matter a lick – with the partial triangle shape, this is a stable design even though the leg isn’t placed at the center (if it was placed further ‘out’, tipping would be quite possible).

Next week: more projects that take longer to post than to complete.
Door!
The house has a beautiful old (huge) front door that gets comments from many visitors. Not clearly visible in the pictures is that the door use to hang the other way and it was switched probably well over 60 years ago. It needs some refinishing and a couple of accent bits but those can come later. Meanwhile, functionality is obviously paramount.

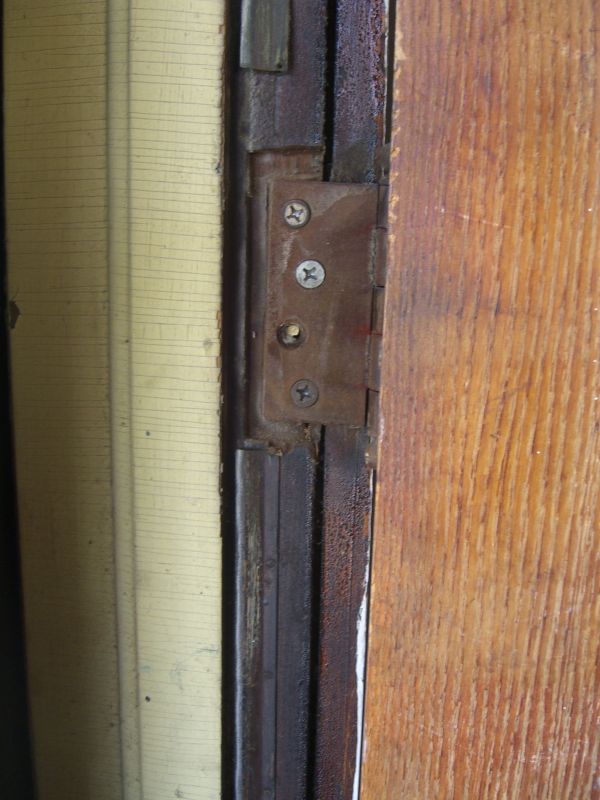
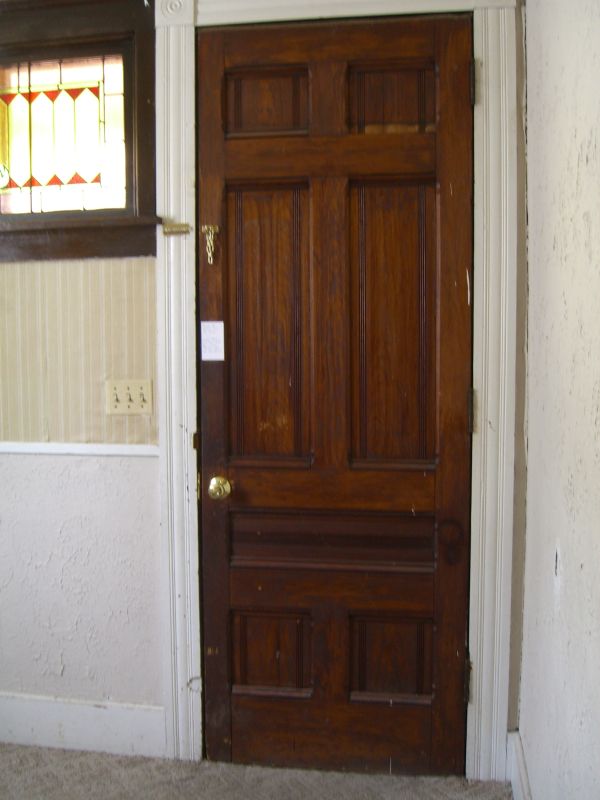 A few months back, though, the door began rubbing in its frame more and more. Mishandling (slamming) didn’t help things and the situation got worse. I took a look at the frame and found a couple of things. First, there are at least three different types of screws in the hinges, indicating it was patched over time and probably not in the best way.
Second, the door stop was adjusted at some point and when it was reattached to the frame – with just a screw or two – it wasn’t properly lined up.
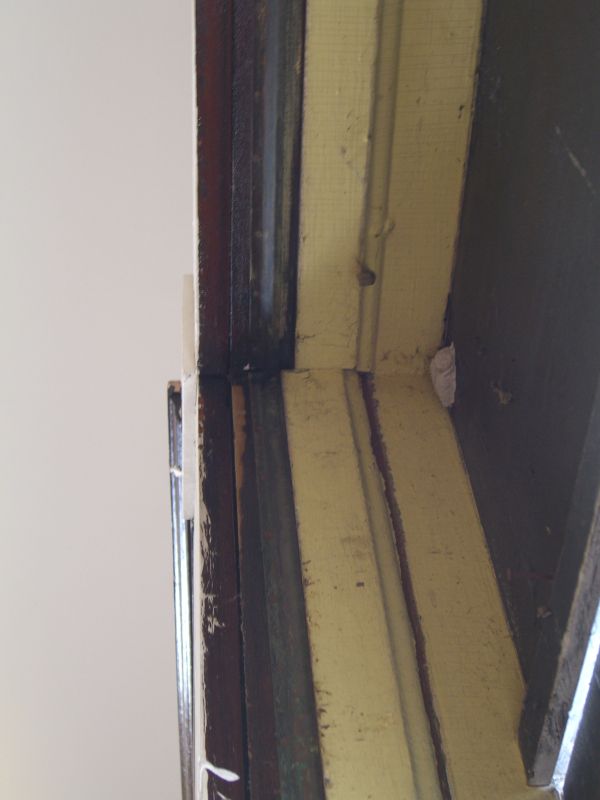
 Straightening the stop was an easy fix, and it made it a bit easier to close the door. But it was still rubbing, and getting worse. The top hinge was the worst culprit, and I tried a temporary solution of tightening the screws as far as they’d go. This helped, but was definitely temporary – and more slamming worsened the problem quickly. Soon, the screw holes – already over-wide and partly stripped from the patch jobs – weren’t holding the threads and the door was essentially leaning on two hinges.
Talking with several friends and carpenters the diagnosis wasn’t great – while some were more than willing to help make it happen, we were talking about replacing an entire side of the door frame. It would be time intensive. With expert friends, it might not cost too much, but it would still be a pretty big project.
Fortunately I emailed one other friend to confirm the diagnosis – O.T. emailed right back with a quick, simple, cheap fix he’s found extremely effective: chopsticks. Worth a try, he said, before getting into a costly, big repair.
 Rather than pack the old screw holes with putty or replace the entire frame side to give the screws something to sink into, all that might be needed is enough strong wood to surround most of the threads. Typical takeout chopsticks are still bamboo, which is very strong.
A few quick steps and this job is done:
1) Pull one screw at a time. Push in a chopstick as far as it’ll go, mark off.
2) Cut the stick – heavy kitchen shears worked for me. Because of the thickness of the hinges, I clipped at least 1/4″ shorter than my mark – cutting short in this situation is fine – cutting too long will just screw you over since it’ll be hard to pull the chopstick back out.
3) O.T. said wood glue couldn’t hurt – I used it on about half of the sticks, just a quick coat on two sides.
4) Put the shortened stick all the way in (use another chopstick to firmly seat it). If you used wood glue, you might as well wait a little while for the glue to dry. Otherwise, just put the screw back in – I felt immediate results with the hinge tightening back into place.
5) For really drilled out holes or thick diameter screws, multiple chopstick pieces can be necessary.
Doing this repair is pretty easy, but it only works if the screw holes are at least the diameter of the chopstick. Doors are often hung with heavier screws, so you’ll probably be fine – I would have been very reticent to drill out the holes if the chopsticks didn’t fit.
Everything old is new again
Just in time for the new year, a couple of old pictures from my camera which I apparently never posted.
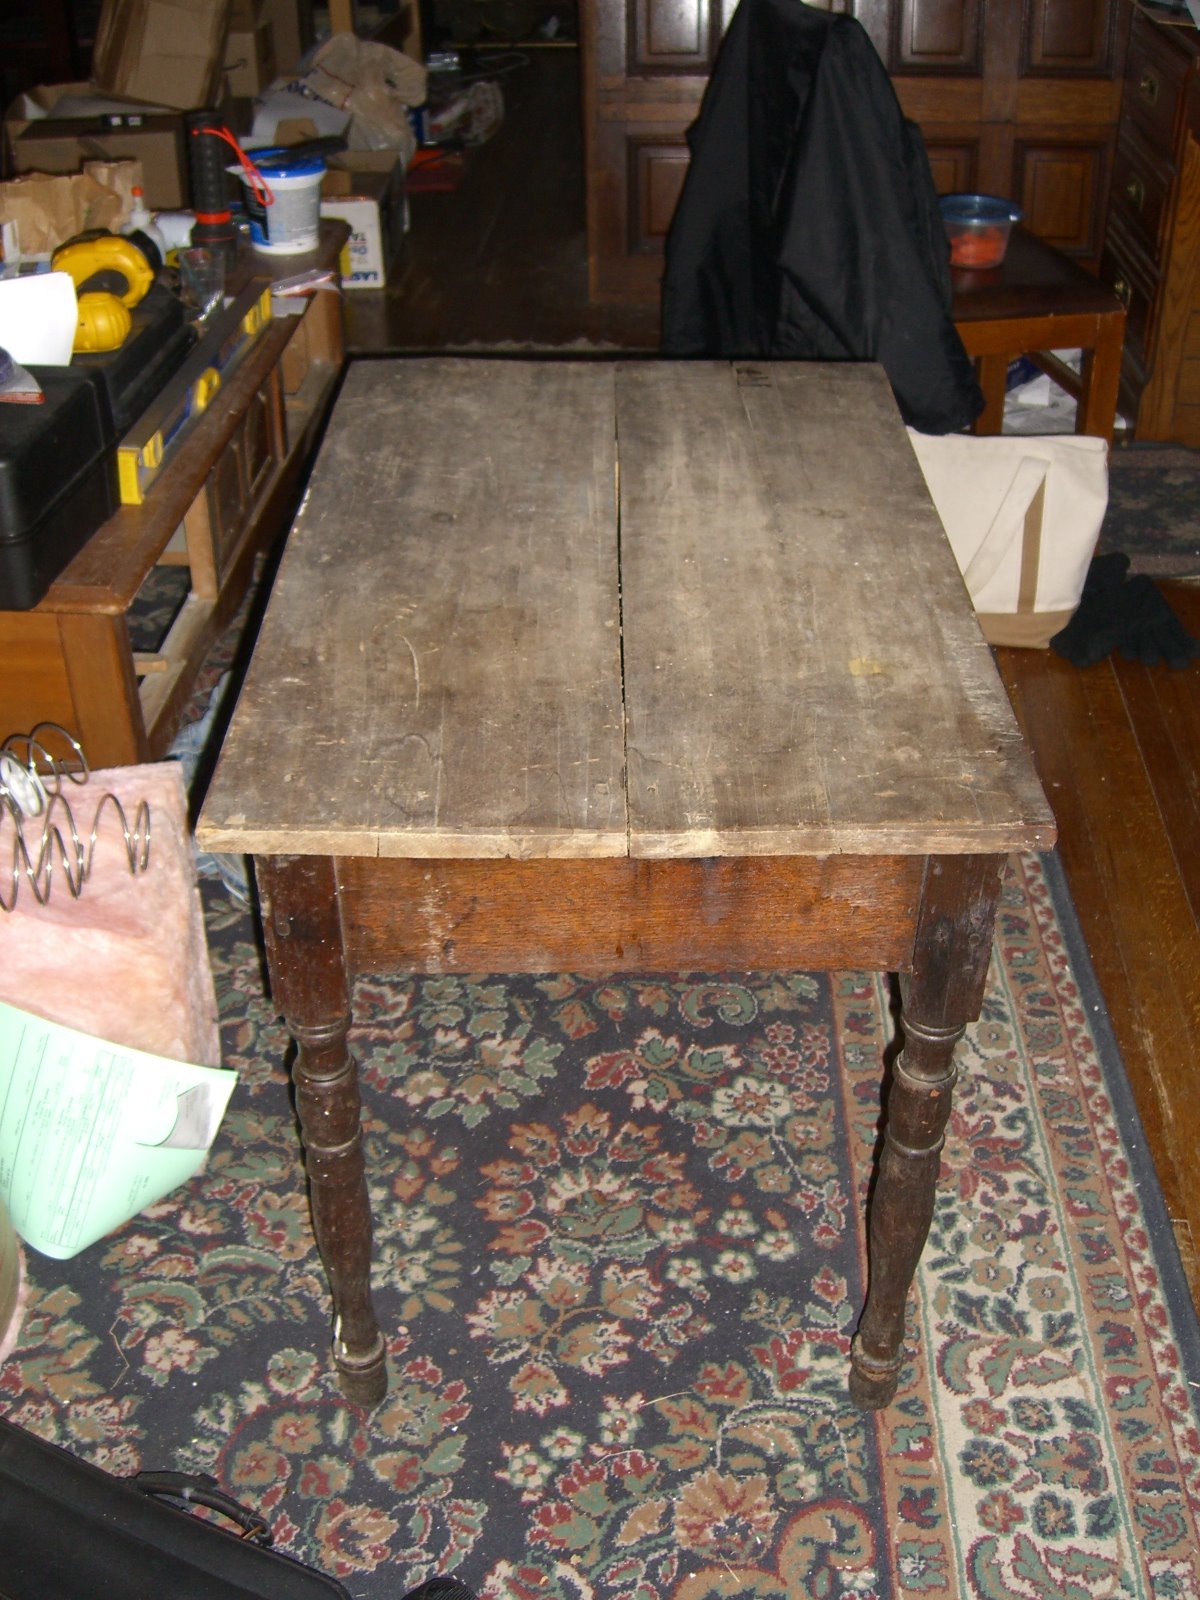
I picked up this table off of Freecycle, planning on using it in my back room/workroom as just a level surface. Originally it was covered in 30-50 year old contact paper (a lovely star spangled theme if anyone wants it) stapled to the underside of the top. When I pulled the paper I found a) a nicer looking old table than I expected and b) a pretty obvious gap between the boards forming the top.
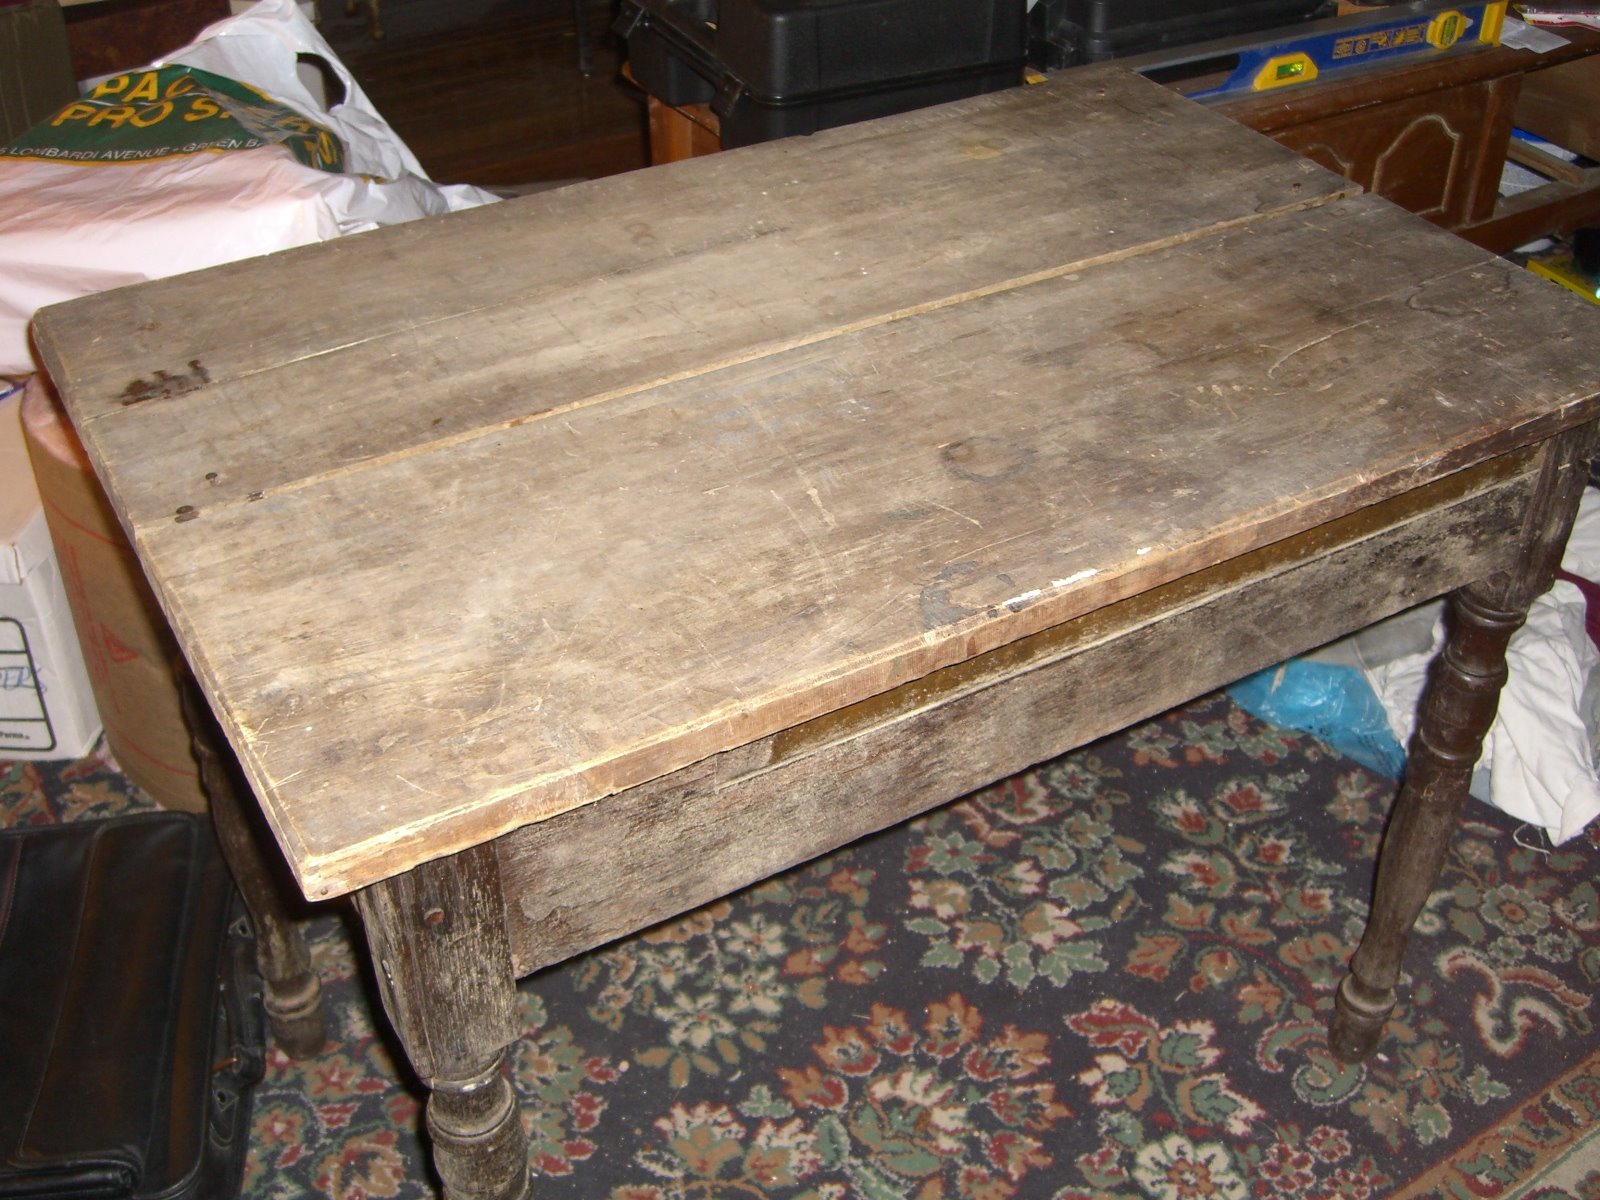
I was thinking about re-covering the table in something, but then I noticed that the nails holding one of the boards were loose. Turns out the table was very poorly repaired sometime decades ago (as well as probably rebuilt – looks like there are three different woods used, plus I’m pretty sure this once had drawer). So I pulled the four nails and tried to reset the board. At this point I discovered that the attempted repair job had involved a heavy coat of glue:
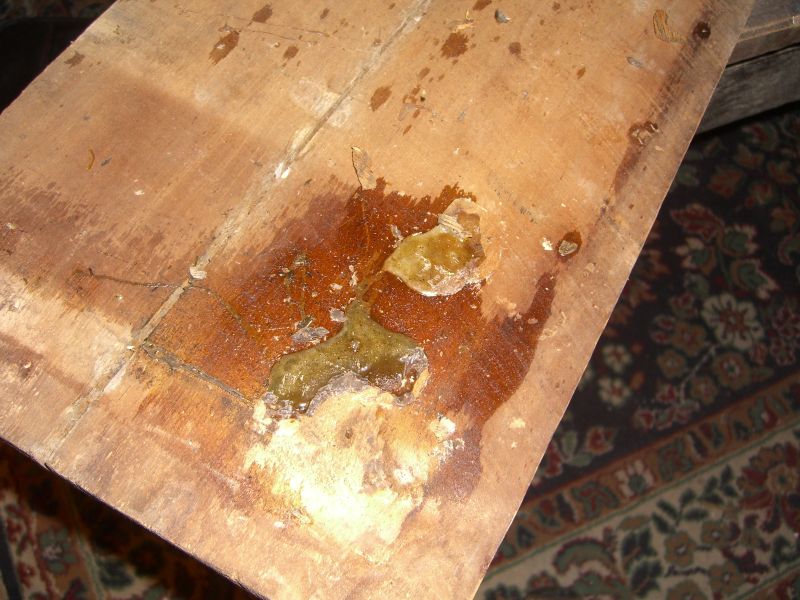
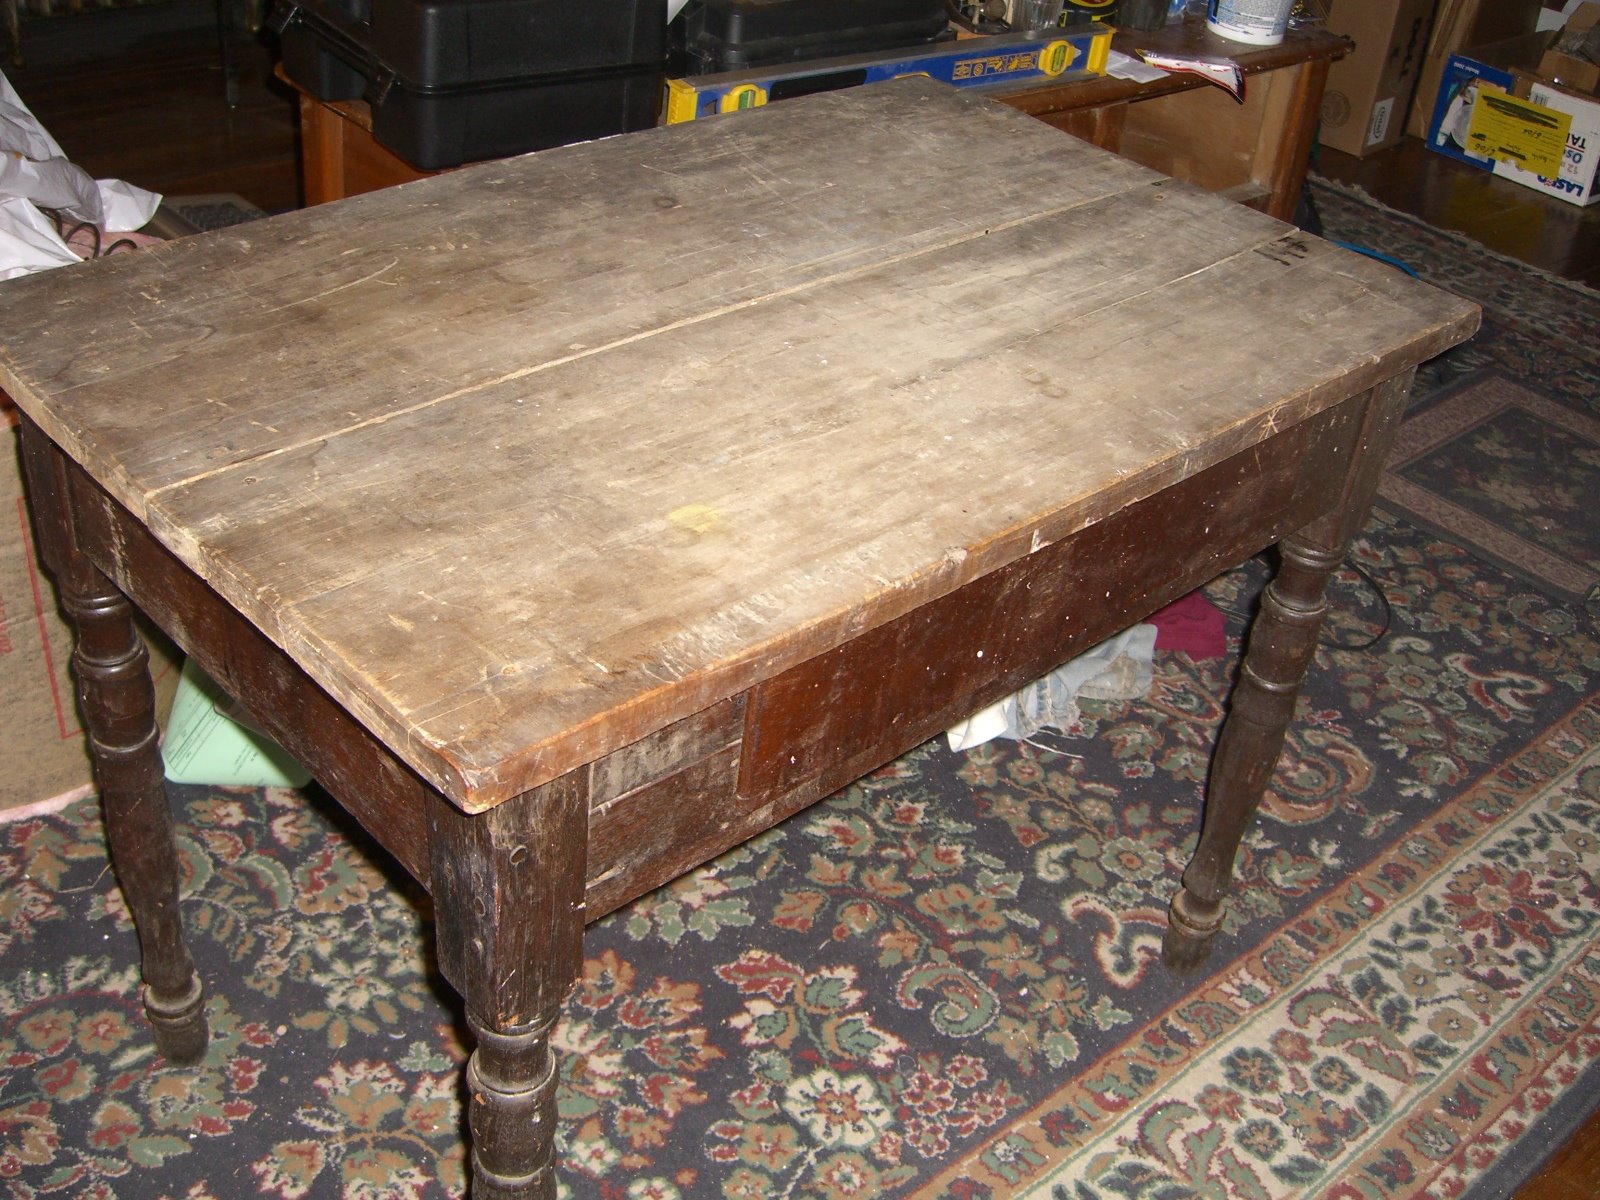
The glue had hardened around the outside edge of the leg, so the board couldn’t be pulled back evenly. Twenty minutes with a putty knife and razor blade and the glue was chipped away. Snug the board as close to the other as possible (the boards look like they were a replacement top ages ago – neither is fully square so there’s still a much smaller gap between them in the middle), tap the nails back into the same holes, and voila!
Before:
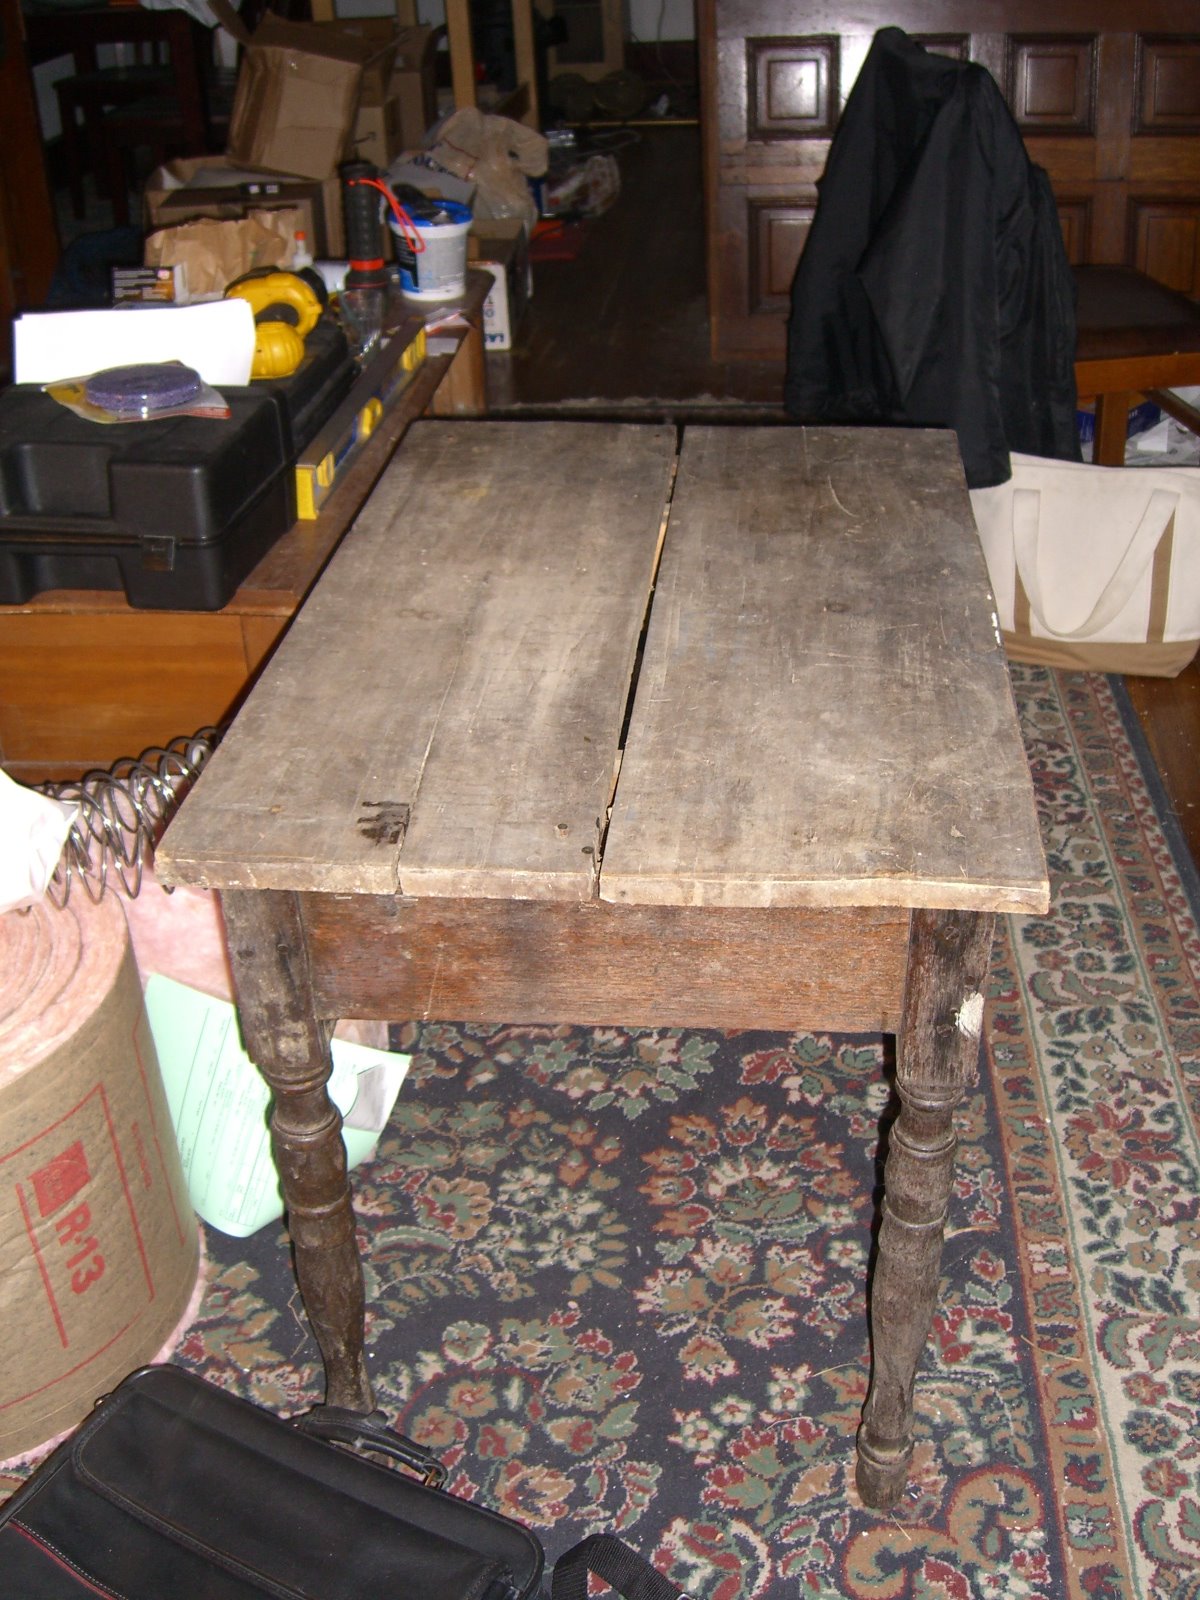
After:
Also, and this was months ago, this is how the window on the steps to the basement used to look:
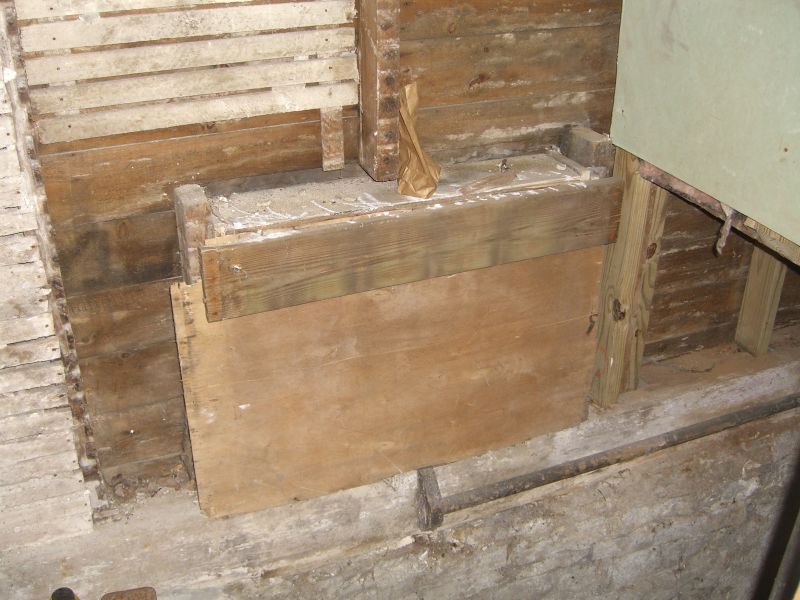
…and here’s how it looks now:
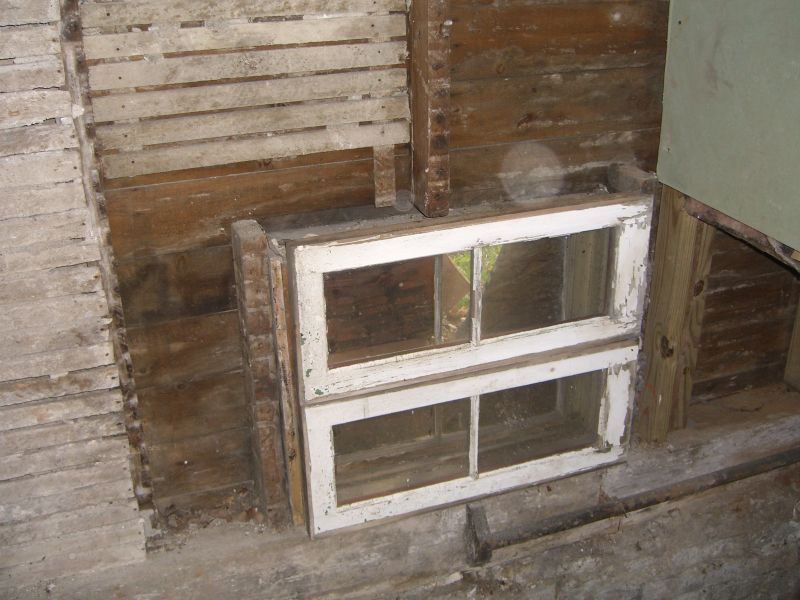
These two windows were lying around in the basement and happened to be the perfect width. Together they’re a little too tall for the space, but they fit snugly enough with the existing box that a heavy bead of caulk on all three sides seems to have sealed out the wind pretty well. The exterior window (sort of visible in the second photo) is missing a pane though, and I was waiting for the temperatures to come back up before testing out my new glass cutter/glazing points/glazing compound bundle that’s now sitting in the back room desiring to be useful. Better pics of both inside and outside once I lay that last pane.
Small Successes
More camera cleaning. Here are a variety of things I’ve actually done at the house over the last 2+ months.
 This was the first fully successful project in the house, actually, which is the only reason I’m bothering with posting it – minor surgery to remove a shard of what may have been the previous doorstop’s screw from the hole in the wall, then sinking the new stop into the barest sliver of good wood next to it.
 All I wanted to do was replace the two broken door guides for my shower doors. But the generic ones Home Depot required some… modifications. As in, there used to be another upright portion on the bottom edge there, and there wasn’t a screw hole in the originals. But hey, they both stay in place and guide the doors.
 I hung it myself. And it even turns on! Its sister at the other end of the hall is still not up, though, because the wires in the attic might as well be replaced before I attach anything to them.
 And now people don’t suffocate while working in the back bedroom.