Archive for category boiler

…and then I hotwired my house.

New high tech boilers?  Insulate all the walls of the house?  Sure, these things will help reduce energy usage.  But in an old house like mine, one with partial infrastructure upgrades, most a few decades old, there’s a smart, simple place to start – the thermostat.
The old thermostat, likely installed in the 80s or earlier.
Old mercury-based thermostats are typically less accurate than modern digital systems – their temperature reading alone can be off by four or more degrees.  Plus a new programmable thermostat comes with all sorts of fancy ways to make your life easier with just a push of a button etc etc end rampant advertising here.
If you’re upgrading to a new thermostat on an older heating system – and especially if your thermostat looks like the one in the picture above – you might run into some of the same issues I did.  The instructions on the Honeywell model RTH6300B I picked up (note – they’ll probably fix it soon, but the Lowes’ website shows a previous price of $100K on the thermostat, discounted all the way to $49. Quite the deal, I know…) were pretty straightforward, and I won’t take you through all the step-by-steps.  I’ll just annotate where things weren’t as simple as advertised.
The main problem was figuring out the wire labels. The instructions assumed that your old thermostat had a label at each terminal – when you unhook the wire from the old setup, you just make a note of the letter and then attach as appropriate to the new thermostat. Suffice to say, no such labels existed on the old thermostat:
Thus some detective work was now in order. Those of you who know me know that the preceding sentence was met with some amount of glee. Anyhoo – first I did a quick check online for the old thermostat’s manual (paperwork for many old systems, appliances, and tools can be found from the manufacturer, or at specialty websites). Unsurprisingly this didn’t have the answer – it showed generic hookup plans for multiple types of heating systems.  Time to head to the basement…
 

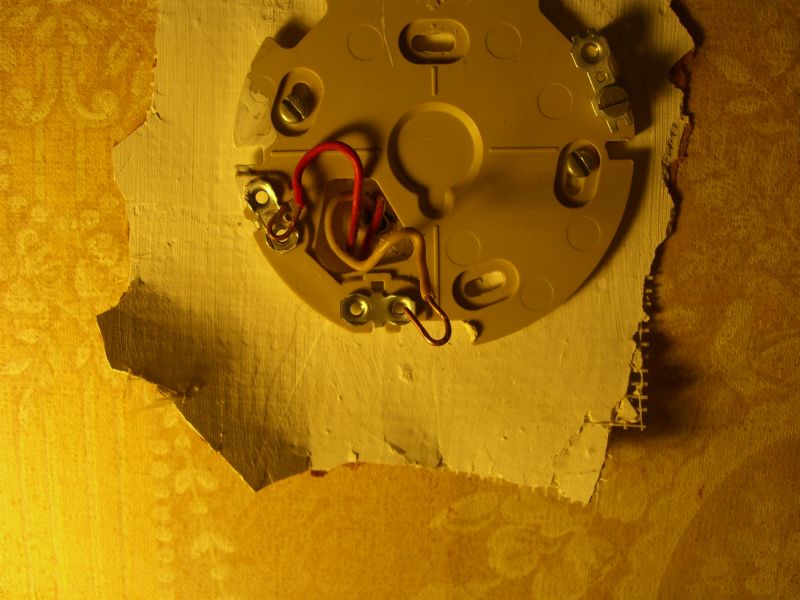
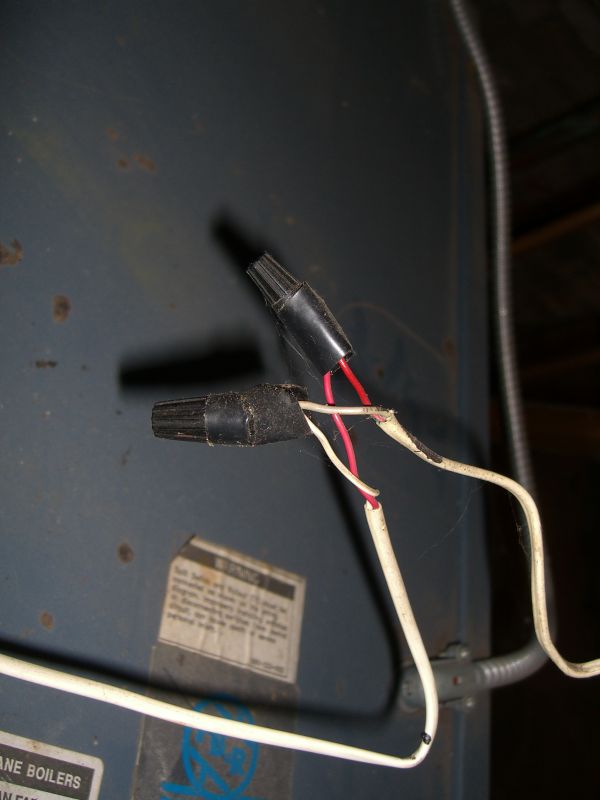
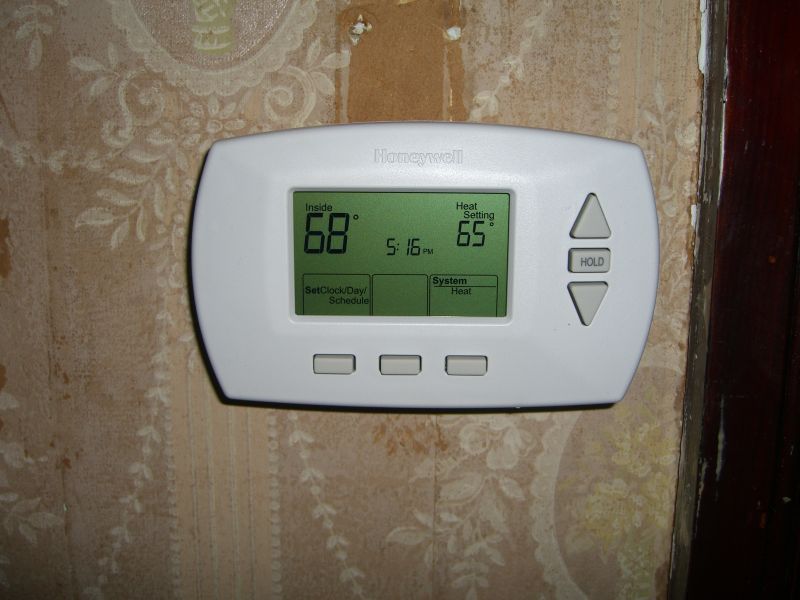
Tracing the wires from the living room wall to the boiler, I found a splice – important to note because it told me I was now looking for where the red and white wires connected to the boiler controls, instead of the red and yellow wires from the living room wall.  This is truly an important but subtle distinction when you see where all this was leading:

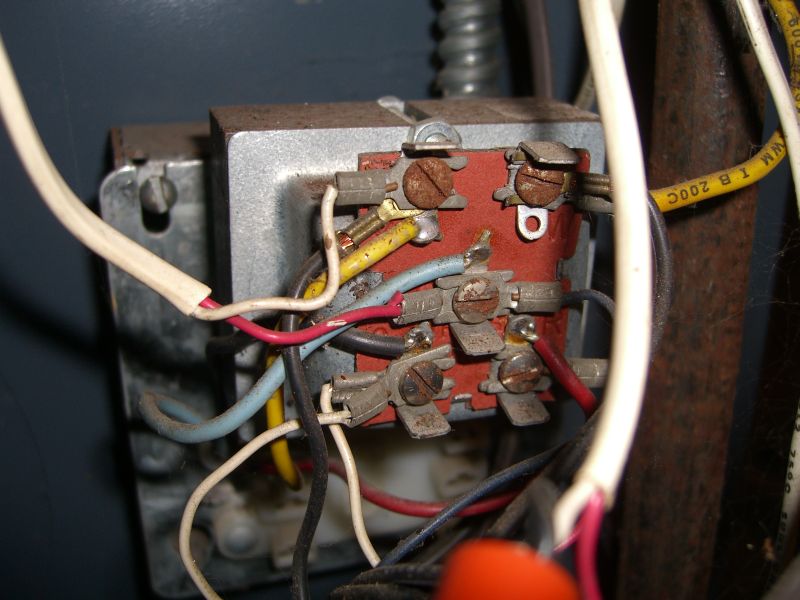
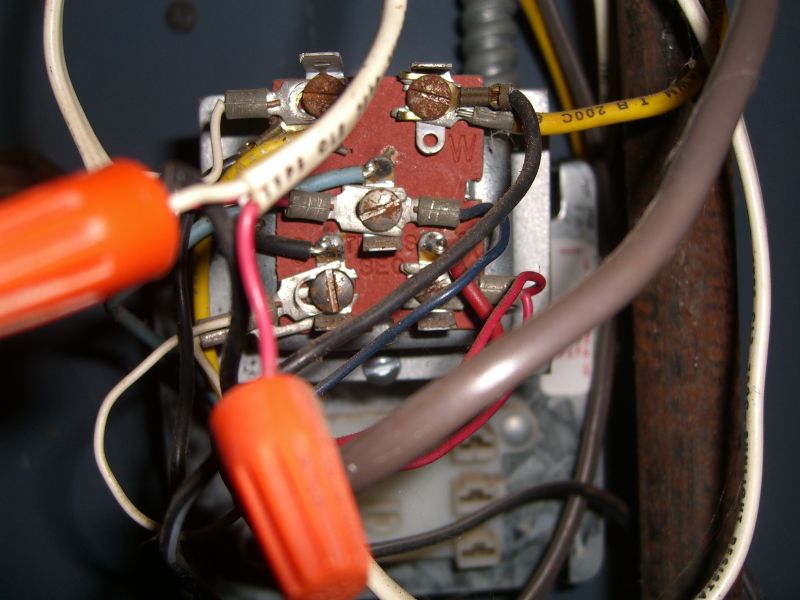
With the power already off, it was a simple(ish) matter of unscrewing the terminals where the red and white wires (from the bundle on the top left) ran.  Some of the terminal labels were easy to see:

Most, including the two I cared about, were not:
 
 
After some poking and moving, I found what I needed.  Except it wasn’t at all what I needed.  The boiler control might have had letters on it that matched expected letters for wiring up environmental controls and thermostats in this day and age, but they turned out to mean nothing. I dutifully attached wires G and Y to their appropriate terminals, plugged the thermostat faceplate back in, programmed it, and sat back on my couch… the thermostat then failed to talk to the boiler, even though everything else was working fine.
Quick sidebar explaining the title of this post: Honeywell technical support was closed by the time I tried to call them so I was sitting in a slowly cooling house.  Pieces of the old thermostat had come loose when I was removing it, and I wasn’t sure if I could successfully put it back together.  Soon after I’d posted online griping about the problem I got a call from a high school friend who had dealt with a similar issue on an old heating system.  To test to make sure that everything was still working beyond the thermostat, he had me hold the two wires together (the voltage is stepped down from 120 thanks to a transformer on or near the boiler) to complete the circuit and see if the boiler came on. It did, and we were back to musing about possible fixes.  Meanwhile, though, I looped the two wires together so they would stay connected – and keep my heat on.  My friend on the phone is a firefighter and he assured me this was perfectly safe – at the same time, you follow in my footsteps at your own risk; hotwiring houses is not on a list of great solutions. It’s barely on a list of temporary ones.
 
In any case, when I did get Honeywell on the phone it was a quick conversation.  The wire labels I had were useless – Y was for compressors, I think – but the phone rep had the correct info in front of him.  If you’re dealing with a boiler control that looks like the one in these pictures, you may want to call the thermostat manufacturer at the outset and see what terminals should be used for an old 2-wire basic I/O system.  Might save some time, might not.
Everything else proceeded pretty much as the instructions said.  One reminder – if you’re dealing with old plaster walls like these, even if you’re only making minor changes, it’s best to wear a mask or, better yet, a respirator.  Drilling the two screw holes to mount the unit will kick up a little dust, not to mention you don’t know what will be knocked loose when you remove the old mounting plate, jerk the wires around, etc, etc, etc.
 
All plugged in an programmed!
Two minor quibbles with this model – First, the instructions call for using a 7/32″ drill bit to make the holes on a plaster wall for the wall anchors; this is too large – the anchors slide right in with very little tension.  I’ll have to redrill smaller holes and reset the mounting plate tomorrow.  Second, the mounting plate doesn’t have fins or bumps from the back to make it more flush with the wall.  As a result, you get a very slight rocking when you press the control buttons – not a big deal by any stretch, but I wish they’d thought about this given that they included wall anchors as part of the installation and could easily have balanced that slight depth with equivalent bumps on the bracket.
 
Oooo. It even has backlight…

As always, there are really no small jobs on an old house.

No Comments

Excitement! Adventure! Explosions!

No, not really with the explosions. Actually, not really with the other two if you don’t find boiler maintenance to be exciting or adventurous.

The boiler’s water level sight was coated with rust and other sediment, so I took the opportunity to, as my neighbor Joe put it, get to know my heating system. Monroe’s Heating is right up 58 and Tim, the owner, was able to stop down today for a full cleaning and inspection. Gave me plenty of do-it-yourself pointers (including ‘clear out the sight glass like you’d do with a gun’ – a point not lost on this former Boy Scout, although it’s been almost 15 years since I’ve done that), spotted a couple of potential trouble spots and told me what to look for to know something has to be replaced, screwed everything back together, and headed off.

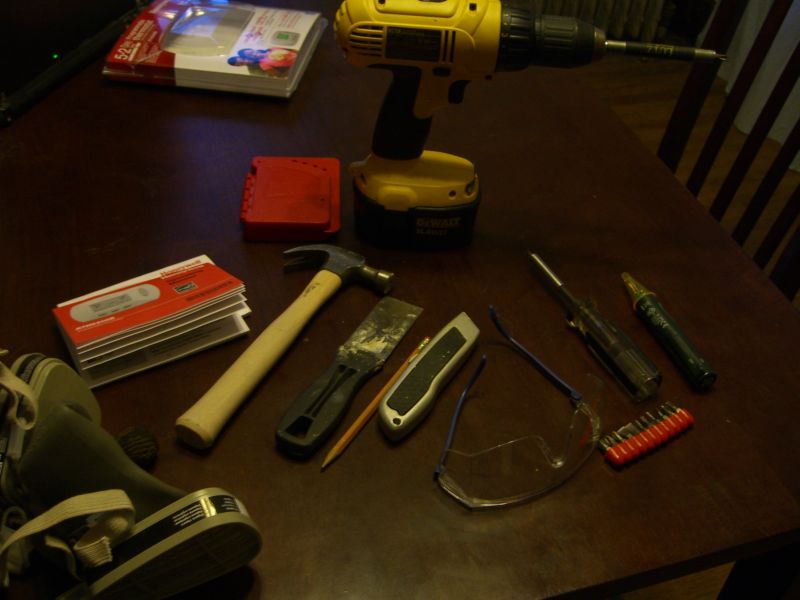
Minor snag though – he detached the wires powering the starter by hand to shut off the power (not recommended, but doable if you know where to grab and not grab – I always flip the breaker first, but then again I’ve been known to look both ways and still step into oncoming traffic) and thus was reattaching and capping live wires. I think one of them was loose as a result which kept the burners from kicking on when I turned up the thermostat this evening. Ten minutes with some electrical tape though and things are running fine.

Except for the last part of today’s adventure. Heat comes on, normal radiator noises, some of the abnormal radiator noises I’ve been meaning to address (see below) – and then a new noise from the radiator in my bedroom (which I could have sworn I turned off) which sounds suspiciously like water splashing on the floor. Somehow the valve had been turned upside down and had bled out a good half cup of water. Fortunately I caught it and mopped everything up before it could damage anything.

What all this means is that I’ve just added a significant (in terms of time) project to my Project Weekend – getting all the radiators in shape. I’ve been hearing some bad whistling on the downstairs radiators and have been meaning to clean them out – you can literally screw apart the valve and tap/blow out most blockages, and vinegar and hot water works for anything worse. The color of the water on my bedroom floor tells me that there are probably deeper clogs in each unit, which means putting some vinegar into the boiler* and doing some brush and wire work on the inside where the valve screws in. A couple of units also have excessive sloshing sounds, meaning I should level them to make sure water runs all the way back out and down to the return piping. After all that I should still bleed each radiator before winter, but pulling the valves to clean them technically overbled them. This will probably be a two-part project, then. 1) Clean the valves and level the radiators to eliminate unwanted noises; 2) Let the boiler push air and water back into all the radiators, then go through and bleed as necessary to ensure even heating.

*Careful with this if you have a boiler system of your own. It’s not caustic, but it can still do damage. Plus my system is a pretty simple steam system – yours may not like the home remedy approach (assuming you have an annual professional checkup anyway your boiler company should be able to tell you the risks and benefits). Moreover, and here’s the ‘planning’ part of all this – if you’ve ever cleaned out an iron by putting vinegar in the tank, you know what steamed vinegar smells like; not bad, but not what you want around your house all day. You’ll need to leave windows open to let the smell dissapate – shouldn’t take long, but unless this weekend’s temperatures get back to the 60s, the vinegar treatment may have to wait ’till spring at my place.

No Comments