Archive for category backyard
It’s so comfortable…
Posted by aaron in backyard, furniture, outside, tools and materials on 30 September 2012
… and make something both functional and aesthetically pleasing:

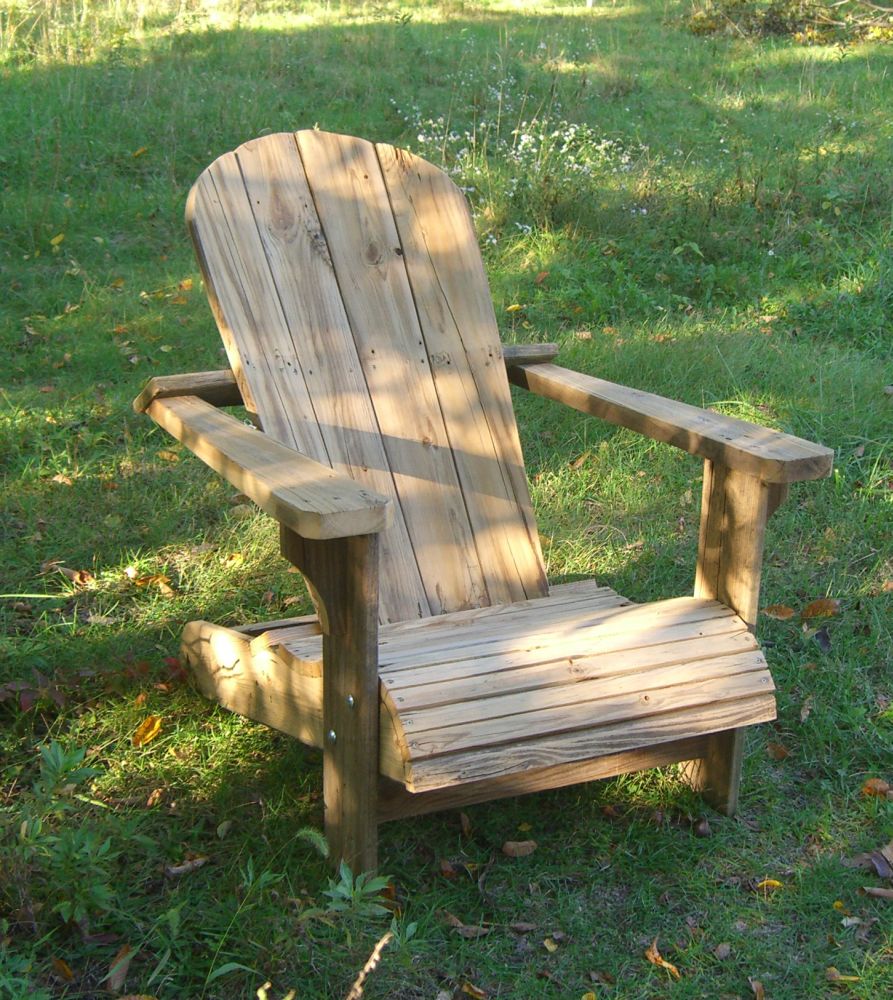
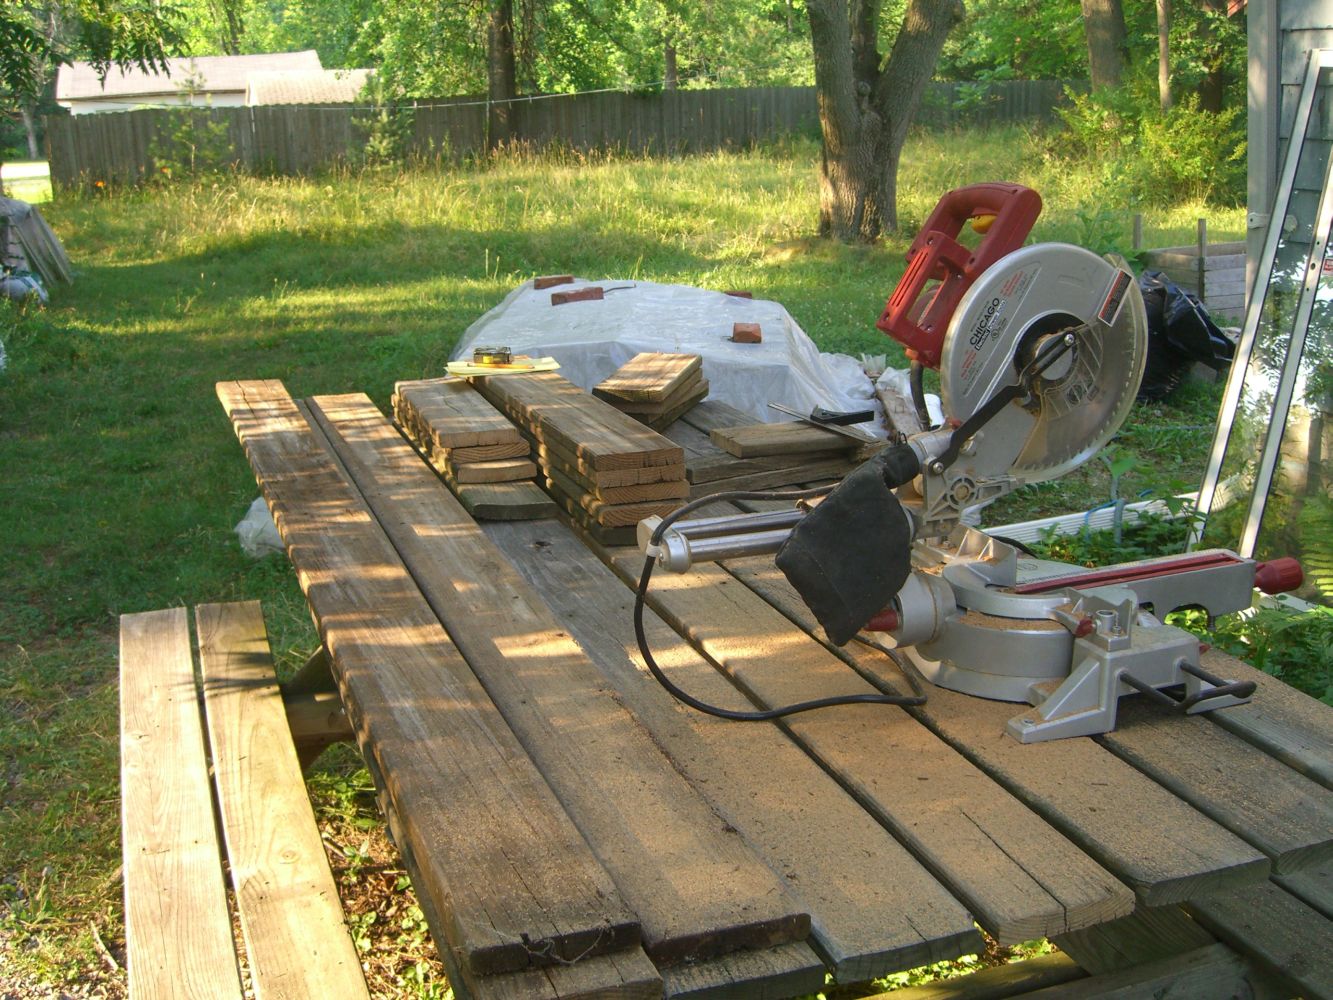
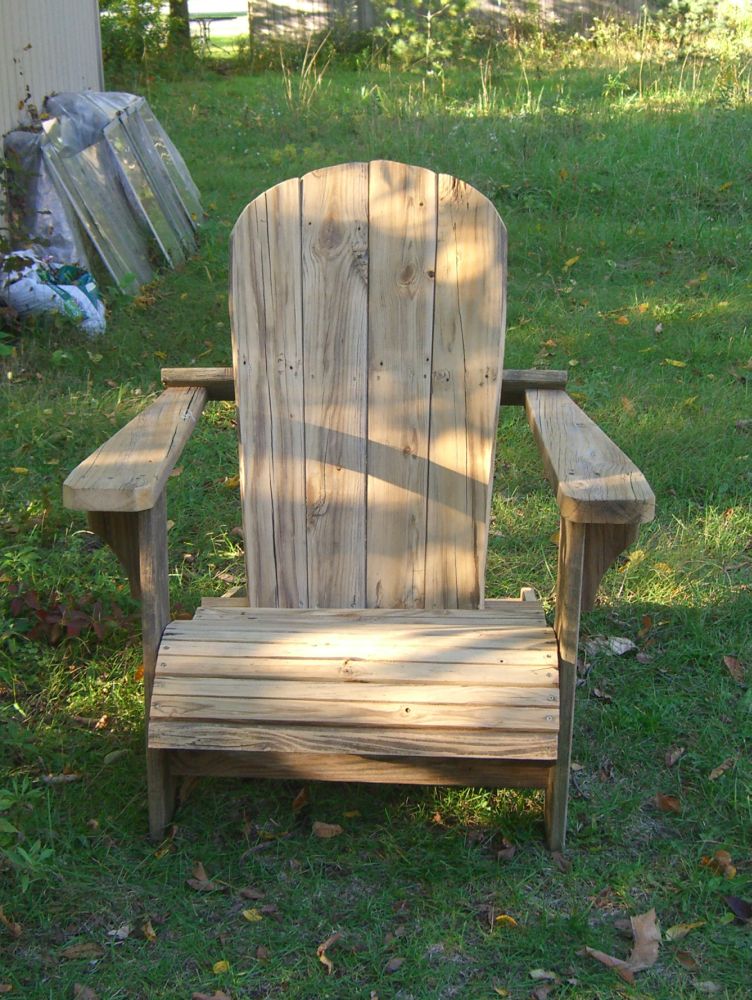
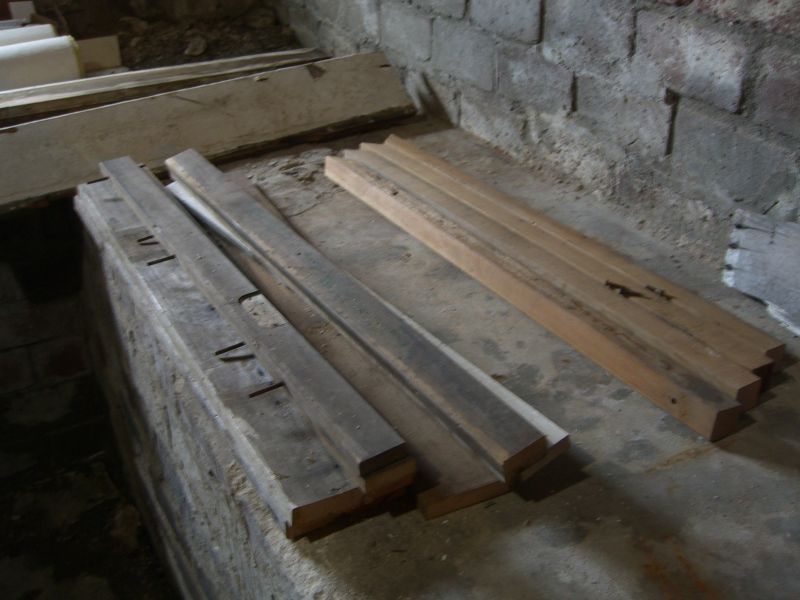
Even after completing that picnic table several years ago I still had maybe a dozen 8-foot lengths of almost 1×6 (I’ll explain the almost later) and a desire to create a sitting space other than my front porch. I’ve always liked the look and feel of Adirondack chairs (variants sometimes called Cape Cod-style, or Muskoka apparently) – the wide arms, the curved seat (not always a standard design element, FYI), the high backs, and the rustic quality, plus I used to go to Boy Scout camp in the Adirondack Mountains. So there we are.
Searching for chair plans online brought up literally dozens of options. I settled on this plan for its look – it really seemed the most comfortable of the designs I viewed – and its largely complete instructions set including three excellent options for creating the cut templates.
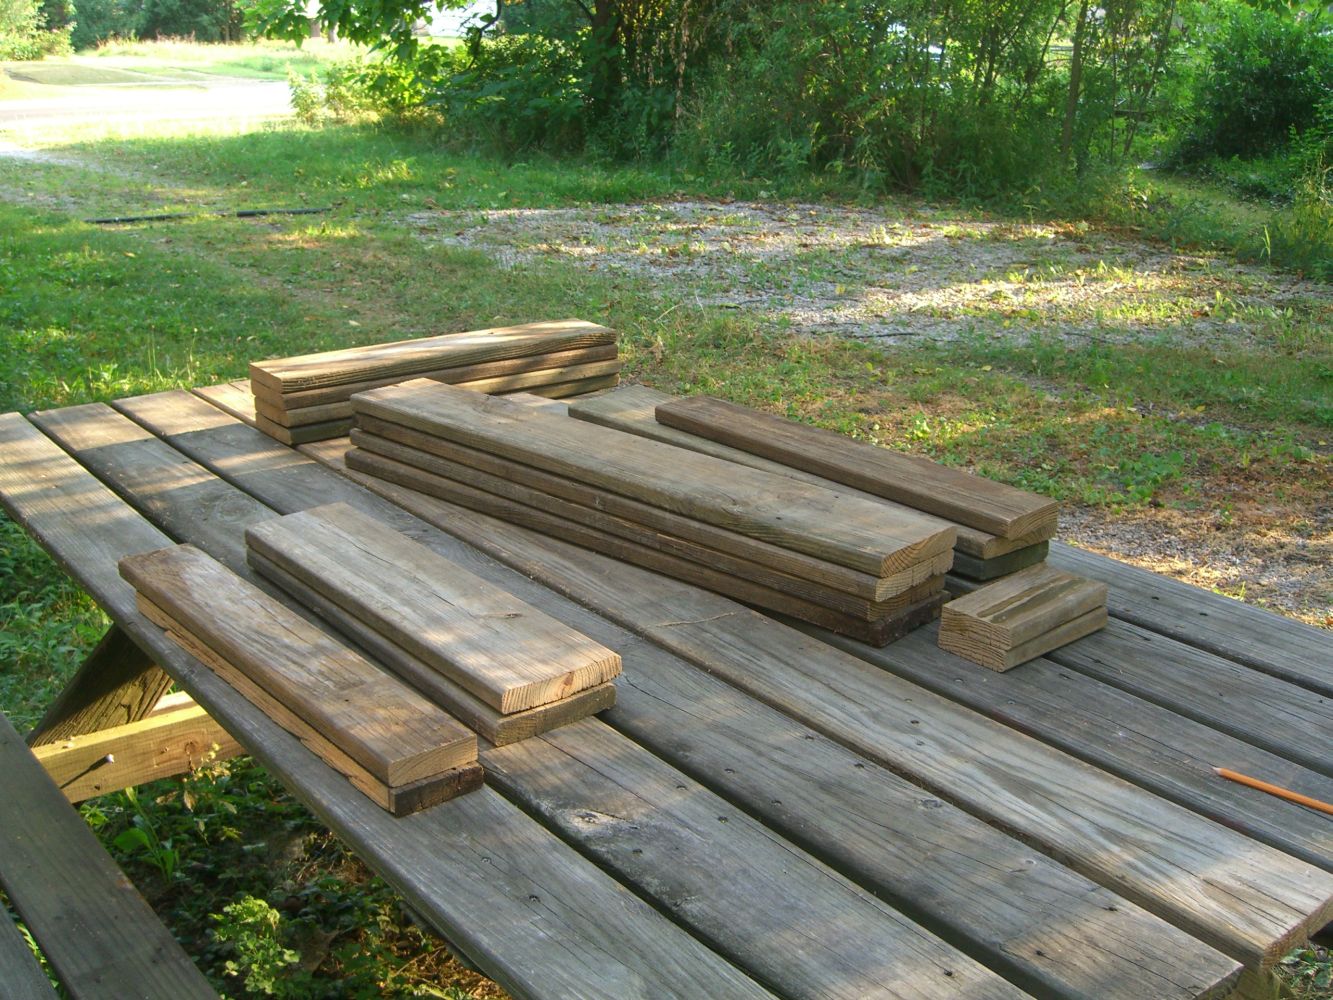
Depending on the wood you buy, 38 feet of 1×6, 8 feet of 1×4, and 68″ of 2×6 could wind up costing $100+ easily. Because these chairs are meant to be used outdoors – and therefore may be painted – this is a great project to use reclaimed or even scrap lumber. It’s even better if you have ‘spare’ pressure treated (or, heaven forbid, redwood or other traditional outdoor furniture woods) boards. $10 in fasteners and several hours of work later and you’ll have a conversation piece from which to have very relaxed conversations.
This project got stopped and started several times due to other work, but I’d estimate it as doable by one person in four hours (not counting sanding) IF you have all the tools and space so you don’t get in your own way.
Tools:
- Mitre saw
- Table saw (at minimum, the seat slats need to be ripped)
- Jigsaw
- Drill with paddle bit and predrill bit
- Circ saw
- Workbench with adjustable opening in top. (If your table saw can cut a shallow enough angle for the back slats and arms, you won’t need this or the circ saw)
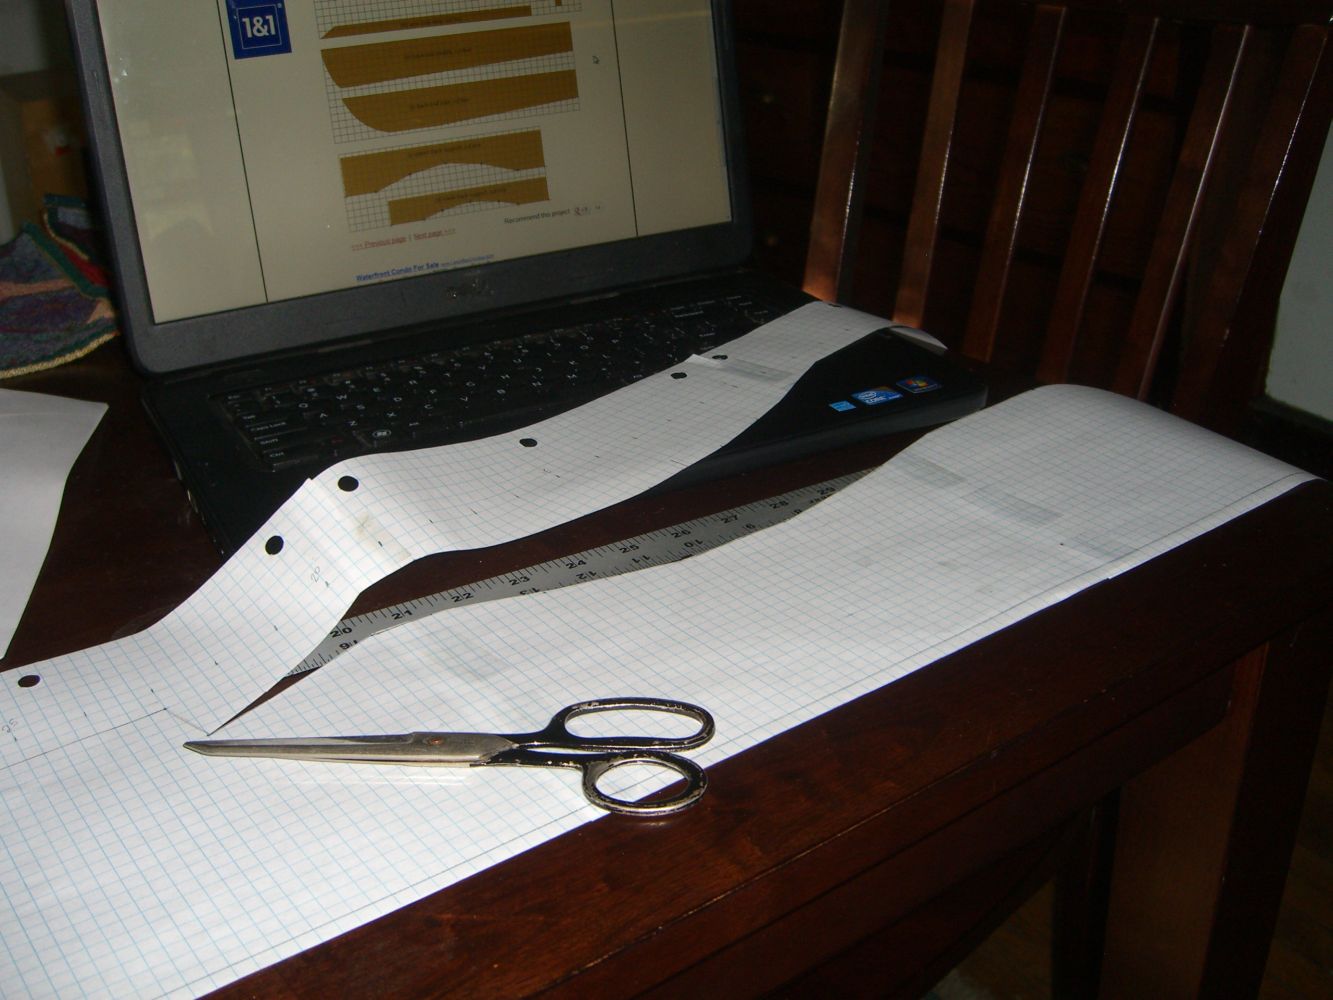
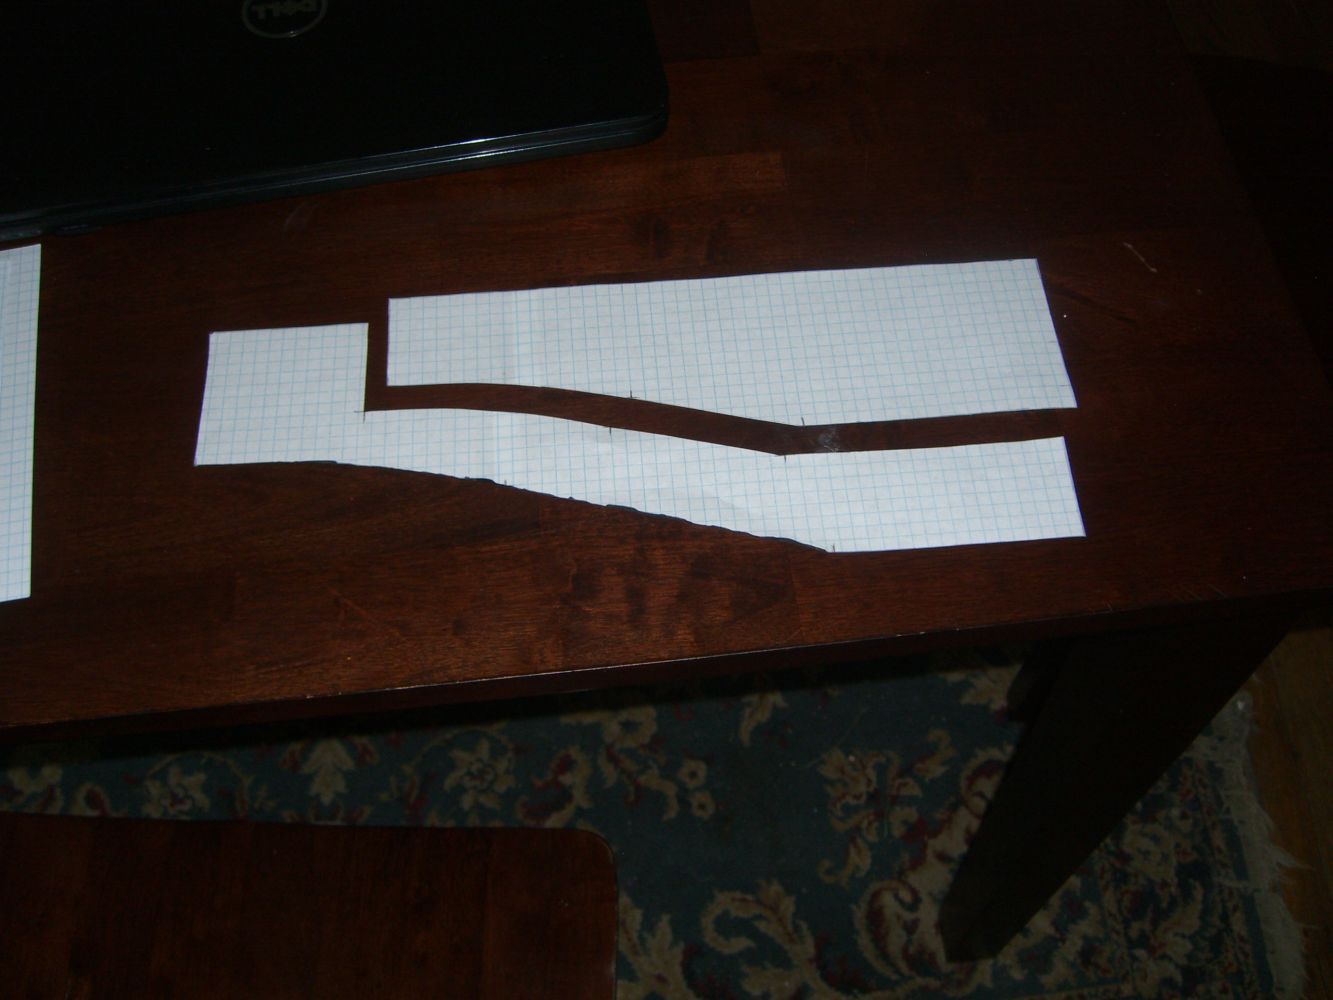
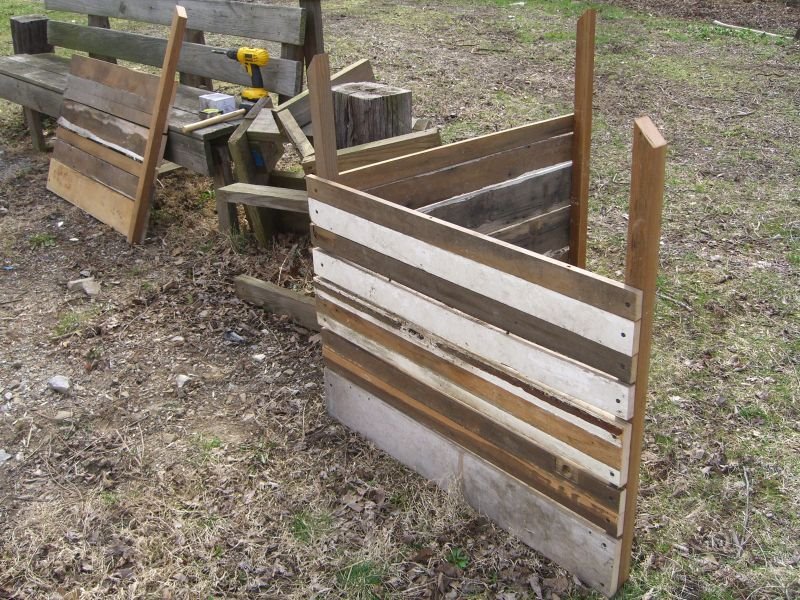
Saves time and paper, but does require a bit of spatial reasoning. Above, the upper and lower back supports.
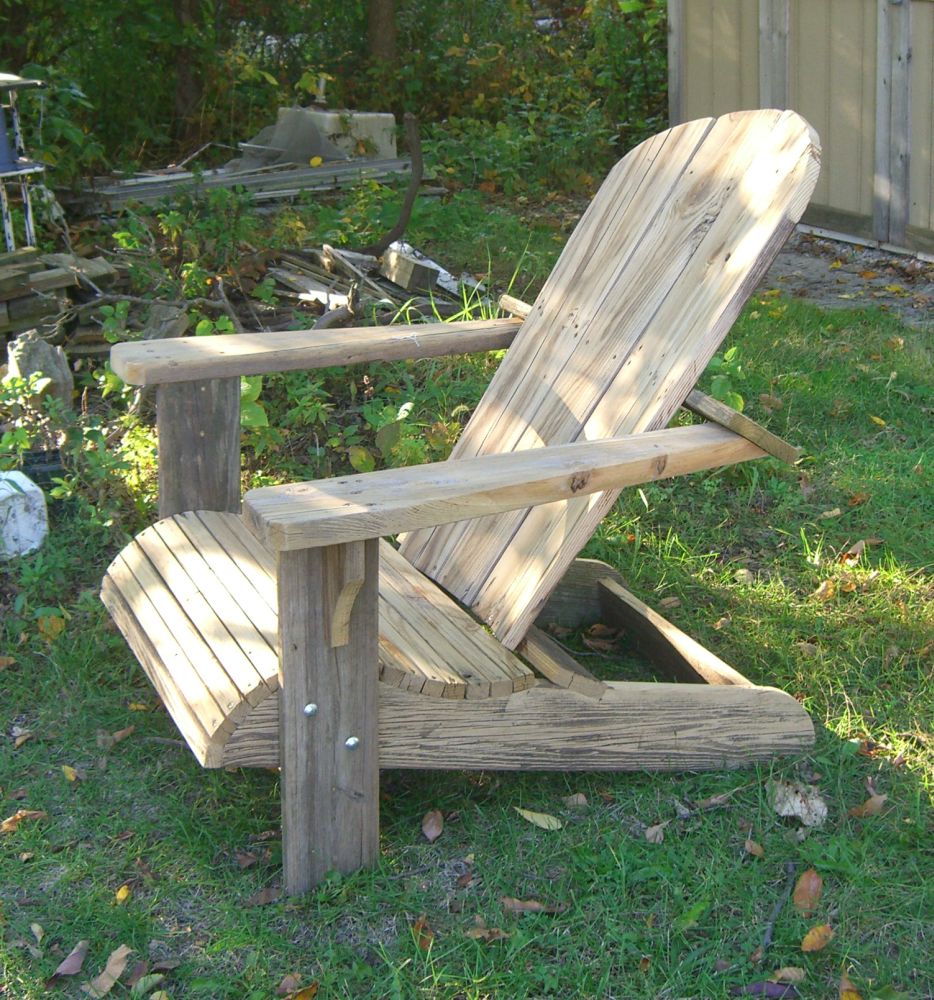
Not much else to report – the online plans (and handy pictures) were easy to follow and made a lot of sense. Two adjustments, and then another pro tip. First, I skipped the part in the instructions where they suggested temporarily attaching the sides to the leg/arm unit and using temporary spacers to keep the right width. I just maneuvered everything into place, clamped, and attached the bolts directly, several steps early. It’s possible I lucked out and got everything pretty square by accident. If anyone sees a good reason to do things the way the instructions say, I’m all ears.
That should be my mantra.
Second adjustment – I was sloppy in measuring the salvaged wood. The boards are actually 1 1/4x6s – so one inch thick instead of 3/4″ thick. This had virtually no impact on the construction, save for the rear spacer which had to be cut down a half inch (1/4″ on either side) to fit. As always, measure twice, cut once, then remeasure, realize your mistake, and cut again.
No, I was wrong. That’s my mantra.
Quickly now – pro-tips all around:
- Narrow scrap wood should be a mainstay of every shop – easiest way I know to guide a circ saw along a long angled cut, like for the back slats.

- Invest in a good saw blade for said circ saw. If you’re cutting pressure treated wood or heavy hardwoods, get a new blade, period. My old blade was bucking and binding when trying to cut the arms especially. $11 at the hardware store later and the cut took less than three seconds.
- Finally, if you’re using reclaimed wood, take advantage of the ravages of time. Knots, gouges, nicks – don’t sand them all away. And with weathered pressure-treated wood, experiment with not sanding down too far to allow for multiple colors and graining to emerge. The arms (which I have no idea where that wood came from, just that I had almost the perfect lengths sitting on my shelf) have three or four colors, like desert wood, from yellows to grays (of course) to even a bit of reddish purple. And the sides (second shot below) are tiger-striped because of how deep the worn ridges in those boards were. Great accents to the piece, I think.
Weeding
Posted by aaron in backyard, landscaping, outside on 14 July 2011
Extensively throughout the yard(s), including a real thorough hack at the stuff growing around my old dwarf apple tree. (In an awesome turn of events, both the dwarf tree and the young apple I planted next to it last year are both bearing fruit; small and probably tart since I haven’t been spending enough time on them, but fruit nonetheless.)
Of particular interest was the discovery of why buckthorn shoots keep cropping up around the dwarf apple – there’s a thick stem *ball* that established itself *under* a low-leaning branch. No way to dig this one up, so I’ve cut all the shoots, dug up the few seedlings nearby, and am now talking with a brother of a friend who is a forester about paint-on pesticides for buckthorn. More updates once the devilish weed is dead.
Raised garden beds
I am now light-years behind on any sort of posting schedule, or non-schedule, or really just posting, period. As a result, several of the next few posts will be horribly outdated: projects I finished months ago – some even last year. I’ll start with some adaptive reuse that’s been feeding me for part of this summer:
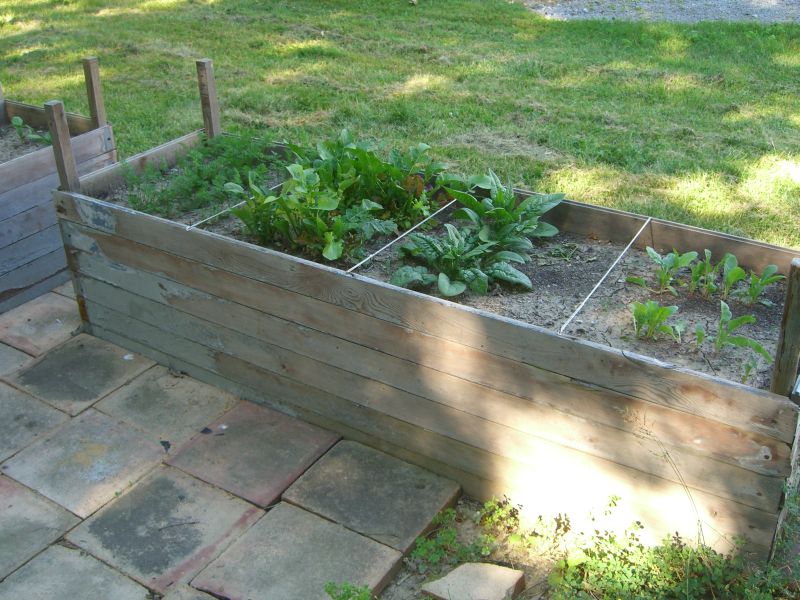
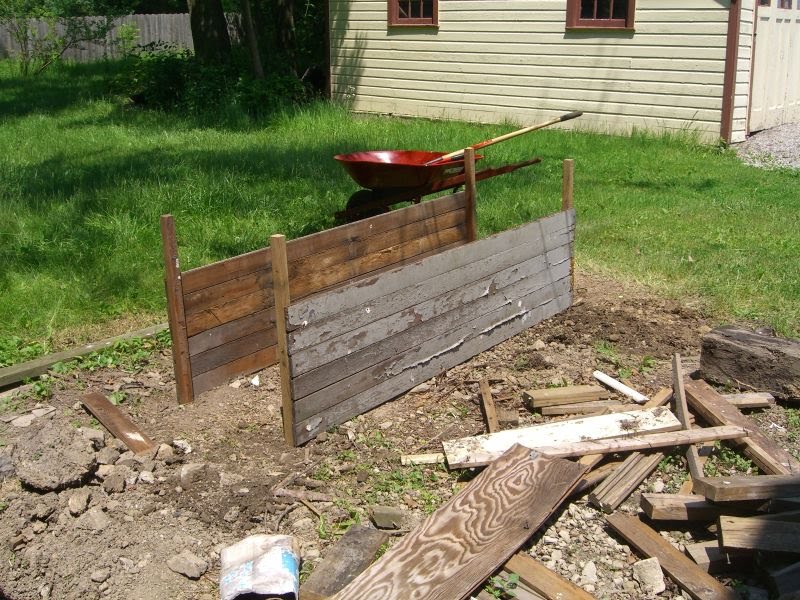
I won’t go into the virtues of raised beds here (plenty of others have said it better than I can right now) – and I’m not even to the point of square foot gardening – but I knew a couple of raised beds were going to be an important feature of my efforts to turn the gravel pit behind my house into something better. These are made entirely from found materials. The stakes – which are roughly 2′ in length each – are the same scrap posts I used for the compost bin last year; each has the same 45-degree miter at one end. The walls used to be a porch up in Elyria. The homeowner had redone his porch but hadn’t thrown out the wood yet, then saw my post on Freecycle looking for tongue and groove planks.
Construction could have gone several ways, each with their own pros and cons. One option would have been to measure off the stake locations and dig/drive them in first, then fit the walls to that skeleton. This would probably wind up with some imperfect corners since you’re looking at keeping things square over a four foot run. Another involves building the entire box in the workshop, moving it, holing out for the stakes, and then hoping you’ve leveled the ground well so it doesn’t skew when set down.
I chose to lay out two stakes on a flat surface, attached the planking for a long wall, then sank that whole wall into the ground. After both long walls were in I attached the short walls, screwing in the lowest plank, then fitting the next plank, screwing it in, etc. It was easier for one person to handle, and a little forgiving of leveling issues. The most important detail in this approach is being as exact as you can in spacing the two walls – otherwise the corners are likely to look ugly.
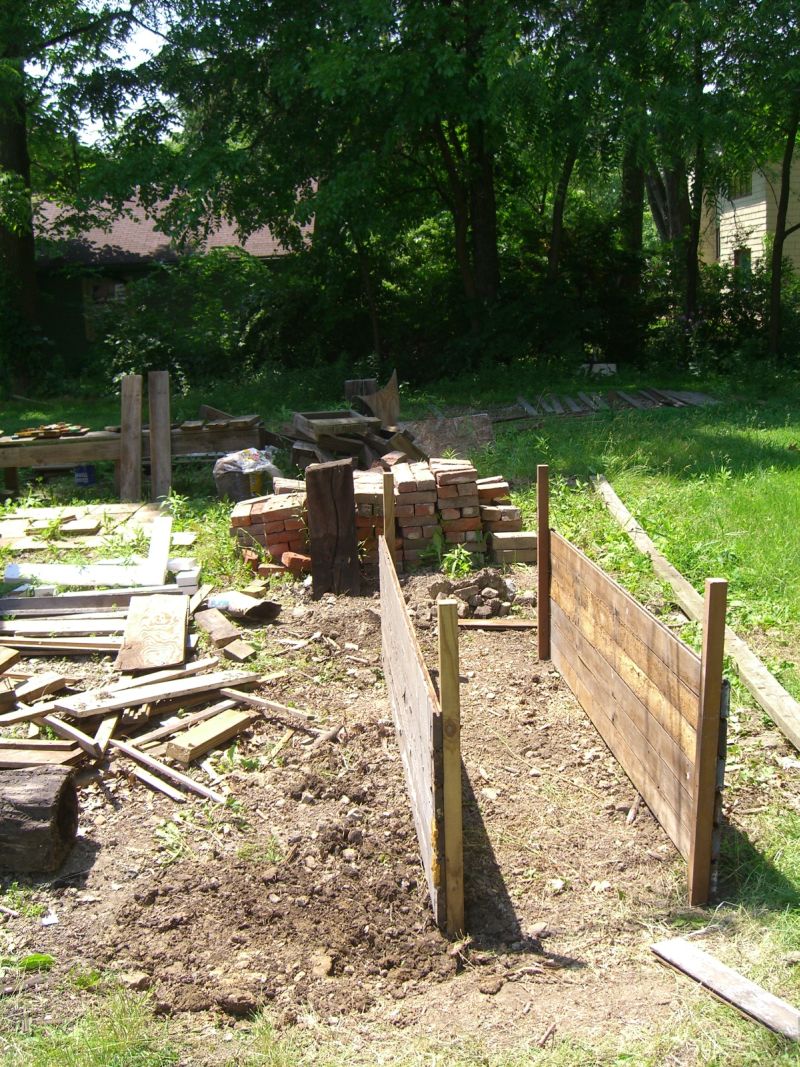
It’s conceivable that you could build two ‘L’s of one short and one long wall each, then move those into position. Again, that approach will have its own pros and cons.
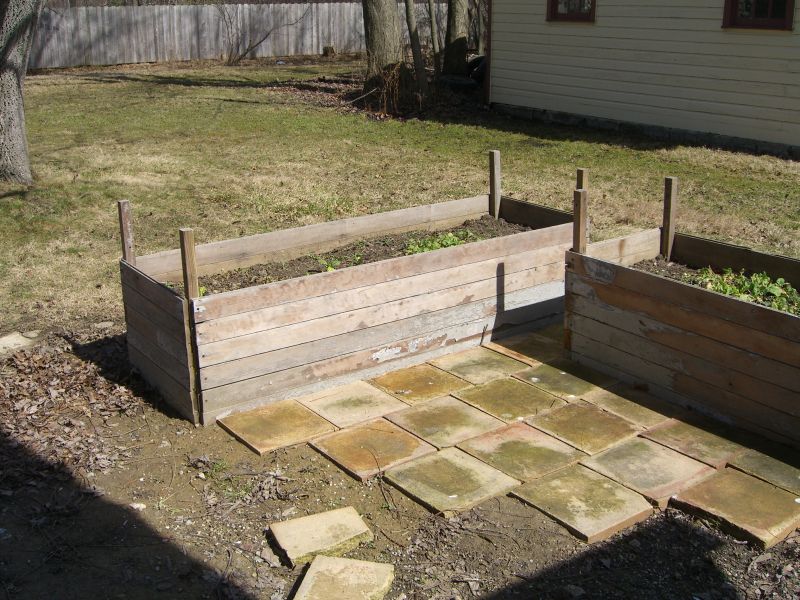

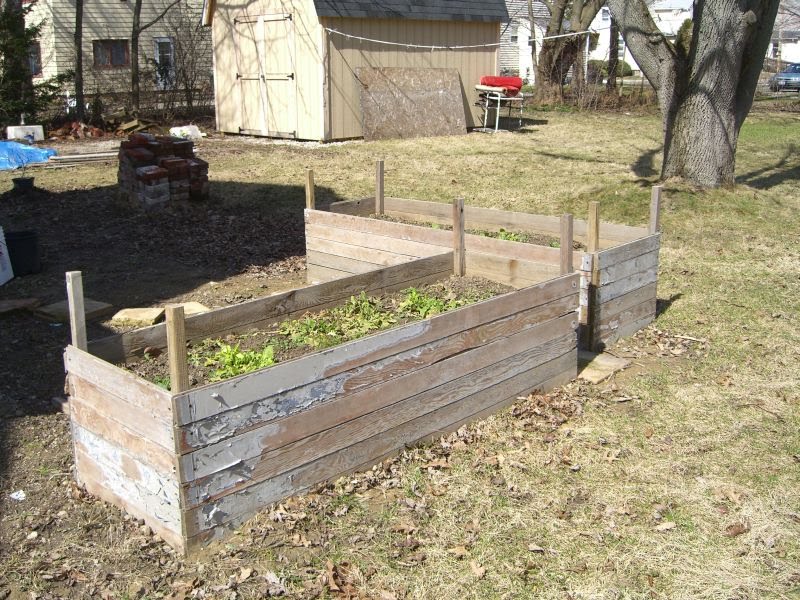
Ultimately, no matter how you build your garden beds, it’s still all about the dirt. These beds are roughly 20″ high so I wasn’t planning to fill them entirely with top soil. I have piles of clay fill from a neighbor’s basement excavation and put in about 15″ of that to fill the lower half. A healthy topsoil mix (river soil and mushroom compost from the local nursery) filled the rest of the box to within an inch or so of the top. Gravel or other drainage materials might have been helpful in the long run, but this mix seems to be working fine.
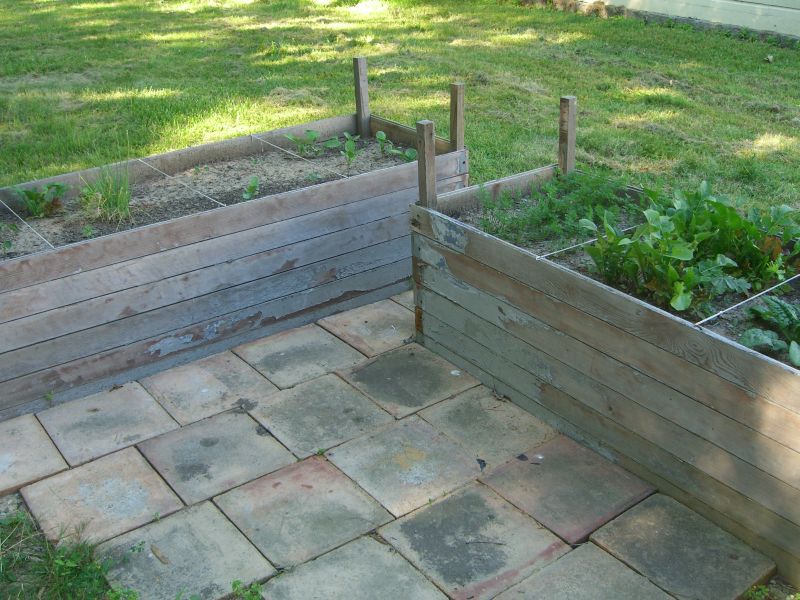
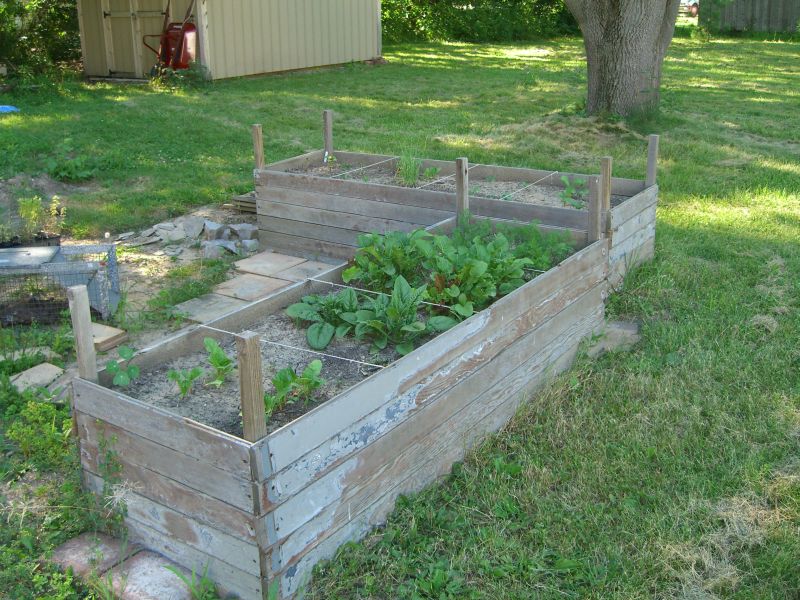
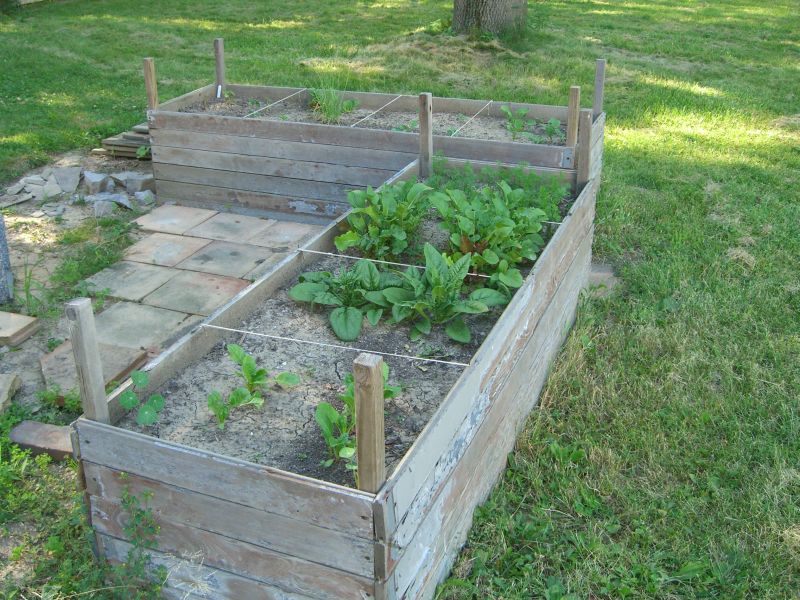
The paving stones were highlighted in the previous post. We’ll see how these beds and that mini patio tie together into the rest of the landscaping plan.
More updates as they are warranted.
Update (warranted):
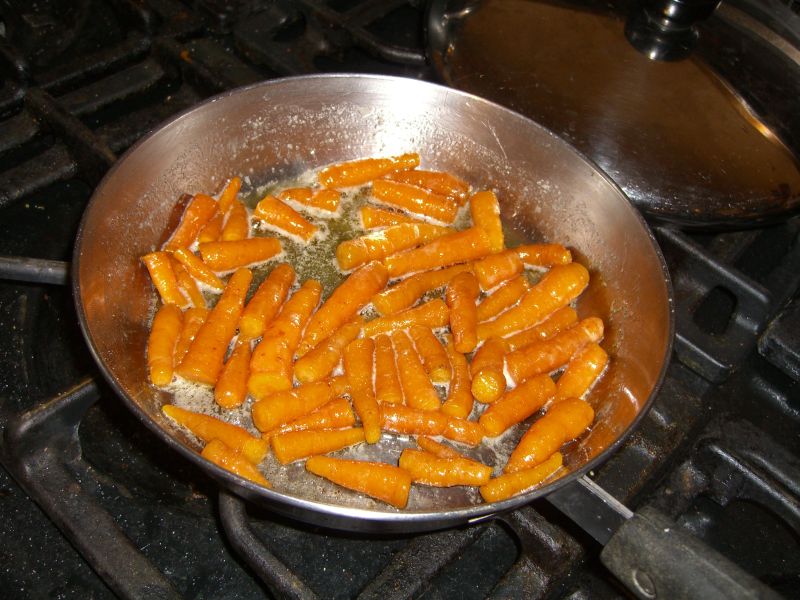
Never posted these, but here’s the first dish that came out of the garden (cukes were from the front garden beds):


Delicious in butter, sadly not from the garden:
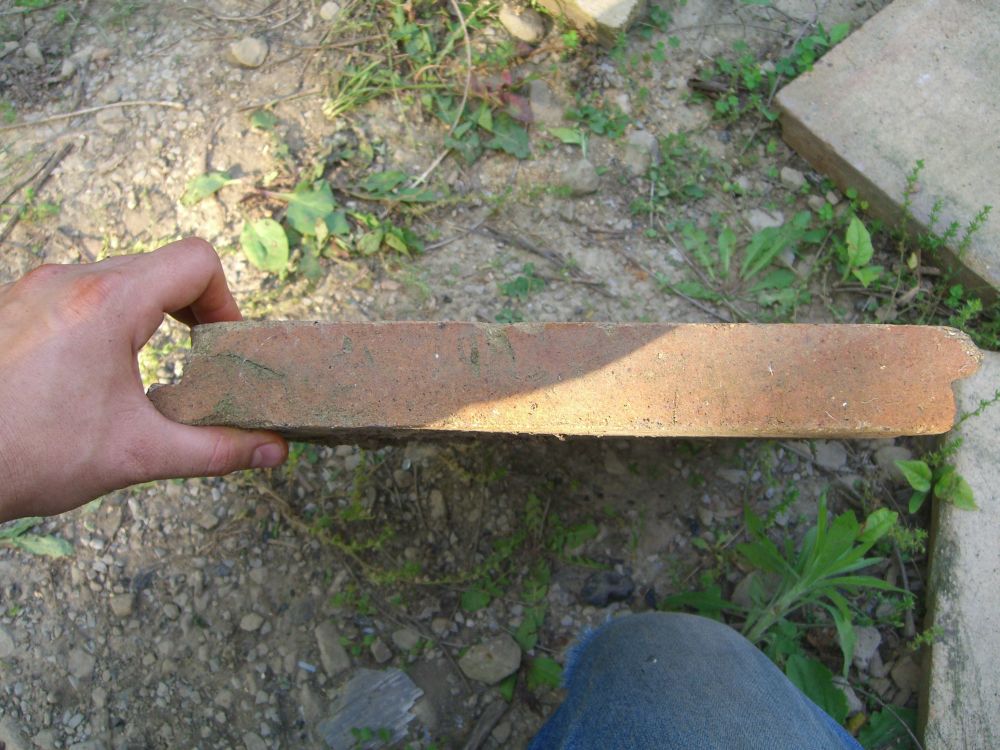
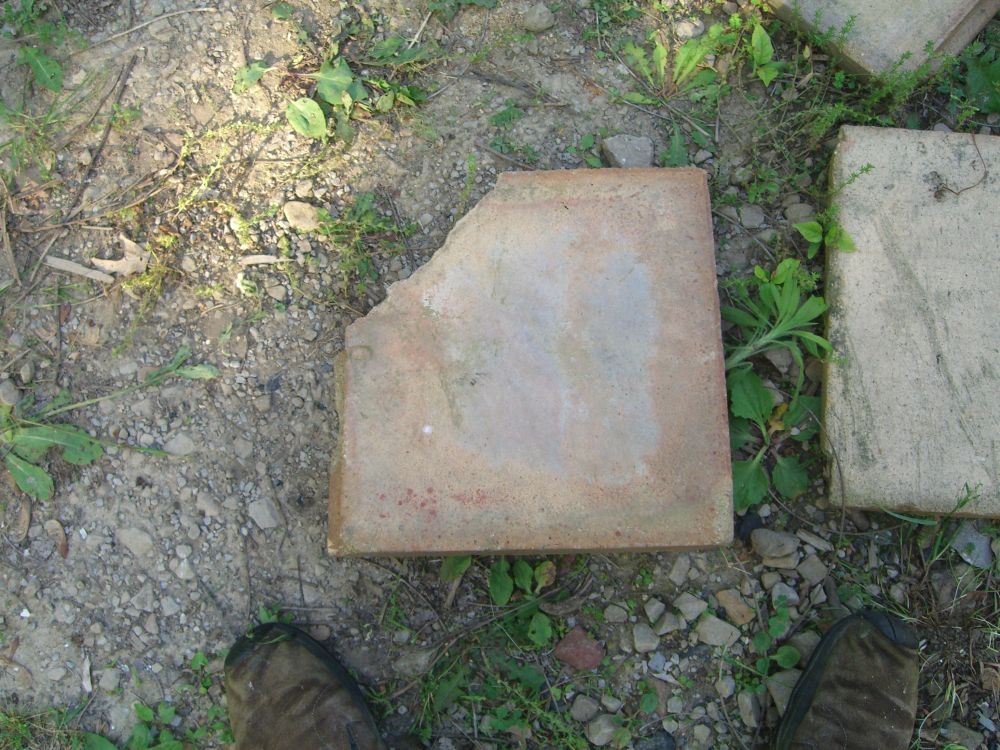
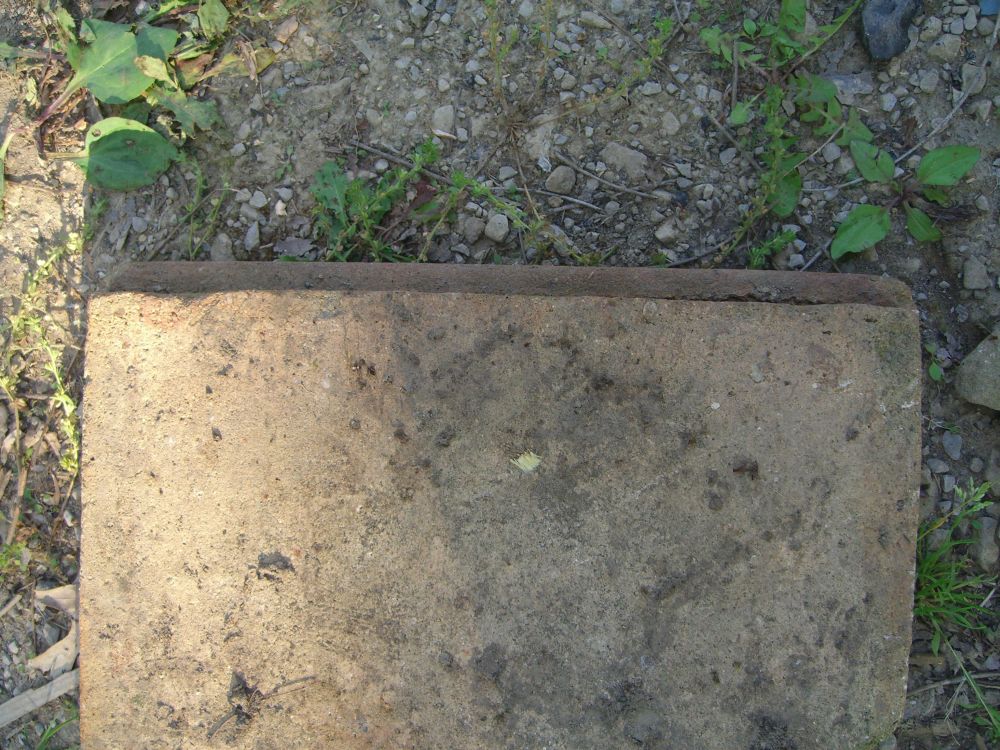
Can anyone identify these paving stones?
Posted by aaron in advice wanted, backyard on 20 June 2010
These were salvaged and quite likely discontinued, but I’d like to get more that match if possible – problem is I don’t know what the type is called so I can’t search for suppliers. If anyone knows, and has any recommendations on where to buy, it’s much appreciated.
Pavers are roughly 1′ square and an inch thick with – and this is the feature I can’t match anywhere – half inch deep ‘ledges’ on alternating sides that allow you to lay them in an interlocking fashion without needing mortar. The sample in the picture has a broken corner, but otherwise should give (I hope) an idea of what I’m dealing with.
So much for that schedule…
The blog-updating one, not the house-working-on one. Apparently I didn’t make a single post while on vacation (surprise, surprise), so I’ll have to catch up … some other time. Meanwhile, let’s get the typing started again with, if nothing else, a not-very-elucidating list of things I did around the house today.
– husked the last of the walnuts
– raked the last of the leaves from the front and side yards
– plugged the couple of carpenter bee holes from last summer with that savior of old houses, Abatron
– created more tool hooks in the back room
More stuff later, as always.
Flora
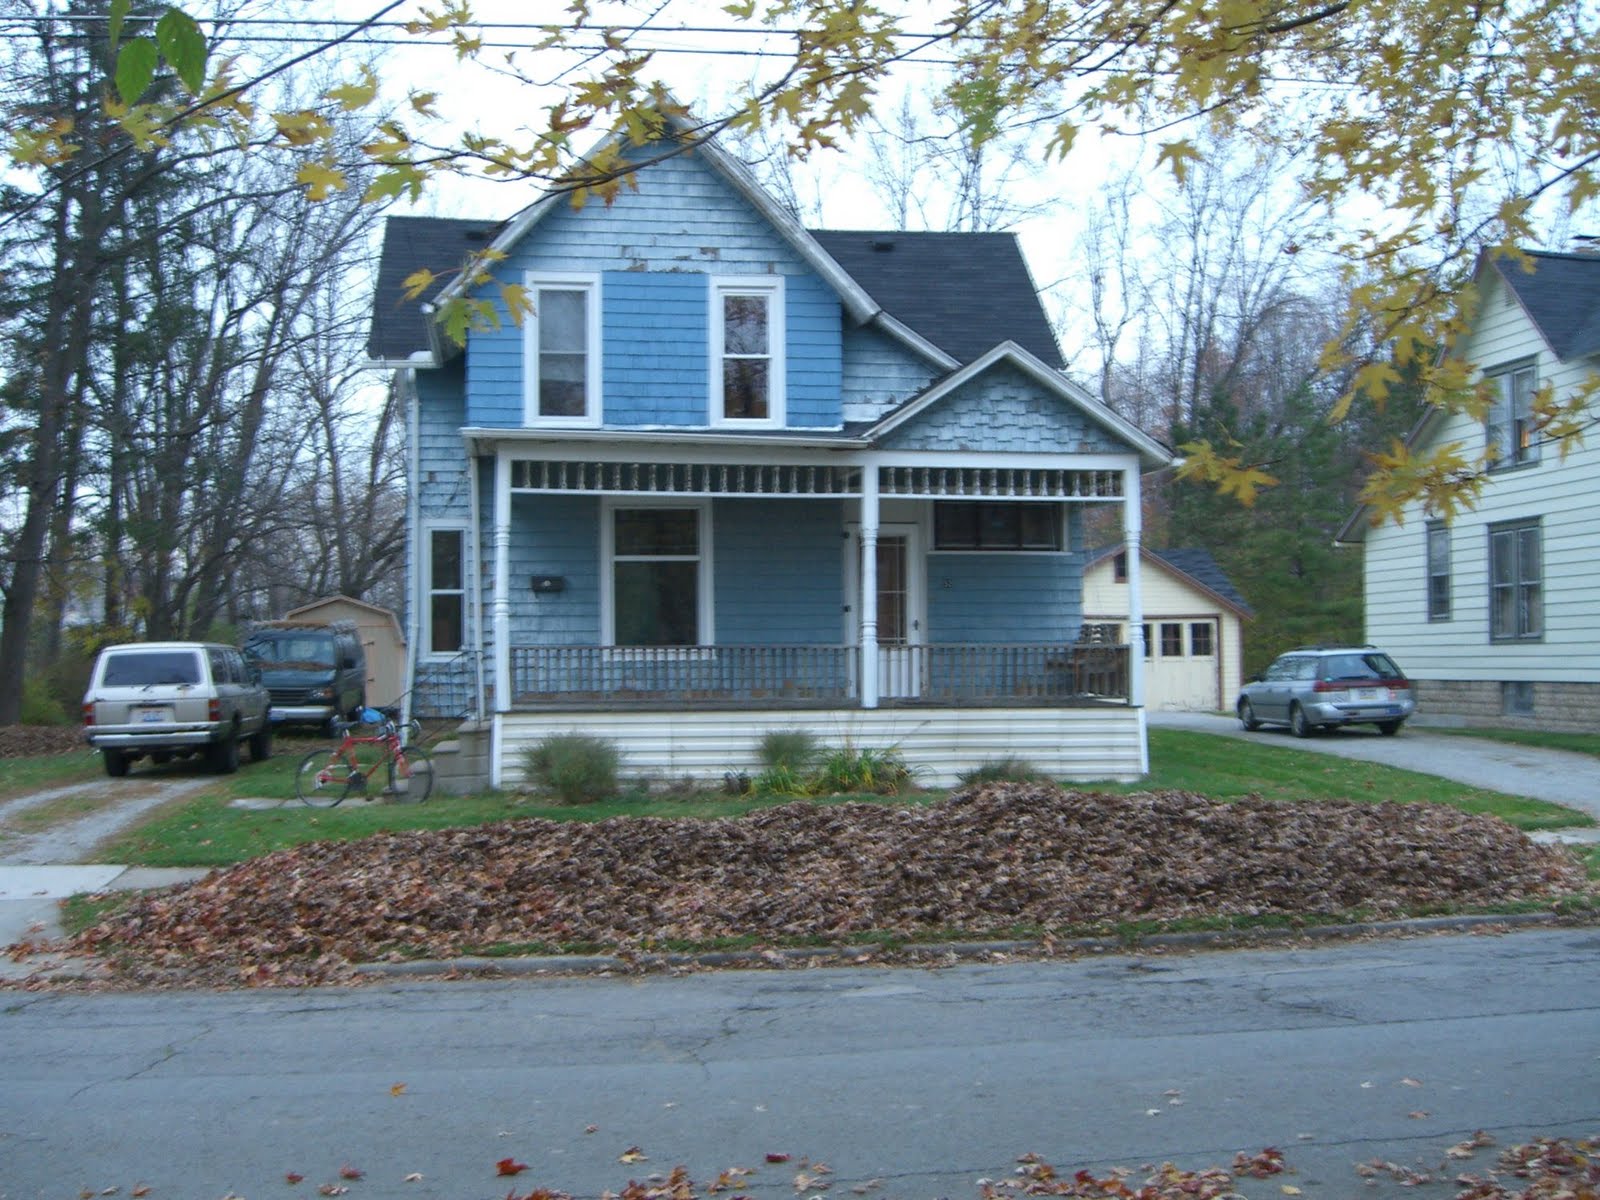
Wow. Has it really been two months since I posted anything? The mini vacation I’m taking will give me a chance to catch you all up I’m sure. Meanwhile, here’s a little bit of what grows on three tenths of an acre (untended for a few years):
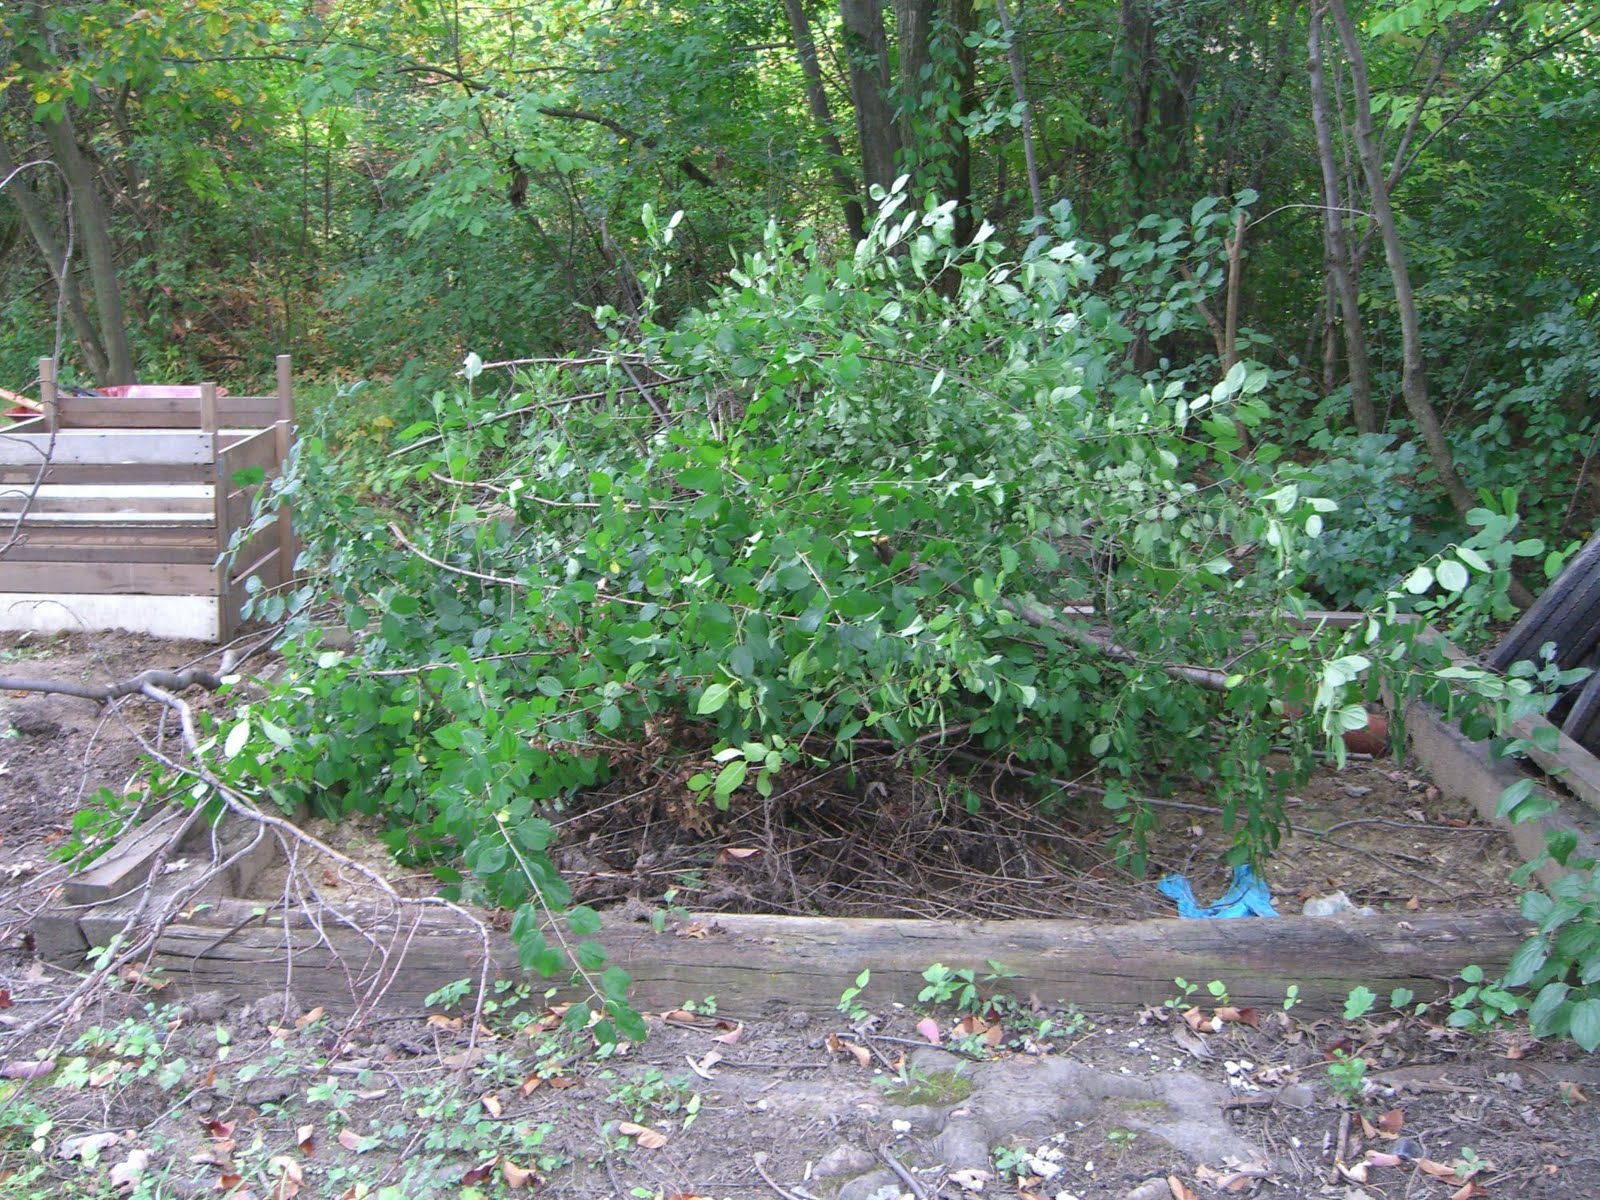
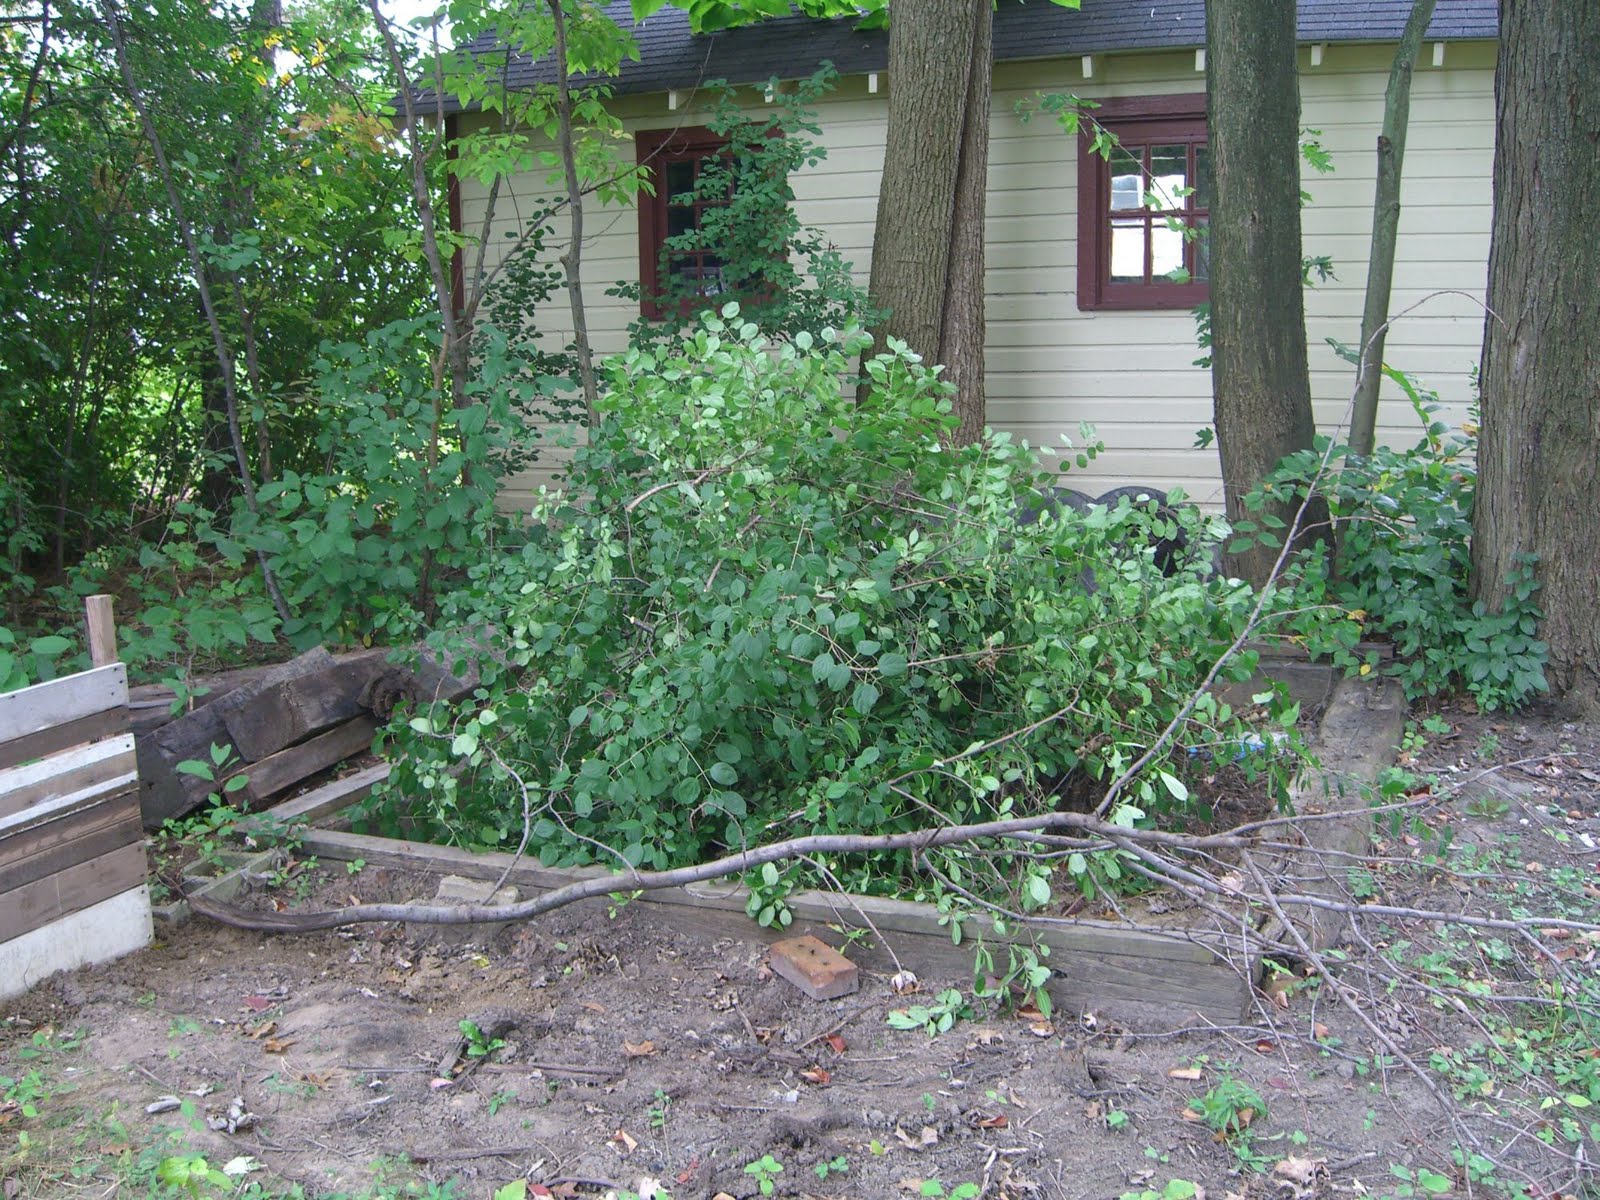 That’s a vast amount of buckthorn pulled out of the area around the old shed foundation. There’s some more on the west edge of the property, but I’m not going to deal with that until I decide what I’m planting over there.
And here’s most of the leaves that fell in the yard. I know! This blog is just so scintillating sometimes:
When the only tool you have is a hammer…
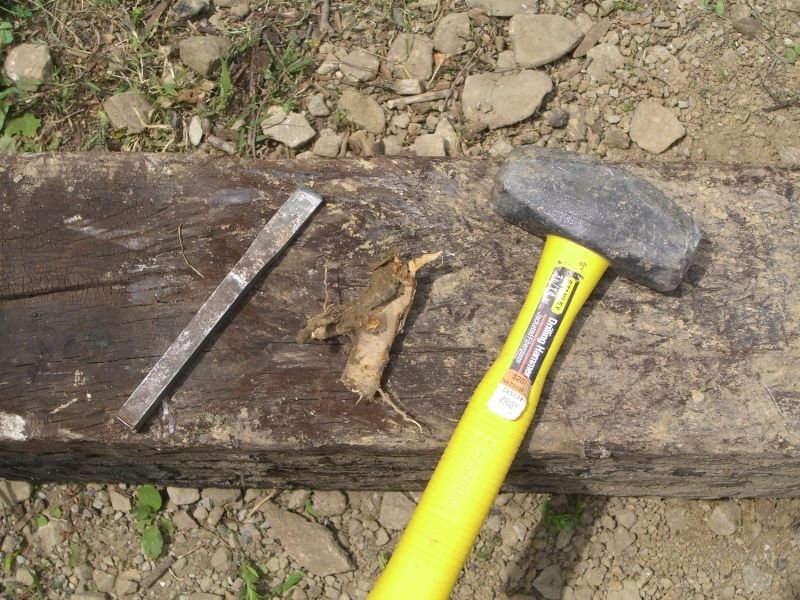
You really need to go to the flea market. Amongst the other tools I picked up was a cold chisel. While digging out one of the pilings in my backyard, I ran into a series of tough roots. The smaller ones split under the shovel, but the thicker ones just sheared off a layer and stayed put. Cold chisel plus hammer plus two or three taps at each point on the root equals no more root.
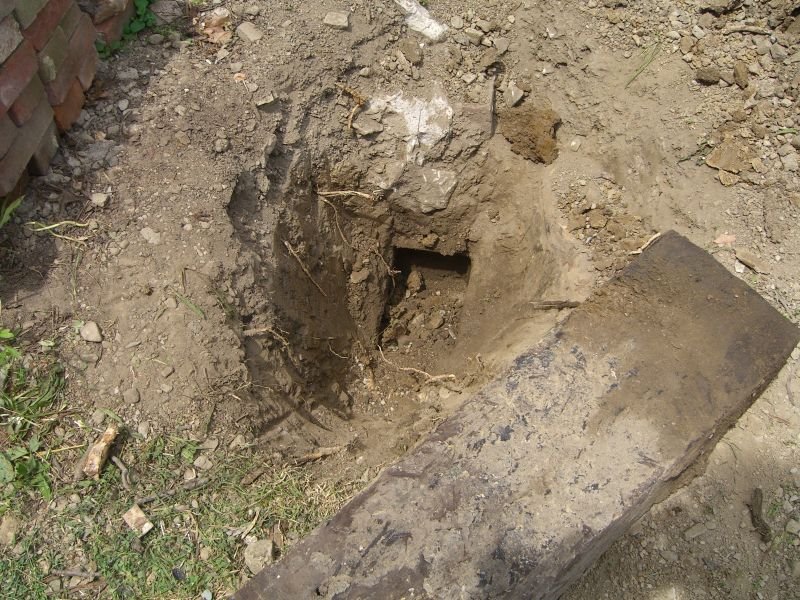
Hard and deeply buried targets
That’s not an innuendo, just a reference to my days working for DoD. It’s also an appropriate title for this post about pulling a set of old pilings that had once supported a deck in my backyard. The deck is long gone and the thick pilings are now just in the way of various plans for the space.
Incidentally, these pics were taken over the span of at least a month. Plenty of things have been happening at the house, but since June 2 plenty more have been happening with the theater festival I’m in this summer. My days have been a combination of rehearsals/performances, housework, client work, eating, and sleeping. No time for reportage.
Back to the reportage:
 This is one of five pilings that need to be pulled this summer. Thick, heavy, sturdy wood that’s been sunk in the ground for a number of decades now. I asked the previous owner how deep they were and if there was any concrete. To the best of his recollection, they’re buried about three feet down, and there was no concrete. You can see where this is going.
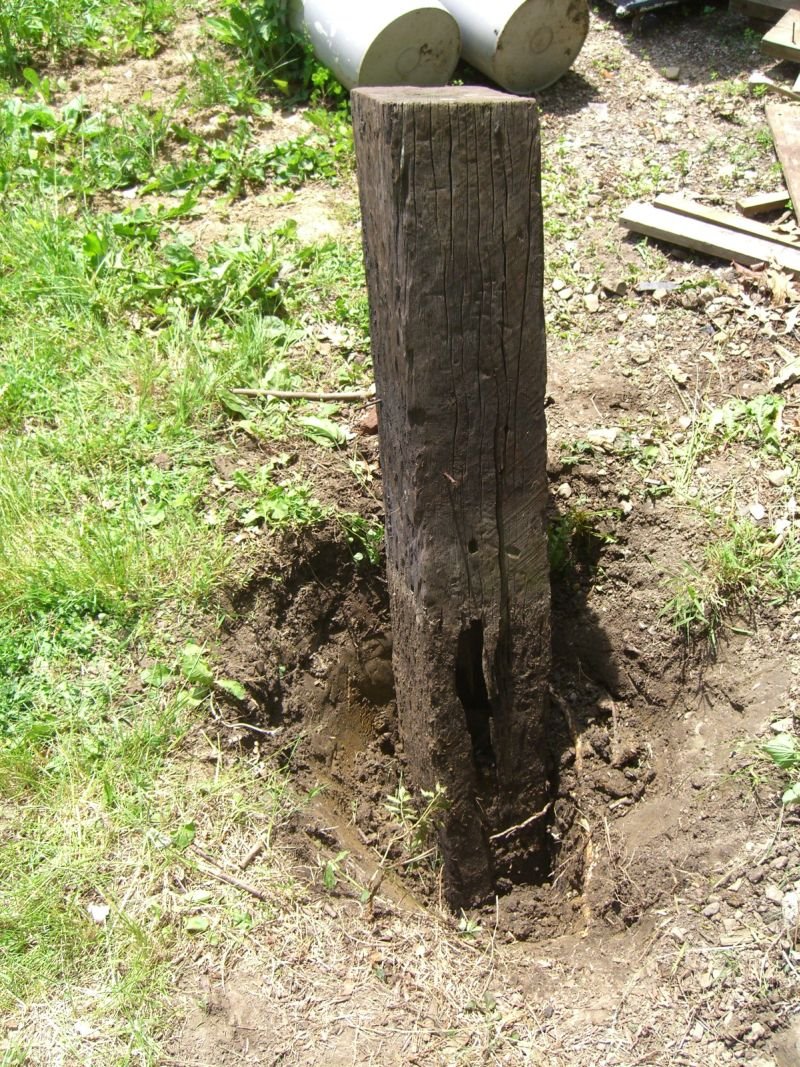 They are buried three feet deep.
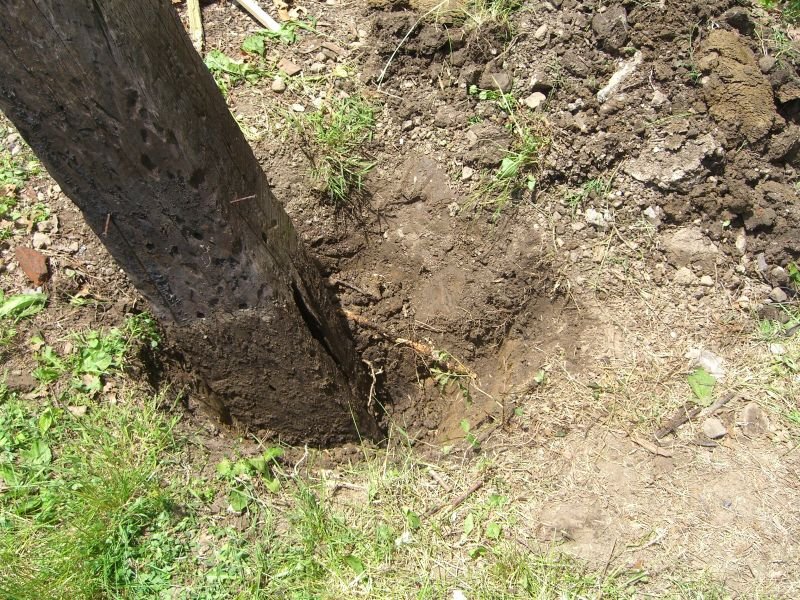
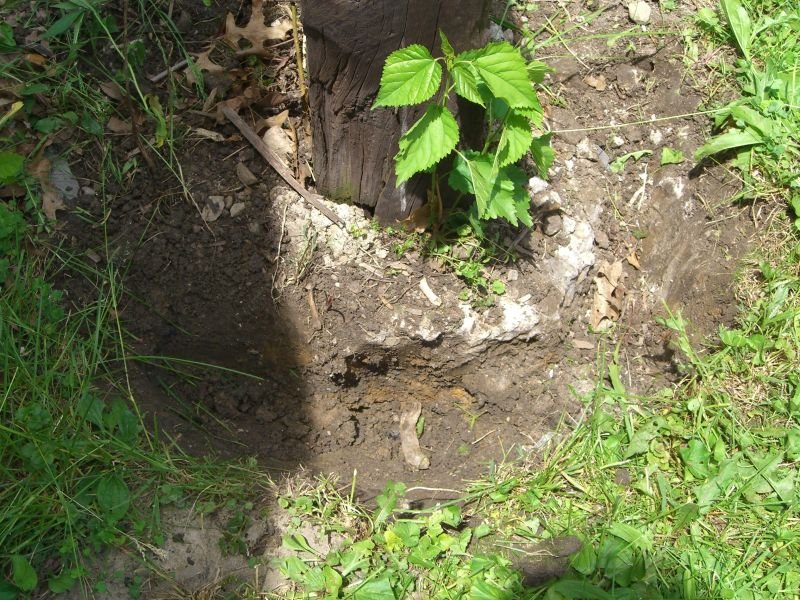 There is a ring of concrete a few inches down, about 4-6″ deep. Fortunately I’d recently bought a three-pound sledge. Remember to wear safety goggles when taking out your aggression on some harmless (but very in the way) concrete. Also, dig out underneath the concrete as much as you can with either a shovel or spade before wacking the rocks.
Pulling an old piling isn’t that difficult a process, just time and labor intensive. Dig, break up any concrete, pull any rocks right by the base, keep digging…
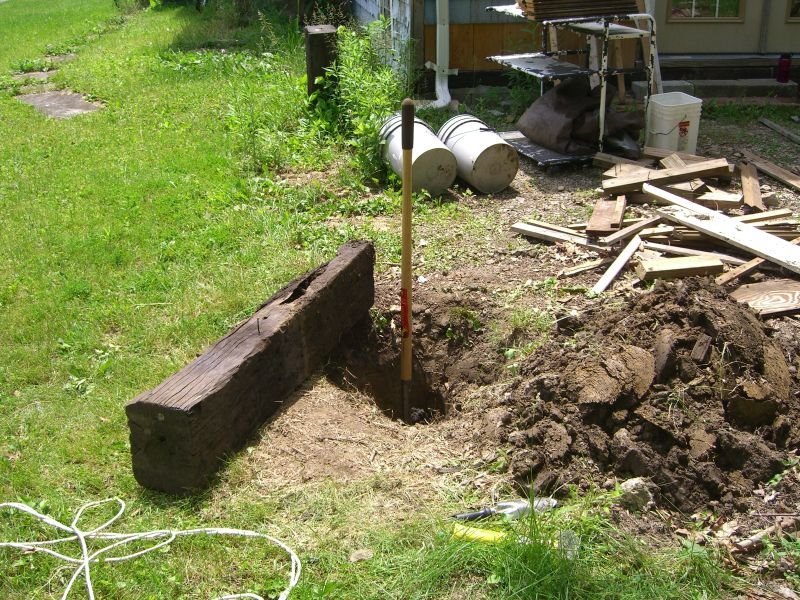 If they’re buried three feet deep these things’ll be pretty hard to pull straight up (although far from impossible – see the last pic in this series). I found the best way to remove them was to rock them back and forth (it also loosens some of the dirt at the base, although if you rock it too hard you’ll start compacting the dirt), digging out more of an oval to allow the piling to ‘fall’ further with each shove. Eventually you should be able to do one of two things – either get a 2×4 under the buried end and just lever the piling out:
 Or, if you really loosen all the dirt around the base enough, and there’s something to grab onto, you can lean the piling against the side of the hole and drag it up and out:
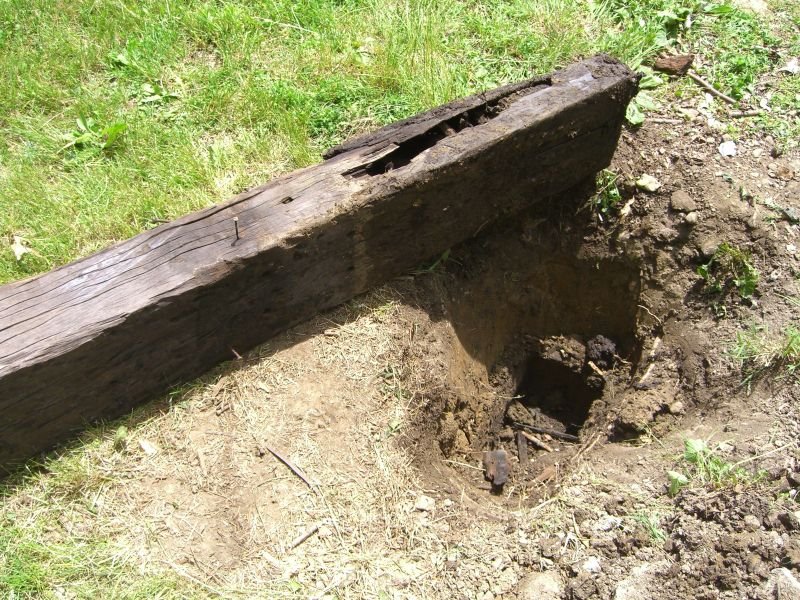
 This third one was a real problem. Aside from the bricks I’d stacked right next to it before the winter that had to be moved, two sides of the piling had obstructions that made it very difficult to dig a full hole. On the right (not visible) are some old tree roots about as thick as your arm. On top is either an old cement/brick pour from who knows when, or some additional heavy fill put in when the piling was sunk. It just took a little longer to work around everything, but now it’s done. Hooray!
Oh, and fill the holes back in before you close up for the day. It’s always these little details that escape us after hours of manual labor.
Compost bin
Maybe I’ll catch up on some – what, two months? – missed posts at some point (treasure hunt, circus, now summer theatre festival all conspire to suck my time from updating this blog, if not also updating the house). Meanwhile, let’s go with what we know (and have pictures of). Today’s illustrated lesson: how to make a compost bin for $4.
Start with scrap wood. I took some 1″-square posts – probably from an old wooden swingset – cut them down to 3′ with a 45-degree cut at one end so they became stakes. Miscellaneous scrap of a huge variety of widths cut to 3′ gave me the planking for the sides.
 Depending on the weight of the scrap wood you’ll probably want to assemble (or at least connect the sides to each other) closer to where you plan to place the bin. This next image shows three completed sides, leaving about a foot of each post at the bottom to be driven into the earth. This turned out to be unnecessary (and hard to do) so I wound up driving them about 6″ deep, and moving the top plank on each side to close the bottom. I think planning for 6″ of clearance at the bottom of each post should be fine.
 Locate the bin, pound into the ground with a mallet or hammer and woodblock. Here you can see the ‘swapped’ planking, leaving some space at the top of each stake – handy if I ever string or fit a cover over the top.
 As luck would have it, I stumble across what looks like part of a shipping crate in a junk pile – and it was the perfect width to serve as the bin’s gate. If you don’t have handy piles of pre-built salvage lying around your neighborhood, just remember that the gate you build out of scrap won’t be as wide as the other ‘walls’. Two hinges and a hook from the hardware store were the only materials costs on this project – about four bucks in all.

More small stuff
Raked about half the backyard.
More clearing in back room and living room.
Took a wire brush to the stand pipe cleanout, then gave it another dose of Kroil. Will alternate this with a blowtorch for the next couple of days and see if it gets us anywhere.
Mapped a few electrical circuits in the basement, including finally isolating the dining room light so I can install the switch and unit – and have a dining room again!
Also sorted through most of the papers that had piled up on the coffee table, which isn’t really house-related per se, but at least I now have a coffee table again. And now Sarah’s calling saying they’re at the Feve, so I think that’s it for today…