Archive for category tools and materials
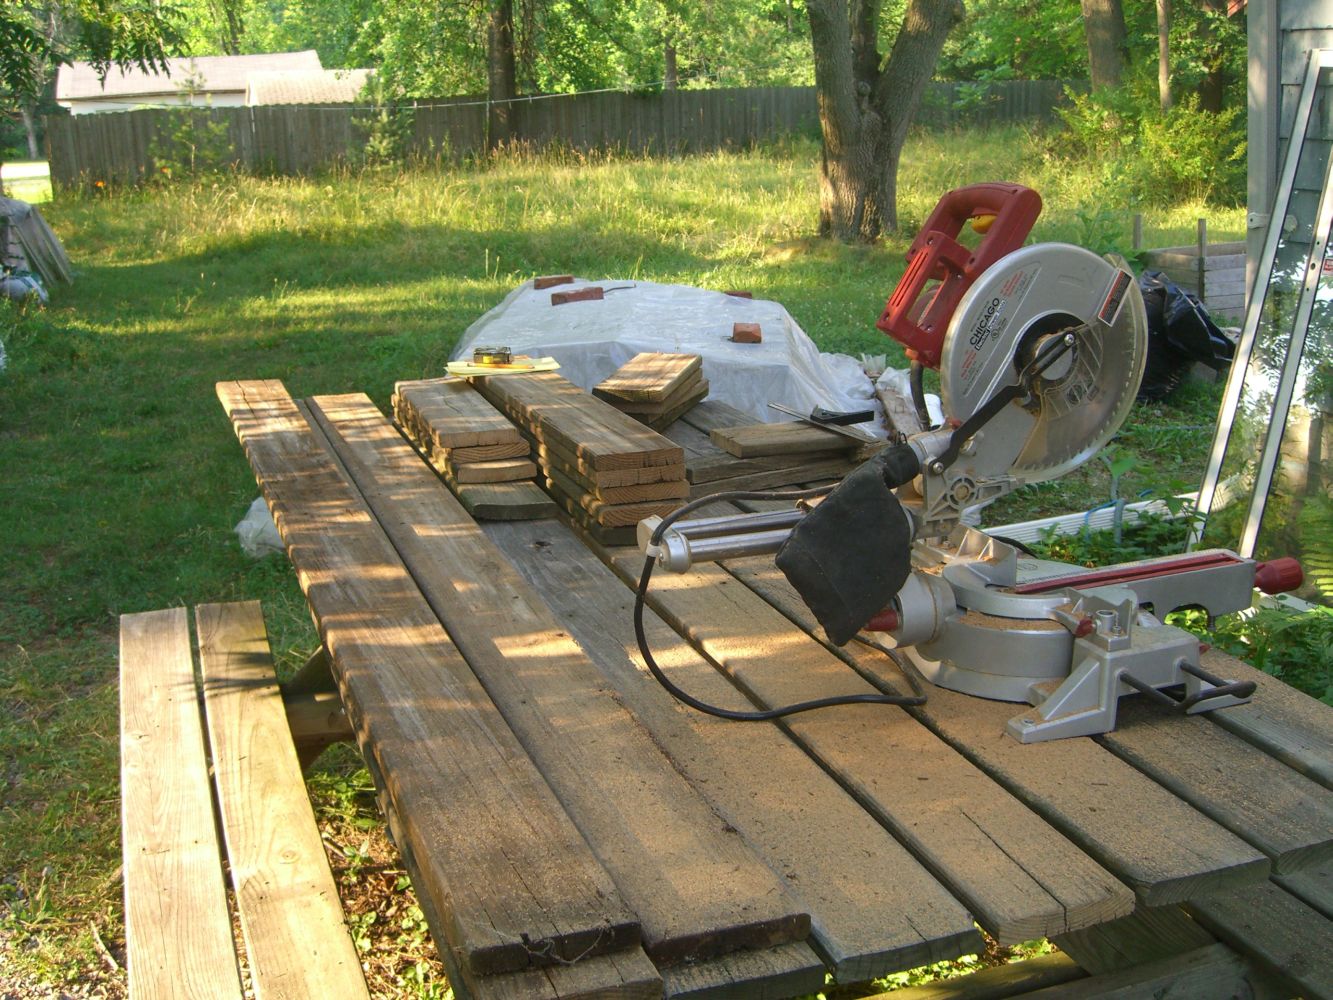
Build your own mitre saw bench
Posted by aaron in tools and materials on 15 August 2013
It’s quick and easy, and you can do it with things you have lying around the house!
Step one – check if you have a mitre saw lying around the house. Otherwise, this is not the project for you.
Necessity is the mother of semi-permanence
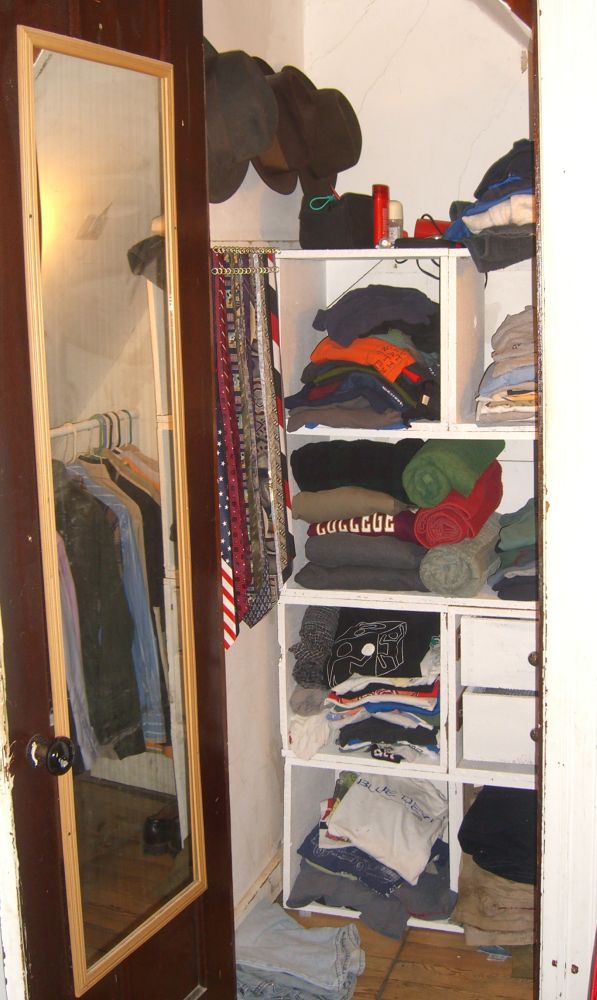
Posted by aaron in bedroom, closet, furniture, reused materials on 6 August 2013
Close readers of this blog (hi Ezra!) will note that my closet project had reached a midpoint, and said midpoint involved all my clothes in the living room. After standing in front of the now-bare closet for many a day, chewing on the end of a metaphorical pencil and gazing thoughtfully into the space, envisioning a huge range of possible shelving and hanging possibilities, colors, finishes, rewired light fixtures, and a use for that trap door, I determined that my clothes were still in the living room. The situation now growing untenable, I built some box shelves:
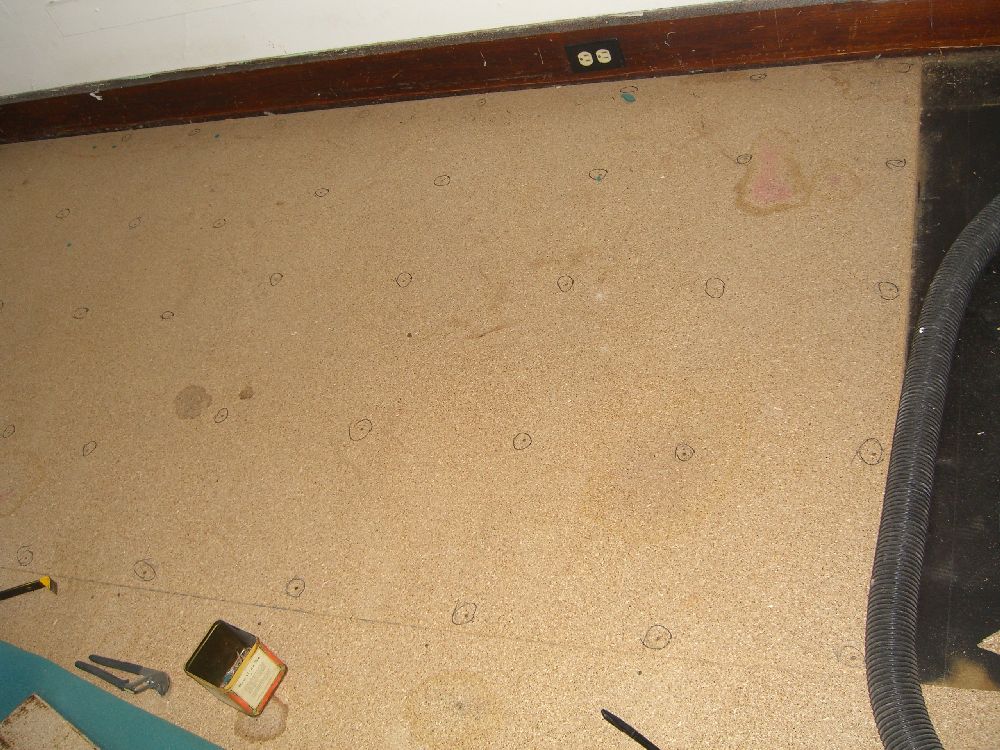
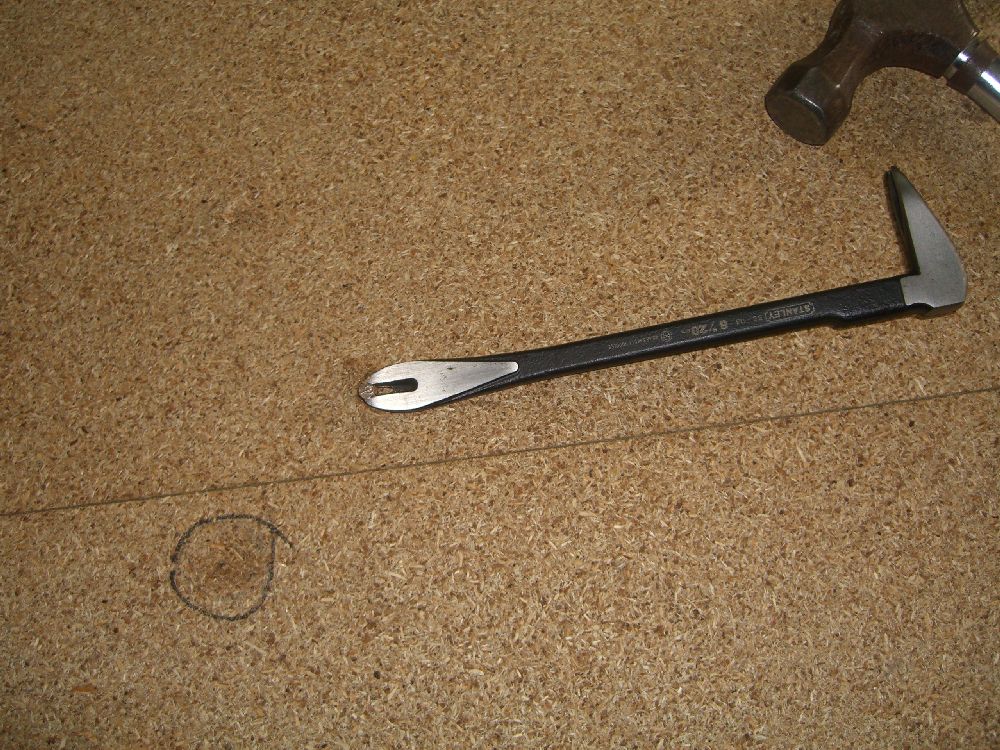
How to pull old nails out of particle board
Posted by aaron in tools and materials on 20 June 2013
I’m not going to think up a ‘clever’ title for this one – it’s purely instructional.
Particle board or plywood sheets are common as subflooring. Properly, they’d be nailed down every foot to 18 inches along each rafter or joist. That means a lot of nails:
Here’s the fastest way I know to get a job like this done and done well – buy a cats paw:
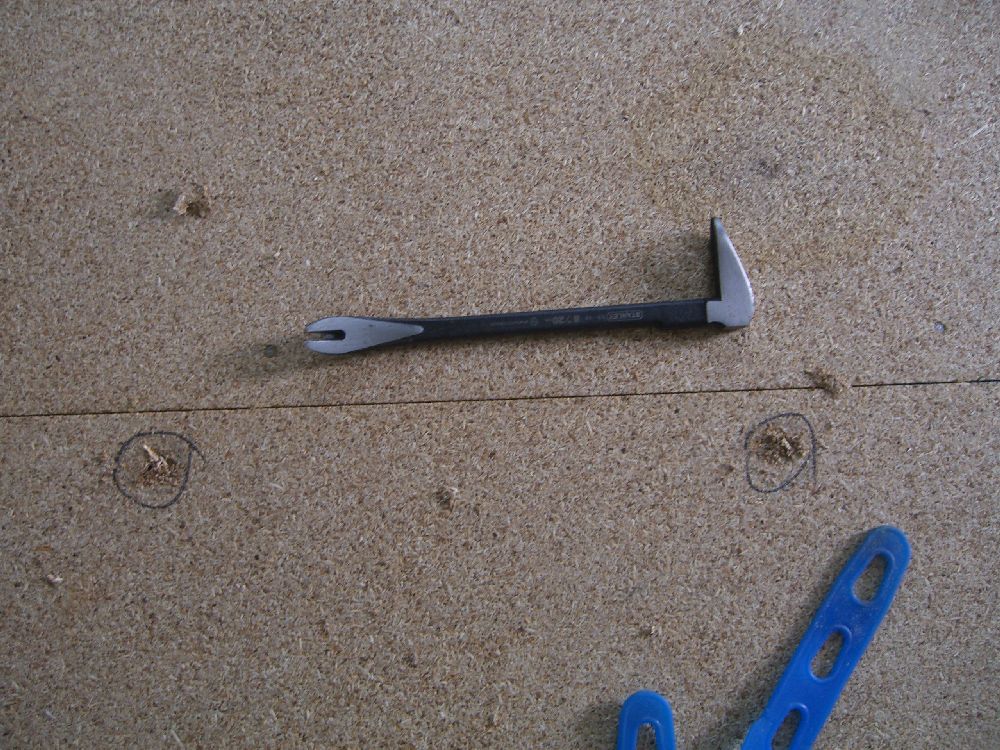
These are designed to easily get the tines around a nail or screw head and then maximize leverage to make pulling it out a breeze. They’re also made out of a solid piece of steel, so a couple of light taps with a hammer is all you need to set the tool:
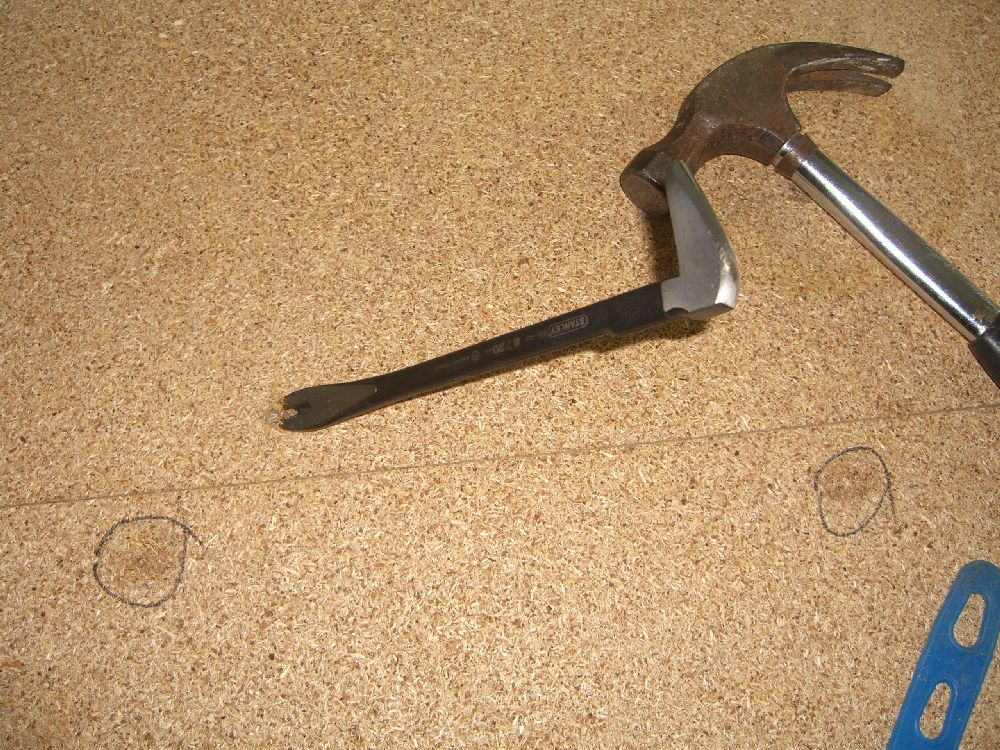
Then lean – lightly, even – on the other end and the nail should pull right out:
But, you say rhetorically, can’t I do this with the tools I have on hand? I don’t want to buy a new tool for a simple project! Well, I reply, first of all you’re lying if you’re a do-it-yourselfer and say you don’t want to buy a new tool. Second, would it kill you to support your local hardware store? And third and most importantly, sure there’s an alternative – and it’s a pain in the neck. And the knuckles. And tears up the boards much more than necessary.
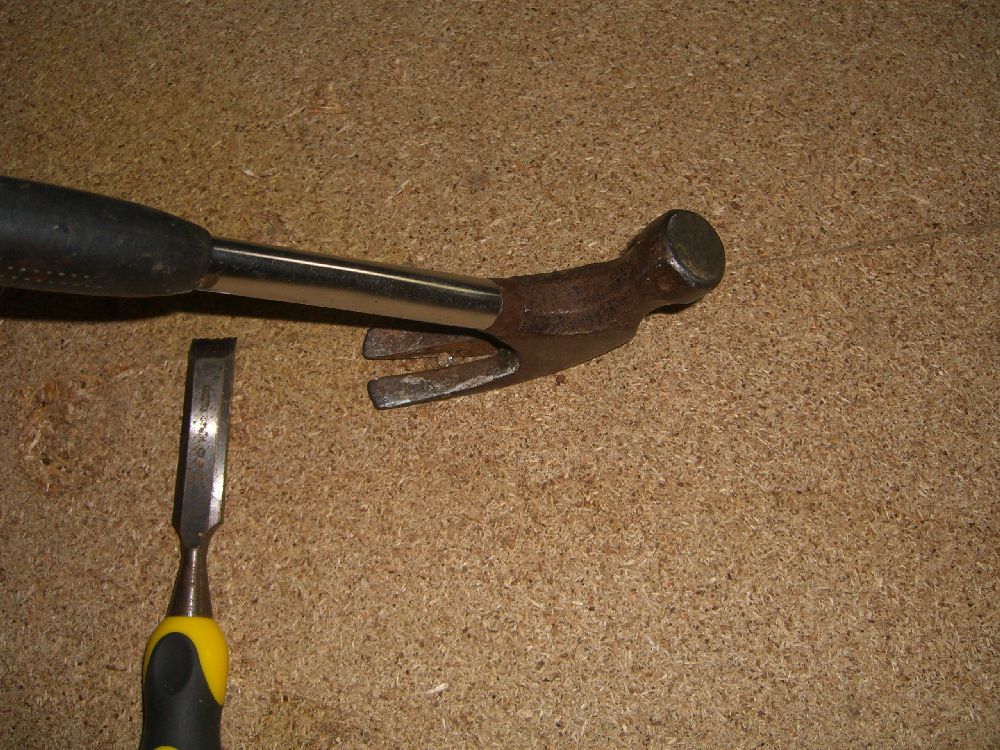
Sure you can always use a claw hammer or a small pry bar to pull the nail loose. It’s the getting the tool under the nail head that’s the difficulty. You need to free up space around the nail head since neither the claw hammer nor the pry bar will penetrate the surface neatly or at all. Start with a chisel:

Then hammer the pry bar into the wood to snag the nail head. This is the point at which you’ll miss once or thrice and bust the knuckles on the hand that’s holding the bar in place.
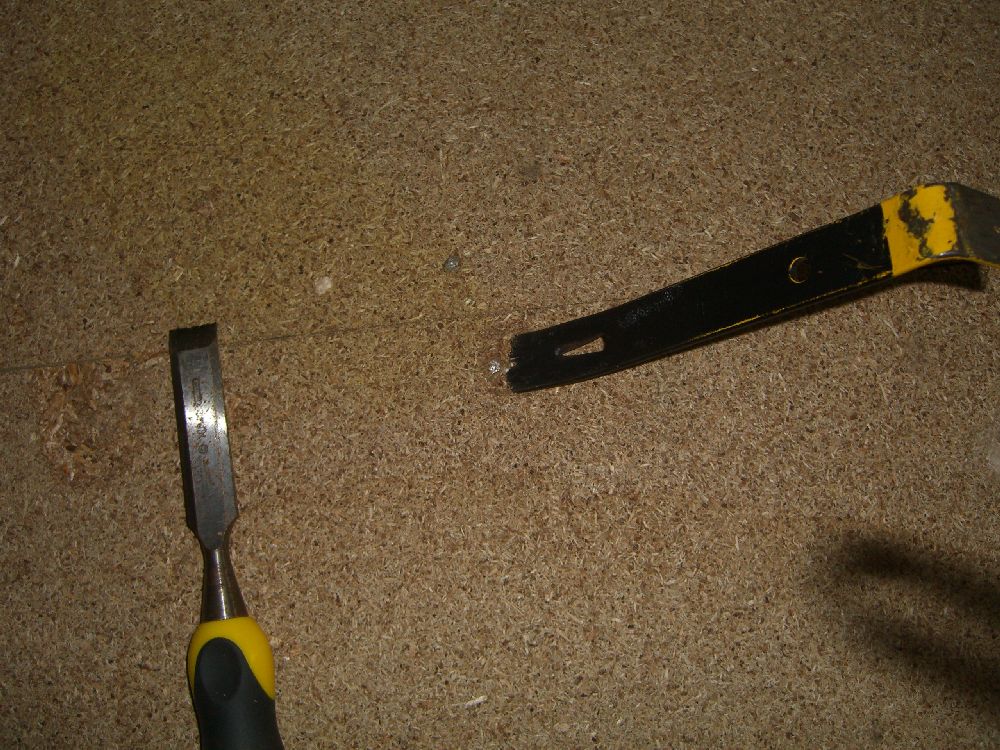
*Then* lever the nail up as far as you can with this tool, which won’t be much with a pry bar of this size. *Then* use a claw hammer to finish pulling the stubborn nail out of the &#*$@# board.
Just buy a cats paw – I got the whole room done in about half an hour.
It’s so comfortable…
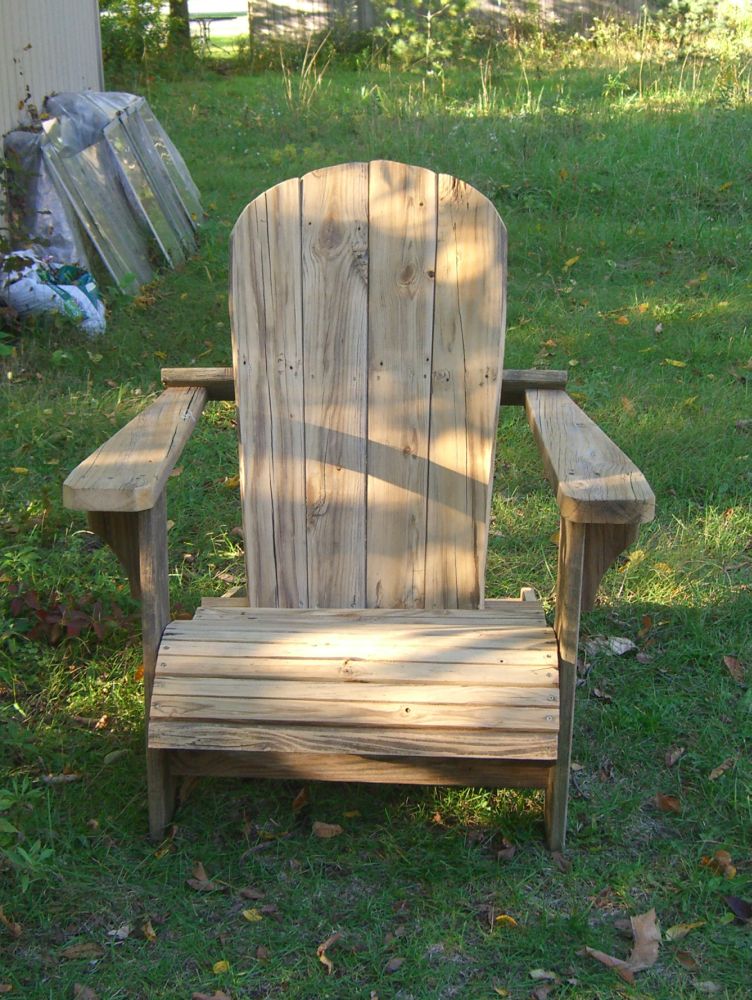
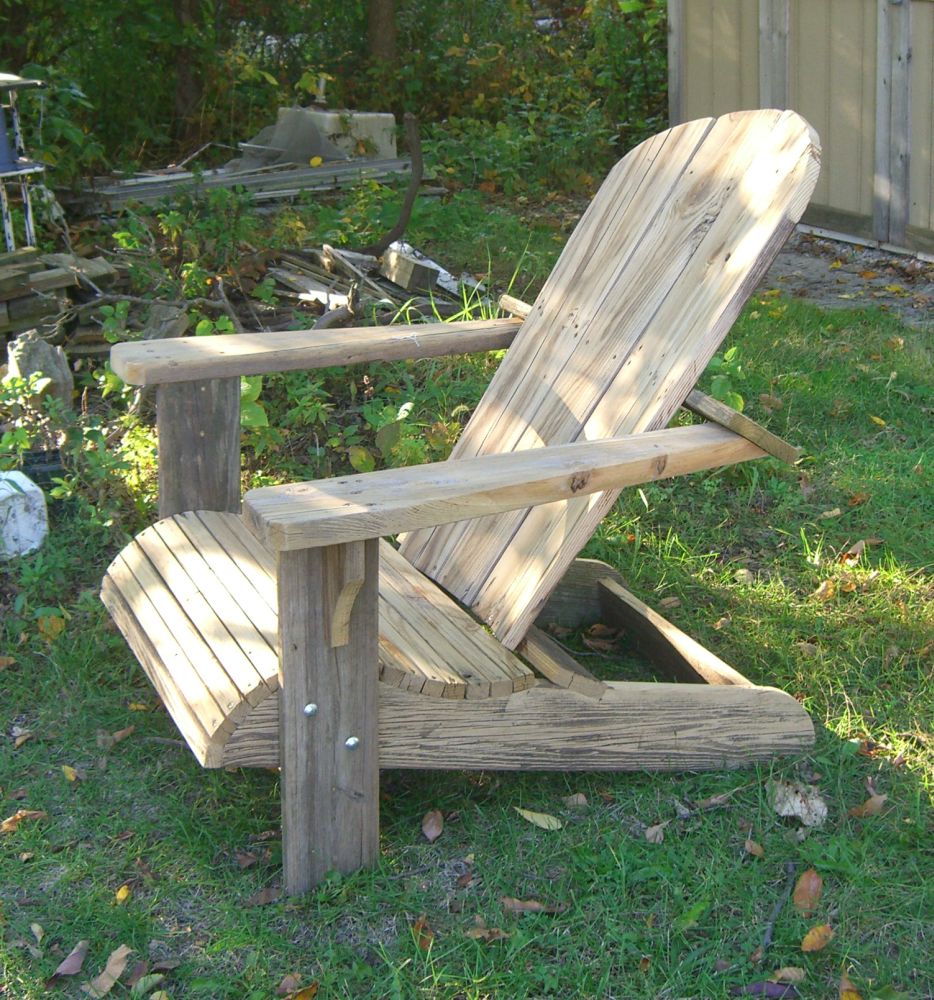
Posted by aaron in backyard, furniture, outside, tools and materials on 30 September 2012
… and make something both functional and aesthetically pleasing:

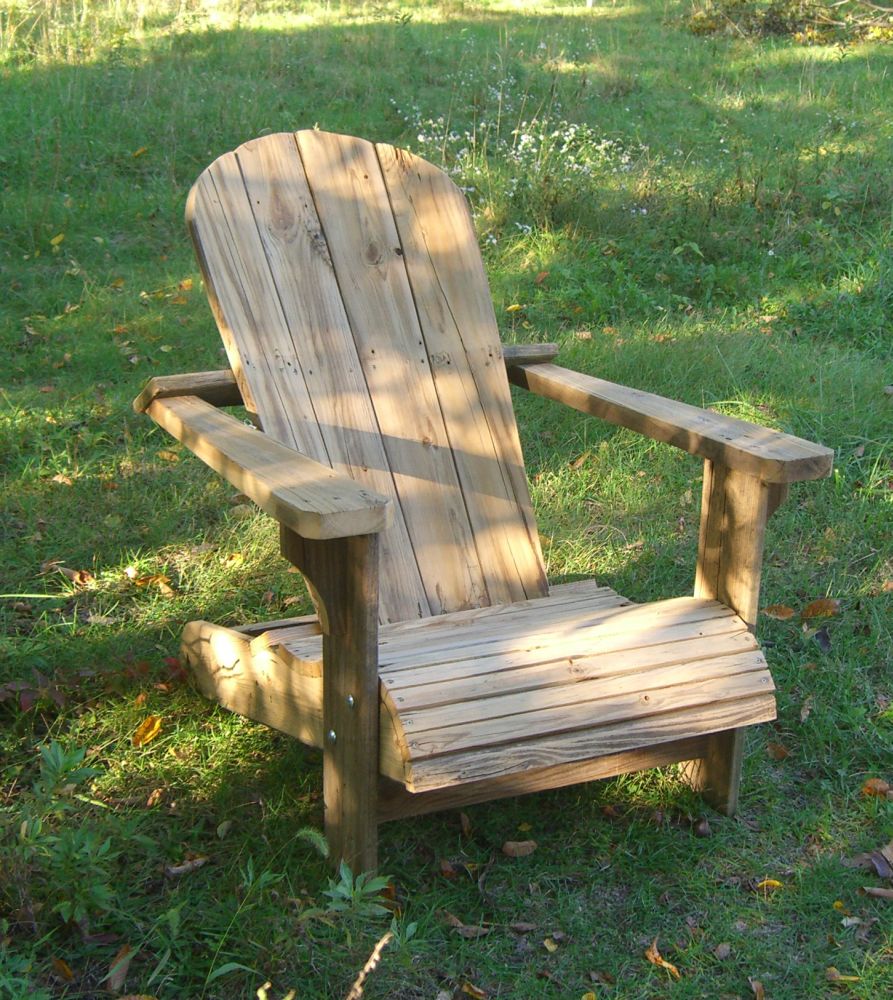
Even after completing that picnic table several years ago I still had maybe a dozen 8-foot lengths of almost 1×6 (I’ll explain the almost later) and a desire to create a sitting space other than my front porch. I’ve always liked the look and feel of Adirondack chairs (variants sometimes called Cape Cod-style, or Muskoka apparently) – the wide arms, the curved seat (not always a standard design element, FYI), the high backs, and the rustic quality, plus I used to go to Boy Scout camp in the Adirondack Mountains. So there we are.
Searching for chair plans online brought up literally dozens of options. I settled on this plan for its look – it really seemed the most comfortable of the designs I viewed – and its largely complete instructions set including three excellent options for creating the cut templates.
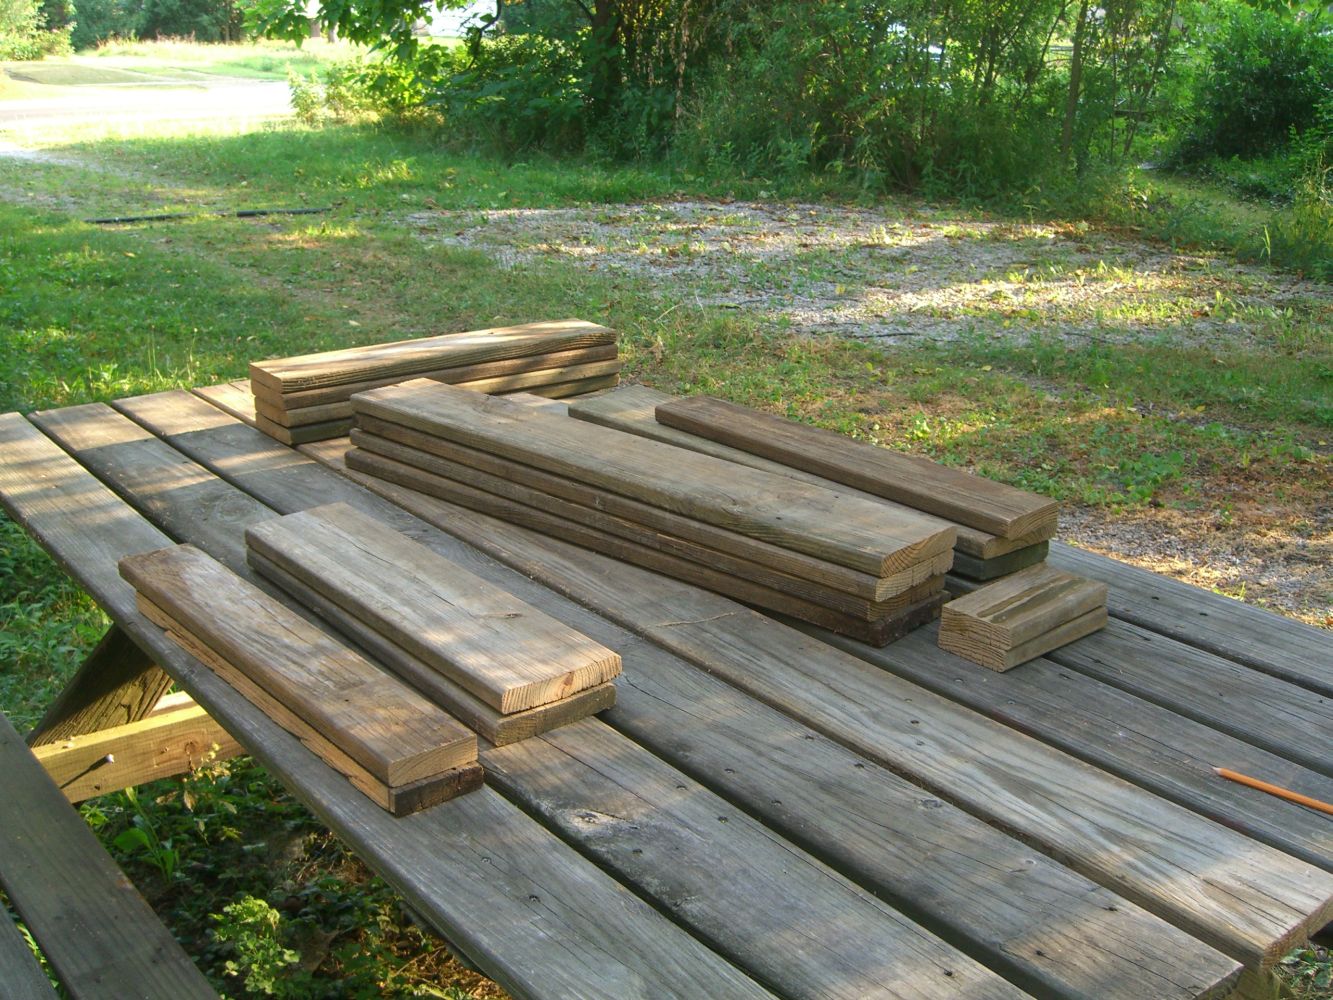
Depending on the wood you buy, 38 feet of 1×6, 8 feet of 1×4, and 68″ of 2×6 could wind up costing $100+ easily. Because these chairs are meant to be used outdoors – and therefore may be painted – this is a great project to use reclaimed or even scrap lumber. It’s even better if you have ‘spare’ pressure treated (or, heaven forbid, redwood or other traditional outdoor furniture woods) boards. $10 in fasteners and several hours of work later and you’ll have a conversation piece from which to have very relaxed conversations.
This project got stopped and started several times due to other work, but I’d estimate it as doable by one person in four hours (not counting sanding) IF you have all the tools and space so you don’t get in your own way.
Tools:
- Mitre saw
- Table saw (at minimum, the seat slats need to be ripped)
- Jigsaw
- Drill with paddle bit and predrill bit
- Circ saw
- Workbench with adjustable opening in top. (If your table saw can cut a shallow enough angle for the back slats and arms, you won’t need this or the circ saw)
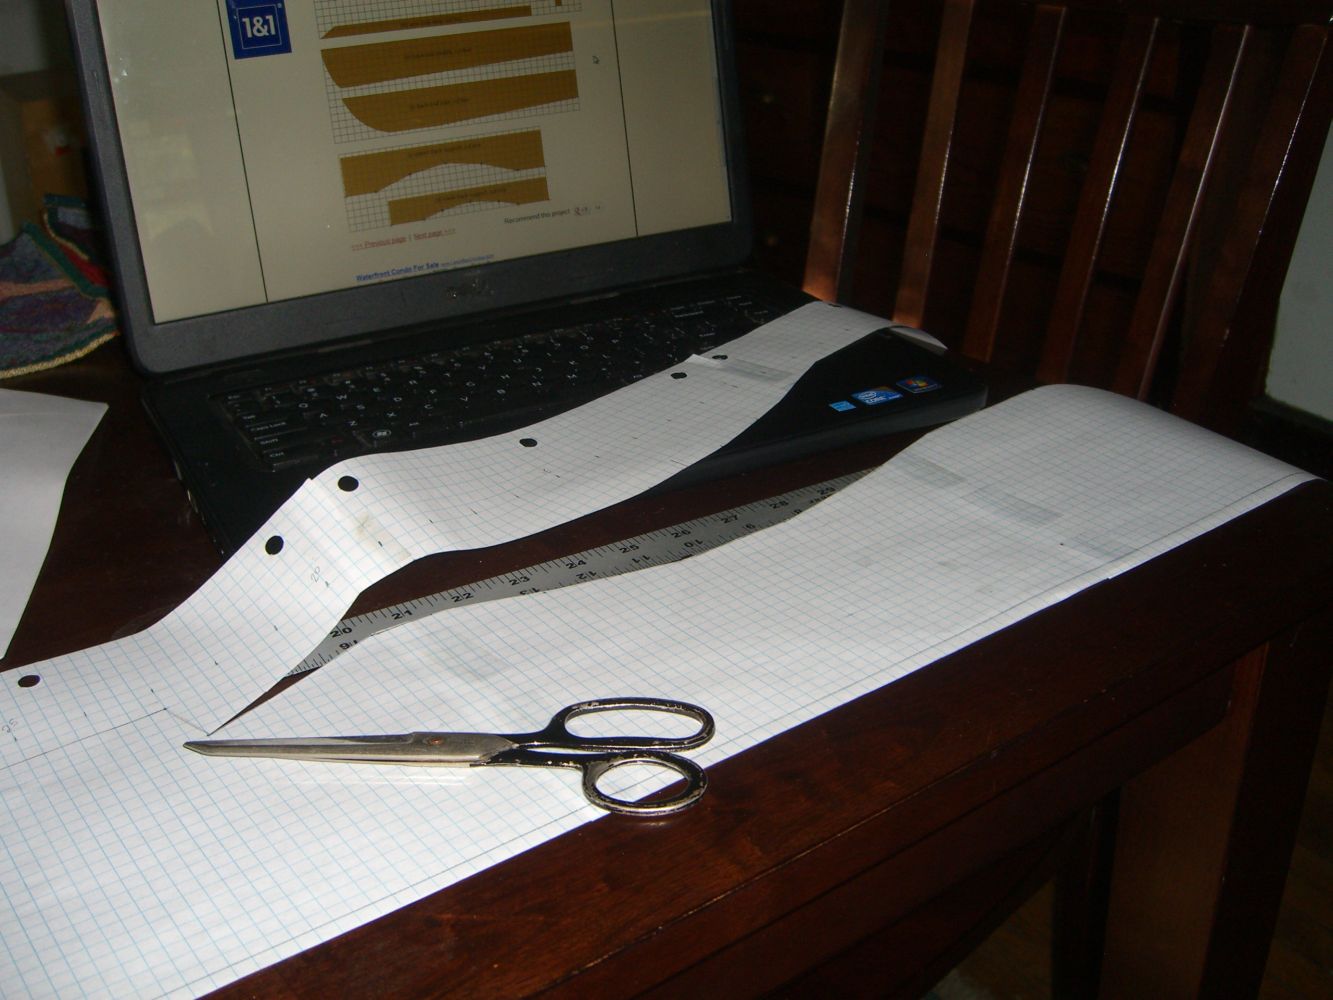
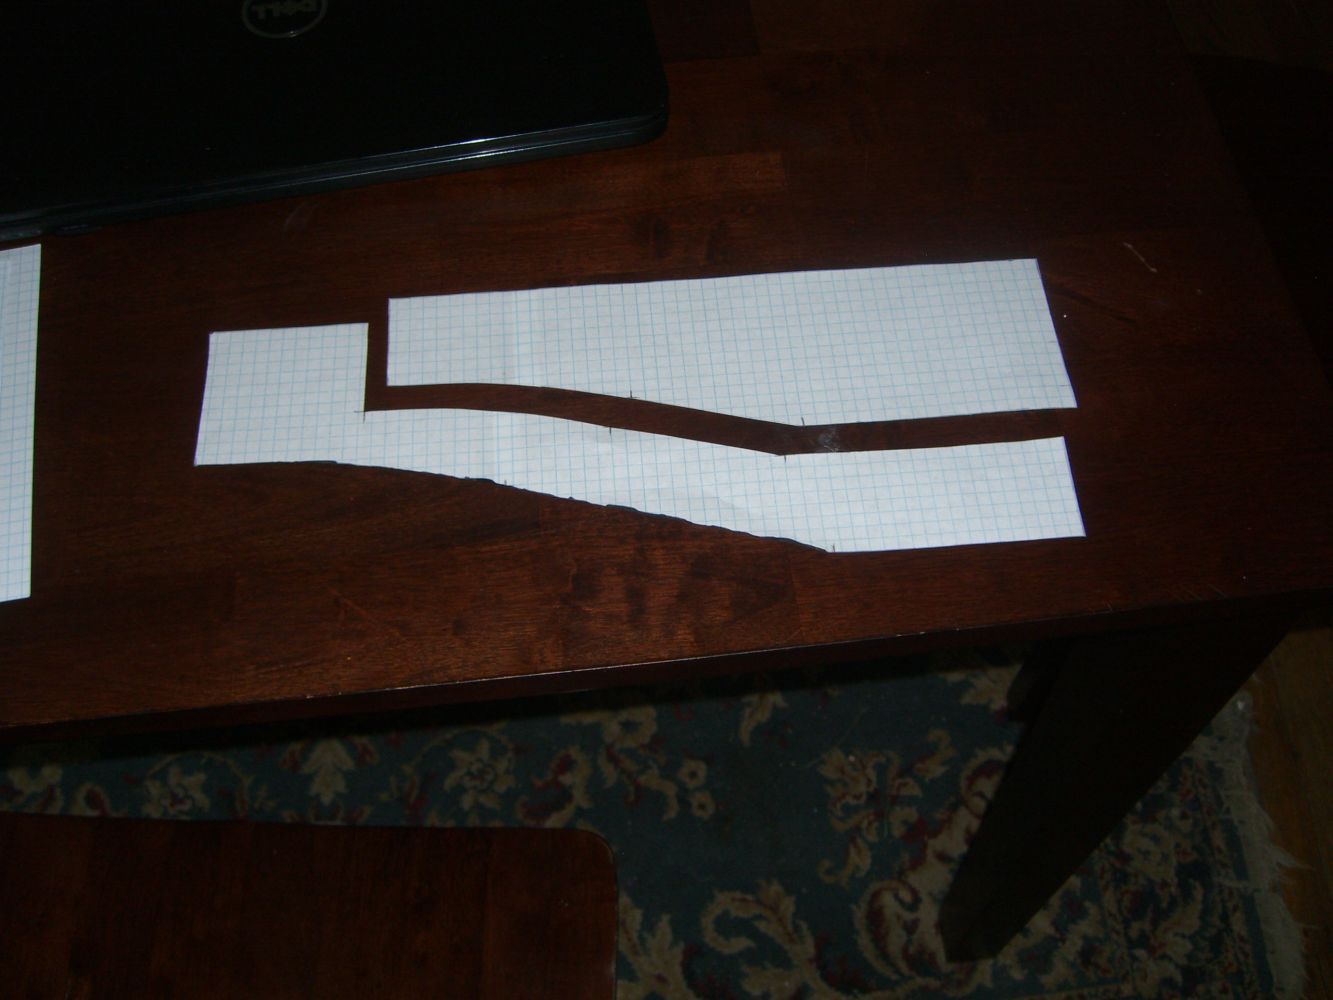
Saves time and paper, but does require a bit of spatial reasoning. Above, the upper and lower back supports.
Not much else to report – the online plans (and handy pictures) were easy to follow and made a lot of sense. Two adjustments, and then another pro tip. First, I skipped the part in the instructions where they suggested temporarily attaching the sides to the leg/arm unit and using temporary spacers to keep the right width. I just maneuvered everything into place, clamped, and attached the bolts directly, several steps early. It’s possible I lucked out and got everything pretty square by accident. If anyone sees a good reason to do things the way the instructions say, I’m all ears.
That should be my mantra.
Second adjustment – I was sloppy in measuring the salvaged wood. The boards are actually 1 1/4x6s – so one inch thick instead of 3/4″ thick. This had virtually no impact on the construction, save for the rear spacer which had to be cut down a half inch (1/4″ on either side) to fit. As always, measure twice, cut once, then remeasure, realize your mistake, and cut again.
No, I was wrong. That’s my mantra.
Quickly now – pro-tips all around:
- Narrow scrap wood should be a mainstay of every shop – easiest way I know to guide a circ saw along a long angled cut, like for the back slats.

- Invest in a good saw blade for said circ saw. If you’re cutting pressure treated wood or heavy hardwoods, get a new blade, period. My old blade was bucking and binding when trying to cut the arms especially. $11 at the hardware store later and the cut took less than three seconds.
- Finally, if you’re using reclaimed wood, take advantage of the ravages of time. Knots, gouges, nicks – don’t sand them all away. And with weathered pressure-treated wood, experiment with not sanding down too far to allow for multiple colors and graining to emerge. The arms (which I have no idea where that wood came from, just that I had almost the perfect lengths sitting on my shelf) have three or four colors, like desert wood, from yellows to grays (of course) to even a bit of reddish purple. And the sides (second shot below) are tiger-striped because of how deep the worn ridges in those boards were. Great accents to the piece, I think.
More things that can be built with 2x4s
Posted by aaron in outside, tools and materials on 25 August 2012
A ramp for the shed which *should* be capable of supporting the industrial drill press that’s currently in there.
Quick (stackable) sawhorses using these plans, currently minus the plywood caps.
Updates (and pictures) to follow.
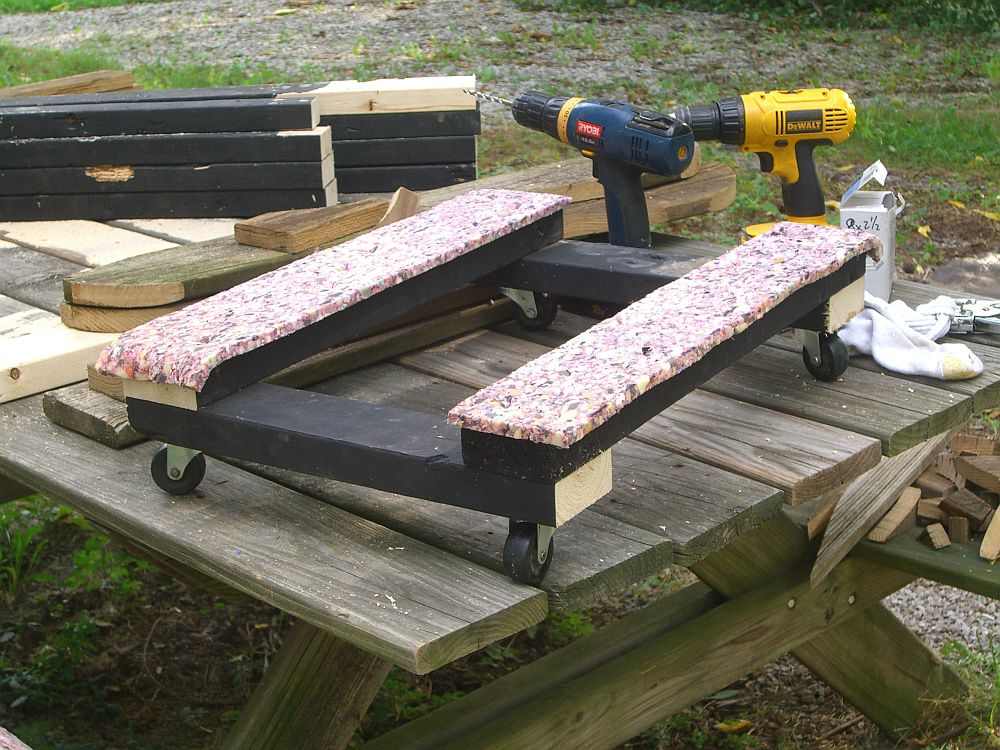
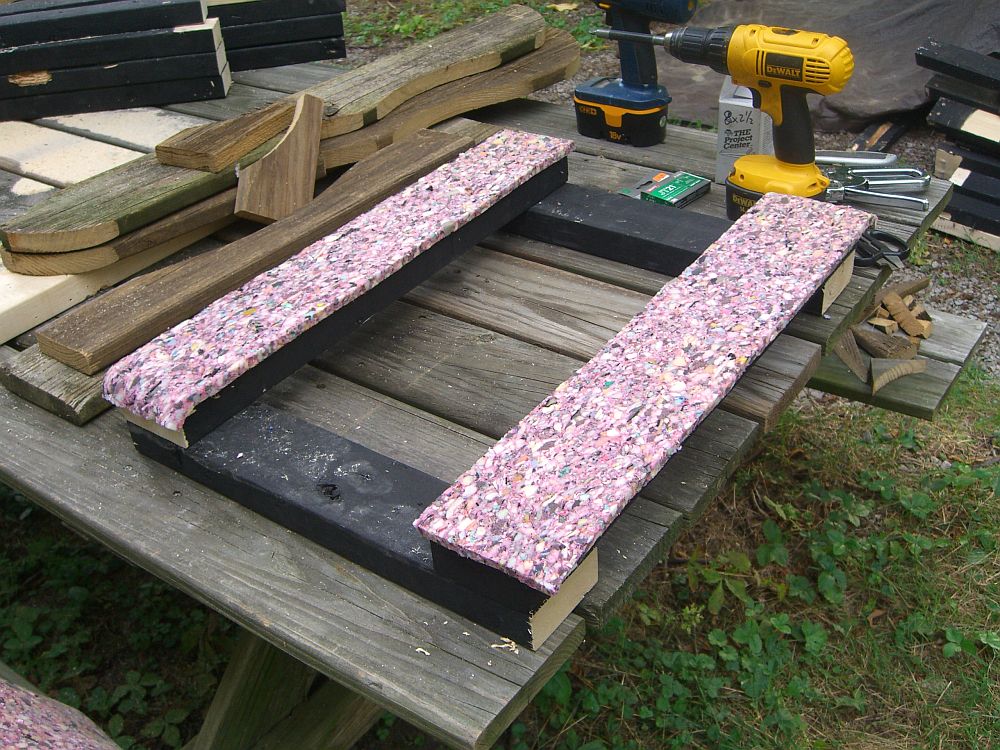
One thing led to another…
Posted by aaron in tools and materials on 14 August 2012
I built a dolly:
- Box up books in one corner of living room. Consider placing them temporarily where the desk is currently located.
- Realize the bookshelves that are also coming from NY would fit well where the desk is, and decide to place something else in that space, something that will be gone before the shelves arrive.
- Decide to take all the stuff I agreed to store for someone for the month of August and put it in the place where the desk resides currently. Plan to move other things to the foyer where the stored stuff is currently.
- Realize all this is contingent on moving the desk.
- Remove everything from the corner where the desk will go.
- Empty desk drawers, clean top, finally unplug and put away various electronic devices atop the desk that are no longer being used.
- Find that desk is too heavy to move by myself.
- Mutter ‘I could do this if I had a dolly.’
- Decide to build a dolly.
- Get sidetracked for an hour sorting all the lumber I rescued from the theater festival strike by size, even though I only need four pieces of wood.
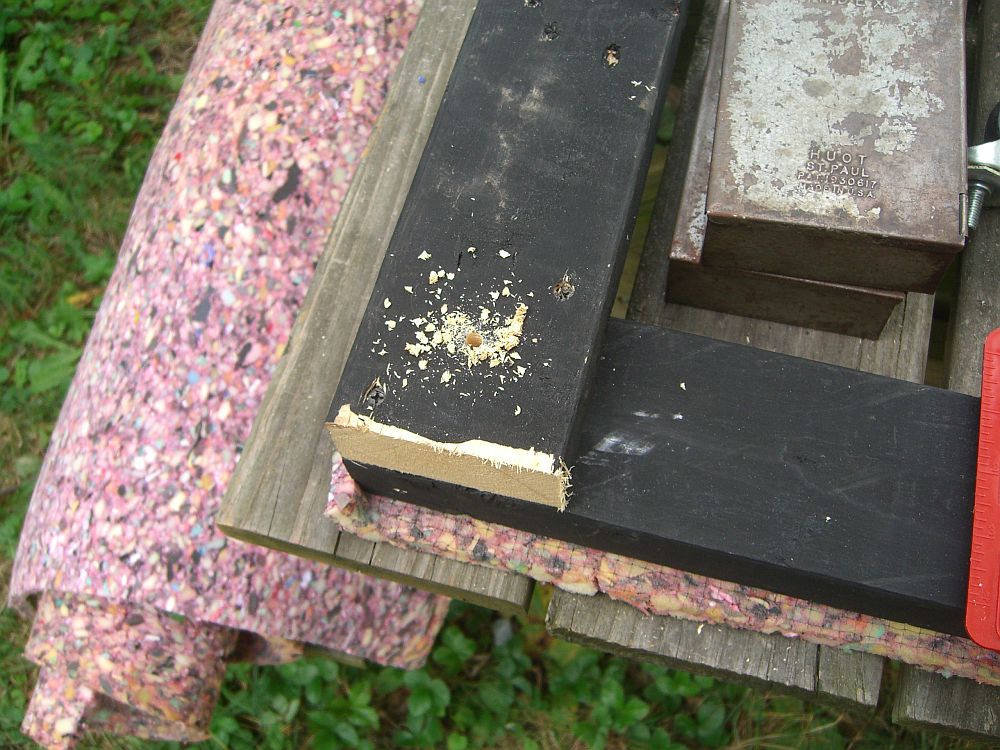
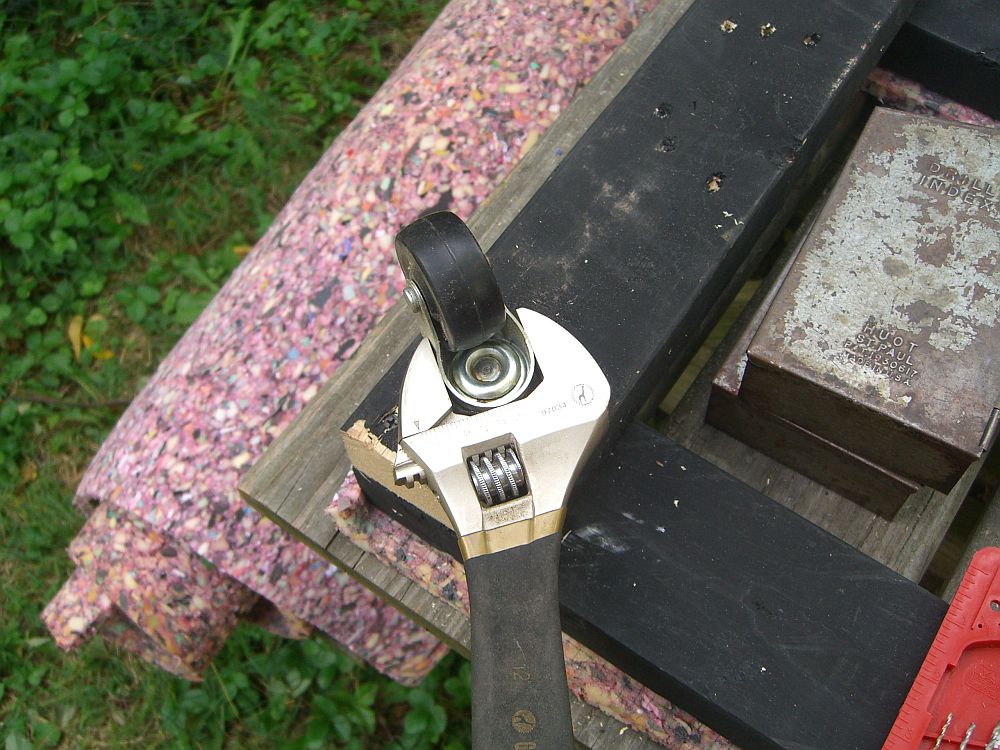
- Finally begin this fifteen minute construction project:
- 2x4s (I went with 2@18″ and 2@25″)
- four casters
- carpet padding or scrap carpet
- staple gun and staples
- 2.5″ screws
- power drill and bit set


I need this like I need another hole in my random metal rectangle
Posted by aaron in advice wanted, tools and materials on 29 January 2012
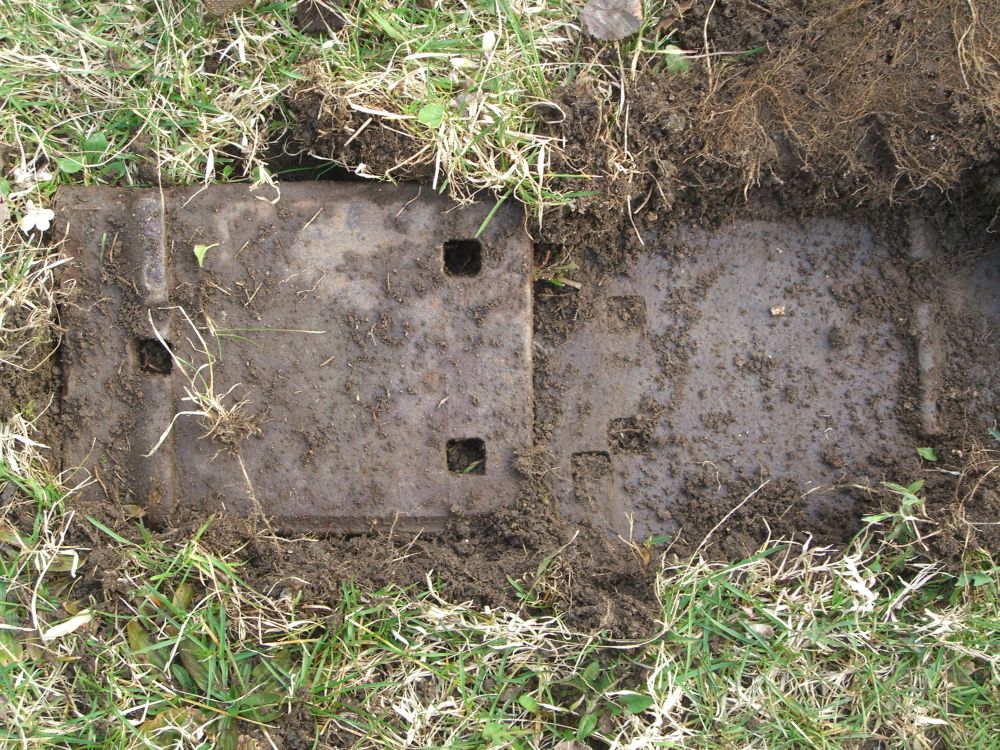
UPDATE: Figured it out – these are rail tie plates for railroads. They’d be attached to the tie and the rails would lay on top of them. I put two and three together when I found another one attached to a decaying tie used for a landscape boundary in the backyard. Why these were buried next to the house, I can’t say for sure – they quite possibly were forgotten during some renovation project.
I haven’t Googled that thoroughly, but anyone know what these things are? Heavy old metal, possibly iron, about ten inches long (each; there are two in these pictures, next to each other). These were uncovered while digging an inch below the grass, but I’ve found one of these lying around in my basement as well.

You know why I’m sitting in the green room watching Hulu right now?
Posted by aaron in tools and materials on 22 July 2011
Because I did stuff all day today and I deserve it, that’s why.
Up early to scrape the last of the gravel up and pile it by the parking spaces. Realized that the back yard gets more sun than I remembered, especially early in the morning, which is not good when the temperature is expected to be near triple digits. Moved all the bricks that had been supporting the big pile of wood to where the gravel had been out back, thus freeing up another ten feet of driveway.
Drove north (did anyone ever say ‘Go north, young man! (or woman!)’? Somehow I don’t think so, or at least not seriously.), even though I always swear to avoid going up Rt. 58 and into Elyria or Lorain around midday. Stopped for lunch at Blue Sky Diner because a) it’s delicious, if terrible b) I was hungry and c) it meant I could get out of the car after stop-and-start traffic on a bright, sunny day where the temperature was expected to be near triple digits. The plan – and you know what they say about plans – was to stop by the Restore, then Goodwill/Sears (I had a gift card), then Lowes, then a used car dealership looking for, in total:
- one brake light bulb for my Landcruiser
- plastic sheeting, for to well cover the lumber
- a ceiling fan/light unit for one of the upstairs bedrooms
- a car with better gas mileage
- anything else that looks interesting/useful
- two brake light bulbs for my Landcruiser
- plastic sheeting, for to well cover the lumber
- two green glasses (I love those for some reason) and a picture frame (Goodwill, in case you were wondering)
- two awesome wood windows with original hardware that I have no need for at the moment but were in too good condition to pass up
Oh man! Today I did stuff!
Posted by aaron in driveway, outside, tools and materials on 22 July 2011
97 degrees today and I decided to work outside most of the day. With the breeze, working mostly in the shade, and drinking plenty of water, it was fine (I think – check back tomorrow to see if I’m dead). Peaceful at times, actually – a good day’s work in the great outdoors, or whatever a small backyard is considered.
All the joists are laid out and soaking up rays. 95% of the gravel has been moved from the yard to the new parking spaces, to be spread about soon. Tomorrow I’ll flip the boards and figure out how to stow them where the gravel was, thus freeing up my driveway for, y’know, a car or something.
This would probably make more sense with pictures. And it would probably matter more if anyone were reading this blog aside from me. You are? Well click on an ad to say hi or something.
Tomorrow: more stuff. Yes.
Lumbering about with lumber
Posted by aaron in tools and materials on 21 July 2011
Remember the other big pile of wood? With two straight days of near triple digit sunny weather, I’m temporarily covering my lawn with the stuff to dry and de-mold it, and see what condition it’s in. Then maybe I’ll sand some of it, but mostly I think I’ll just be wrapping it tightly in plastic and putting it somewhere else in the yard for use next year. Oh the planning…