Archive for category furniture
Voila. A sideboard. Sorta.
Doesn’t this look nice?
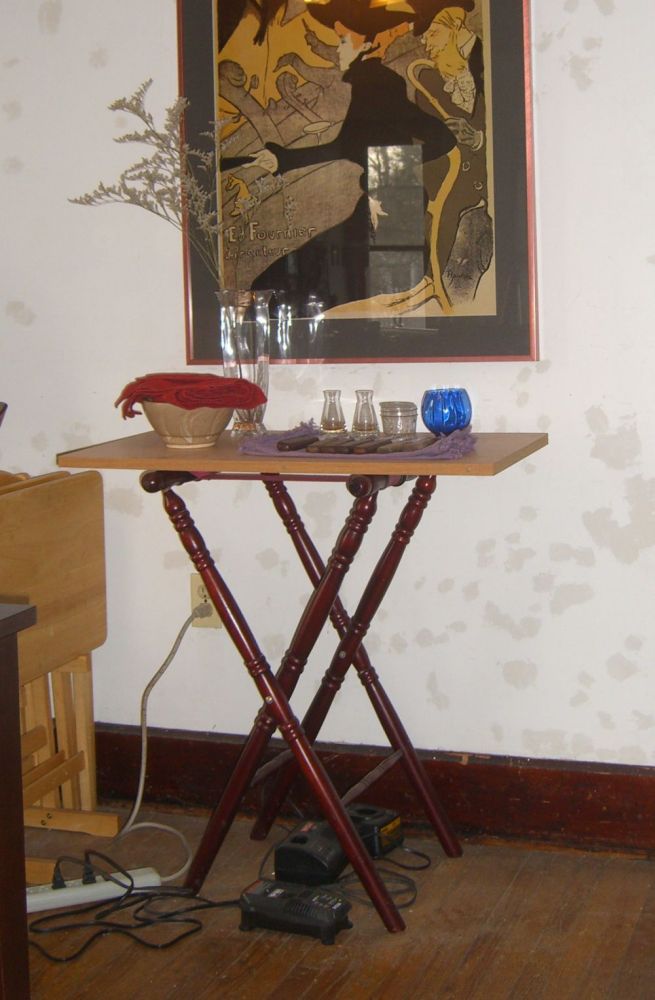
It does! That’s why it’s a shame it would have fallen apart and/or collapsed if you looked at it wrong. I say ‘would have’ (and fallen, and collapsed, and looked) because I turned these miscellaneous items into a fully functioning side table with less than $2 in parts.
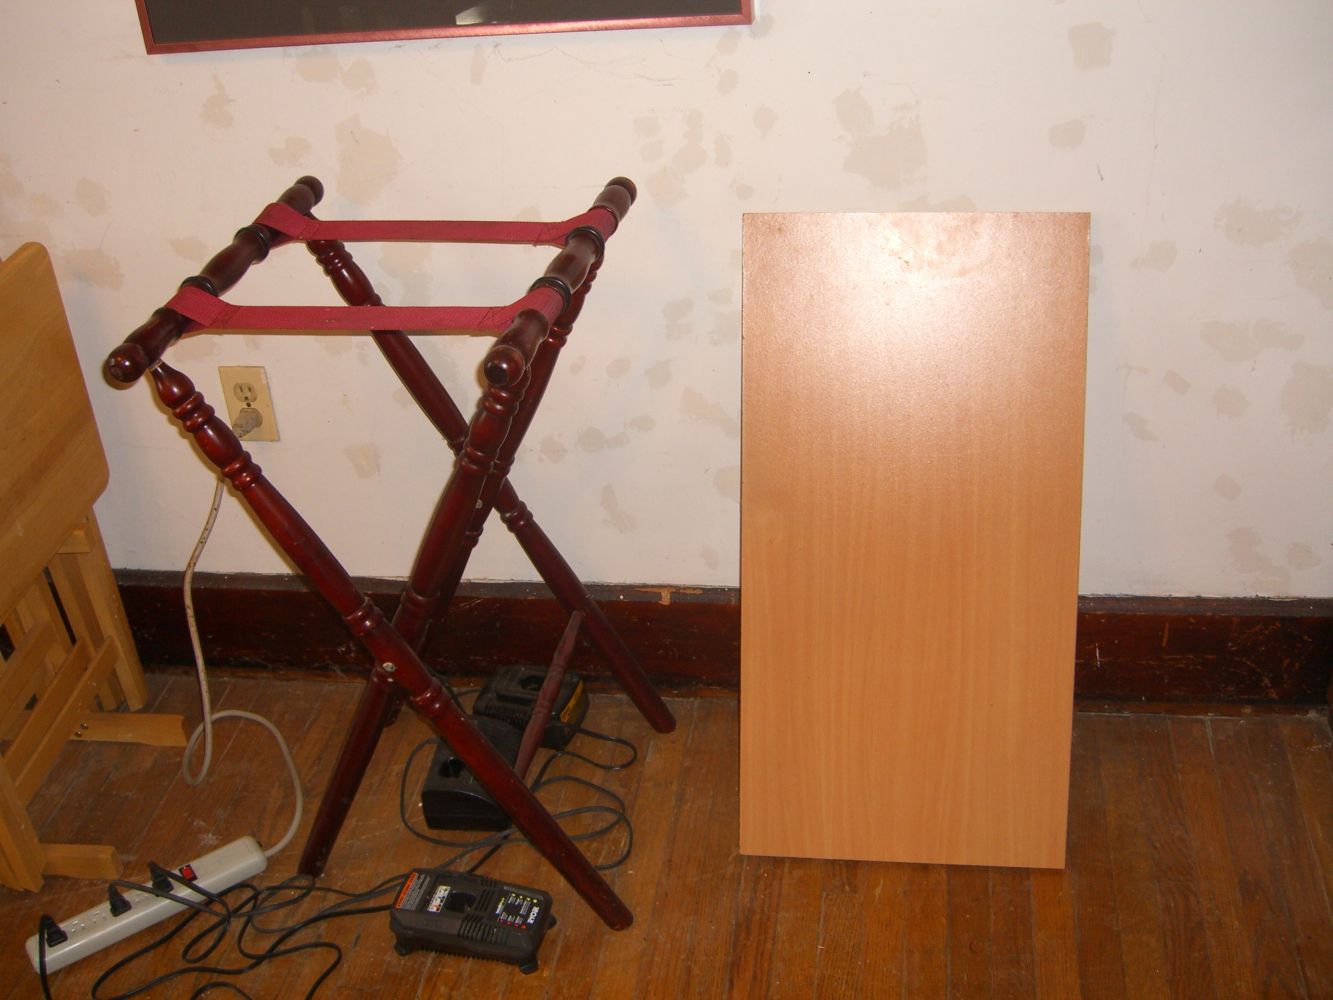
The legs were a handy find at a restaurant liquidation – they’re a stand for a server’s tray, and probably cost me less than 50 cents. The top is a salvaged piece of good quality veneered particle board from a broken Ikea dresser I disassembled a while back. The dimensions worked and the pieces looked nice together. Keeping them together was the trick.
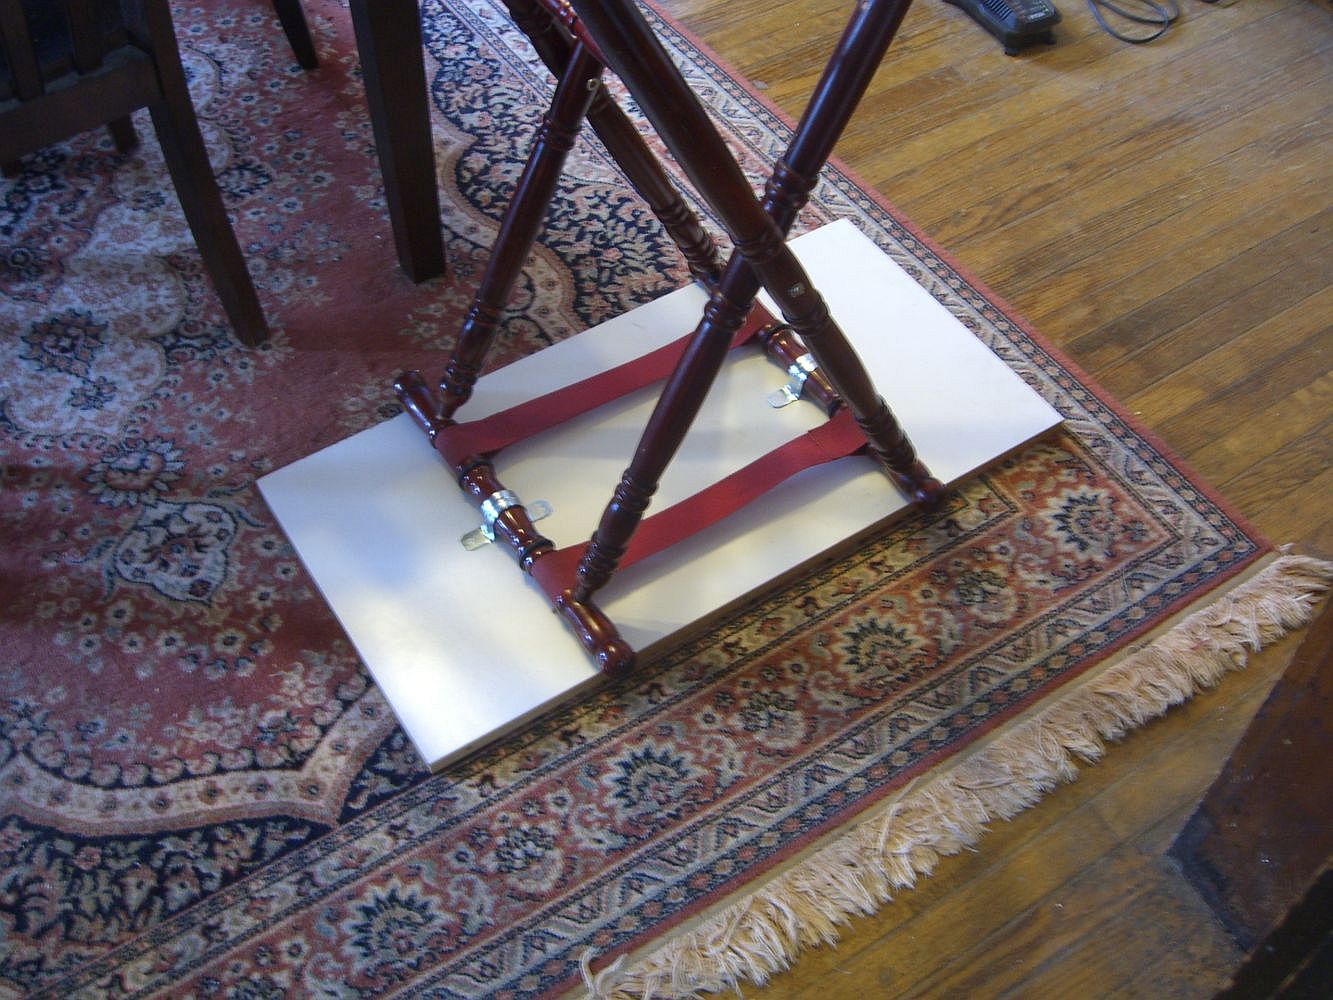
And that illusion was solved by two $0.48 pipe straps from the local hardware store and a handful of screws from the back room:
‘Quick’ custom drawers
The box shelves I built, so as to curb my daily wanderings into the living room for the purpose of getting dressed, did an excellent job of shelving things. But sometimes things should be drawered instead of shelved.
In my experience (and I once built a prop desk off of a three inch sketch, so I have at least some) drawers are boxes with hardware and/or framing that allows them to slide in and out. The box part should be exceedingly simple – it’s the functionality that requires some planning. Or, in the case of my never-ending collection of salvaged stuff, someone else’s planning that you save.
Necessity is the mother of semi-permanence
Posted by aaron in bedroom, closet, furniture, reused materials on 6 August 2013
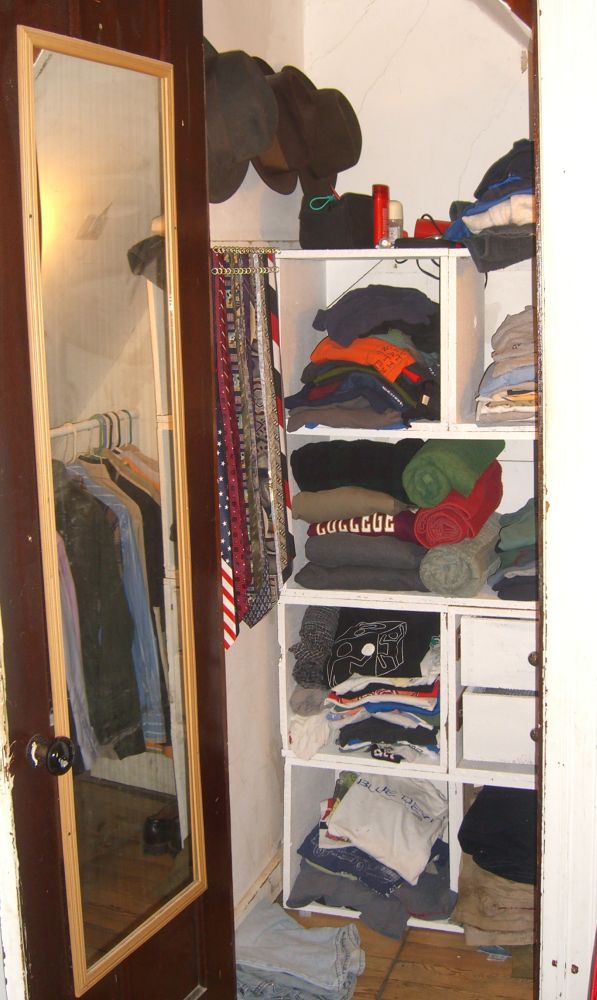
Close readers of this blog (hi Ezra!) will note that my closet project had reached a midpoint, and said midpoint involved all my clothes in the living room. After standing in front of the now-bare closet for many a day, chewing on the end of a metaphorical pencil and gazing thoughtfully into the space, envisioning a huge range of possible shelving and hanging possibilities, colors, finishes, rewired light fixtures, and a use for that trap door, I determined that my clothes were still in the living room. The situation now growing untenable, I built some box shelves:
It’s so comfortable…
Posted by aaron in backyard, furniture, outside, tools and materials on 30 September 2012
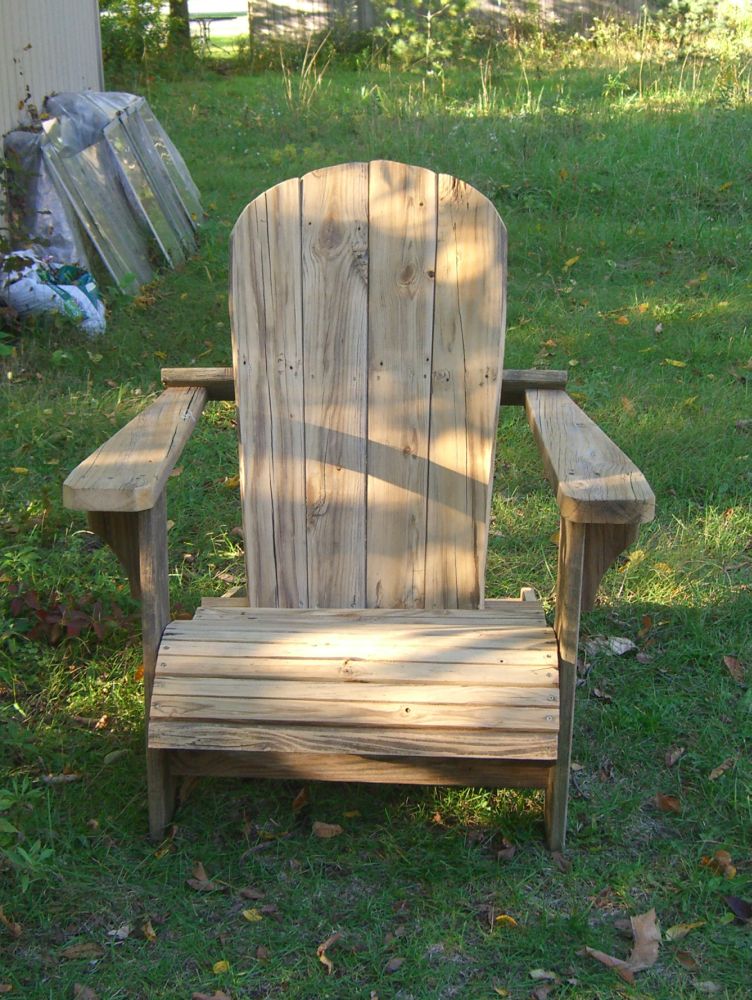
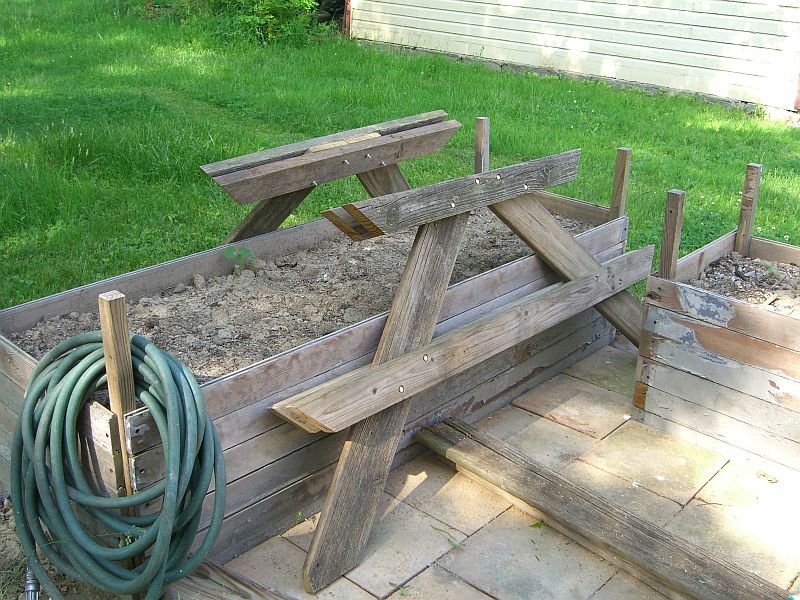
… and make something both functional and aesthetically pleasing:

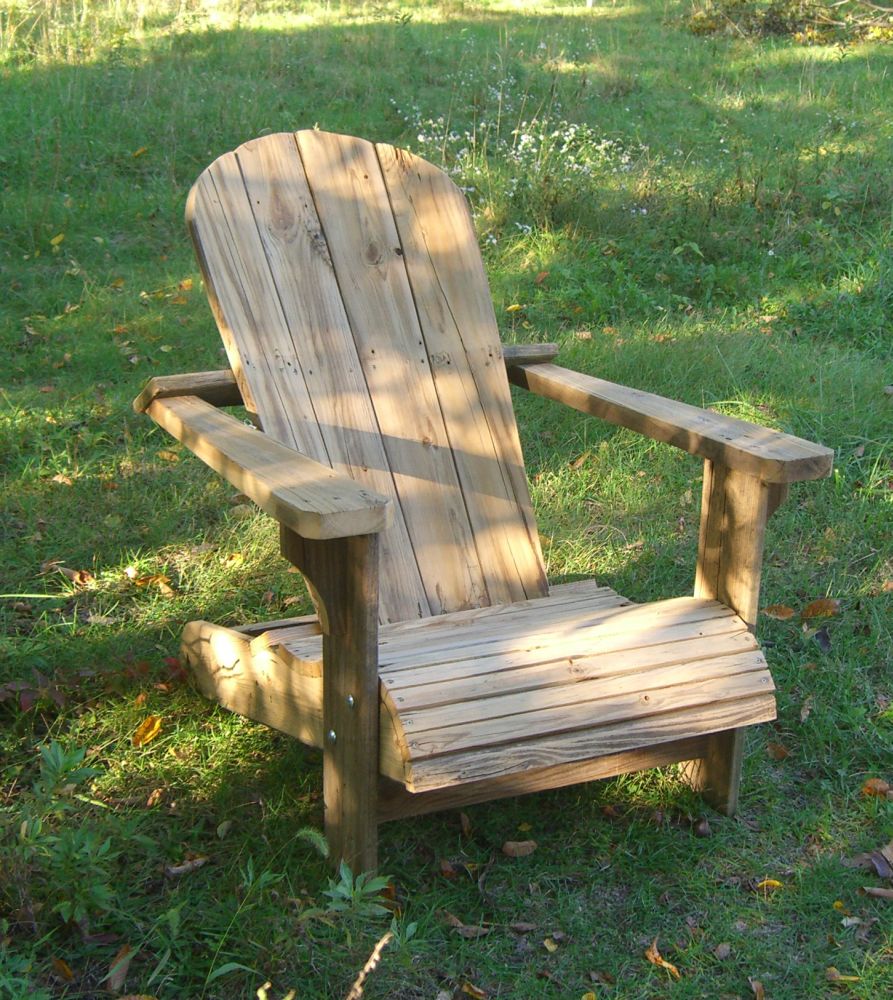
Even after completing that picnic table several years ago I still had maybe a dozen 8-foot lengths of almost 1×6 (I’ll explain the almost later) and a desire to create a sitting space other than my front porch. I’ve always liked the look and feel of Adirondack chairs (variants sometimes called Cape Cod-style, or Muskoka apparently) – the wide arms, the curved seat (not always a standard design element, FYI), the high backs, and the rustic quality, plus I used to go to Boy Scout camp in the Adirondack Mountains. So there we are.
Searching for chair plans online brought up literally dozens of options. I settled on this plan for its look – it really seemed the most comfortable of the designs I viewed – and its largely complete instructions set including three excellent options for creating the cut templates.
Depending on the wood you buy, 38 feet of 1×6, 8 feet of 1×4, and 68″ of 2×6 could wind up costing $100+ easily. Because these chairs are meant to be used outdoors – and therefore may be painted – this is a great project to use reclaimed or even scrap lumber. It’s even better if you have ‘spare’ pressure treated (or, heaven forbid, redwood or other traditional outdoor furniture woods) boards. $10 in fasteners and several hours of work later and you’ll have a conversation piece from which to have very relaxed conversations.
This project got stopped and started several times due to other work, but I’d estimate it as doable by one person in four hours (not counting sanding) IF you have all the tools and space so you don’t get in your own way.
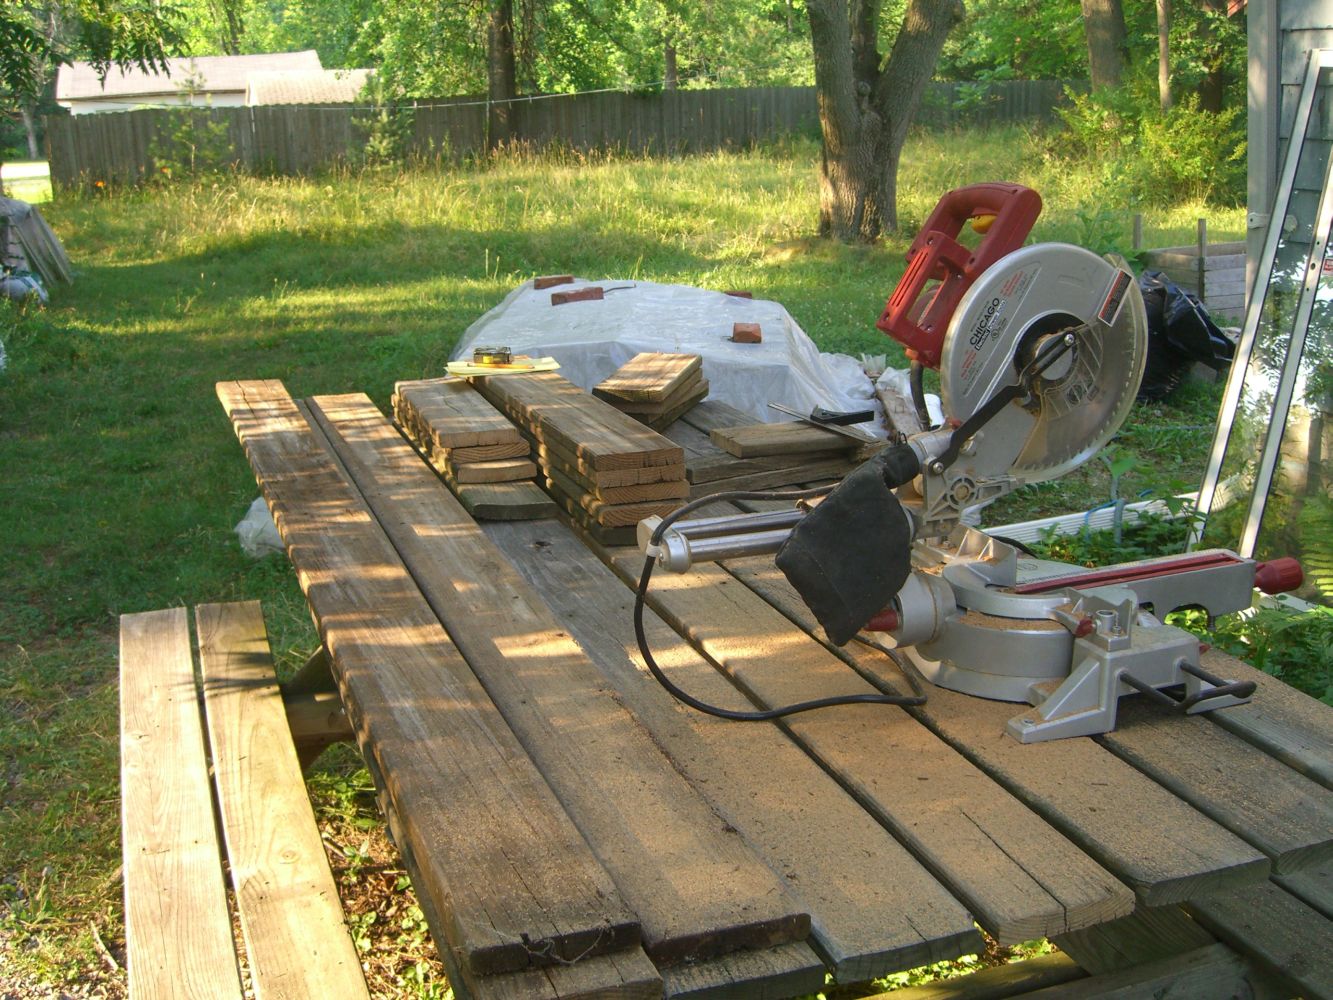
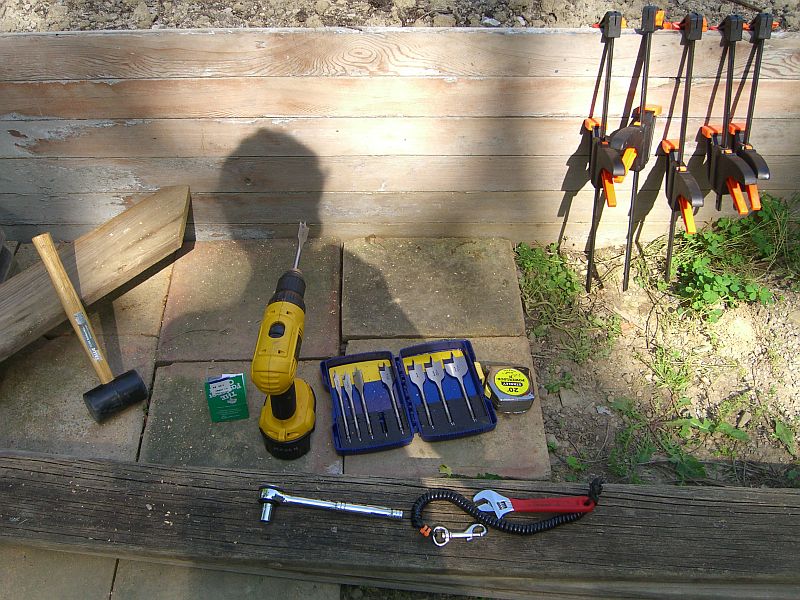
Tools:
- Mitre saw
- Table saw (at minimum, the seat slats need to be ripped)
- Jigsaw
- Drill with paddle bit and predrill bit
- Circ saw
- Workbench with adjustable opening in top. (If your table saw can cut a shallow enough angle for the back slats and arms, you won’t need this or the circ saw)
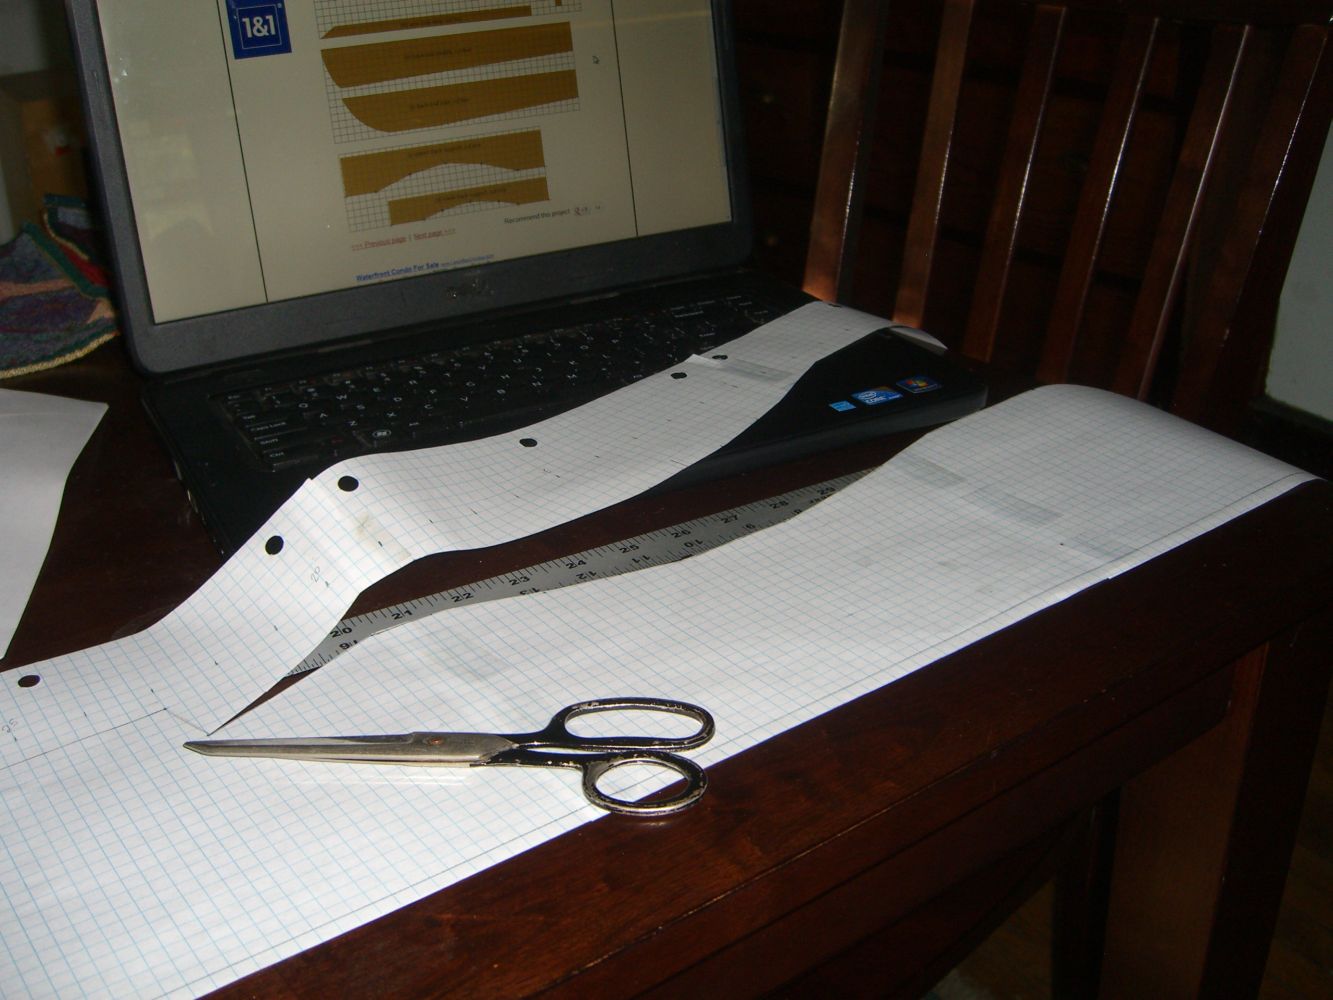
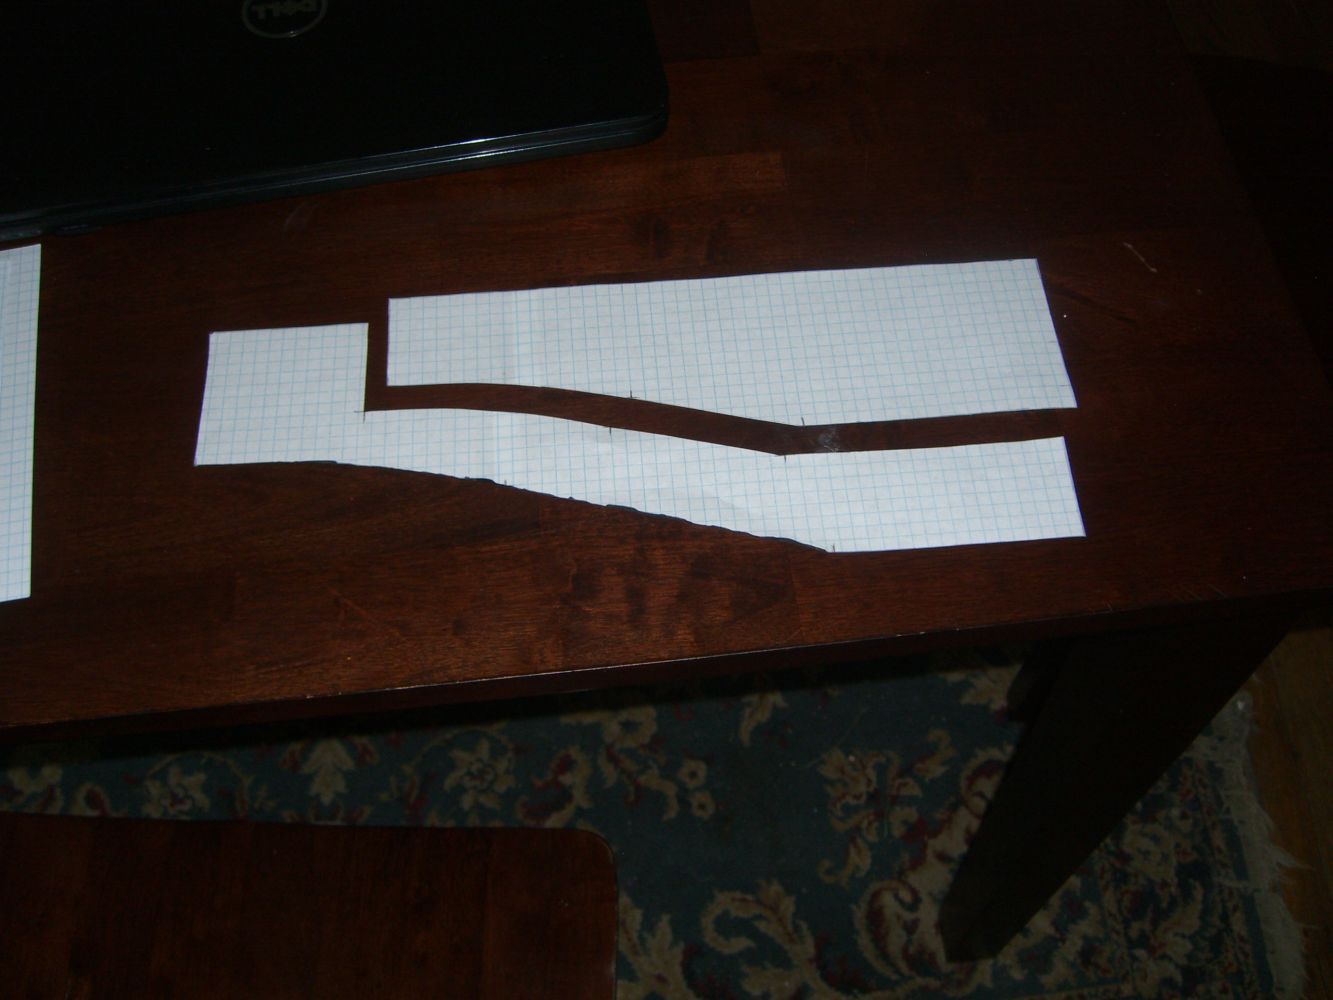
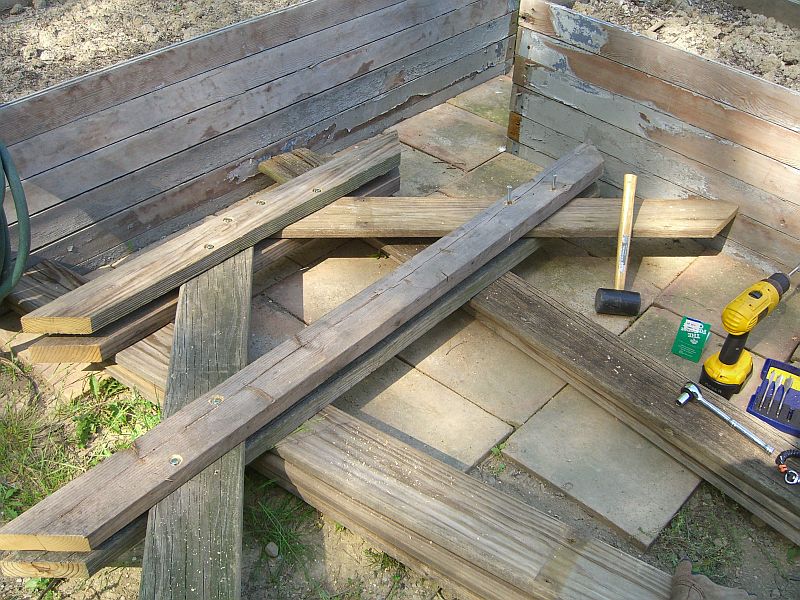
Saves time and paper, but does require a bit of spatial reasoning. Above, the upper and lower back supports.
Not much else to report – the online plans (and handy pictures) were easy to follow and made a lot of sense. Two adjustments, and then another pro tip. First, I skipped the part in the instructions where they suggested temporarily attaching the sides to the leg/arm unit and using temporary spacers to keep the right width. I just maneuvered everything into place, clamped, and attached the bolts directly, several steps early. It’s possible I lucked out and got everything pretty square by accident. If anyone sees a good reason to do things the way the instructions say, I’m all ears.
That should be my mantra.
Second adjustment – I was sloppy in measuring the salvaged wood. The boards are actually 1 1/4x6s – so one inch thick instead of 3/4″ thick. This had virtually no impact on the construction, save for the rear spacer which had to be cut down a half inch (1/4″ on either side) to fit. As always, measure twice, cut once, then remeasure, realize your mistake, and cut again.
No, I was wrong. That’s my mantra.
Quickly now – pro-tips all around:
- Narrow scrap wood should be a mainstay of every shop – easiest way I know to guide a circ saw along a long angled cut, like for the back slats.

- Invest in a good saw blade for said circ saw. If you’re cutting pressure treated wood or heavy hardwoods, get a new blade, period. My old blade was bucking and binding when trying to cut the arms especially. $11 at the hardware store later and the cut took less than three seconds.
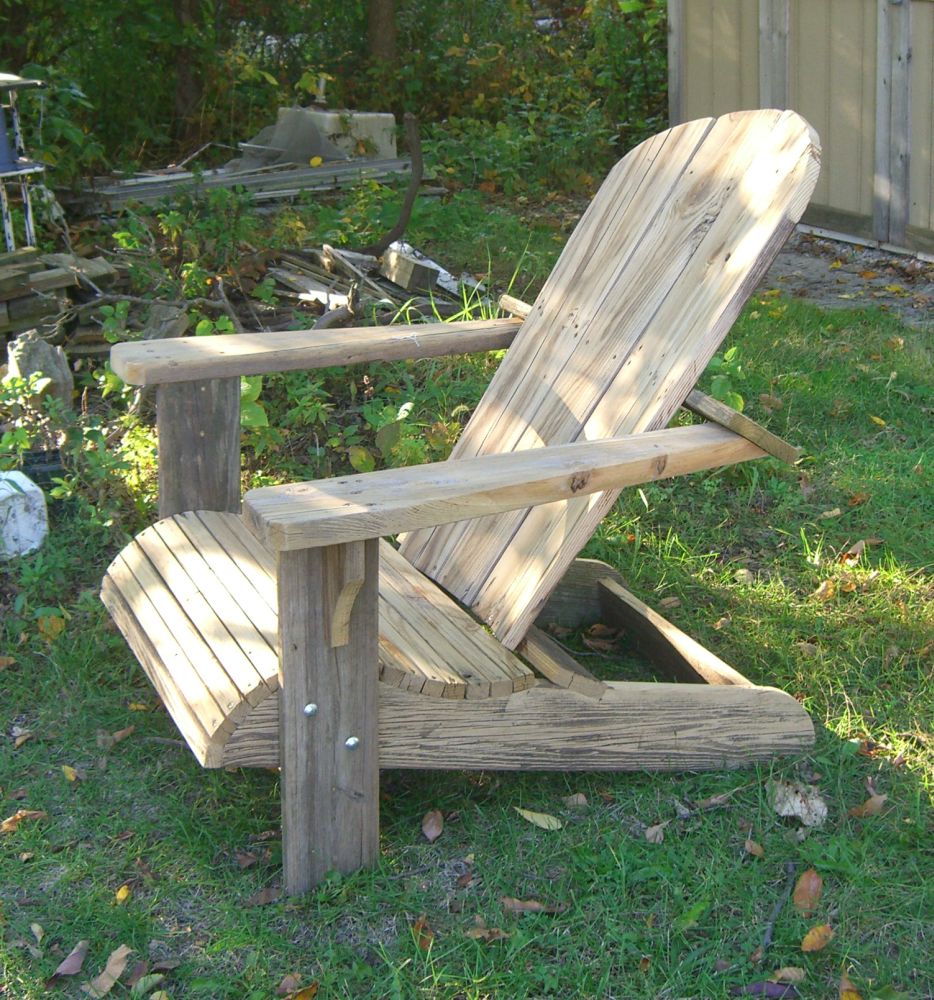
- Finally, if you’re using reclaimed wood, take advantage of the ravages of time. Knots, gouges, nicks – don’t sand them all away. And with weathered pressure-treated wood, experiment with not sanding down too far to allow for multiple colors and graining to emerge. The arms (which I have no idea where that wood came from, just that I had almost the perfect lengths sitting on my shelf) have three or four colors, like desert wood, from yellows to grays (of course) to even a bit of reddish purple. And the sides (second shot below) are tiger-striped because of how deep the worn ridges in those boards were. Great accents to the piece, I think.
Tea shelves
Today on Well That Was… An Idea… a good idea to turn scrap wood into a useful kitchen organizer.
We’ll be back after these commercials.
(That’s your clue to click on all the banner ads on this site and make me millions.)
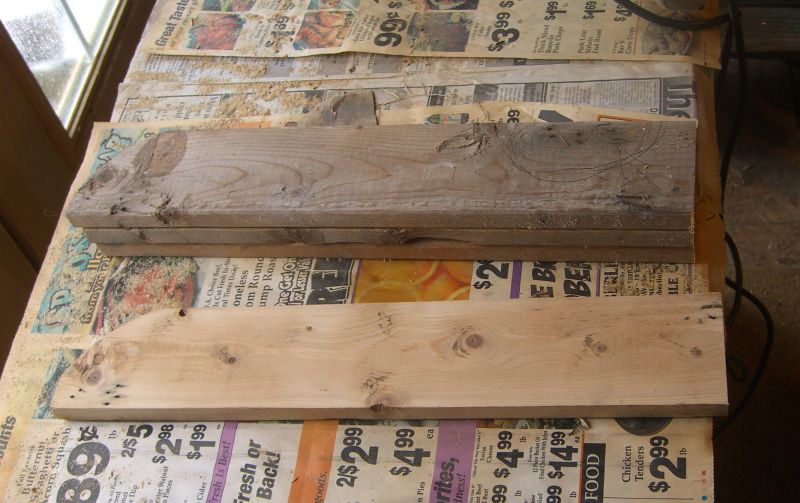
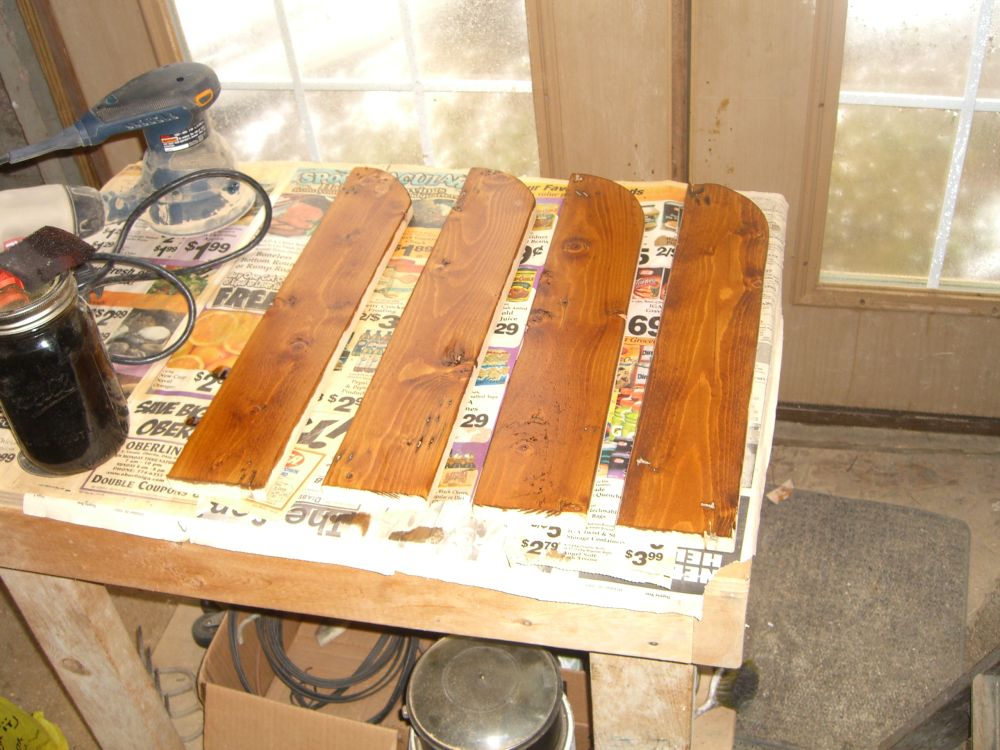
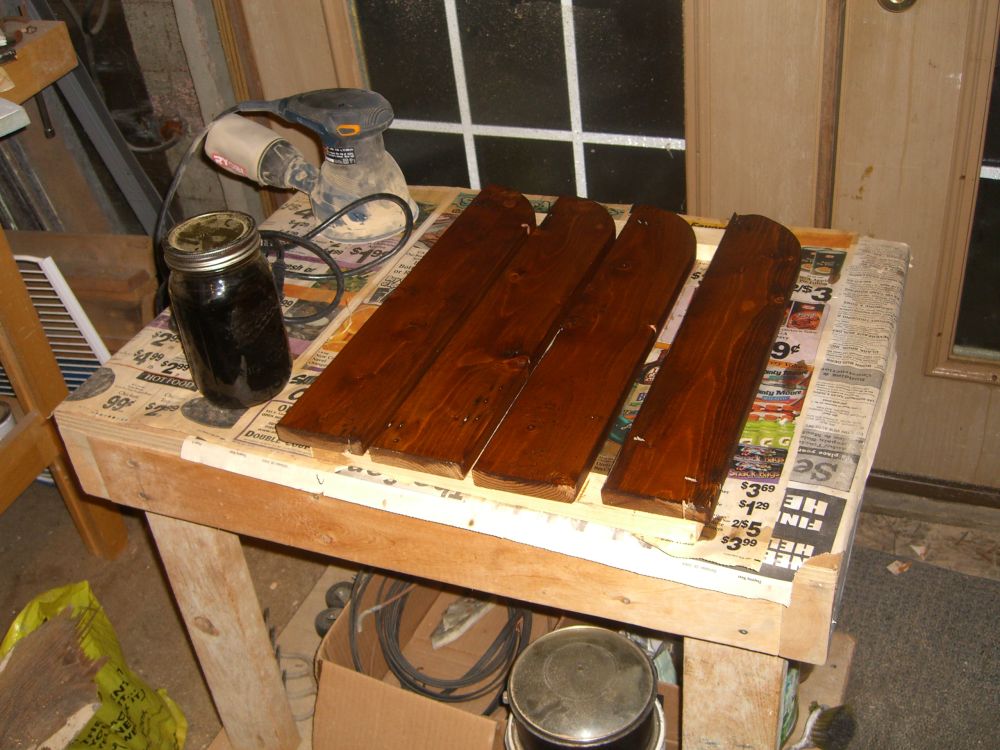
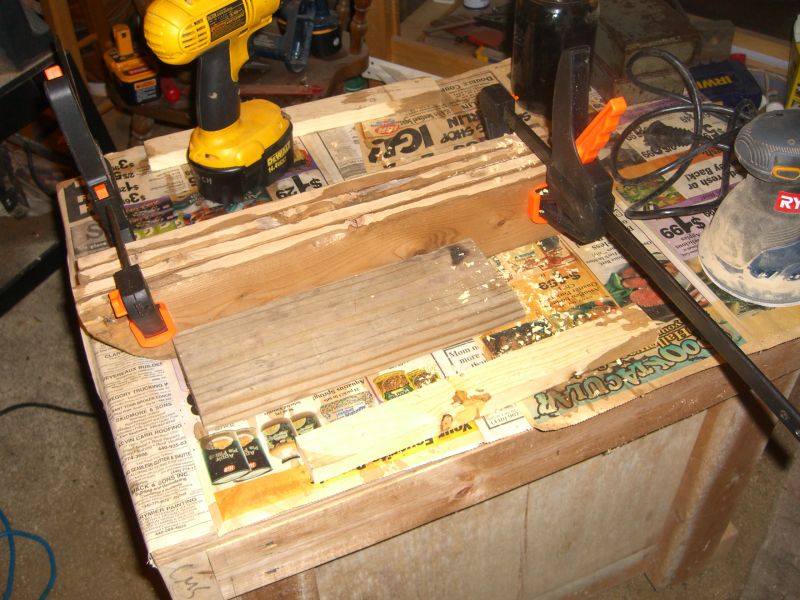
So I had a cabinet full of boxes and bags of tea. I also had a small gap between a door and a cabinet, and plenty of scrap wood just waiting to be project-ed.
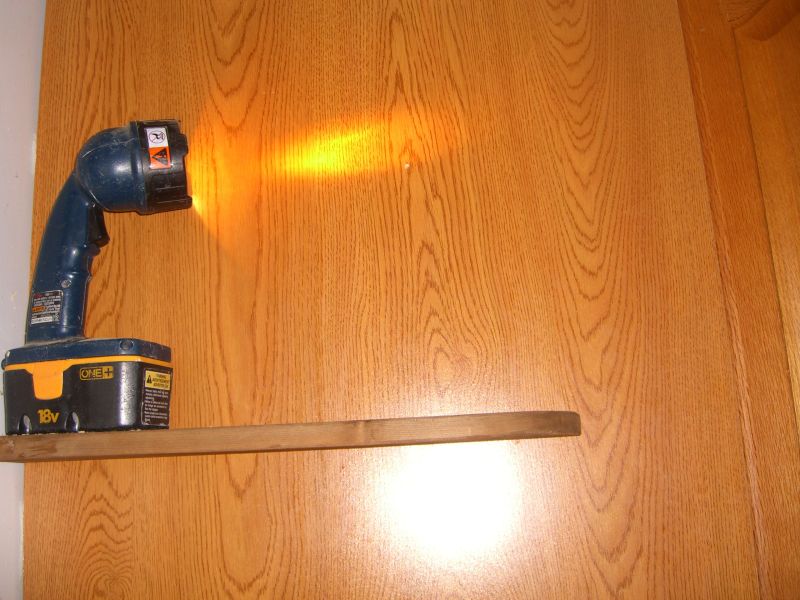


The second problem is you’ll want a peg that goes all the way through the cabinet wall and sinks into the board; much easier to achieve this with a screw or nail.
There’s actually a third difficulty if you’re going into artificial surfaces (like the heavy particleboard of these cabinets) – it’ll be almost impossible to drill a hole of the exact right size so the peg can be tapped in yet won’t slide out over time. Natural woods will be slightly more forgiving. Regardless of your woods, skip this approach and just use the screws.
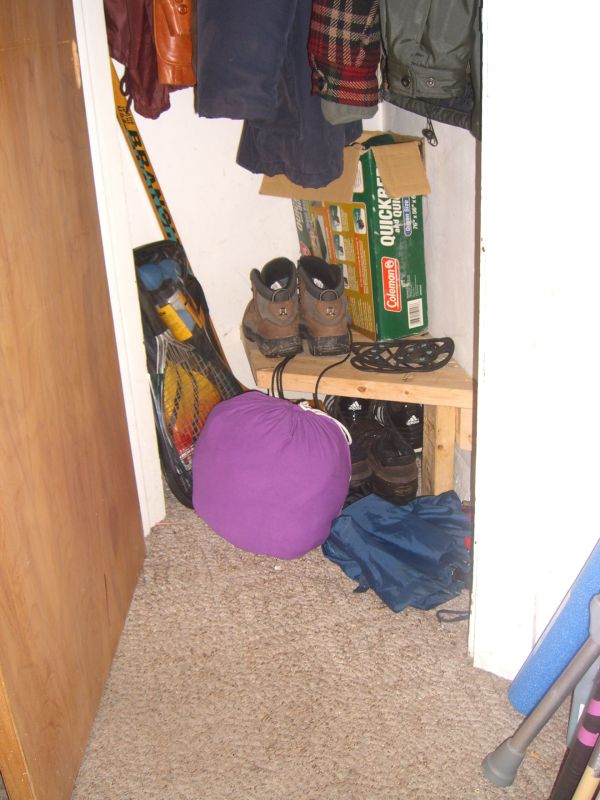
Oh look, there’s a closet in here…
This is why I don’t write for the IKEA catalog. Anymore. Curse you, Lars…
Lets skip to the end for a moment. Here’s what I built:
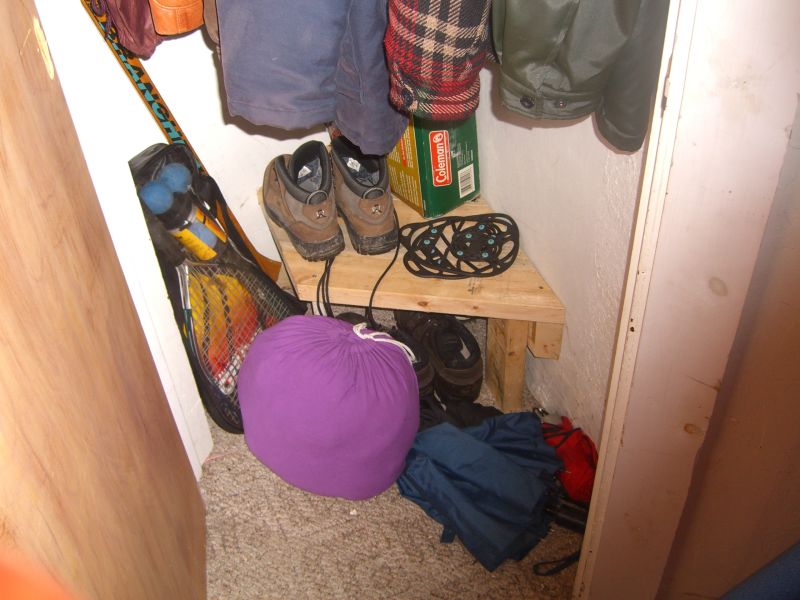
The closet in my foyer is a small triangle, the result of doorways being re-positioned in the 50’s or earlier. Its size and shape make it so even a few items on the floor rapidly became a messy pile. It also presented an interesting planning challenge, namely figuring out the angle of the triangle’s apex so the shelf could fit as cleanly as possible into the back.
There’s probably a more technically-adept way of pursuing this, perhaps with calipers, or a degree in mathematics, but all my geometric scratchings just resulted in a worn pencil, so I went back to trial and error. I set the miter saw to what seemed like a good angle and made two cuts:
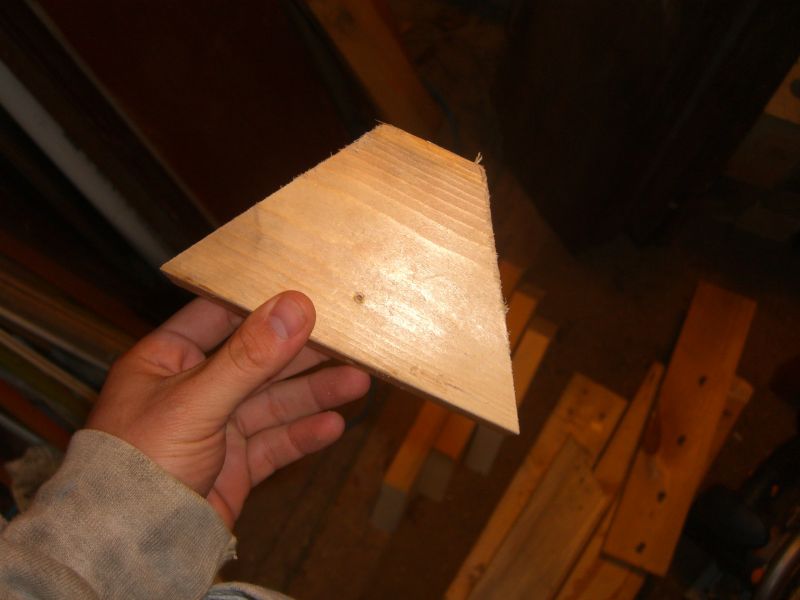
Then I trooped back and forth between the foyer and the workshop just fitting this one piece of wood into the back corner, and altering the angles needed until it fit ‘squarely’. I think I hit an acceptable fit on the third try – for many reasons, this is not an instance where extra time spent getting it justsoperfect gets you much of an improvement in end-quality.
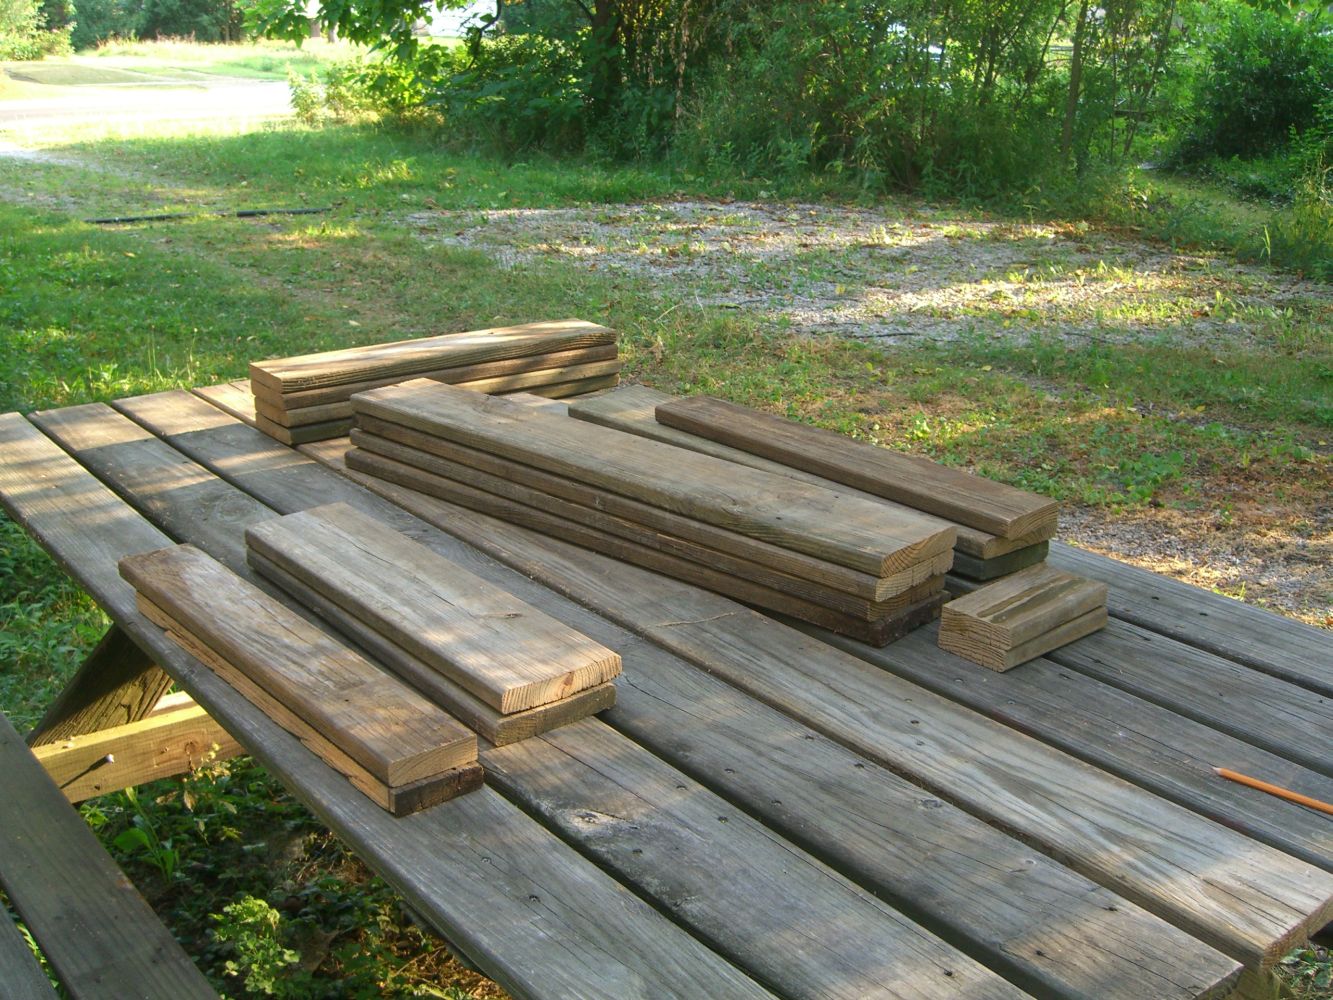
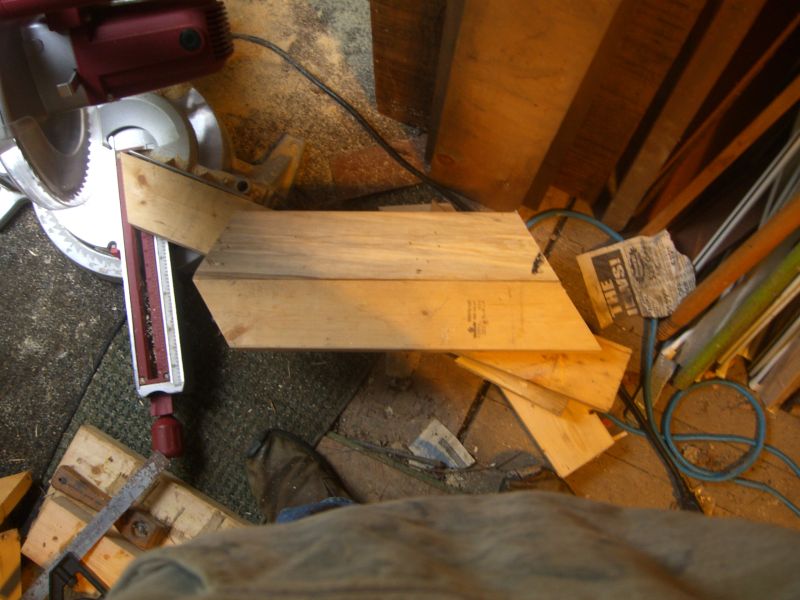
With the angle noted, it was an easy job to knock out several more cuts using a tape measure and a combination square.
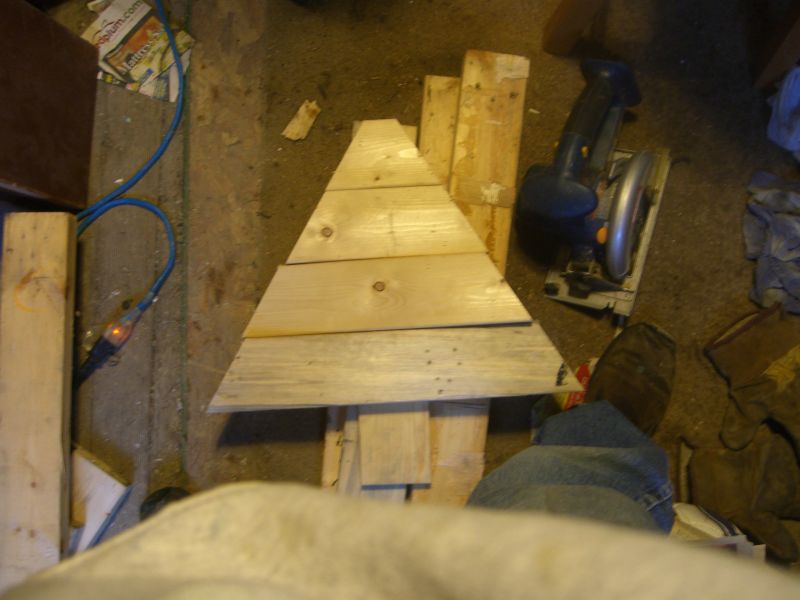
Same thing for the second grouping of boards, just without switching the miter back and forth:
This project was done mostly with two-by scrap for durability (how careful are you with the things you toss into the front hall closet?), because I had it around, and it’s easy to work with and forgiving (assuming you have an accurate enough saw). The rail is an easy cut since we already know the angle; I added a piece of scrap one-by to hold the stack together more cleanly.

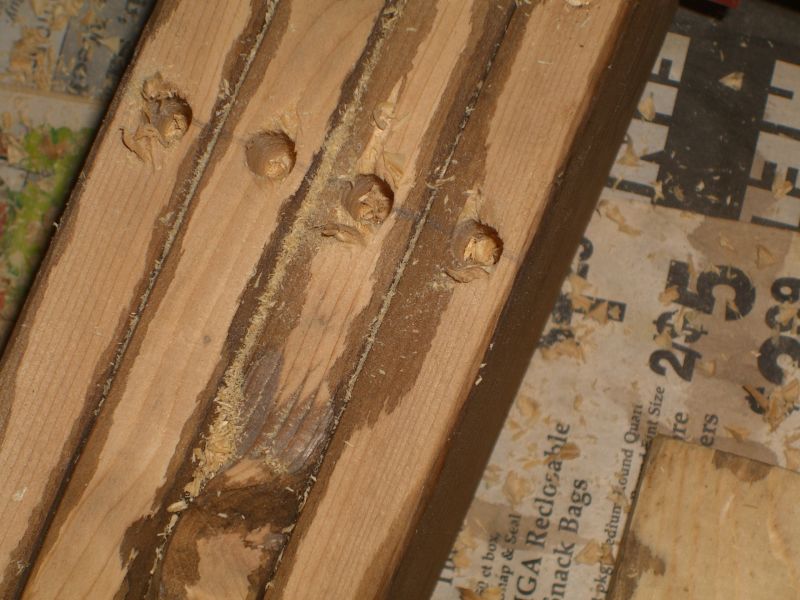
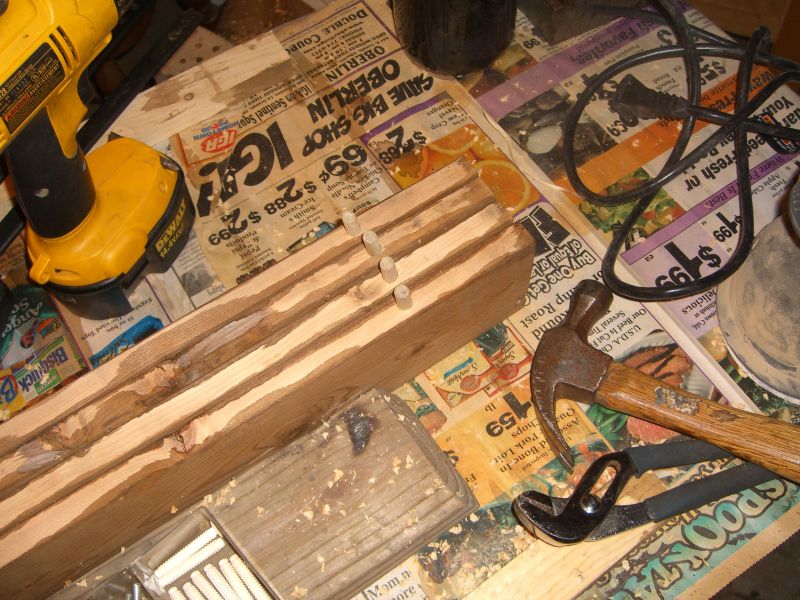
The two-by rail could screw directly into the wall (if I knew where the studs were), but I went with a couple of simple legs made of two-by, and a ‘fancier’ leg cut from an old broomstick. Using a paddle bit, I set the leg about a half-inch into the shelf…
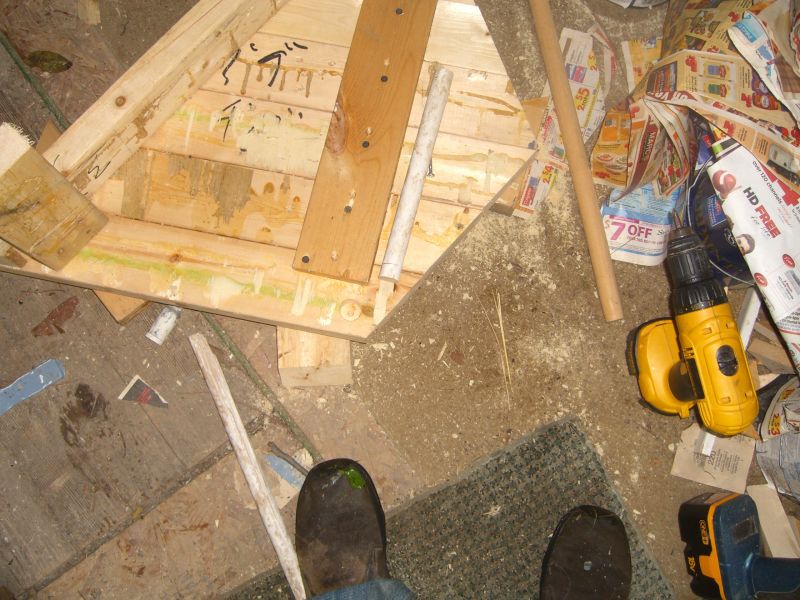
Then screwed in cleanly from the top:

Looks pretty, eh? This is why it’s nice to have piles of miscellaneous (sorted) fasteners, so you can find the right size and finish for the job.
Now I only planned on three legs – two two-bys on the long edge, and what turned out to be the broomstick – to maximize access under the shelf. I debated about the placement of the broomstick leg, ultimately deciding on the ‘front’ placement because I expected any unbalanced loads to be towards the front. Maybe this will prove completely wrong; if so, expect a lengthy report on the matter. In all likelihood, it won’t matter a lick – with the partial triangle shape, this is a stable design even though the leg isn’t placed at the center (if it was placed further ‘out’, tipping would be quite possible).

Next week: more projects that take longer to post than to complete.
Excitement on all sides
1) I finished drilling all the beams for the bookcase.
2) A ’63 Cadillac plowed into my neighbor’s rose bushes while trying to avoid another neighbor’s pickup truck at an intersection. No one was hurt. The image of a giant boat of a car nestled amongst foliage, with a flattened stop sign on the ground nearby, will remain in my mind for a while though.
It continues to be the little things…
- Shopped for flanges for this really clever bookcase thing I’m building. No really, it’s going to be awesome. Someday. Particularly if I can find the pipe fittings I want ideally a) with a patina and b) for not $10-20 apiece. Someone just suggested the local Habitat ReStore which I’ll need to look at soon.
- Moved things about in the shed. Again. I really should have built a garage. Let this be a lesson to all new homeowners, especially those who like to build things like I do. You’re going to need space for the tools and supplies. More space than you think.
- Measured the doors I rescued from a house that was slated for demolition to see if I can swap any in for my upstairs bedroom doors. The upstairs doors need restoration attention, which they probably won’t get for a while, so meanwhile I think giving them temporary replacements (and similarly old replacements at that) is a good idea.
Back to the small stuff
In an effort to keep myself blogging, but also to demonstrate to anyone reading this (Bueller?) how it’s a lot of little things that eventually get you a really nice looking old house, I’m going to try and post, often sans pictures, what I’ve done on the house each day, even if that’s just prep or minor work.
Today –
- replaced several shingles (there’s a post in itself…)
- prepped a bunch more for painting
- marked off the beams for an all-reclaimed-materials bookcase
- got the drill press running and did a test drilling for said bookcase
- trimmed off some old shingles so they can be reused
Just in time for winter – a picnic table
The table was completed in May, actually, but the post title was far too clever to pass up (right? right?).
The internet is a wonderful place. Not just for movie trivia and porn and porn movie trivia, no, it also includes dozens (dozens!) of downloadable plans for picnic tables, including at least one document that covers the theory behind picnic table construction. Not theoretical picnic tables – those are littering my backyard right now, next to the imaginary deck and behind the possible archery range – but the concepts and principles behind constructing a table, particular one without cross braces underneath (I just don’t like that design for some reason). This set of plans can also be completed with a few power tools (drill, compound miter, and… that’s it), an added bonus.
Having a well-explained primer on building a particular thing is very handy when, like me, you’re using materials on hand, not buying fresh stock to match specs. The raw materials for this table are almost entirely pressure-treated wood from the old deck benches I took apart last year – 2x4s and and something like 1 1/4x6s This meant both building deeper benches and adjusting the number of planks for the top.
Paddle bits let you sink the bolt heads for a cleaner look:
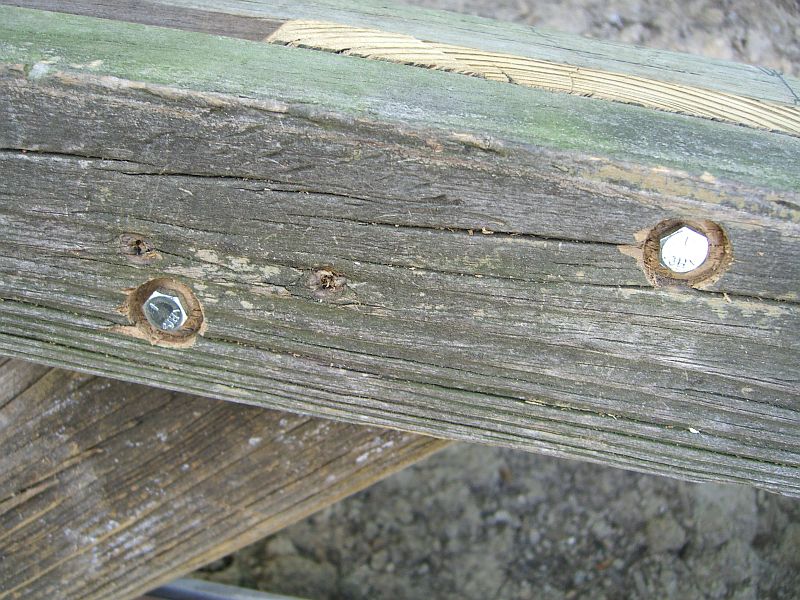
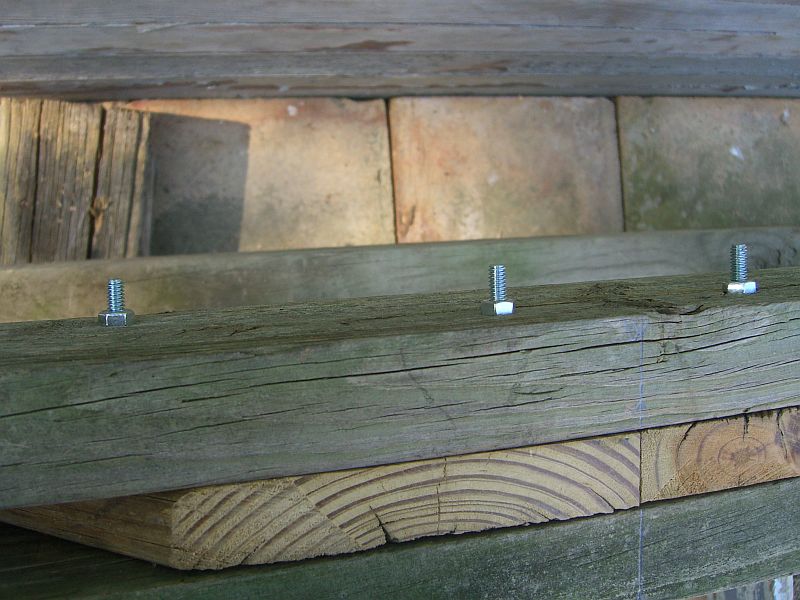
My local hardware store (Watson) lacked the exact length of bolts needed for this thickness of wood, but a little extra length shouldn’t hurt since they’re all on the inside of the frame:
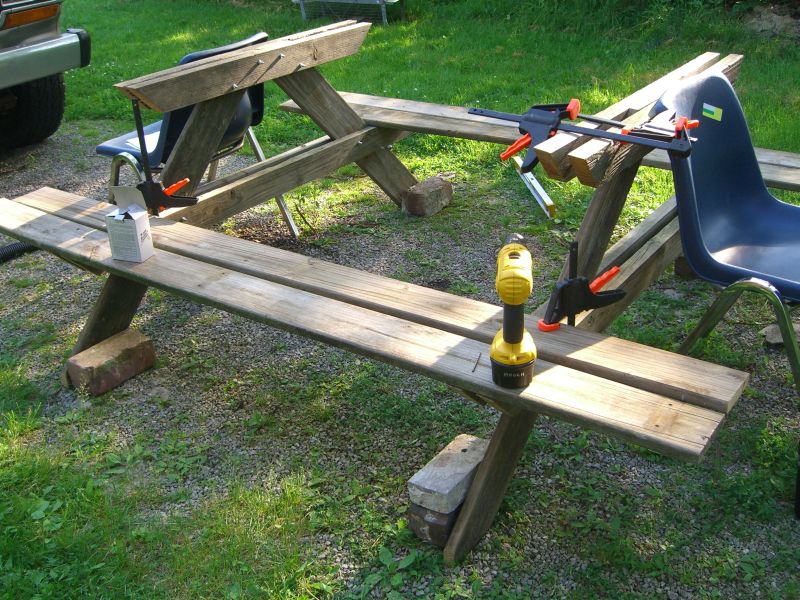
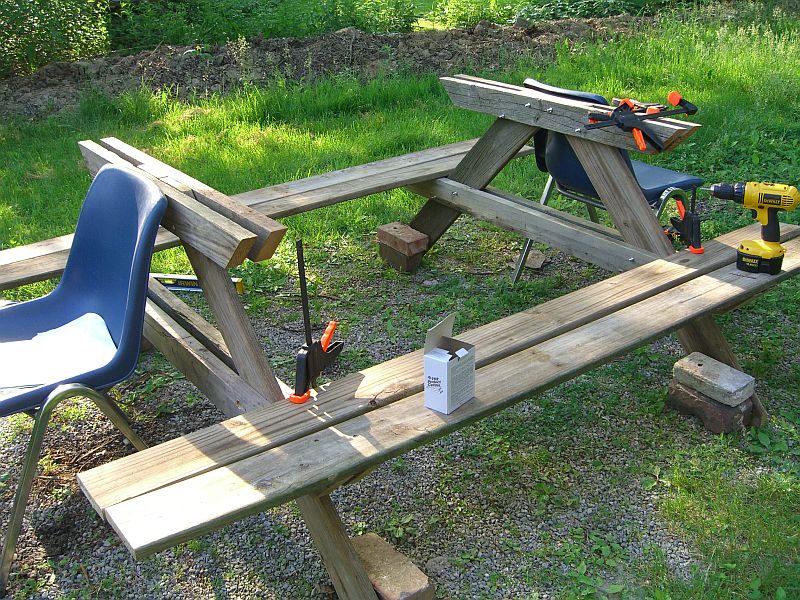
If you don’t have a friend to help level and assemble everything, or a properly equipped shop, find matching chairs:
Jerry, Watson’s owner, recommended ceramic-coated screws from the Project Center line – these are great. They’re self piloting, the drill tip means they aren’t likely to split the wood if used near an edge, and the coating makes this table a lot more weatherproof.
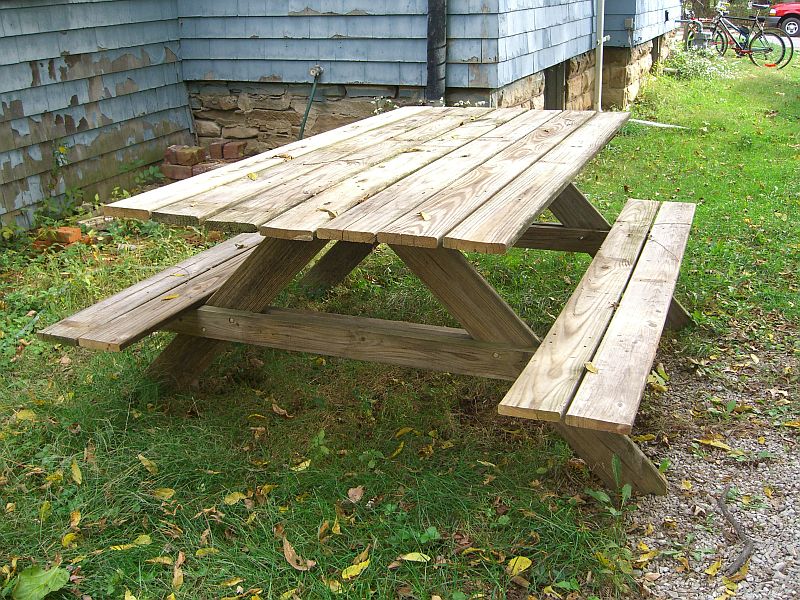
You’ll notice some minor bowing in the top planks – I was working with reclaimed materials, remember. Everything seems to be holding together fine – we’ll see how it survives the coming months.
Total cost: about $20, all for the fasteners.