Archive for category basement
So much for that schedule…
…which, I think, may already be the title of a similar post.
Hang on, I’ll check…
(flip, flip, flip)
(waiiiiit a minute, this isn’t on paper…)
Anyway, I have done many, many things on the house since the last post. No, really, you must believe me. What exactly, I can’t remember, because, you know – so many things! Yesterday I do remember. My friend Amanda wants to… learn about home repair? Is bored? Whatever the reason, she’s been asking to come over and help me on projects in exchange for food and drink, which is exactly in my price range dontchaknow. While the initial intent was to tackle getting the gutters back up, there’s still a bunch of pain in the neck prep work before we can even put the patches on the old holes, so I left that for the day.
Instead, we wound up rearranging a huge amount of stuff between the shed and the back room, freeing up tons of space, making tools accessible, and hitting upon the incredible conclusion that, of all the tools and materials that need to be in storage right now, that maybe that pile of plate glass panes that was in the shed could be what gets stored in the basement. You know, instead of anything wood or metal.
Geniuses, both of us.
Onwards!
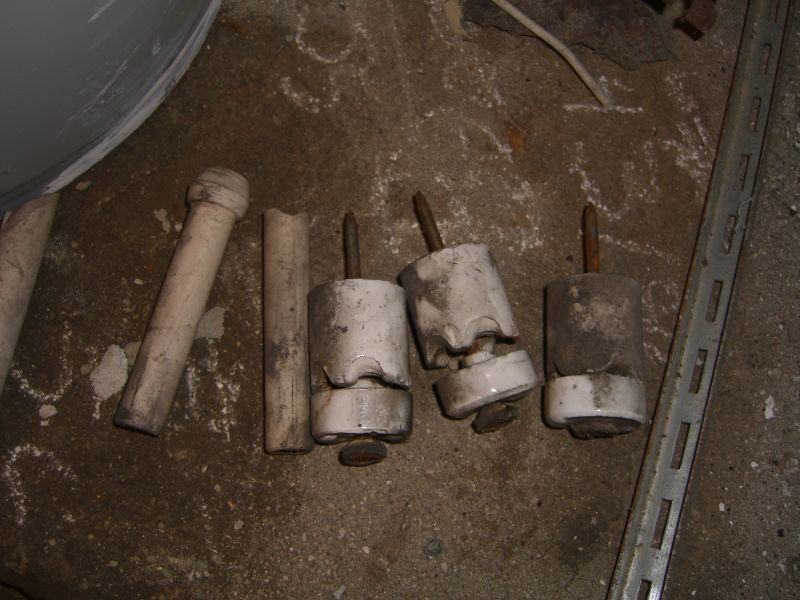
Removing old knob and tube porcelain fixtures
Posted by aaron in basement, electrical on 2 March 2010
This isn’t a post about replacing old wiring with new three strand Romex. (There will be posts on that, don’t you worry your pretty little heads.) No, this is a post about a seemingly small but very poorly documented task related to such replacements – removing the knob and tube porcelain fixtures themselves. Note: The following pictures are of completely dead, orphaned wiring segments – they have not been attached to the electrical panel for decades. Never muck with live wiring, especially live knob and tube.

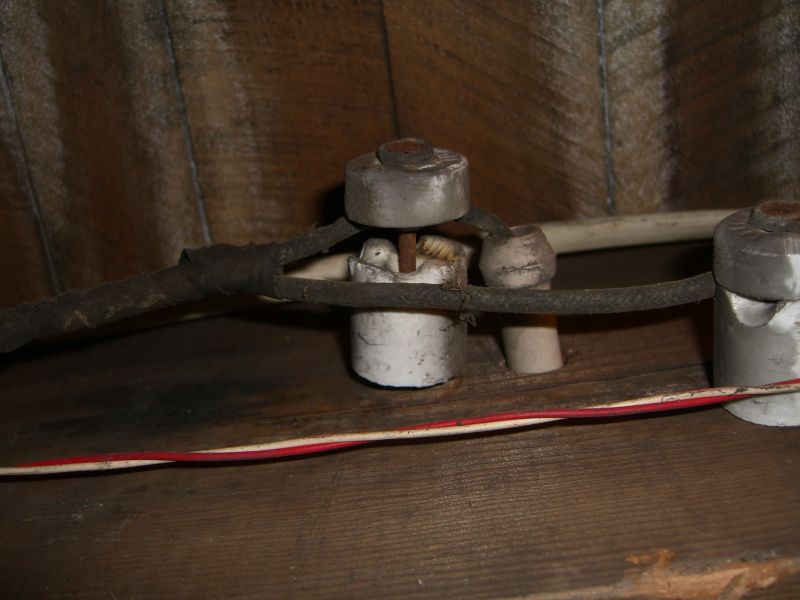
The nail likely extends an inch or less into the beam:
Removing knobs, then, is a fairly straightforward matter of wedging a hammer between the beam and the porcelain, and levering the nail out using the entire fixture. This next picture doesn’t show how far I actually inserted the hammer – quite close to the nail:

I was a little unsure at the start of this project for fear of shattering porcelain everywhere. It doesn’t seem to be an issue – the porcelain will likely chip and flake, especially as you’re first working the hammer in behind the knob…

… but it’s stronger than you might think. A gentle-but-firm approach had a half-dozen knobs out in less than ten minutes, and even an overzealous pull on one resulting in it flying from the beam and clattering to the floor didn’t cause any of them to break.
Pump piping
Loyal readers (hi Ezra!) will recall last summer’s adventure with my sump pump, and later issues with the hose getting tangled and once getting frozen. I said last year that I should just replace the hose with PVC piping – and now I’m finally getting to it.
First things first, turn everything off, pull the pump, and see if the pit can’t be dug a bit deeper. This will keep the water level lower in relation to the basement floor. I’d poked at this last year and thought the pit had a concrete bottom – meaning no digging. Upon closer inspection though, turns out there was just a LOT of accumulated silt…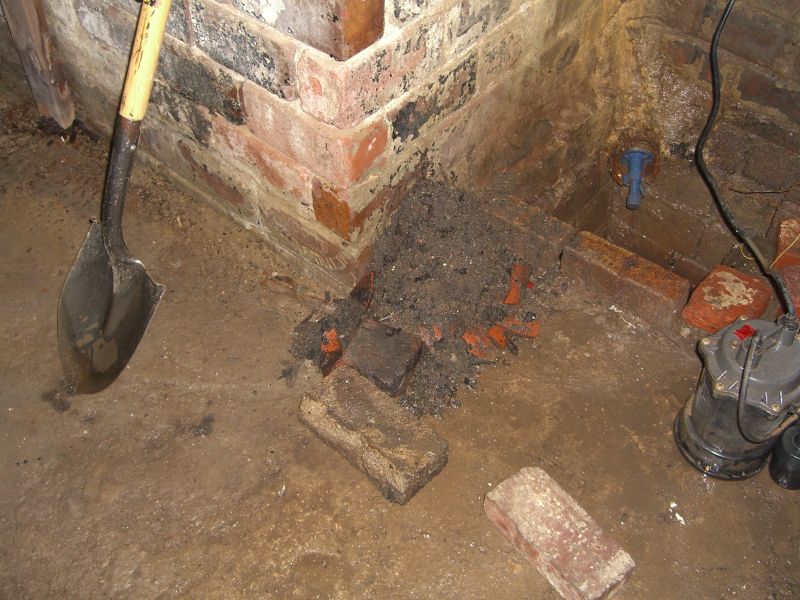 and two large bricks acting as a ledge on the dirt bottom (not pictured). Pull everything, dig some more, find two bricks of equal depth, place them carefully, lower sump pump. Now we’re getting somewhere.
As usual, these project require way more tools and equipment than one might think. Ignore the caulk gun – that was actually for something else.
 Here came the fun part. The sump pump manual has a basic diagram for setting up piping. It calls for a roughly 15″ run of pipe running from the pump to the check valve (a one way valve, necessary to keep your pump from getting slammed over and over with water still in the pipes) with a small relief hole drilled into it; then the check valve, then a run of pipe to an elbow joint, then a run from the joint to the outside. This is actually fairly straightforward and should take about 15 minutes, cutting included, EXCEPT most check valves I’ve seen have one threaded end and one smooth end. I found it easier to buy a couple of connectors to make the whole system a) fit and b) be somewhat disassemble… able.
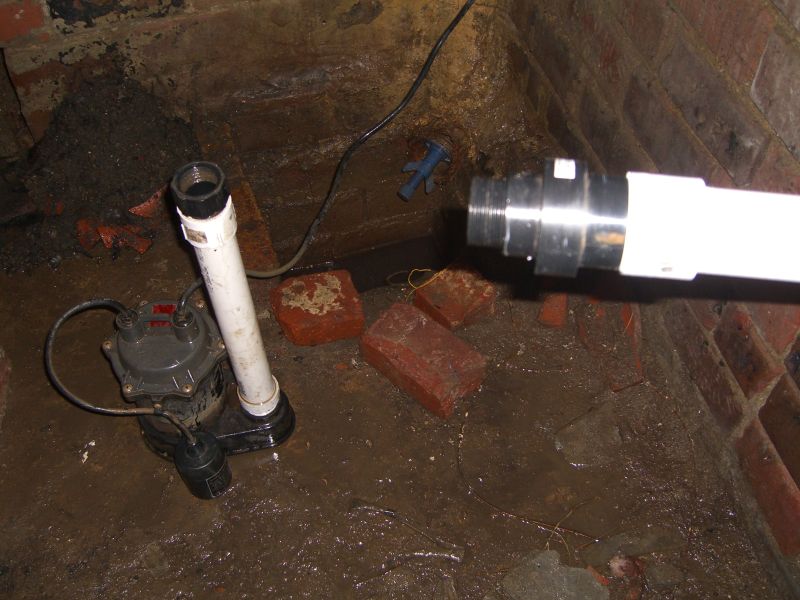 The above pic shows the end result. A male thread connector at the bottom going into the pump itself, cemented to the short run of PVC. Two different connectors (you might be able to do it with one, but this is what the hardware store had) ending up with a female thread end pointing up. The check valve will screw into this, and on its other end it’s cemented to the longer run of pipe with one last connector.
Yes, I did finish this project:
 One last important note: I put PVC cement on everything at the bottom of this contraption since I knew how it would fit together. I held off on cementing the check valve to the pipe (which requires all-purpose cement, incidentally – the check valve is made out of a different kind of plastic) and on cementing the pipes at the top (the elbow joint) together so I could make sure the whole thing was placed correctly, allowed for a slant on the horizontal run (to reduce the chances of anything freezing closed this winter), etc. This was a good idea since I discovered that a couple of additional trims and refittings would reap benefit in the long-term. HOWEVER – I was measuring and refiguring and left this all fit together, but not cemented, overnight – and of course that night it rained. Even PVC fittings you have to wrench apart may not be snug enough to withstand repeated pushes of water against the joints – in other words, the following morning, the joint finally separated and water spilled onto the floor a couple of times. No big deal for my unfinished basement, but if you’re doing this project you might want to try and complete everything, including cementing, as soon as you can.
Everything old is new again
Just in time for the new year, a couple of old pictures from my camera which I apparently never posted.
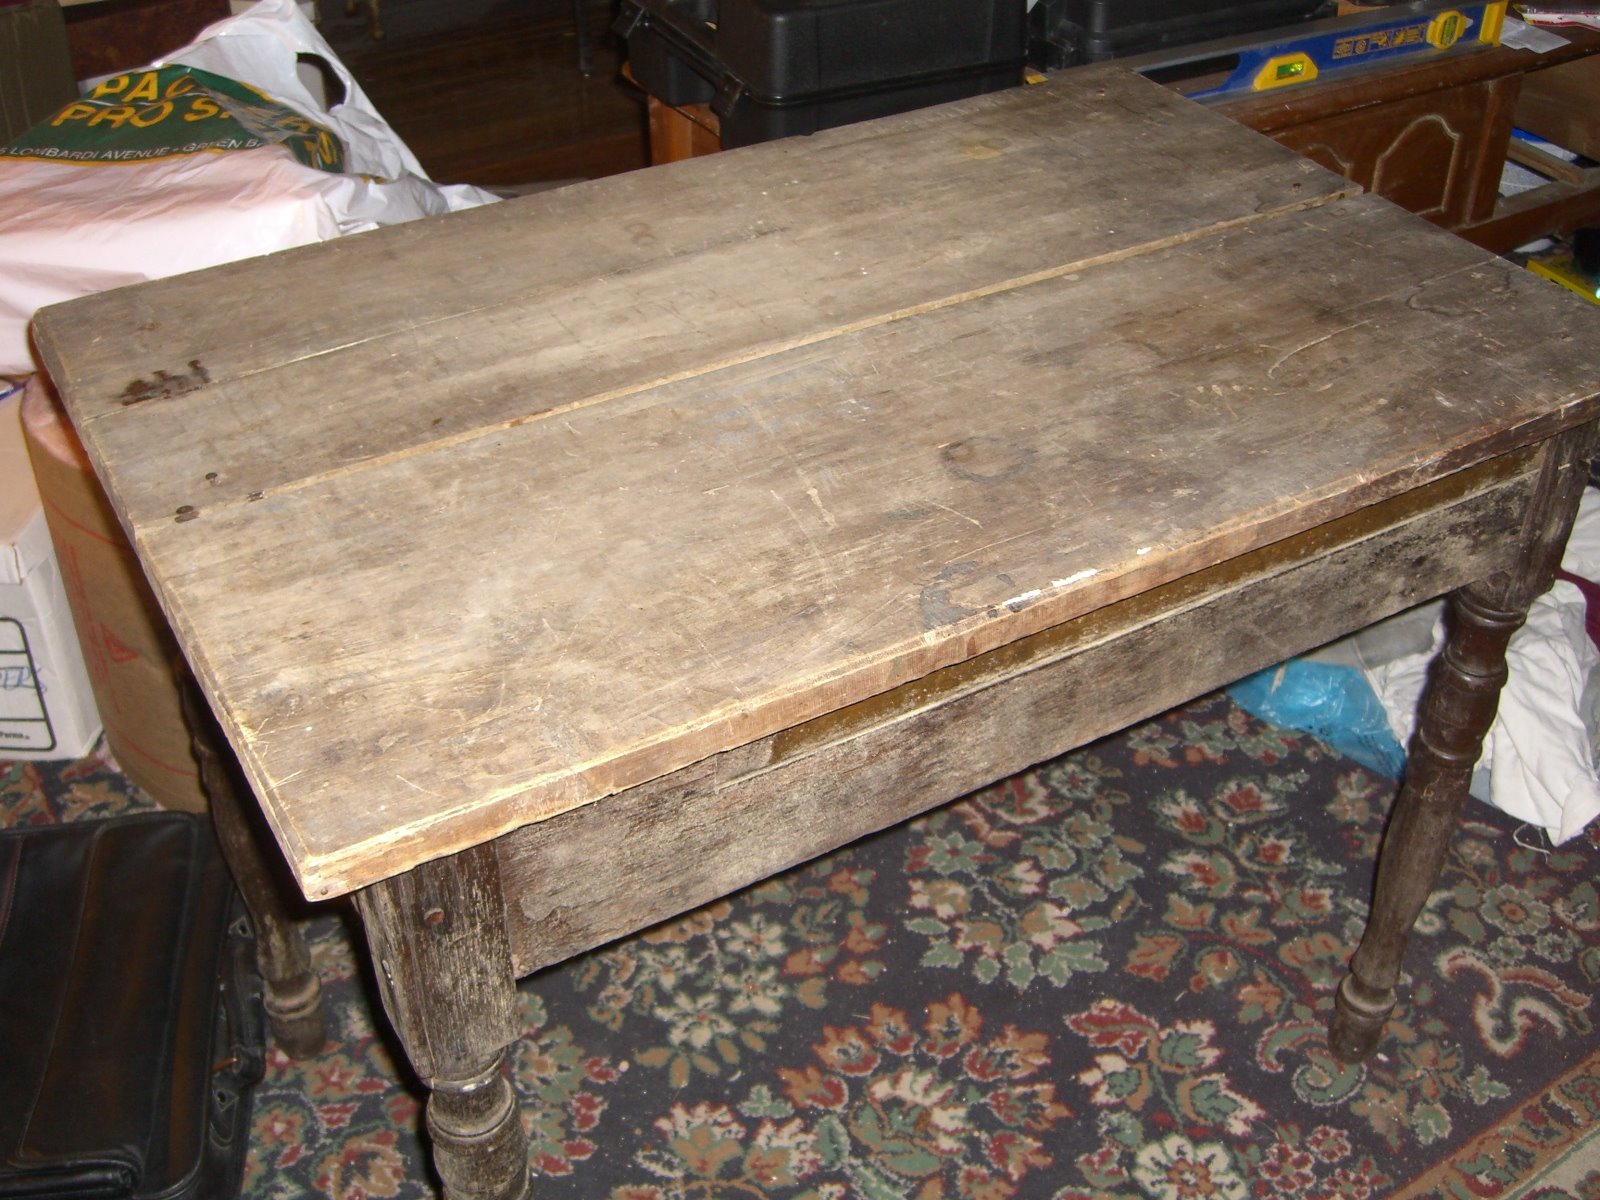
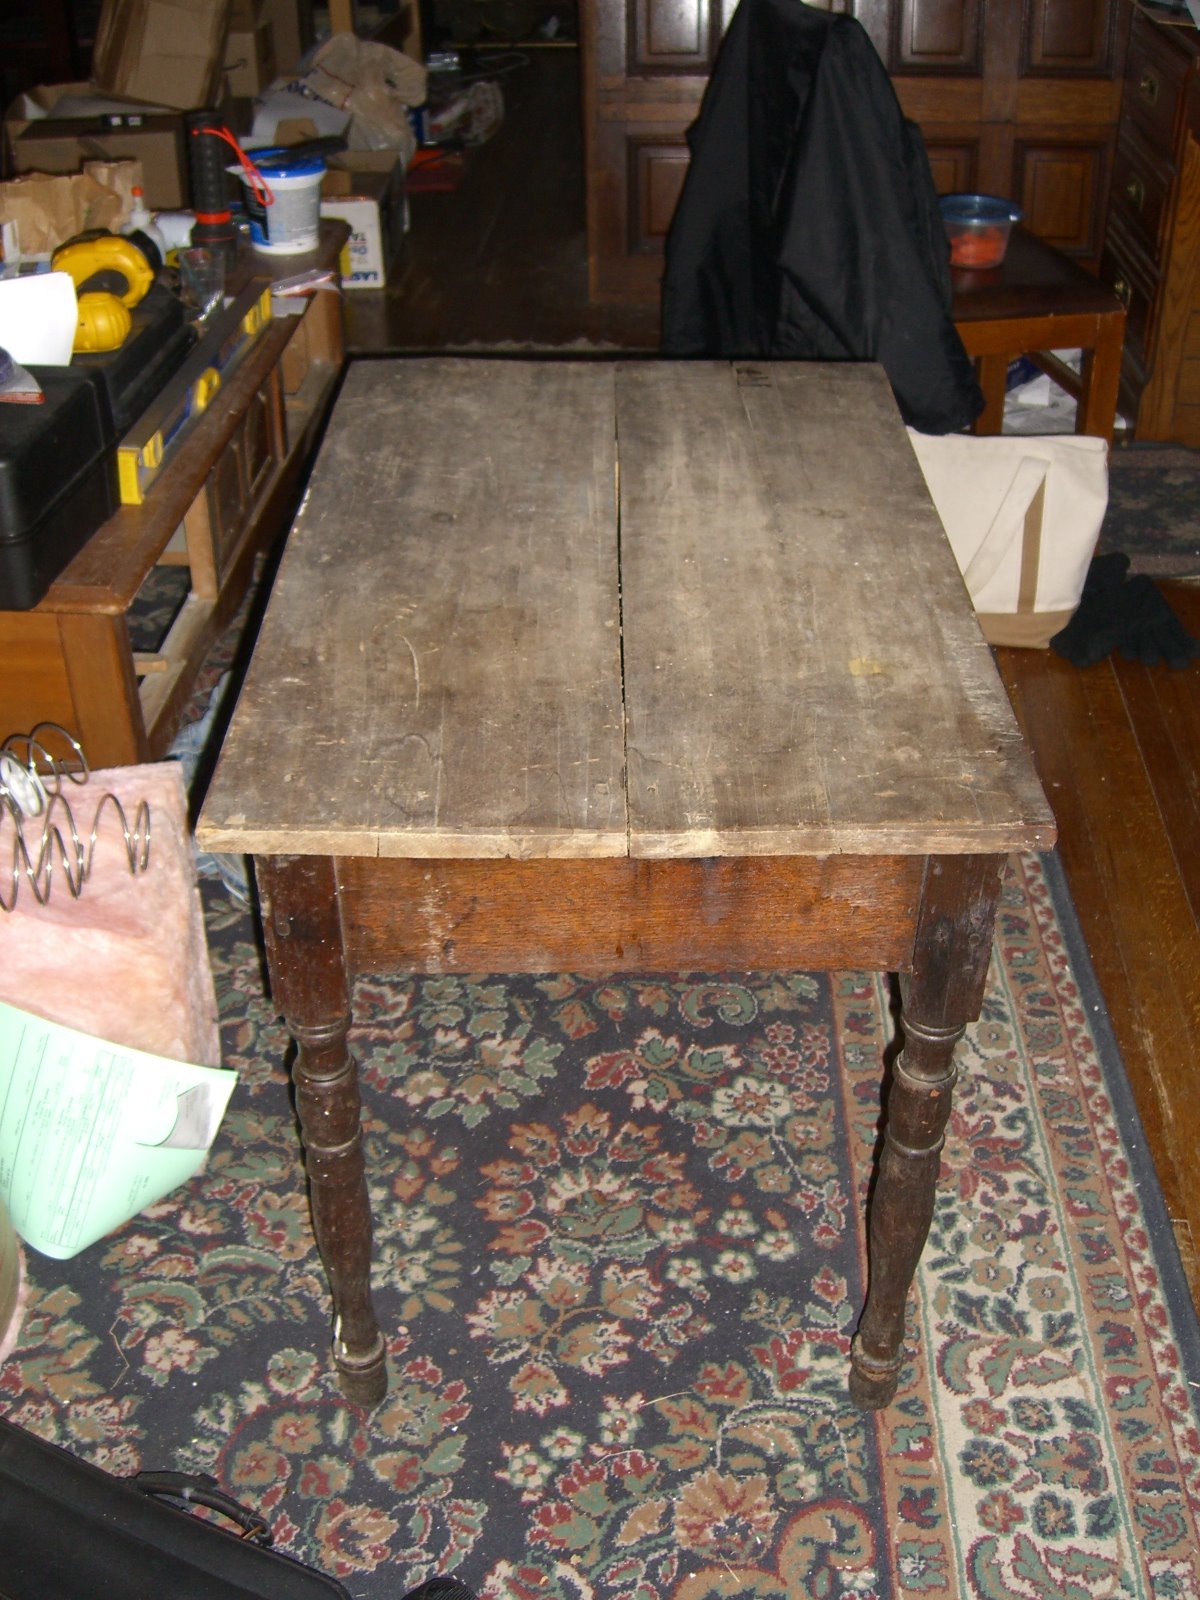
I picked up this table off of Freecycle, planning on using it in my back room/workroom as just a level surface. Originally it was covered in 30-50 year old contact paper (a lovely star spangled theme if anyone wants it) stapled to the underside of the top. When I pulled the paper I found a) a nicer looking old table than I expected and b) a pretty obvious gap between the boards forming the top.
I was thinking about re-covering the table in something, but then I noticed that the nails holding one of the boards were loose. Turns out the table was very poorly repaired sometime decades ago (as well as probably rebuilt – looks like there are three different woods used, plus I’m pretty sure this once had drawer). So I pulled the four nails and tried to reset the board. At this point I discovered that the attempted repair job had involved a heavy coat of glue:
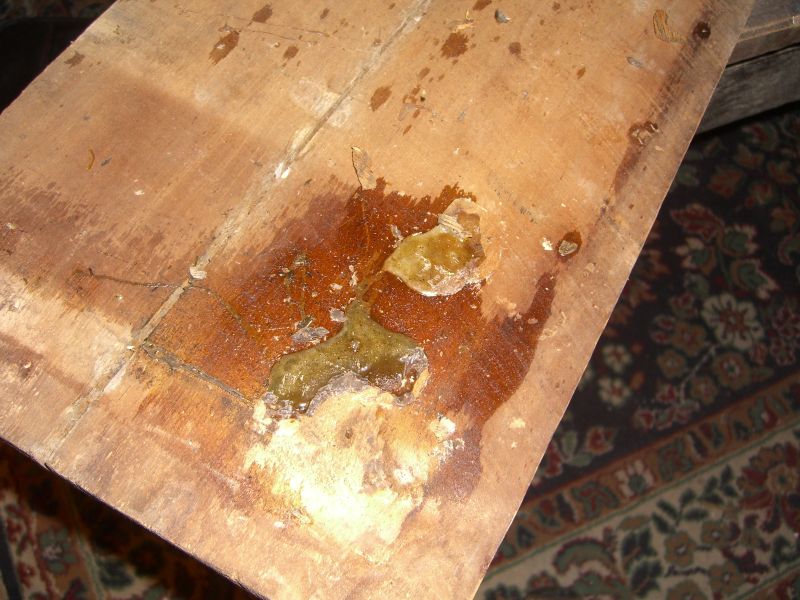
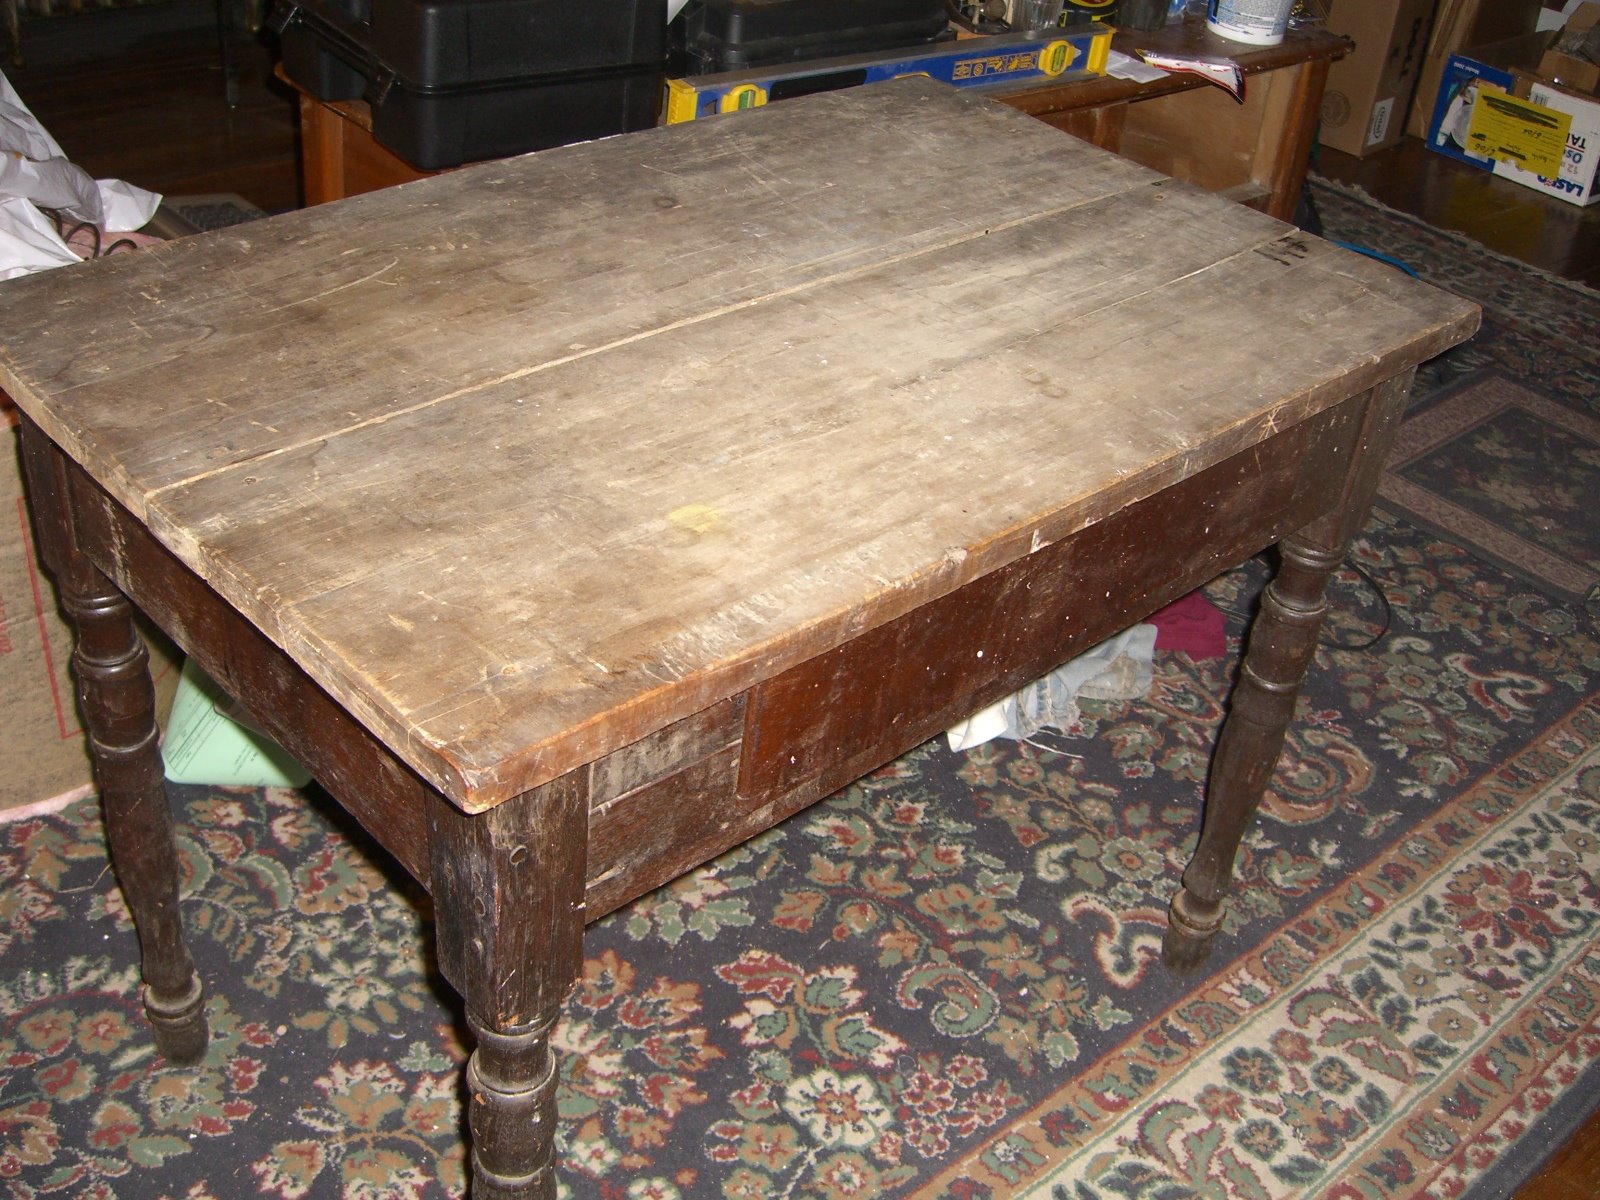
The glue had hardened around the outside edge of the leg, so the board couldn’t be pulled back evenly. Twenty minutes with a putty knife and razor blade and the glue was chipped away. Snug the board as close to the other as possible (the boards look like they were a replacement top ages ago – neither is fully square so there’s still a much smaller gap between them in the middle), tap the nails back into the same holes, and voila!
Before:
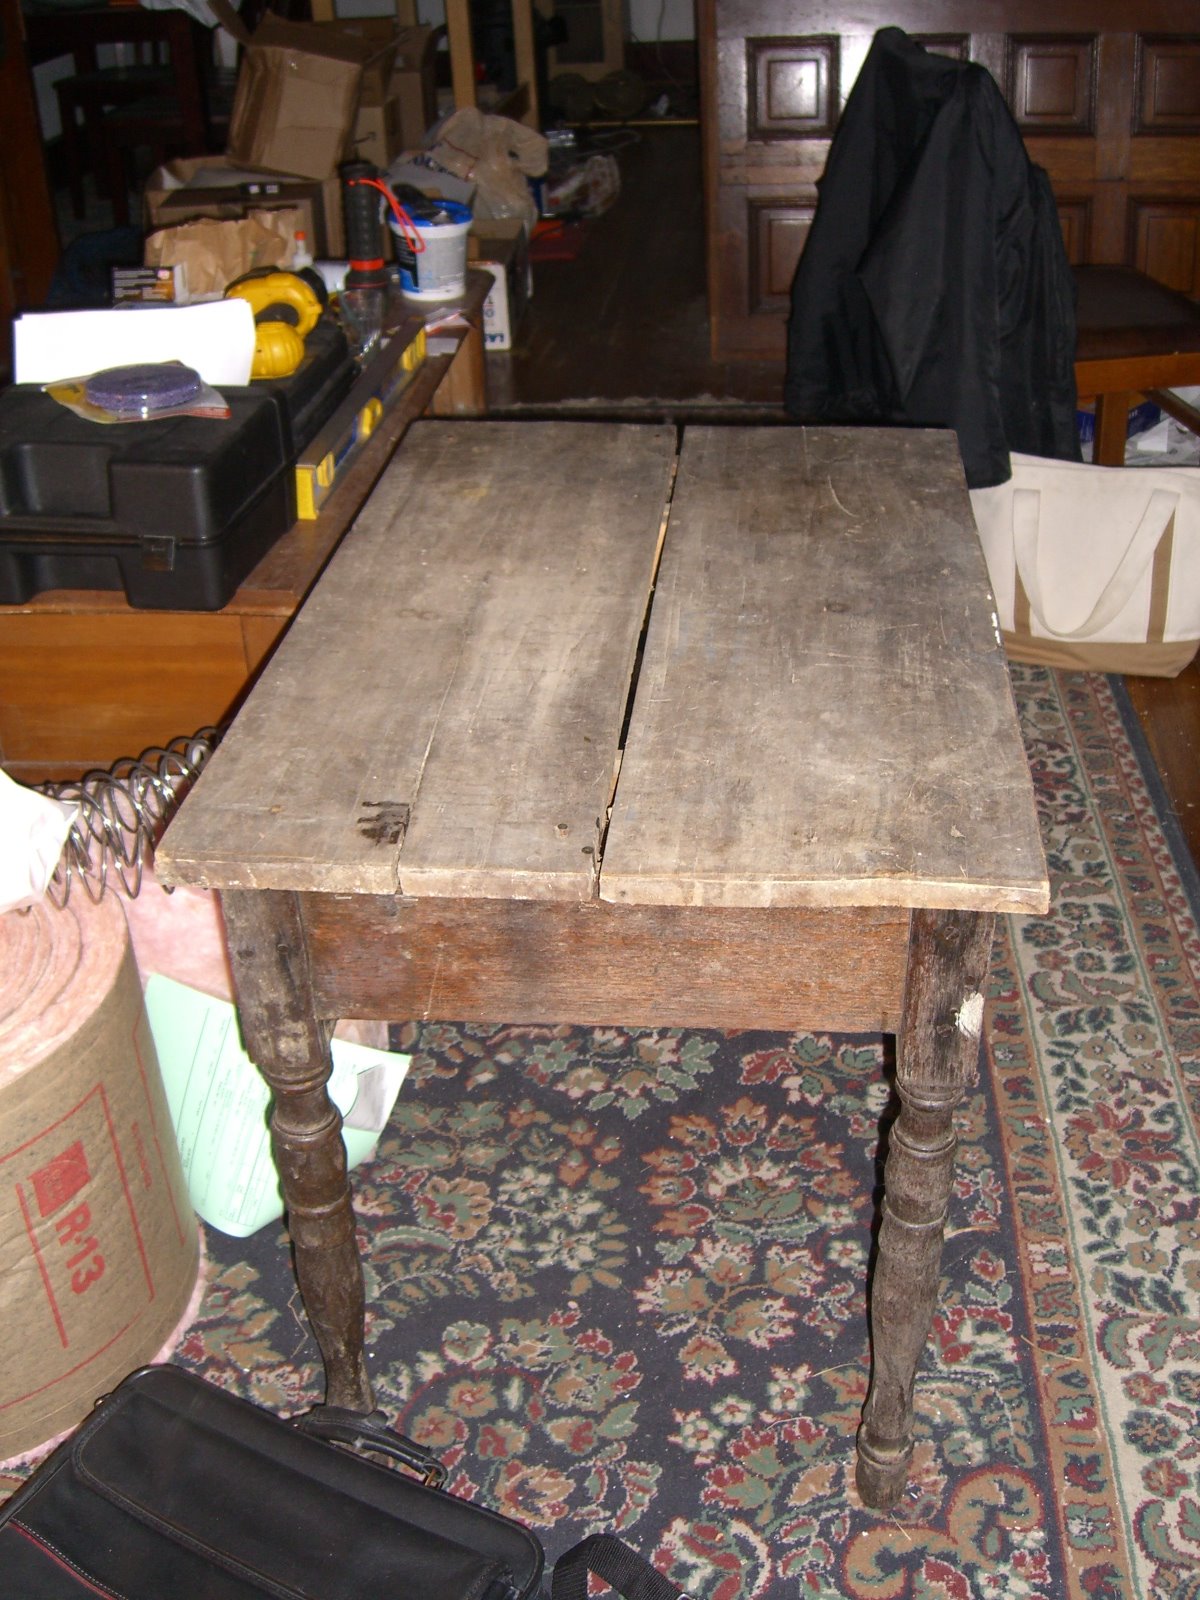
After:
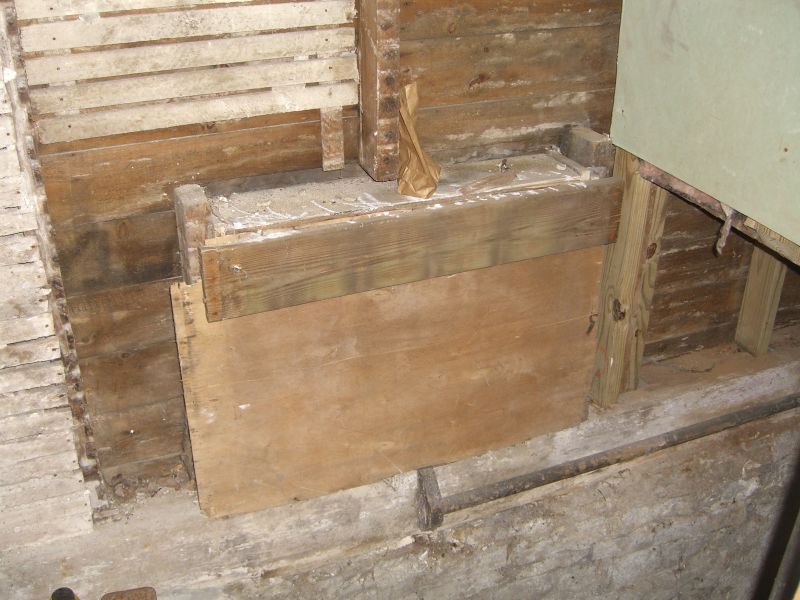
Also, and this was months ago, this is how the window on the steps to the basement used to look:
…and here’s how it looks now:
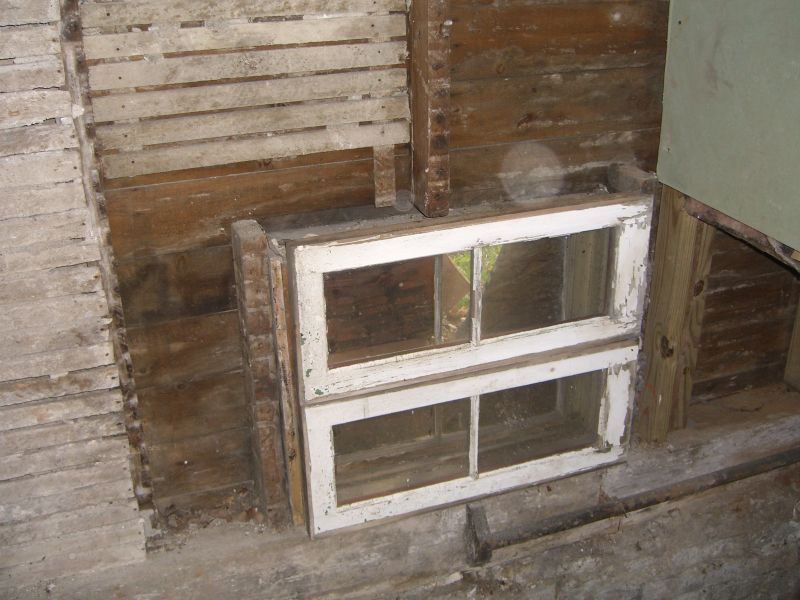
These two windows were lying around in the basement and happened to be the perfect width. Together they’re a little too tall for the space, but they fit snugly enough with the existing box that a heavy bead of caulk on all three sides seems to have sealed out the wind pretty well. The exterior window (sort of visible in the second photo) is missing a pane though, and I was waiting for the temperatures to come back up before testing out my new glass cutter/glazing points/glazing compound bundle that’s now sitting in the back room desiring to be useful. Better pics of both inside and outside once I lay that last pane.
More small stuff
Raked about half the backyard.
More clearing in back room and living room.
Took a wire brush to the stand pipe cleanout, then gave it another dose of Kroil. Will alternate this with a blowtorch for the next couple of days and see if it gets us anywhere.
Mapped a few electrical circuits in the basement, including finally isolating the dining room light so I can install the switch and unit – and have a dining room again!
Also sorted through most of the papers that had piled up on the coffee table, which isn’t really house-related per se, but at least I now have a coffee table again. And now Sarah’s calling saying they’re at the Feve, so I think that’s it for today…
Quick update
I had to take half the door latch off the shed and move it over a quarter of an inch (took thirty seconds, just three screws). I think that it was a little tight to start with, and then the weather and the structure settling slightly was all it took so that the two parts would no longer smoothly fit together.
I was in the shed today, despite the rain, continuing to clear stuff from my back room. I’ve started building more things into the shed – just some crossbars to hang tools right now; soon enough a shelf or three to take advantage of all the space – so it won’t become cluttered like the rooms it is decluttering.
Finally, checked the sump pump today and found that the hose had shifted and blocked the float just enough that the pit wasn’t draining (it was actually overflowing onto the floor). Moved things around a little and it’s draining fine now, but I think this and the frozen hose the other day are signs I should finally go get some PVC pipe and properly build out the pump line.
Plumbing the depths
Been quiet for a few days, I know, but not because nothing is going on. The shed is almost finished out back (some rain and snow (none that stuck) delayed things, but the builder is working hard at this moment in some near-freezing temperatures, and the thing should be finished, including roof shingles, tomorrow) just in time for it to be too cold for me to want to haul anything out there.
Meanwhile, I came home Saturday to find what looked like a minor mud explosion in my downstairs bathroom. Something had forced a lot of the gunk that built up in the pipes up out of the drain and splattered it around a bit. The cleanup was quick and easy but clearly there was a pipe problem. Still is, actually. As I write this, I’ve located several small leaks in the drainpipes (shower, sink, toilet), none of which should be too hard to fix – that’s another post. The bigger problem -and what likely caused the eruption – is a severe clog somewhere in the line.
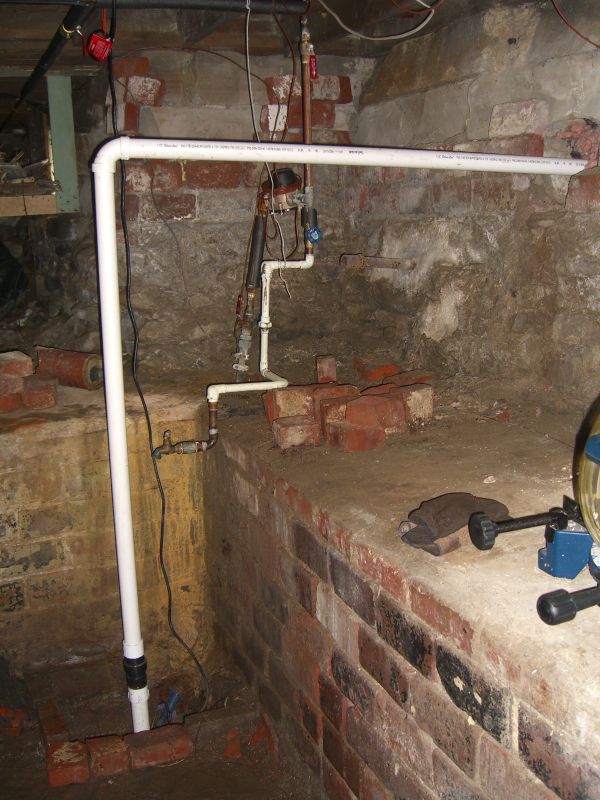
The water in the pipes is clear – run the shower and it runs down past the trap no problem, for example. But run any of the three long enough and you can hear burbling from at least one of the others; when I used a plunger to test the drains I’d often hear it in both the others. All three – plus the outflow from the washing machine upstairs, and an uncovered(!) vent outside which I’ve recently covered – feed into a main standpipe and I’m guessing that’s where the problem lies:
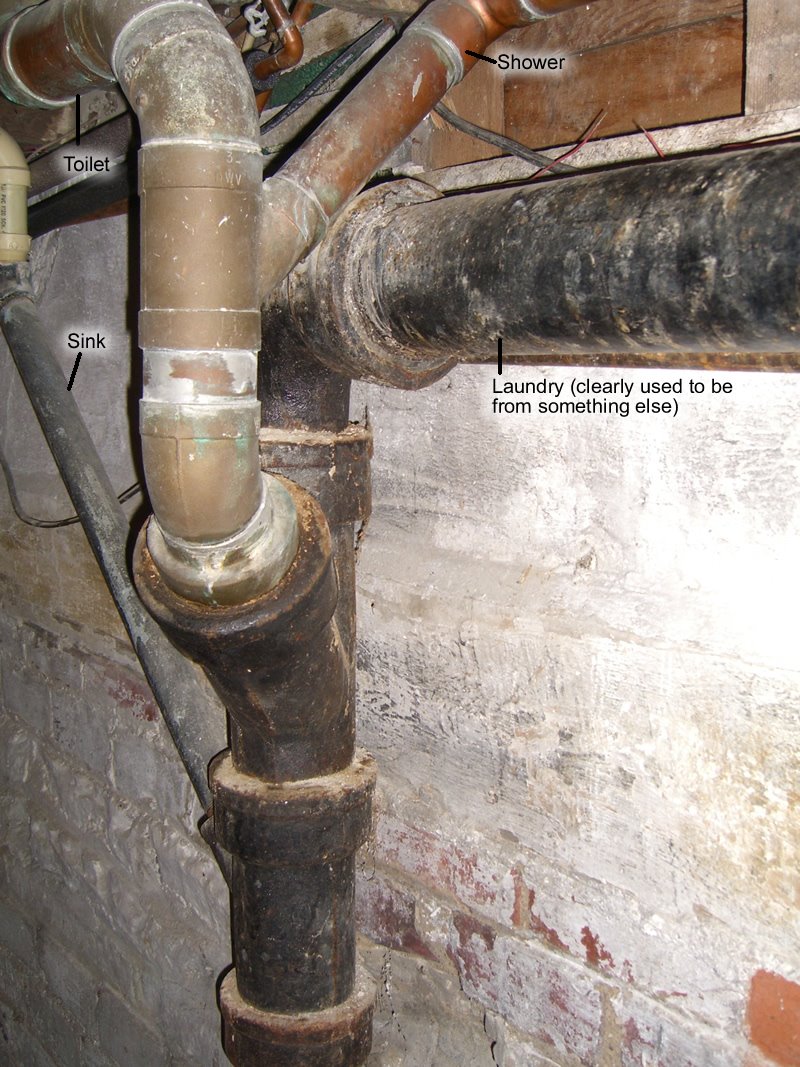 Trying to figure out what to apply to the clog, though, and how is the trick. With the traps on all three bathroom fixtures – and the clog looking like it’s past the traps – it seems like pouring something down the laundry pipe would be best. There’s a short run of PVC at the top, though, and the best cleanser I have is lye – I’m reading that lye is not good for PVC (and absolutely not good for aluminum, galvanized steel, and other specific metals with which it can react; fortunately I have none of that – just copper, cast iron, and pvc). I’ve ordered some enzyme cleaners which will be good for keeping the pipes clear in the long run, but I need to get this clog out soon if I want to actually use my bathroom again – 45 second showers don’t really work.
The sink is mostly PVC to the stand pipe. The shower looks like all copper from the drain down. But again both, and the toilet, have a full trap somewhere on the line so I think I’ll try the laundry pipe first – if a dose or two does damage the PVC it should be a lot easier to replace that where it connects to the cast iron on the second floor than any of the other lengths.
Sage advice
Posted by aaron in basement, dining room, plumbing on 24 October 2008
Years ago my grandfather said to me – and this was while I was in college – ‘Be a plumber. The world is always going to need plumbers.’ It should be noted that he was a film and television producer and did all right for himself and his family.
I don’t know if I should have become (or still should become) a plumber, but I do know this: there is no such thing as a small plumbing job. In an effort to make my non-working spigot work, I decided to seal any joints and connections along the run. I’ve found that – and maybe this is just anecdotal – poorly sealed handles and the like can cause decreases in water pressure even if they aren’t leaking themselves. In any case, it was worth a shot – some more plumbers tape, a wrench, and half an hour in the basement. Problems here were twofold, and all aspiring plumbers take note. First, the spigot was up a flight of stairs, out the back door, and around a corner, so testing it after making any adjustments required running back and forth. Have a partner, and a set of walkie talkies, to make things go faster. Second issue is an oldie but a goodie – know what’s on and what’s off. Same goes for electricity, but with plumbing you don’t have things like volt testers to remind you if you’re being a dumbass. Turn it off as early on the line as you’re willing (I should have just shut it off at the main entry line – I wasn’t using water anywhere else and the boiler was off). Long story short I’ve got a sweatshirt drying in the foyer right now. And the spigot still isn’t working well.
Also today – found a storm window that fits the empty space in the dining room window storm, and removed the broken glass from the interior sash. I think I’ll get that plastic shrink wrap for the winter though just to seal out any more drafts. Oh, and I need to caulk all the storm windows on the first floor at least to seal out drafts. Caulk is going to be my new friend this weekend. And those of you with purile minds can just leave now.
Tomorrow I’m planning on one last Lowes run coupled with a stop at an electrical supply place Dan Gregus highly recommends. If I pick up what all’s on my list right now, I should be able to cap this Project Week with a highly successful Project Weekend. Updates as they happen.
With friends like these…
I should have more people over more regularly. It’s not just the multi-person projects that get done (painting part of one of the exterior walls, for example), something about having other people around gets me more active, to the point that I’ll swap a couple of mismatched cabinet handles in the kitchen (that I’ve been staring at for months) while we’re all standing around and chatting.
Sarah and Mike stopped over today and we did the above plus: mapped out shed dimensions to make sure I’m placing it well; installed a new jack in the basement to replace one that was missing (!); moved all the tree limbs that came down in the storm the other week to the front for city pickup; and I just put some plumbers tape on a valve in the upstairs shower to stop a small drip.
Pictures soon.
Sump pump, part the first
While standing in the basement during a rain storm the other day (checking to see where seepage was worst – as expected it’s near where the gutters have problems and water puddles near the house) I heard the sump pump come on and glanced over to see it in action. Turns out the hose, which the previous owner mentioned was getting near needing to be replaced, had a few small holes in it – on the basement side of the wall. I watched bemused as the table and bricks to the right of the pump got a shower, then switched of the breaker and went in search of a new hose.
 First off, I need to learn to look closer at things. The pump manufacturer says this is a 1.5″ outflow, so I bought a 1.5″ hose. You’ll note that the old hose (below) is attached not to the pump directly, but to an adapter of sorts that I can only assume makes it 1.25″. Anyway, with some extra tightening of the screw clamp the new hose fit fine.
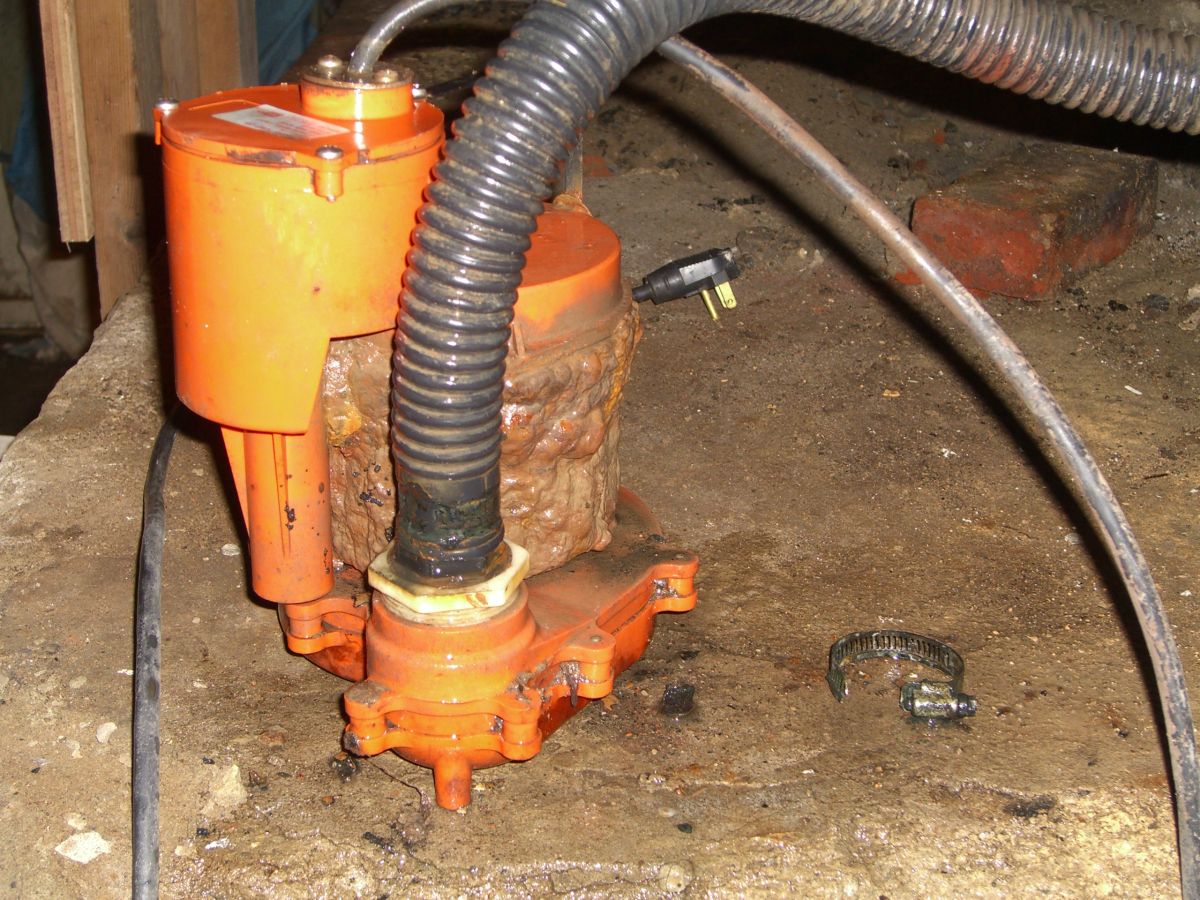 This is your sump pump after who knows how many years under water. This is your sump pump hose, cleaved to the adapter even after the clamp is removed.
Unfortunately, upon securing the new clamp, turning the power back on, and resubmerging the pump, it did not… pump. Some light surgery revealed that either moisture had finally gotten in to the power housing and corroded the connections or something was wrong in the motor section which I can’t access due to severe corrosion and buildup around the screws holding the main housing.
Long story short, $110 at Lowes got me a new pump and a one way check valve that allowed me to connect the hose to the pump.
Few things make you feel so much like a homeowner as having to say ‘Ben, I’m going to be late – I’m up at Lowes buying a new sump pump so my basement doesn’t flood.’