Archive for category outside
When the only tool you have is a hammer…
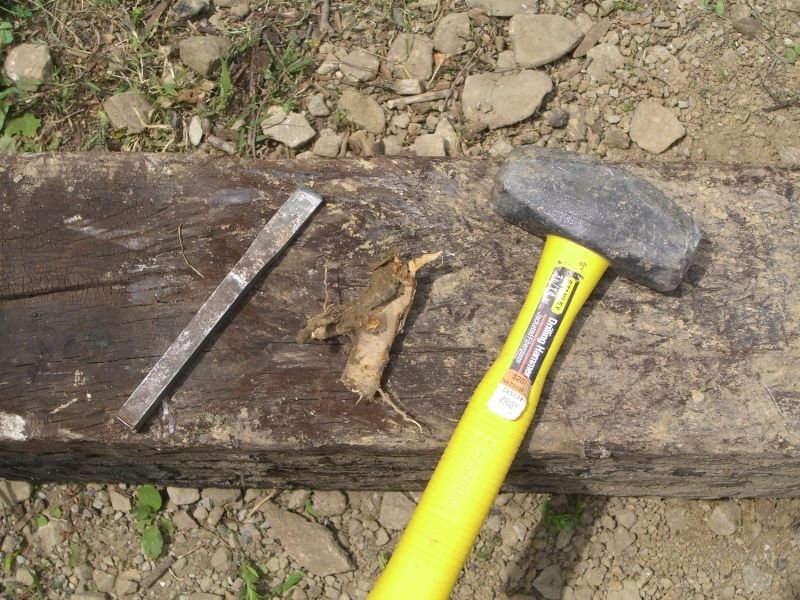
You really need to go to the flea market. Amongst the other tools I picked up was a cold chisel. While digging out one of the pilings in my backyard, I ran into a series of tough roots. The smaller ones split under the shovel, but the thicker ones just sheared off a layer and stayed put. Cold chisel plus hammer plus two or three taps at each point on the root equals no more root.
Hard and deeply buried targets
That’s not an innuendo, just a reference to my days working for DoD. It’s also an appropriate title for this post about pulling a set of old pilings that had once supported a deck in my backyard. The deck is long gone and the thick pilings are now just in the way of various plans for the space.
Incidentally, these pics were taken over the span of at least a month. Plenty of things have been happening at the house, but since June 2 plenty more have been happening with the theater festival I’m in this summer. My days have been a combination of rehearsals/performances, housework, client work, eating, and sleeping. No time for reportage.
Back to the reportage:
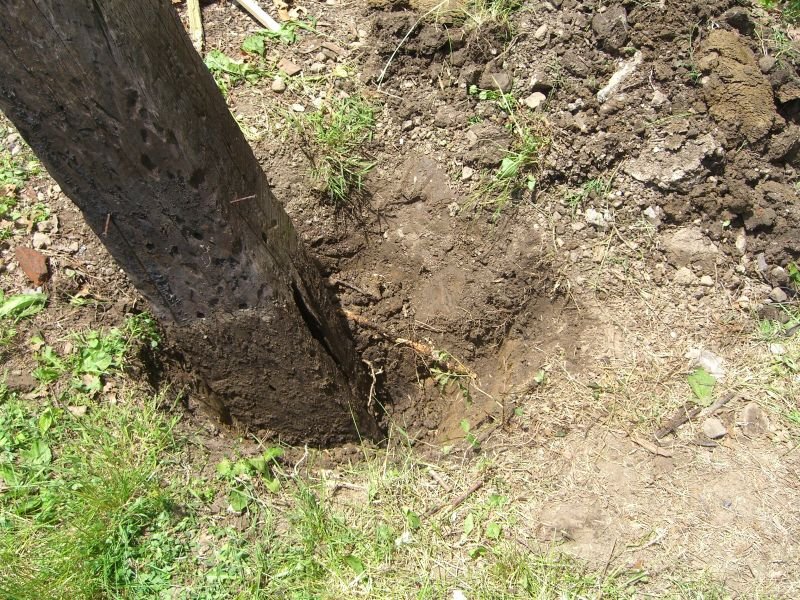 This is one of five pilings that need to be pulled this summer. Thick, heavy, sturdy wood that’s been sunk in the ground for a number of decades now. I asked the previous owner how deep they were and if there was any concrete. To the best of his recollection, they’re buried about three feet down, and there was no concrete. You can see where this is going.
 They are buried three feet deep.
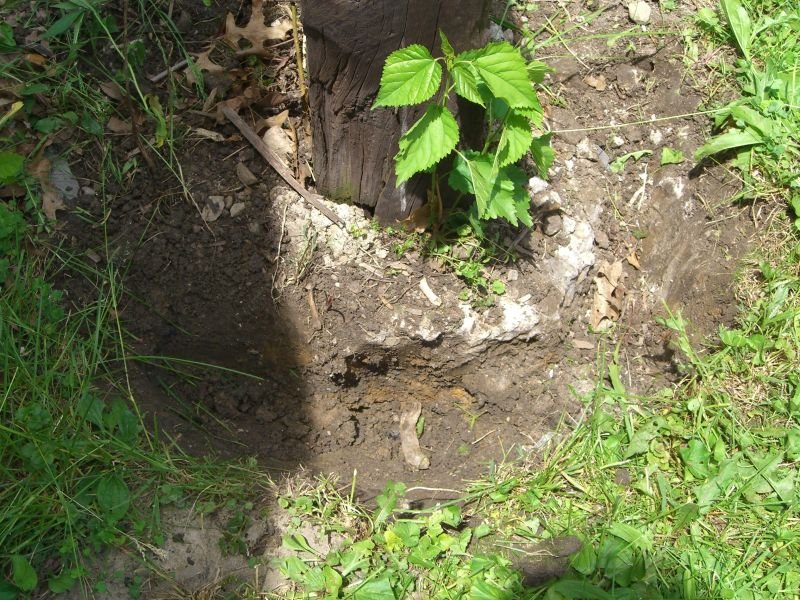 There is a ring of concrete a few inches down, about 4-6″ deep. Fortunately I’d recently bought a three-pound sledge. Remember to wear safety goggles when taking out your aggression on some harmless (but very in the way) concrete. Also, dig out underneath the concrete as much as you can with either a shovel or spade before wacking the rocks.
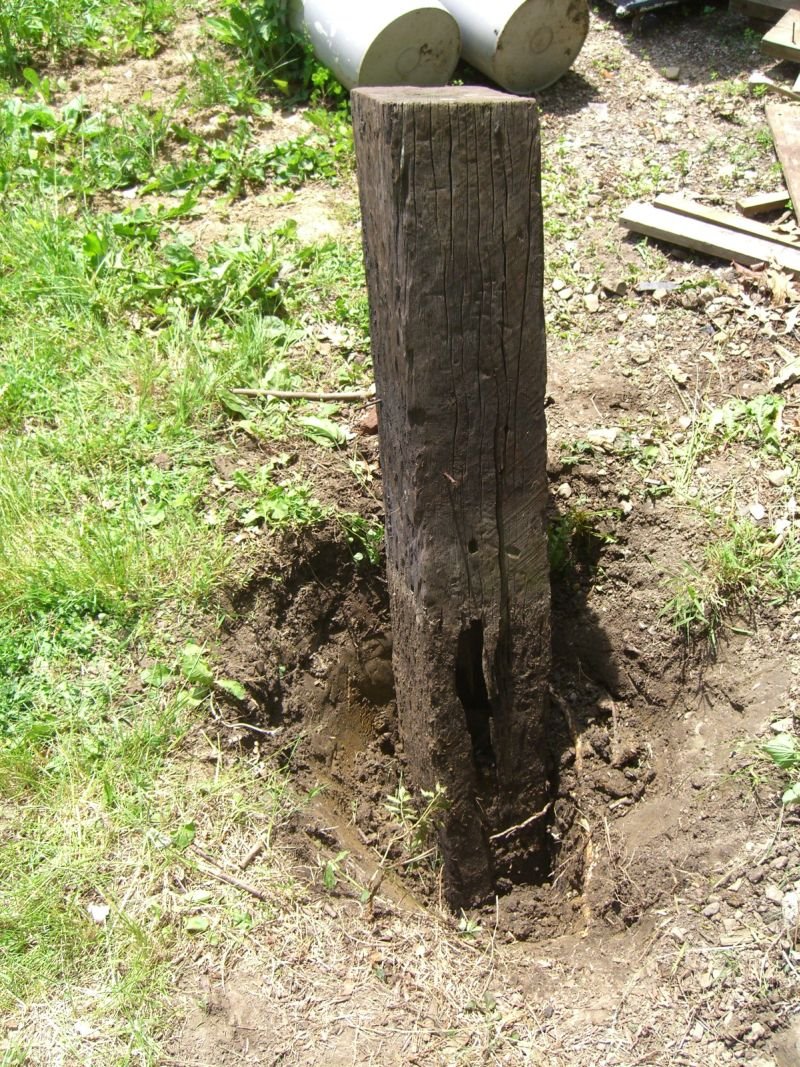
Pulling an old piling isn’t that difficult a process, just time and labor intensive. Dig, break up any concrete, pull any rocks right by the base, keep digging…
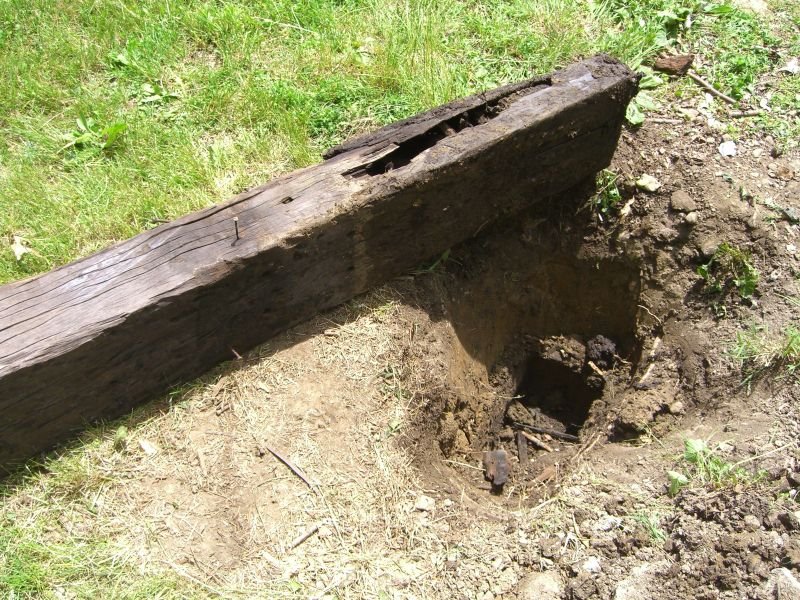
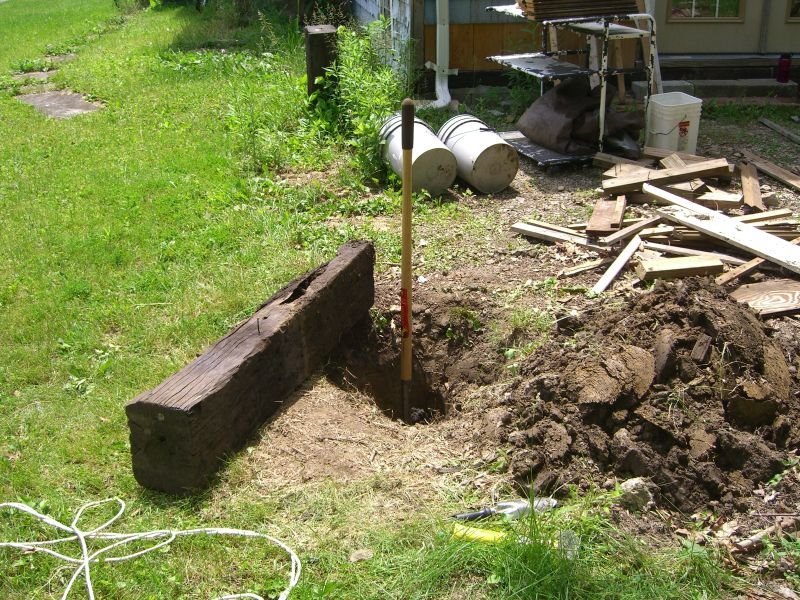 If they’re buried three feet deep these things’ll be pretty hard to pull straight up (although far from impossible – see the last pic in this series). I found the best way to remove them was to rock them back and forth (it also loosens some of the dirt at the base, although if you rock it too hard you’ll start compacting the dirt), digging out more of an oval to allow the piling to ‘fall’ further with each shove. Eventually you should be able to do one of two things – either get a 2×4 under the buried end and just lever the piling out:
 Or, if you really loosen all the dirt around the base enough, and there’s something to grab onto, you can lean the piling against the side of the hole and drag it up and out:
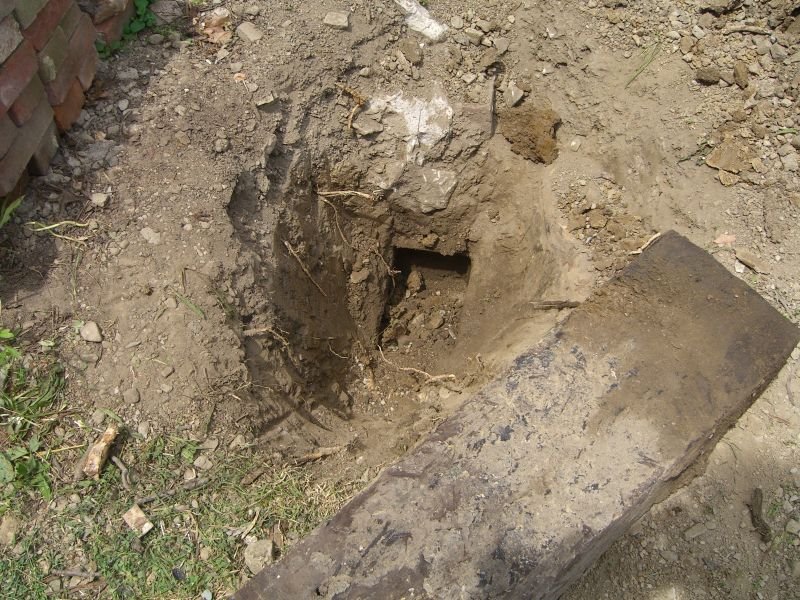 This third one was a real problem. Aside from the bricks I’d stacked right next to it before the winter that had to be moved, two sides of the piling had obstructions that made it very difficult to dig a full hole. On the right (not visible) are some old tree roots about as thick as your arm. On top is either an old cement/brick pour from who knows when, or some additional heavy fill put in when the piling was sunk. It just took a little longer to work around everything, but now it’s done. Hooray!
Oh, and fill the holes back in before you close up for the day. It’s always these little details that escape us after hours of manual labor.
Compost bin
Maybe I’ll catch up on some – what, two months? – missed posts at some point (treasure hunt, circus, now summer theatre festival all conspire to suck my time from updating this blog, if not also updating the house). Meanwhile, let’s go with what we know (and have pictures of). Today’s illustrated lesson: how to make a compost bin for $4.
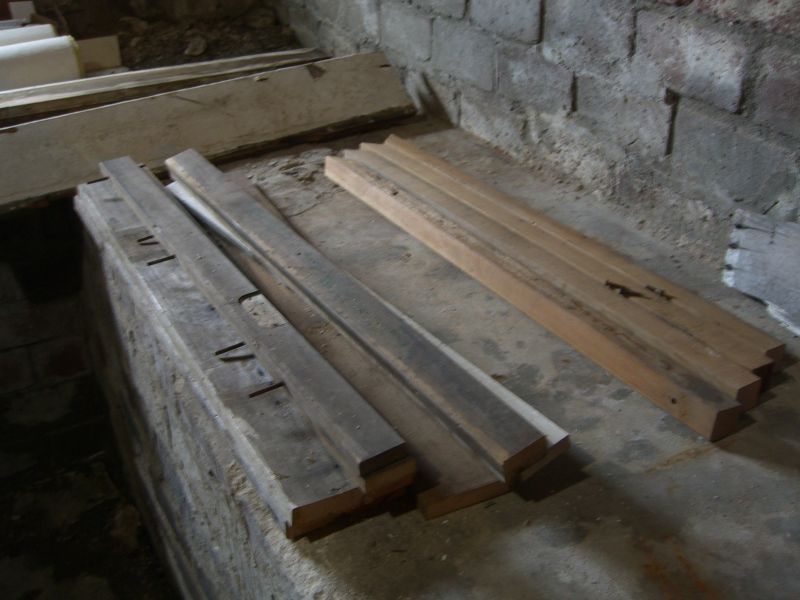
Start with scrap wood. I took some 1″-square posts – probably from an old wooden swingset – cut them down to 3′ with a 45-degree cut at one end so they became stakes. Miscellaneous scrap of a huge variety of widths cut to 3′ gave me the planking for the sides.
 Depending on the weight of the scrap wood you’ll probably want to assemble (or at least connect the sides to each other) closer to where you plan to place the bin. This next image shows three completed sides, leaving about a foot of each post at the bottom to be driven into the earth. This turned out to be unnecessary (and hard to do) so I wound up driving them about 6″ deep, and moving the top plank on each side to close the bottom. I think planning for 6″ of clearance at the bottom of each post should be fine.
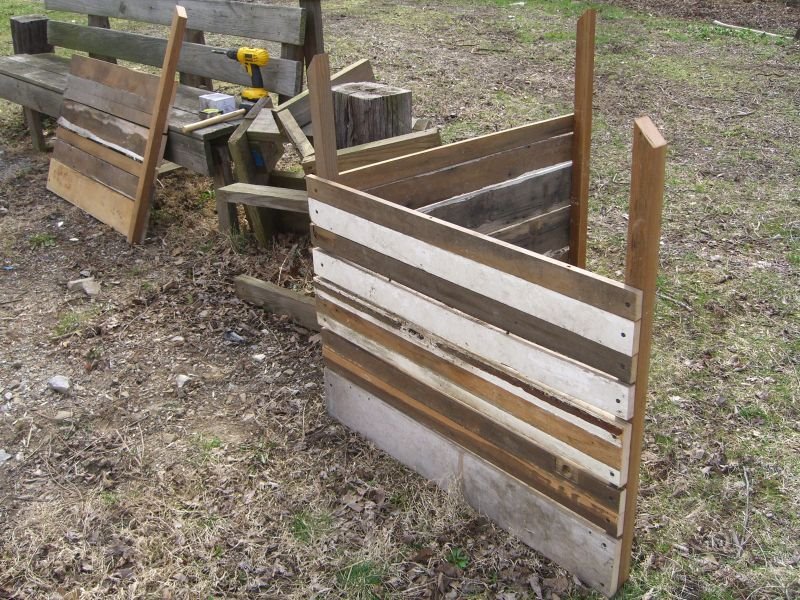 Locate the bin, pound into the ground with a mallet or hammer and woodblock. Here you can see the ‘swapped’ planking, leaving some space at the top of each stake – handy if I ever string or fit a cover over the top.
 As luck would have it, I stumble across what looks like part of a shipping crate in a junk pile – and it was the perfect width to serve as the bin’s gate. If you don’t have handy piles of pre-built salvage lying around your neighborhood, just remember that the gate you build out of scrap won’t be as wide as the other ‘walls’. Two hinges and a hook from the hardware store were the only materials costs on this project – about four bucks in all.

Back to it
Today:
– attached all supports for main shelf in shed
– moved scrap shelf from back room to shed
– hung ladder on shed wall
Tomorrow:
– basement workshop. Seriously.
Quick hits
Got started on the list of things to do that will let me do things on my big list. You’ll see. It’ll all come together soon…
Said list today included:
– cutting two 10′ 2x4s for use in the shed. Of course, these 2x4s were in the attic and I decided not to drag the circ saw an an extension cord up there…
– cut and installed ‘covers’ on two of the three attic ‘windows’ to cut down on the draft up there; it’ll be a little while before I can build the custom windows for those holes, so this is better than nothing
– took ye olde hammer outside to deal with this:
 Then spent a few hours helping Marion get more things shipped so he can leave town (again).
More tomorrow. You’ll see…
More small stuff
Raked about half the backyard.
More clearing in back room and living room.
Took a wire brush to the stand pipe cleanout, then gave it another dose of Kroil. Will alternate this with a blowtorch for the next couple of days and see if it gets us anywhere.
Mapped a few electrical circuits in the basement, including finally isolating the dining room light so I can install the switch and unit – and have a dining room again!
Also sorted through most of the papers that had piled up on the coffee table, which isn’t really house-related per se, but at least I now have a coffee table again. And now Sarah’s calling saying they’re at the Feve, so I think that’s it for today…
Quick update
I had to take half the door latch off the shed and move it over a quarter of an inch (took thirty seconds, just three screws). I think that it was a little tight to start with, and then the weather and the structure settling slightly was all it took so that the two parts would no longer smoothly fit together.
I was in the shed today, despite the rain, continuing to clear stuff from my back room. I’ve started building more things into the shed – just some crossbars to hang tools right now; soon enough a shelf or three to take advantage of all the space – so it won’t become cluttered like the rooms it is decluttering.
Finally, checked the sump pump today and found that the hose had shifted and blocked the float just enough that the pit wasn’t draining (it was actually overflowing onto the floor). Moved things around a little and it’s draining fine now, but I think this and the frozen hose the other day are signs I should finally go get some PVC pipe and properly build out the pump line.
Catching up…
Winding down with my temporary work, applied for a full-time job, and juggling a few other side projects means I’ve been doing a little less on the house and posting about that with even greater infrequency. Since the last post, I’ve pulled another 20’+ of old gas pipe out of the attic, moved a number of items to the shed (despite the near freezing temperatures and snow flurries that have descended upon town) meaning I once again have a foyer and am close to having a back room, and have been dealing on and off with the pipe clog. Using a borrowed drain snake I was able to reach the clog, but it seems to be quite big and solid – hair, most likely. Repeated jabs with the augur didn’t get me anywhere. I was set to try some lye, but the stuff I had had truned into a rock and you’re not supposed to chip it out and use it. Having had no luck opening the stand pipe cover either, I think I’ll grab some washing soda, and some nasty chemical drain cleaner, when I’m at the store Sunday.
More updates as they are warranted.
Not much
Quick update so I don’t let this lapse too long.
- Shed’s due Monday so I’ve been clearing more stuff in the yard – raking leaves, putting all the scrap metal in one pile so I can haul it to Blue Star at some point, etc, etc.
- Borrowed one of Joe’s aluminum ladders today so I could clear the gutters (stupid fall, stupid leaves).
- There’s been a small drip at a corner by the living room and I finally got a look at that – looks like the metal separated slightly at a joint – tough to tell if it’s bent, rusted, punctured, etc. I’ve tried an experiment that is unlikely to hold up that long but worth trying – plumber’s putty. Since it doesn’t really adhere it’ll probably pull off at some point. I also wonder if it’ll stand up to the temperature fluctuations outside. Eh, in the meantime it should keep that drip from happening at the next rainstorm.
There will also be a post soon on how I now have daylight on my basement stairs, but I want to use my new glass cutter first to finish that project completely. It’ll all make sense when you see the pictures and I’m not typing this at 12:30am.
And also today…
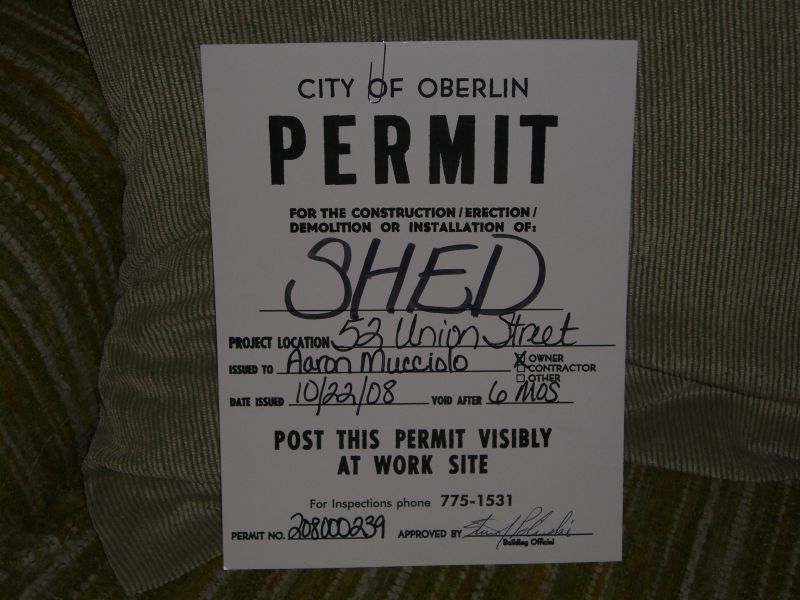
Posted by aaron in laundry room, shed on 22 October 2008
Put up a small shelf in the laundry room, and picked up the permit for the shed. Hey look, I’m legal: