Up and at ’em
Posted by aaron in driveway, landscaping, outside, painting on 29 June 2011
This morning, accomplished a few things, which is good because my afternoons are all Hamlet and my evenings are becoming time for other things. Plus no one likes hammering in their neighborhood at 7pm.
- More leveling and gravelling – almost done, maybe, I think, perhaps
- Nailed part of one wall of shingles, almost ready to paint.
- Transplanted another tree from the edge of the new parking spaces to replace the old dying walnut in the backyard. We’ll see if I didn’t kill this one like I did the last. Note: When digging up a seedling, always dig wider than you’d think, then deeper than you’d think, to avoid the taproot.
Today…
Did some scraping on the west side of house to prep for nailing and maybe painting tomorrow AM.
Gravelgravelgravelgravel
That is all.
More stuff
Posted by aaron in outside, tools and materials on 27 June 2011
A gravel expansion of angled parking spaces next to my still technically gravel driveway continued apace today. Details and pictures soon, when it’s complete. So maybe not so soon, really.
And also today, two revelations about mulberries:
1) They are delicious. I knew they were edible, and had even started looking up things one can make with them online, but hadn’t actually tried real nice ripe ones until today whilst wandering around the yard talking on the phone with an old friend.
2) They stain things. I knew they stained my hands and the tarps on which they’ve fallen over the last few years, but I just realized that maybe they could also stain wood. This could add an interesting, very purple, twist on projects in the future.
Related – noticed that the black walnut by the driveway is bearing fruit this year, so homemade stain plans are definitely back on the agenda for fall.
Stuff happened…
Posted by aaron in Uncategorized on 20 June 2011
But I was either in Hamlet rehearsals or sick over the weekend, and thus wasn’t really a part of them.
Work resumes on the house later today. I think.
It continues to be the little things…
- Shopped for flanges for this really clever bookcase thing I’m building. No really, it’s going to be awesome. Someday. Particularly if I can find the pipe fittings I want ideally a) with a patina and b) for not $10-20 apiece. Someone just suggested the local Habitat ReStore which I’ll need to look at soon.
- Moved things about in the shed. Again. I really should have built a garage. Let this be a lesson to all new homeowners, especially those who like to build things like I do. You’re going to need space for the tools and supplies. More space than you think.
- Measured the doors I rescued from a house that was slated for demolition to see if I can swap any in for my upstairs bedroom doors. The upstairs doors need restoration attention, which they probably won’t get for a while, so meanwhile I think giving them temporary replacements (and similarly old replacements at that) is a good idea.
Back to the small stuff
In an effort to keep myself blogging, but also to demonstrate to anyone reading this (Bueller?) how it’s a lot of little things that eventually get you a really nice looking old house, I’m going to try and post, often sans pictures, what I’ve done on the house each day, even if that’s just prep or minor work.
Today –
- replaced several shingles (there’s a post in itself…)
- prepped a bunch more for painting
- marked off the beams for an all-reclaimed-materials bookcase
- got the drill press running and did a test drilling for said bookcase
- trimmed off some old shingles so they can be reused
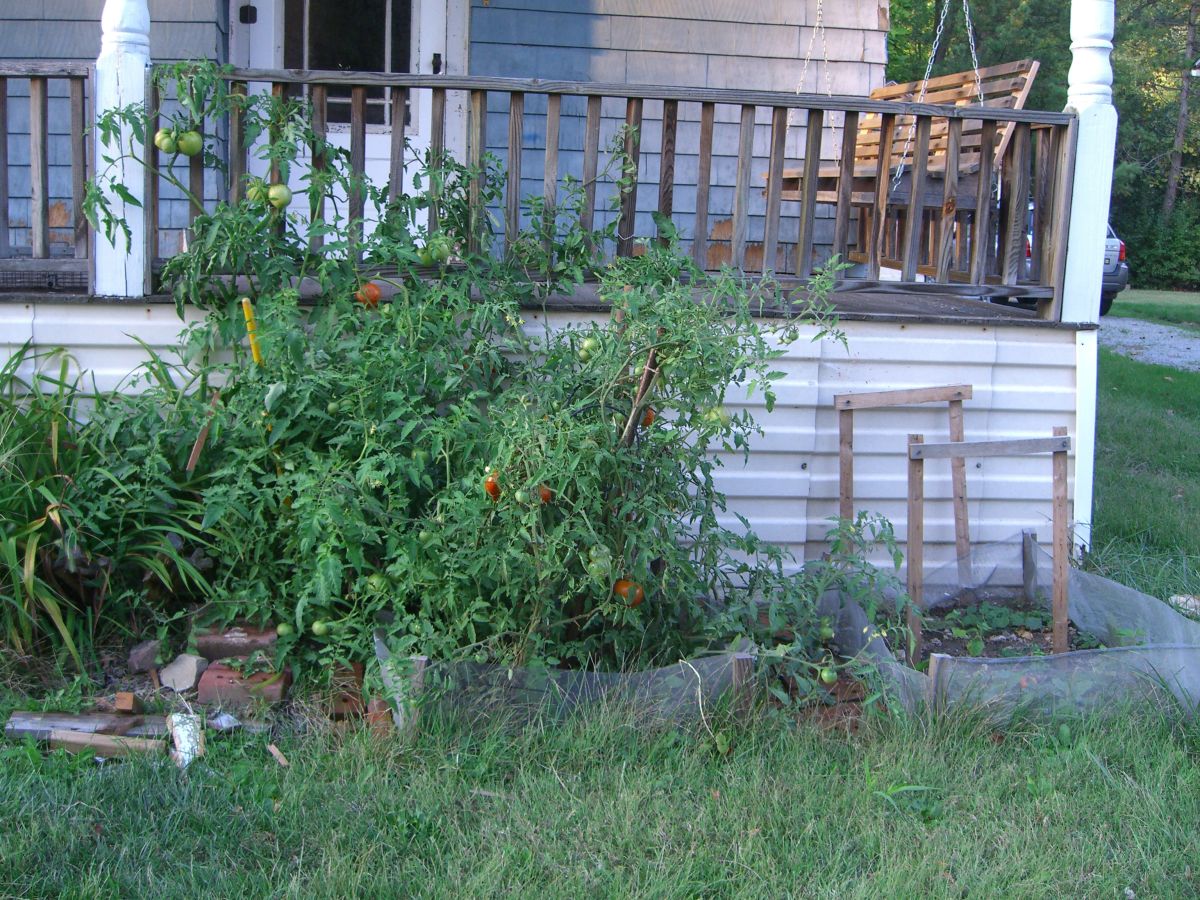
Rabbit-proof fence?
Another old project which I am only now posting. With plans for some garden space (in place of lawn) came the realization that there are rabbits bounding about my town much of the year. Some fencing was in order.
First, to prep the space… I pulled sod in a roughly 8′ x 4′ rectangle next to the existing flower beds, and I think I came across a footer or something connected with the old old old porch stairs that likely came off the front under the peaked roof.
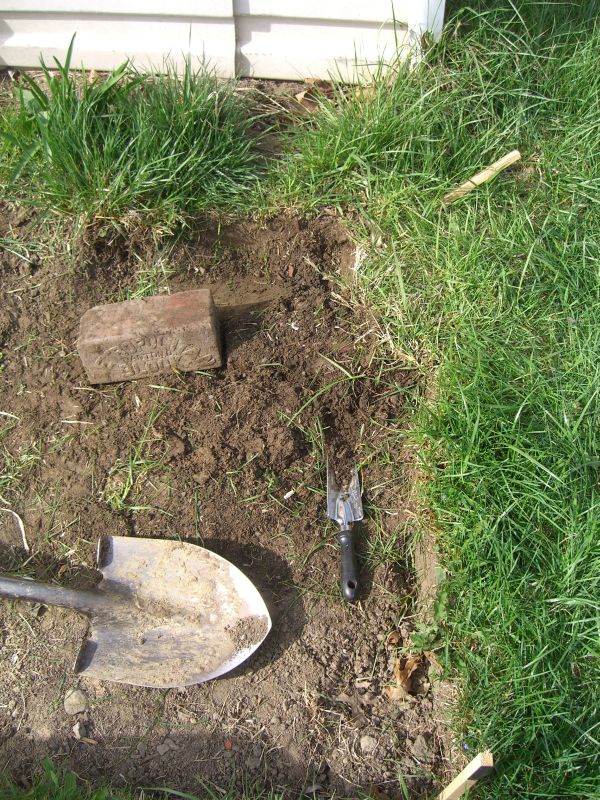

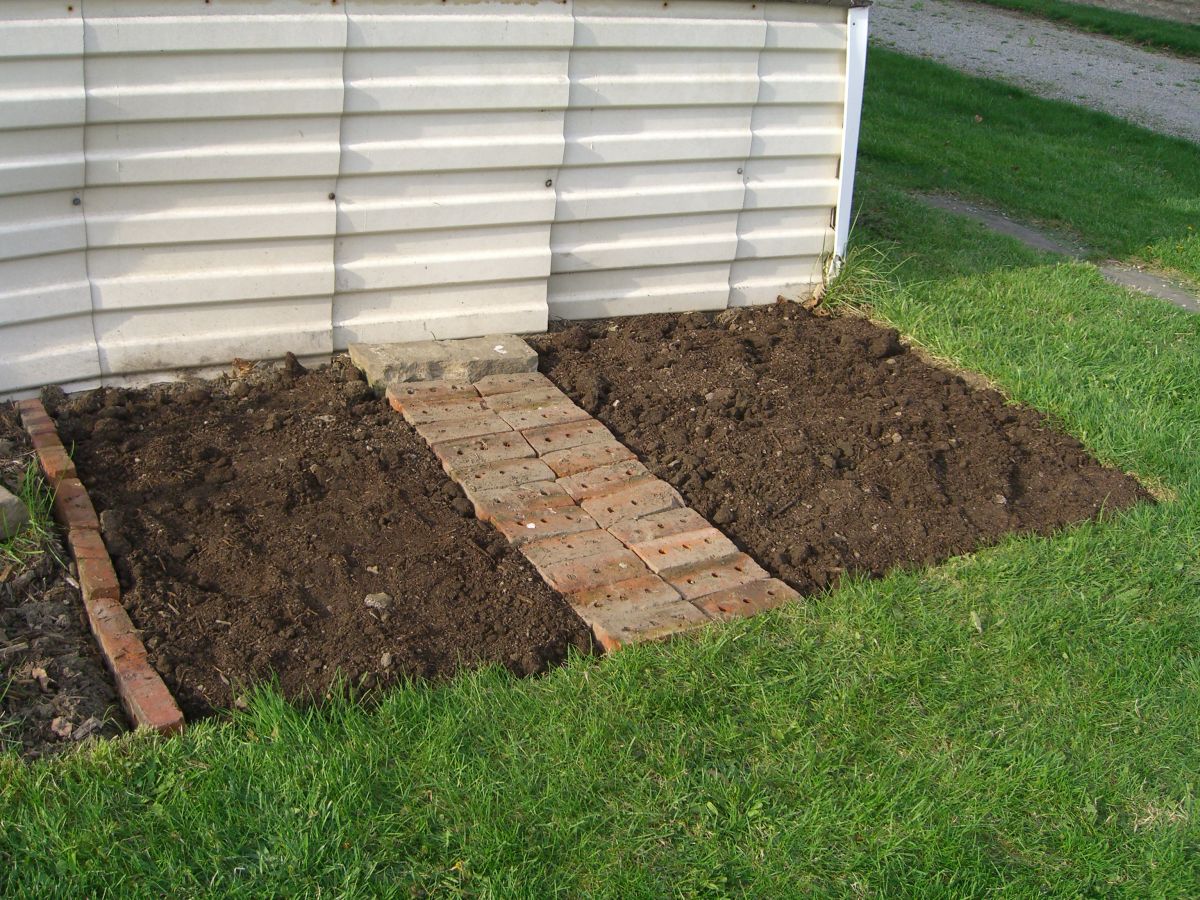
With the space cleared and major rocks and roots removed, I laid a ‘path’ using salvaged bricks so I could access both ‘plots’ easily.
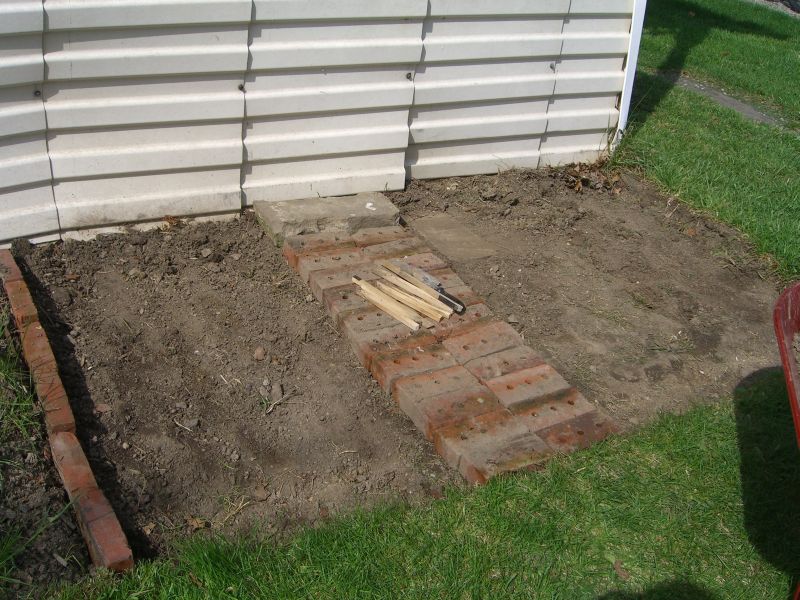
Fill in with several inches of topsoil…
And now for the fences. These held up fine in the ensuing winter, but they were definitely a temporary solution – although a good way to use existing materials, I think. I started by pulling the screen – some fiberglass/nylon, some maybe aluminum – from the frames of old storm windows I hadn’t yet dragged to the scrap yard.

Once again, my 1″x1″ poles were turned into stakes with a quick miter. I then cut the screen maybe 5 inches wide and attached the runs to stakes with ye olde staple gun.
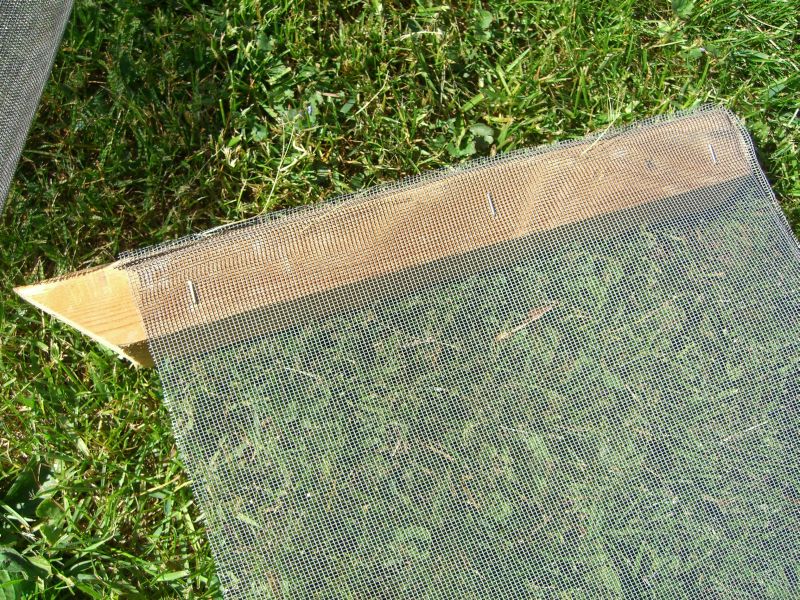
As with the raised beds out back I found it easiest to attach no more than two walls at a time, and then complete the sides after the first walls are in the ground. You may also want to carve some trenches along where the screens will run first (you want them to be even a little bit underground so gaps don’t open up between earth and barrier) to make it easier for yourself as you lay in the stakes, the screens, and then refill with some dirt.

And here’s what you get when you drop some plants in your now rabbit-proof plots:

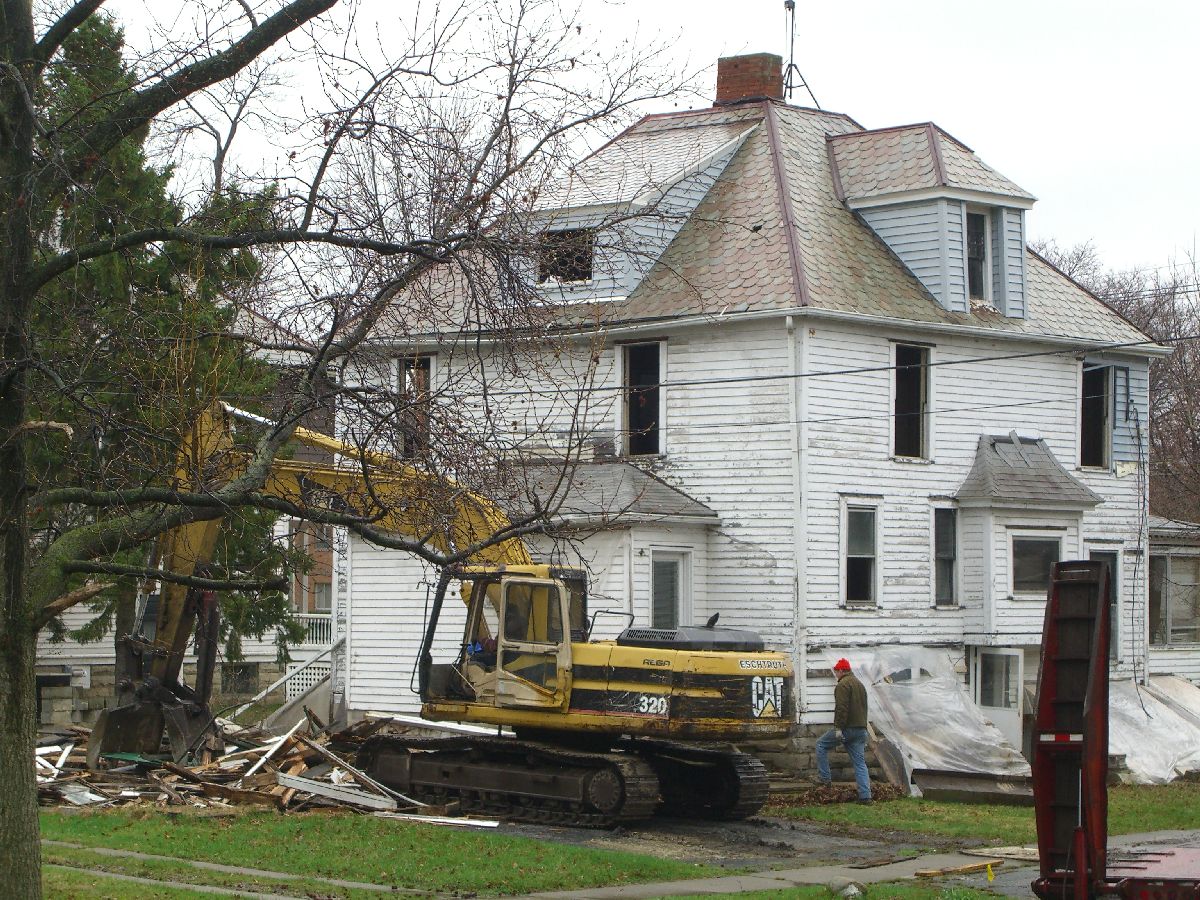
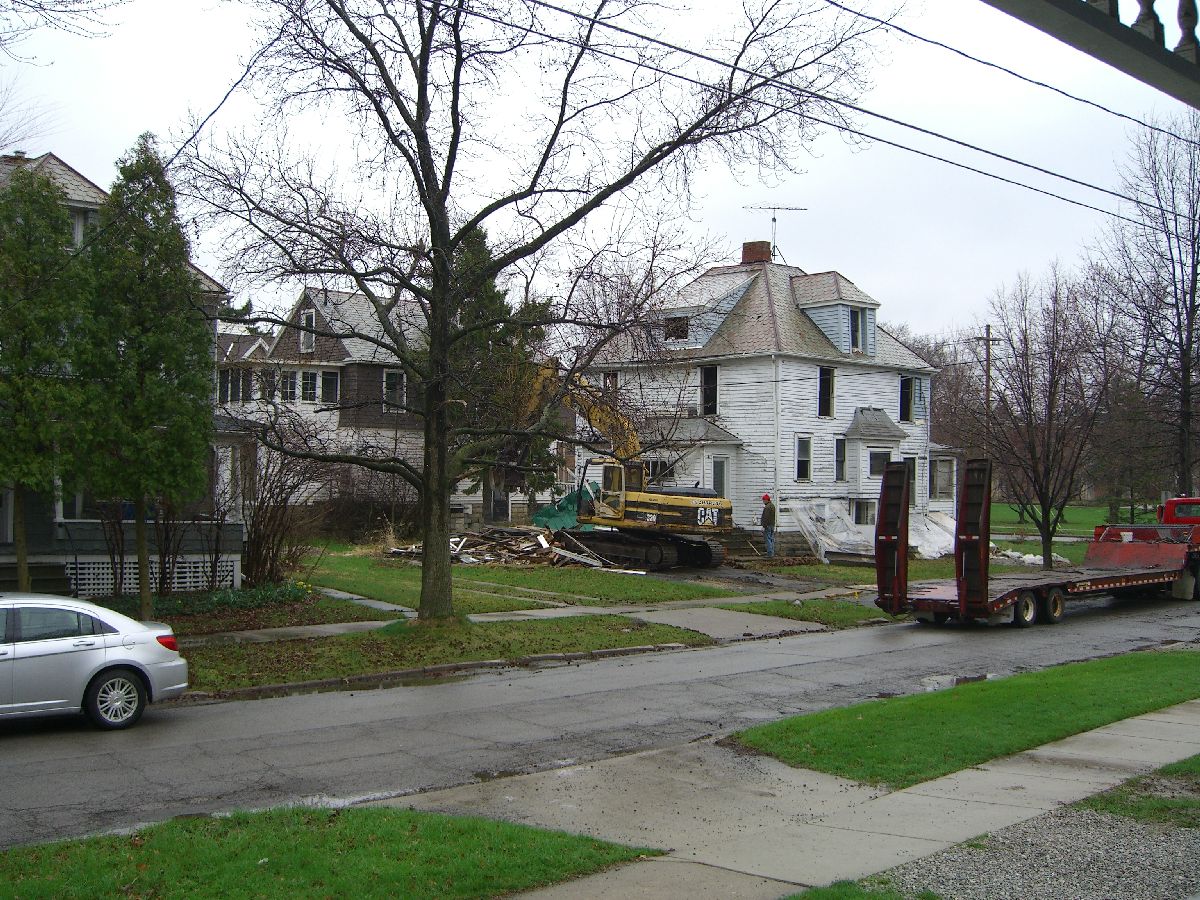
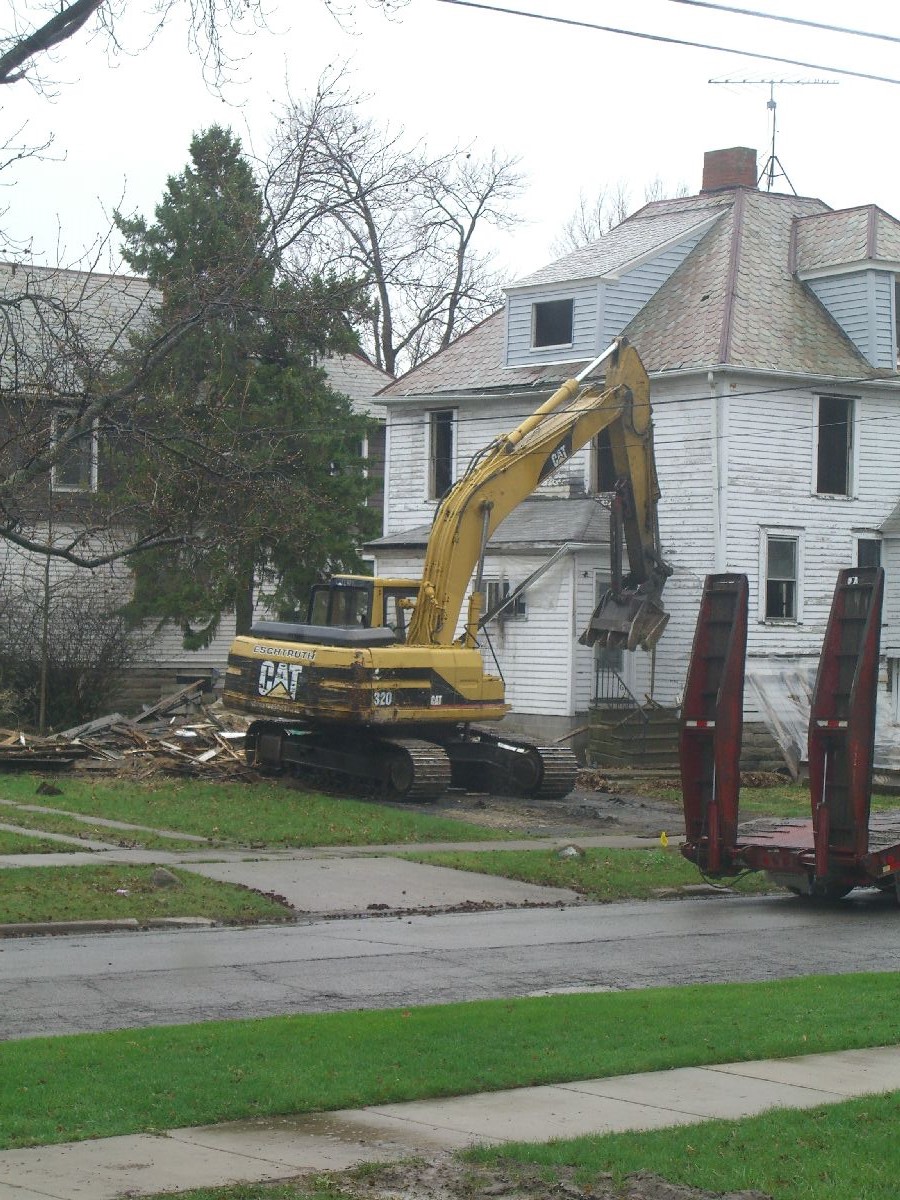
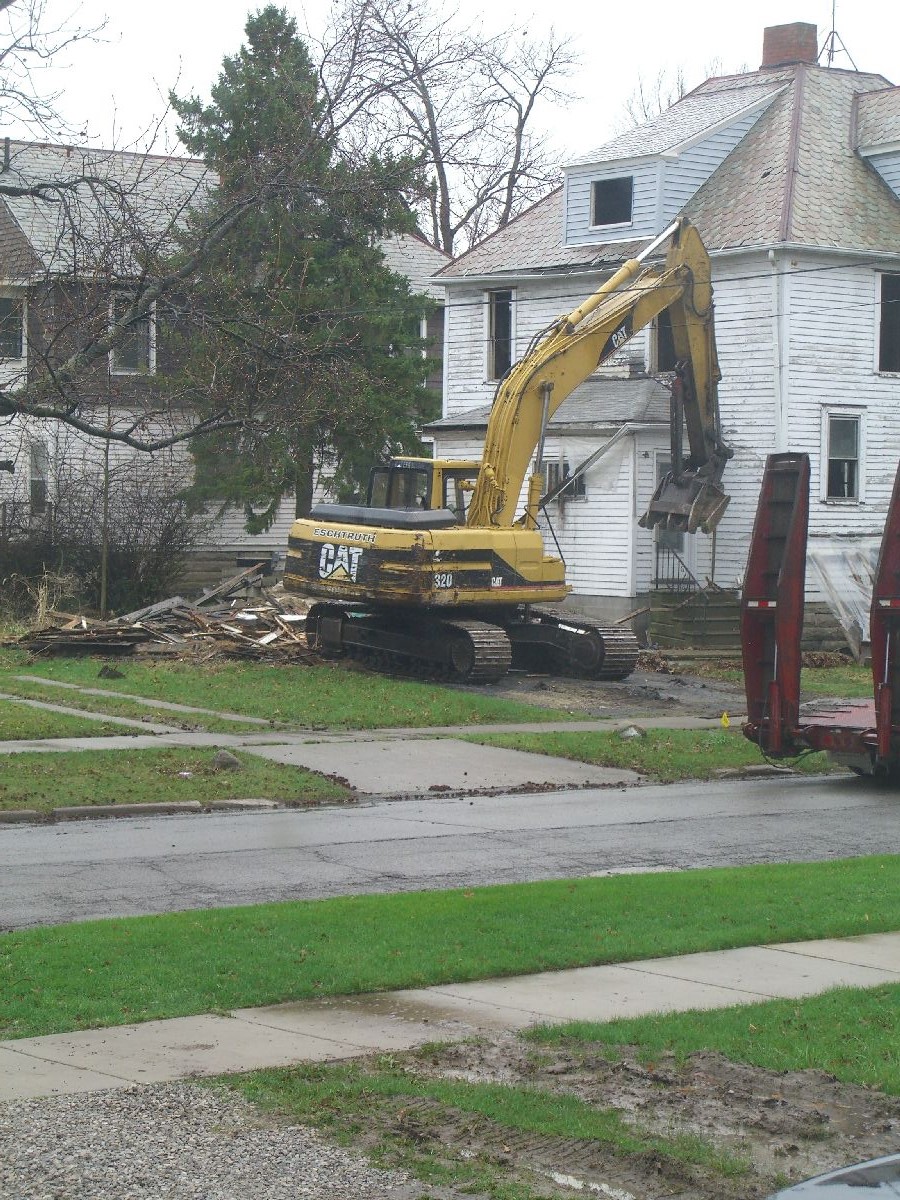
Bringing down the house
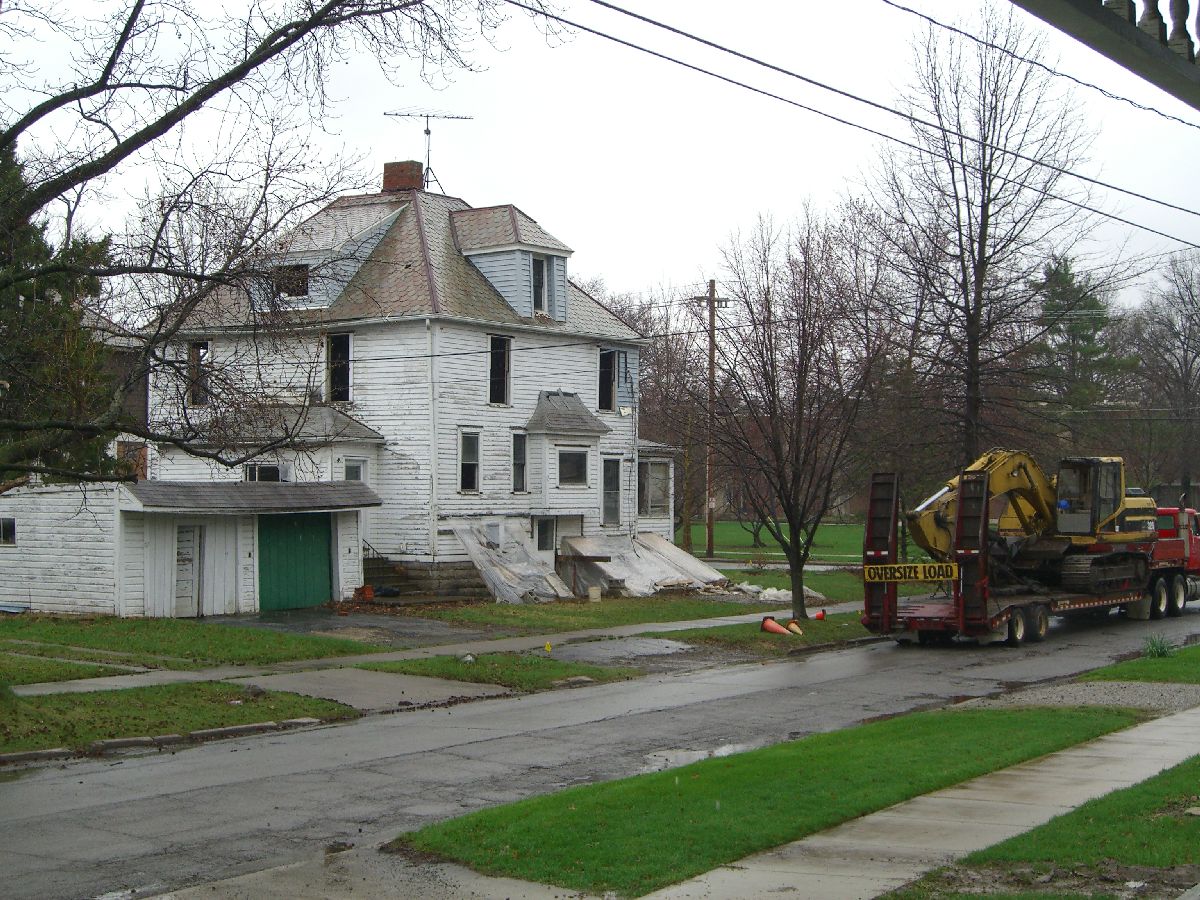
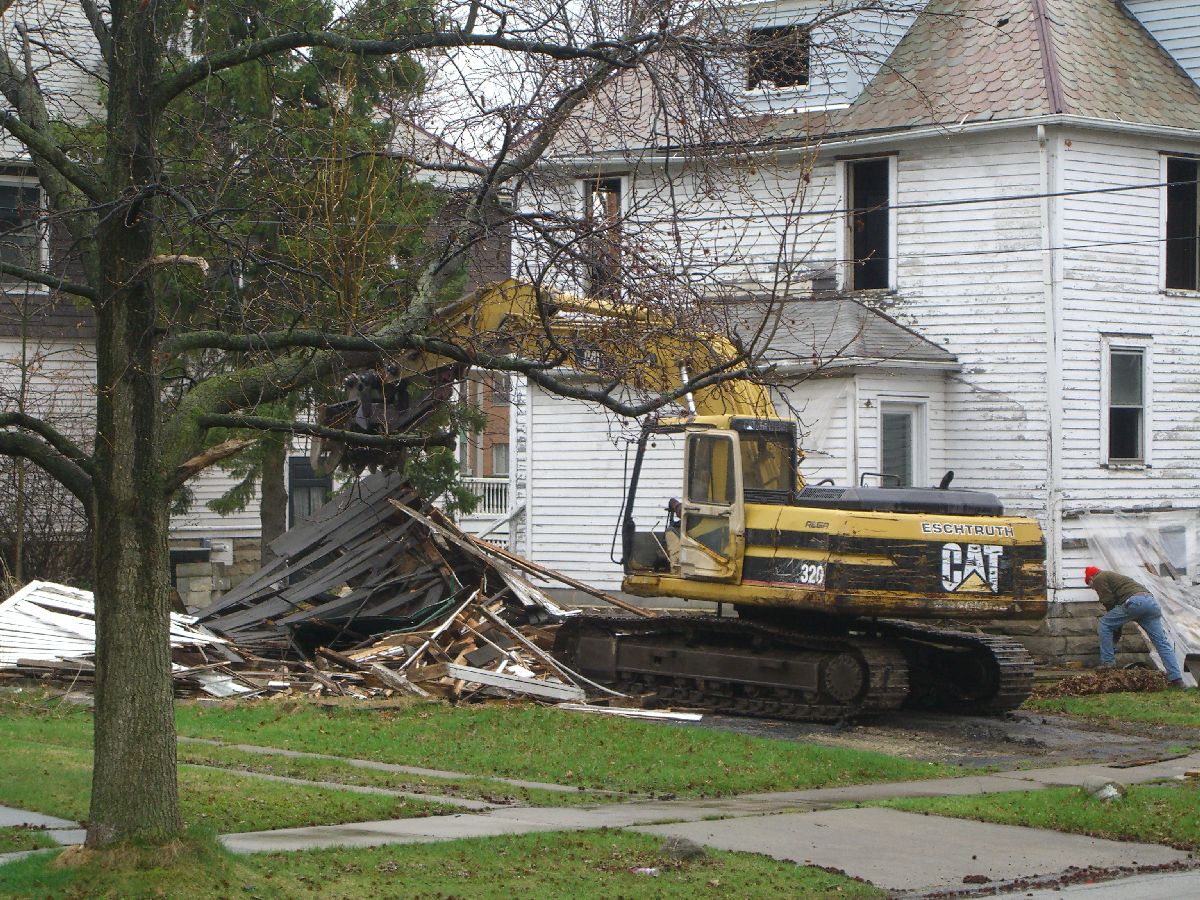
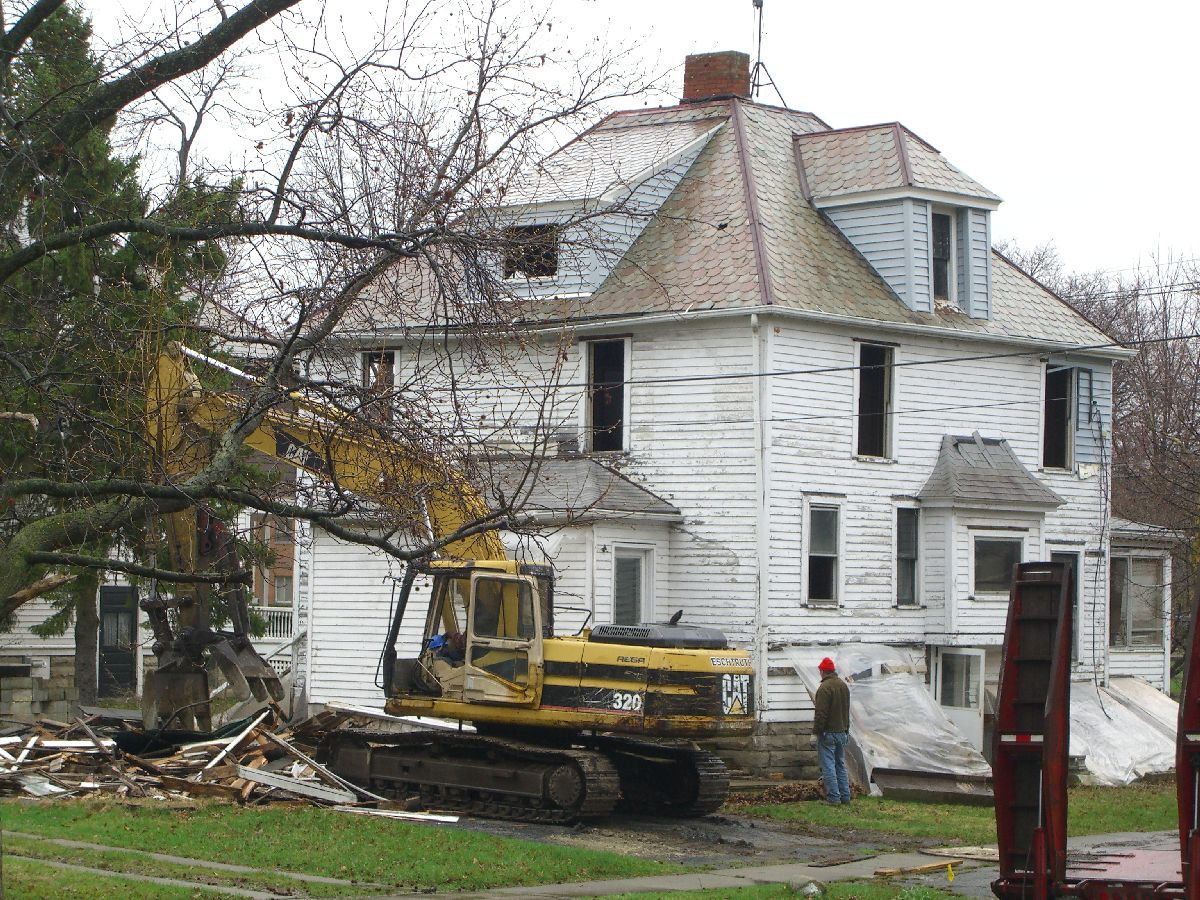
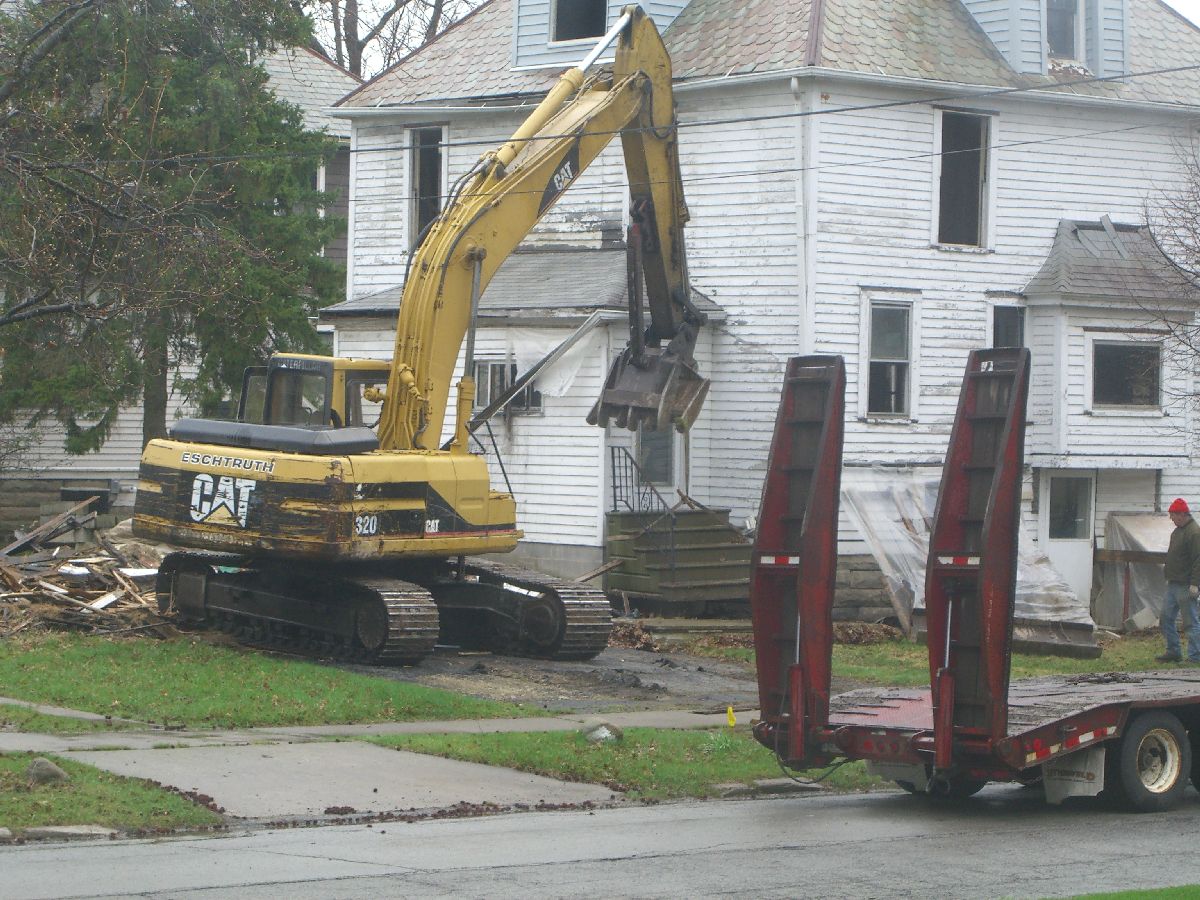
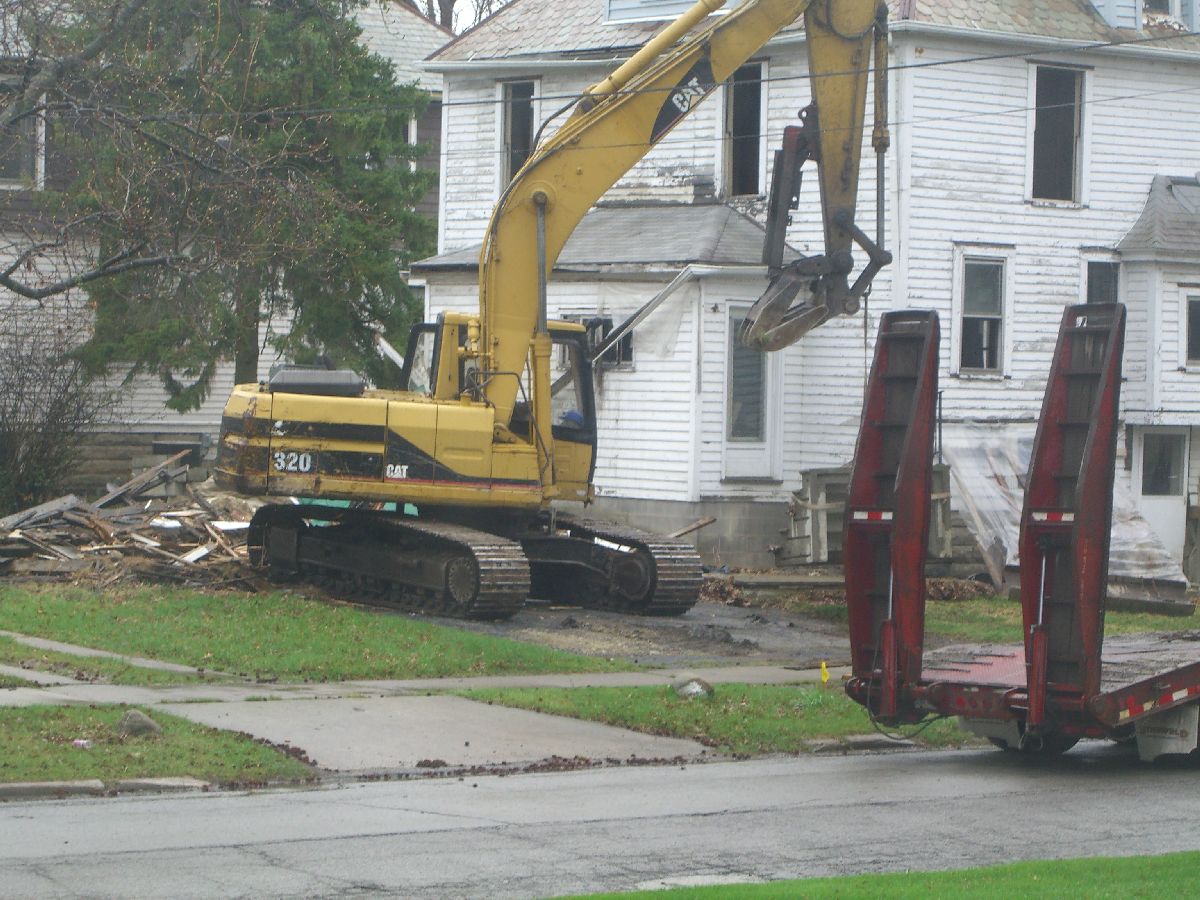
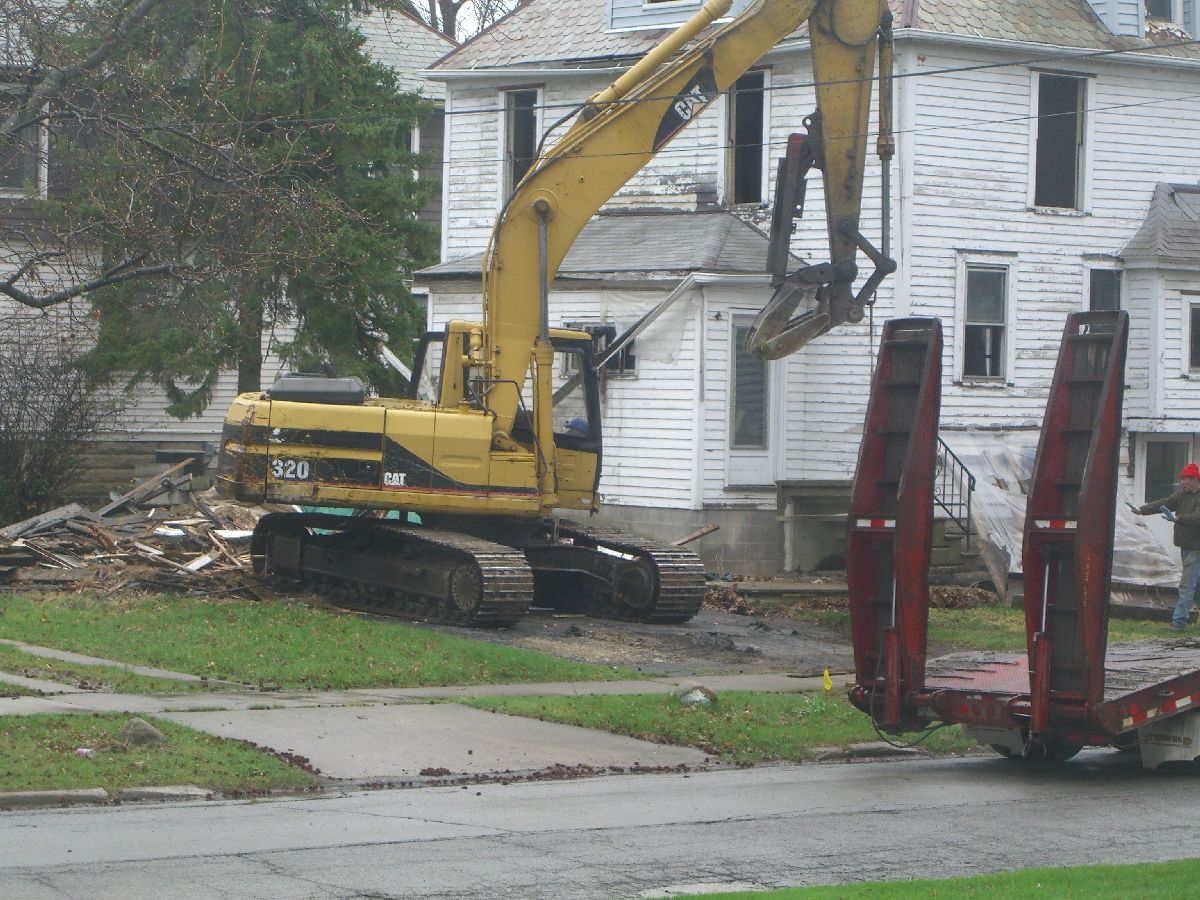
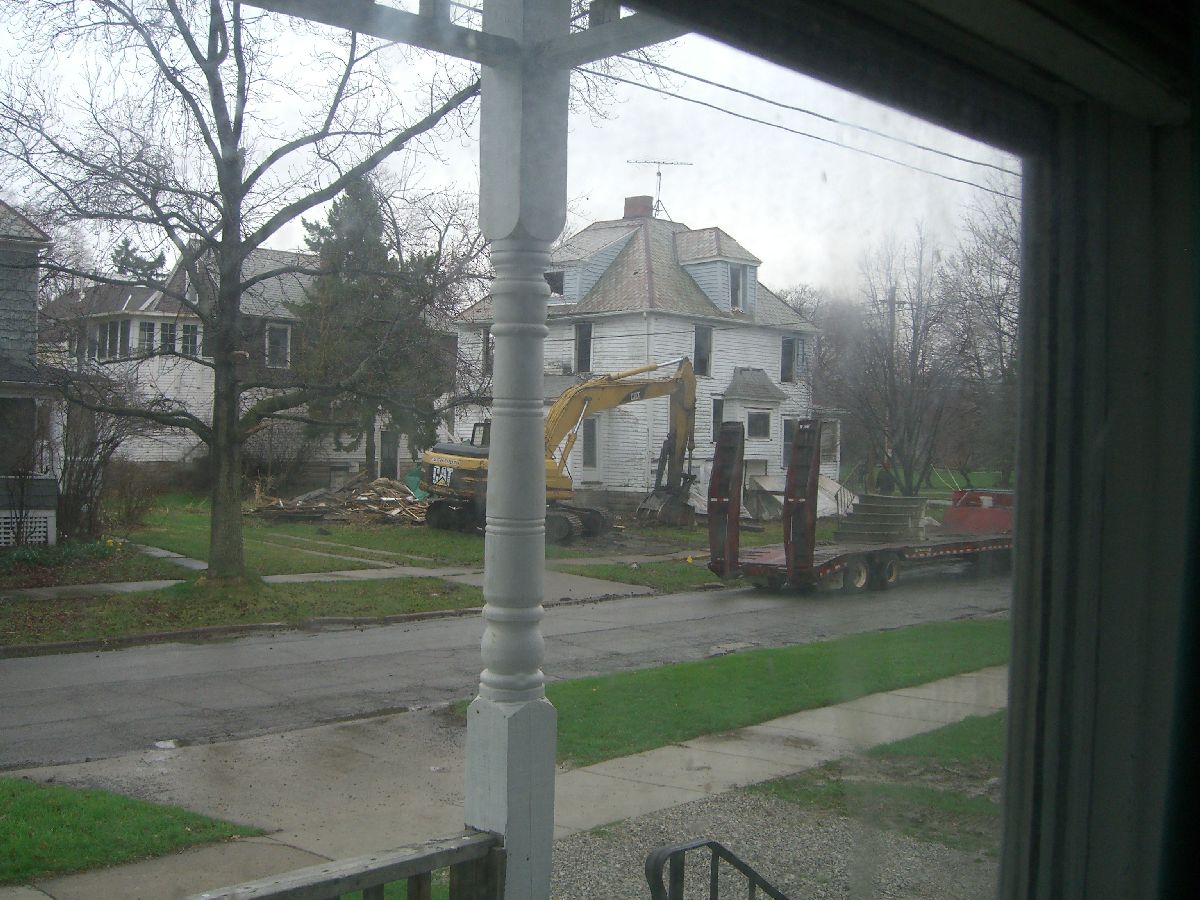
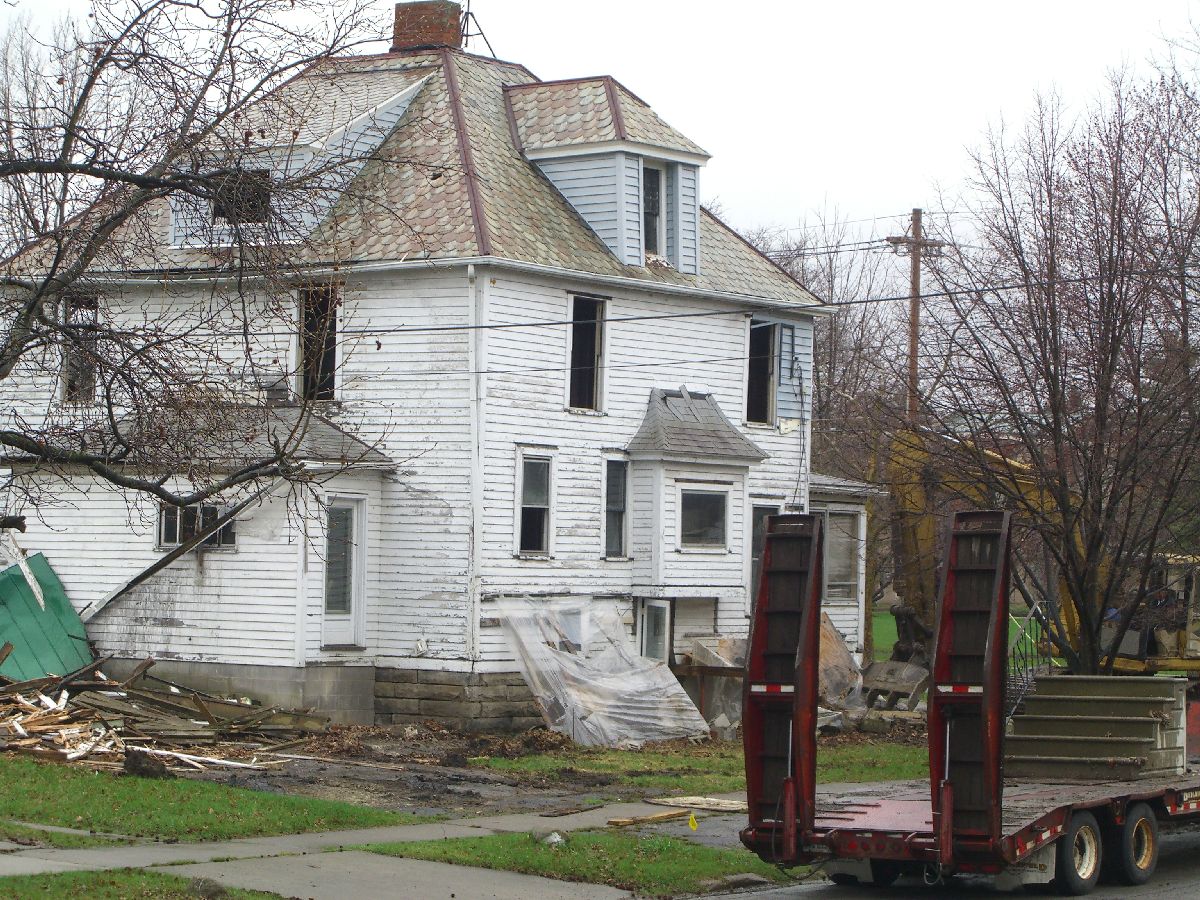
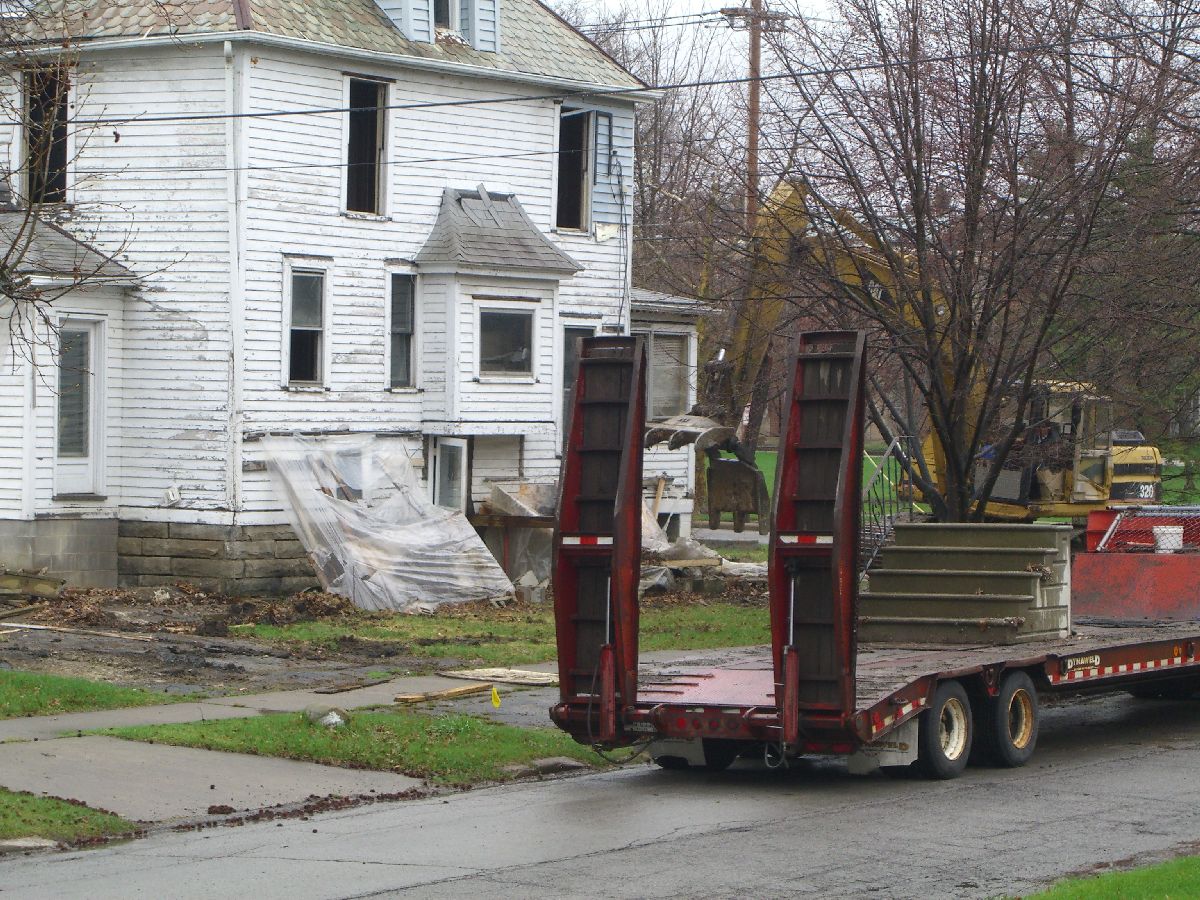
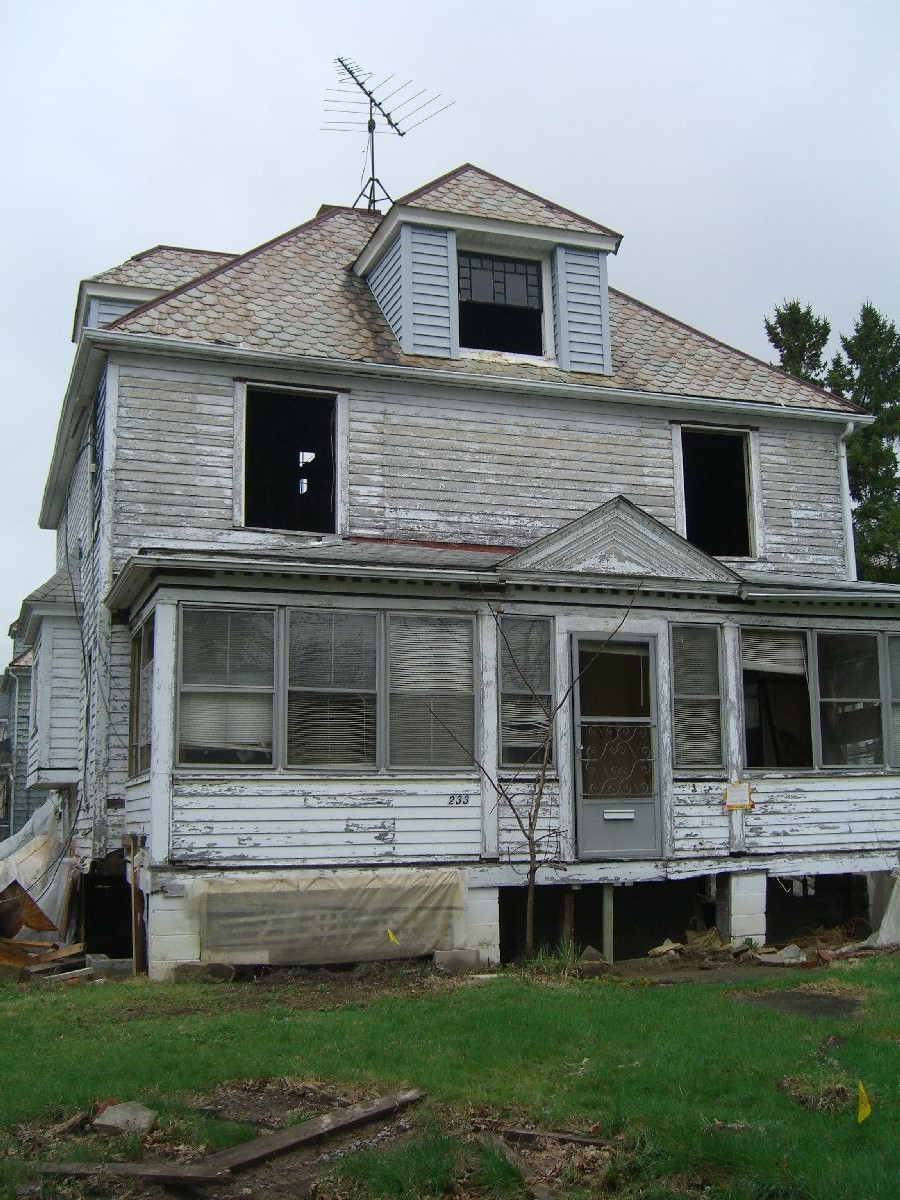
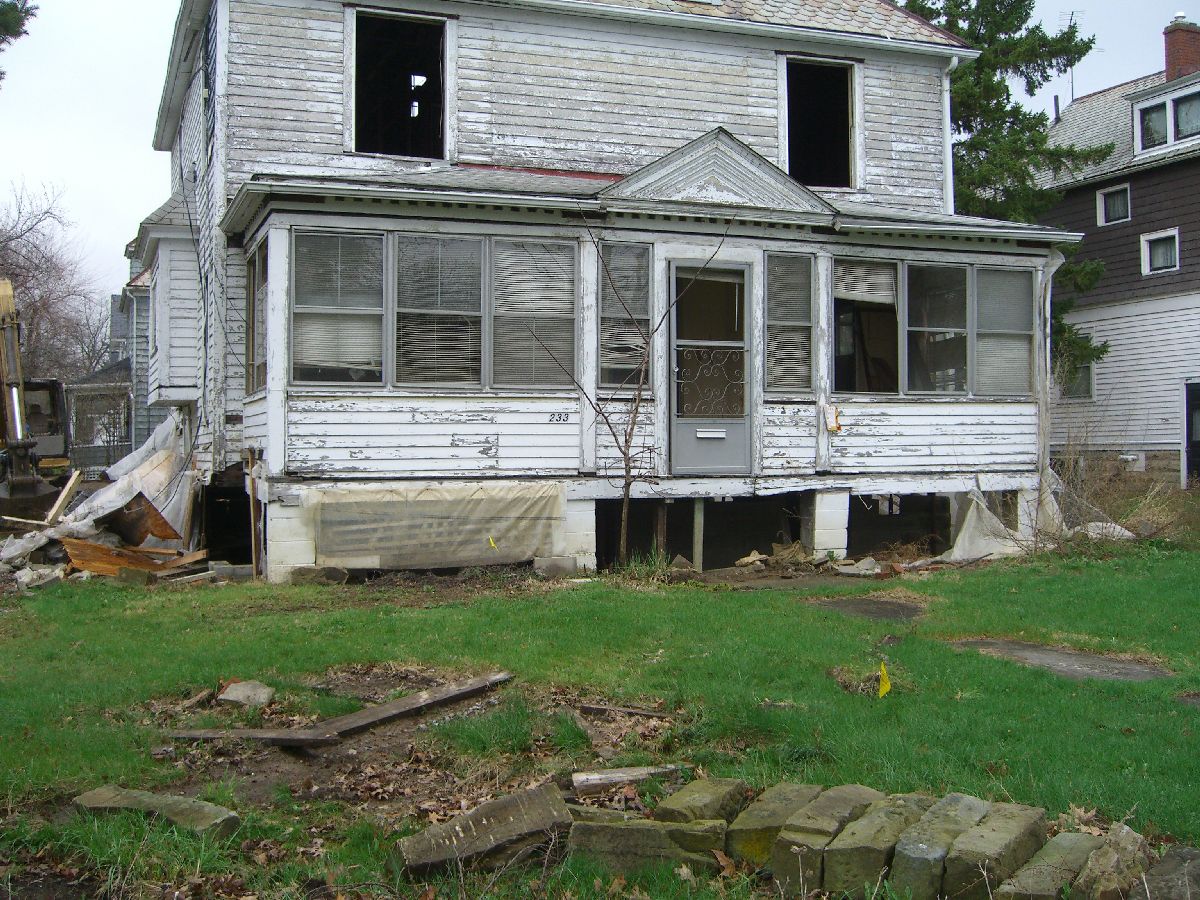
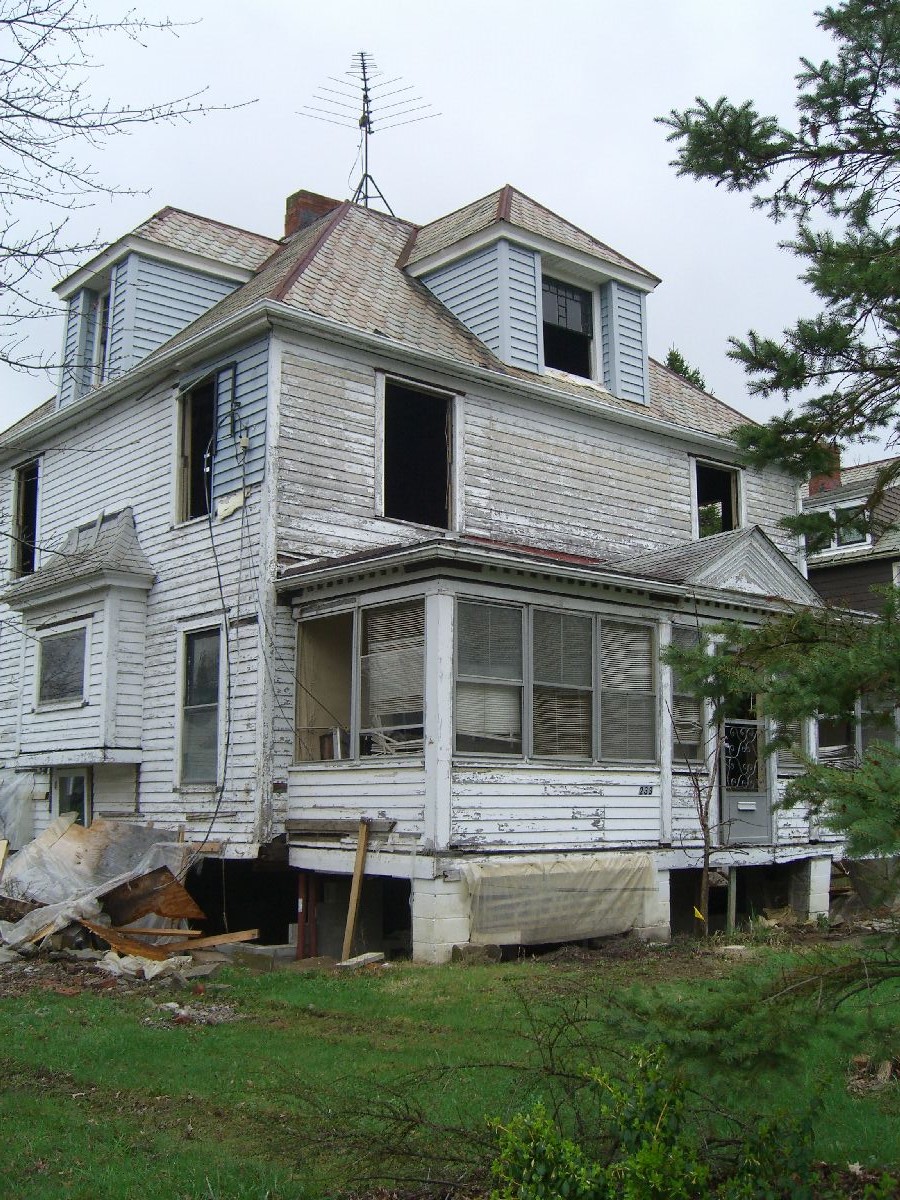
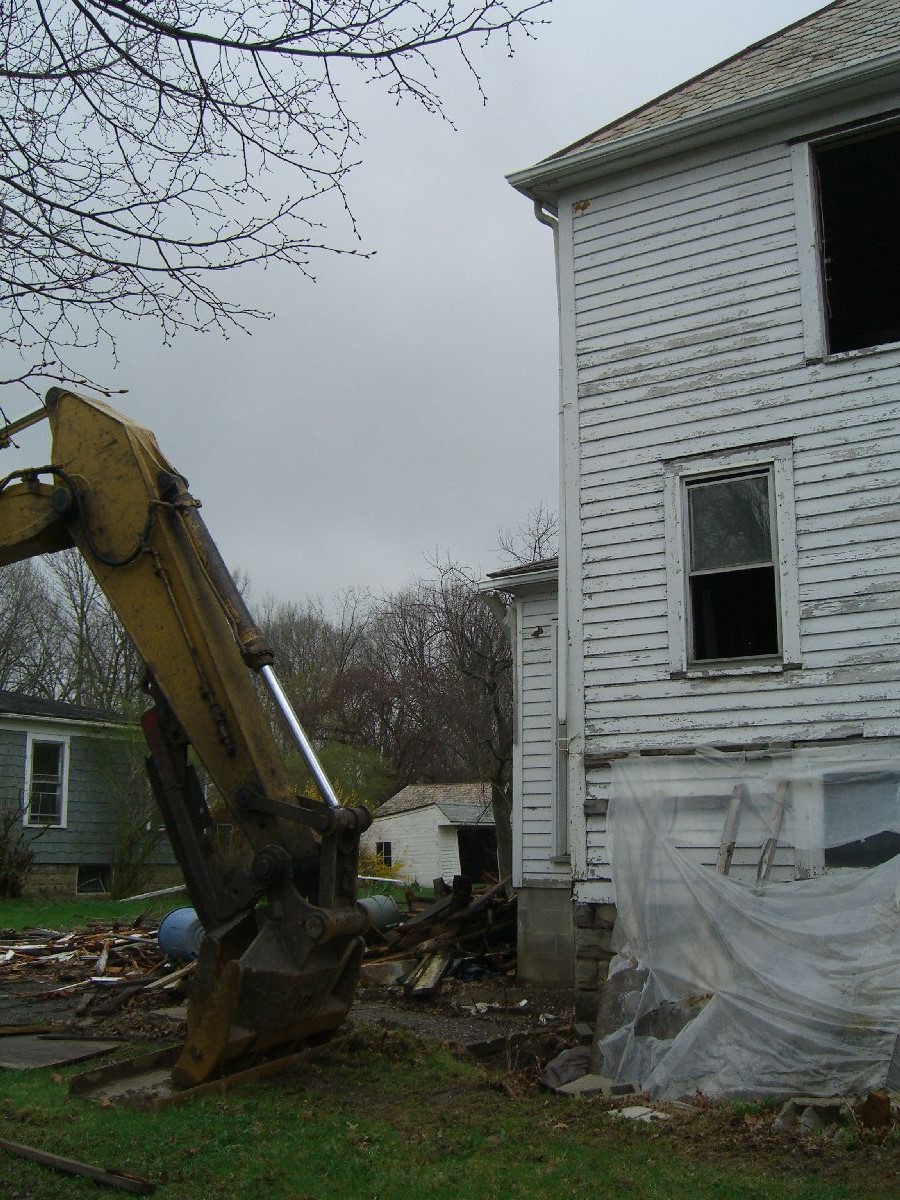
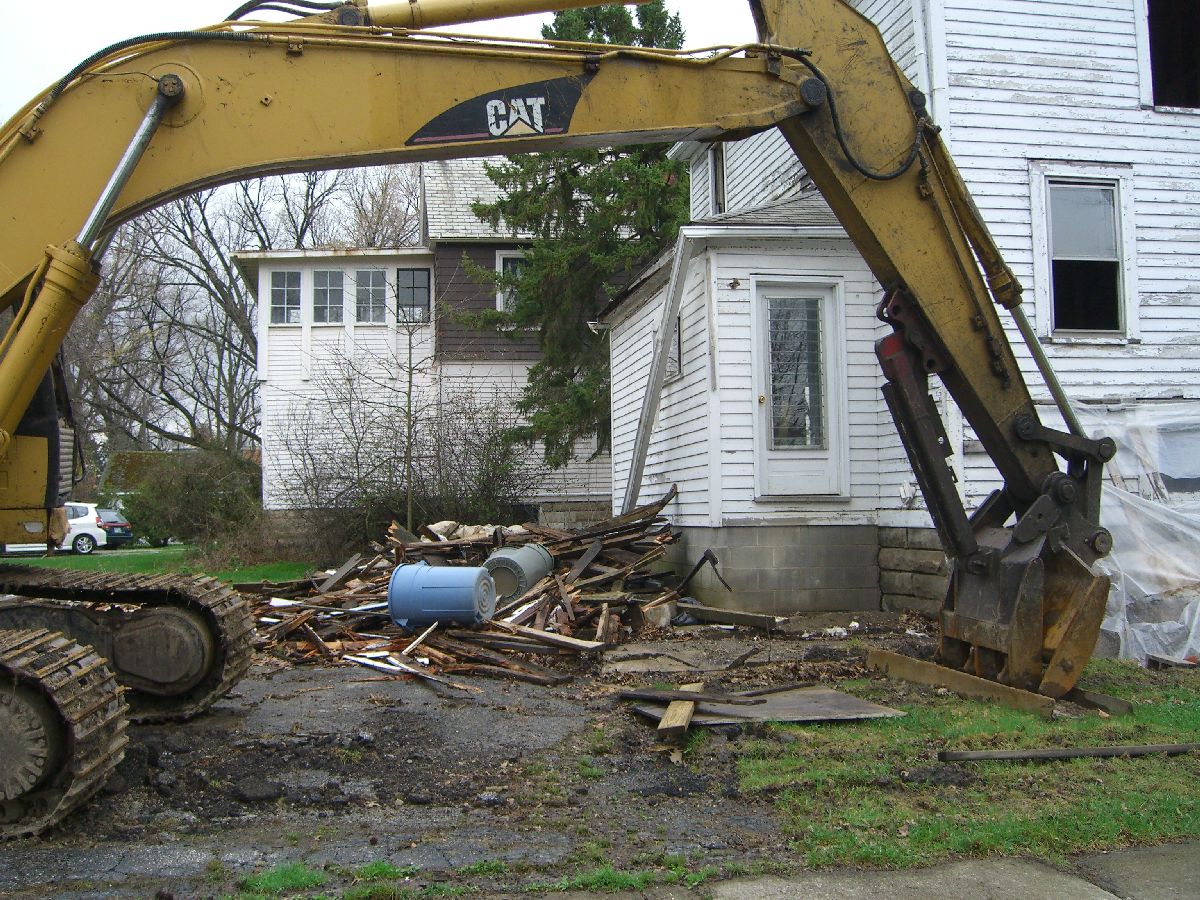
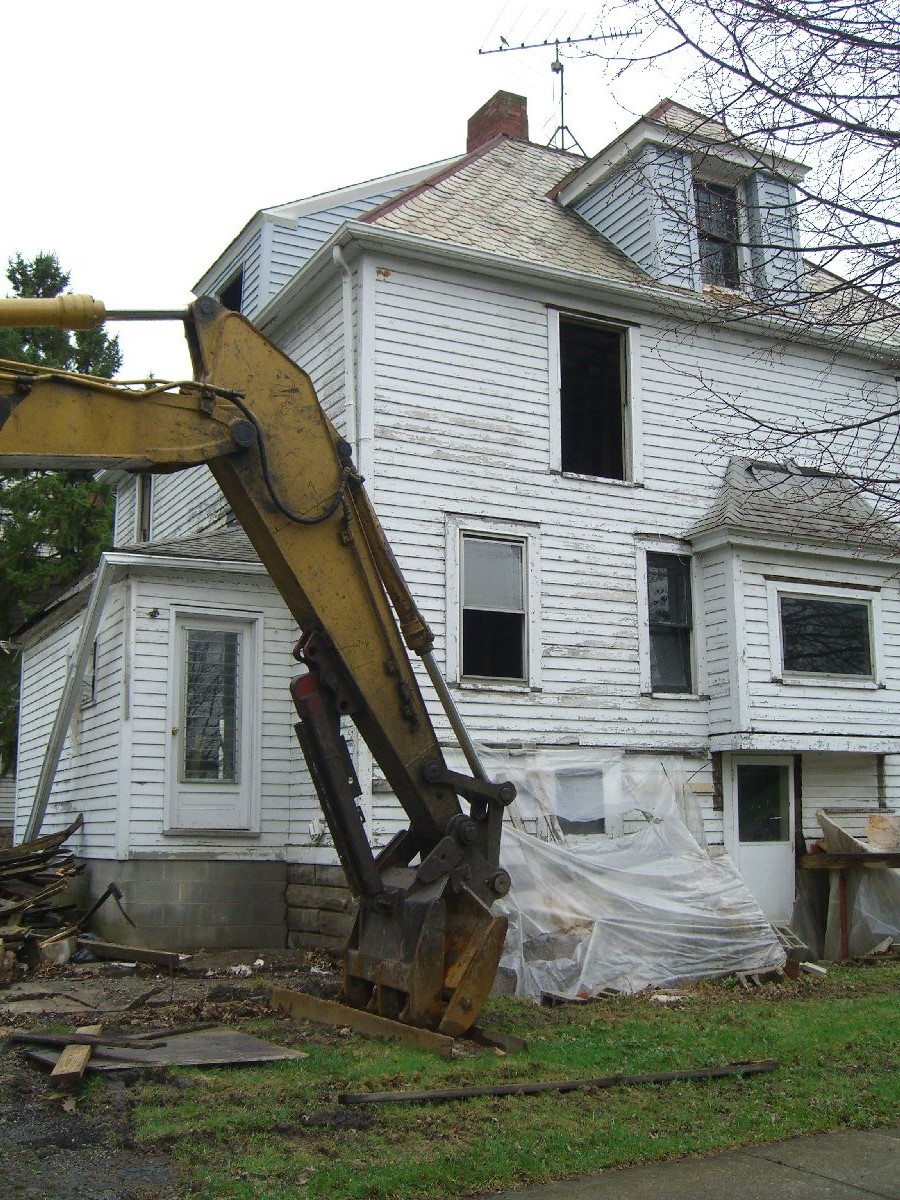
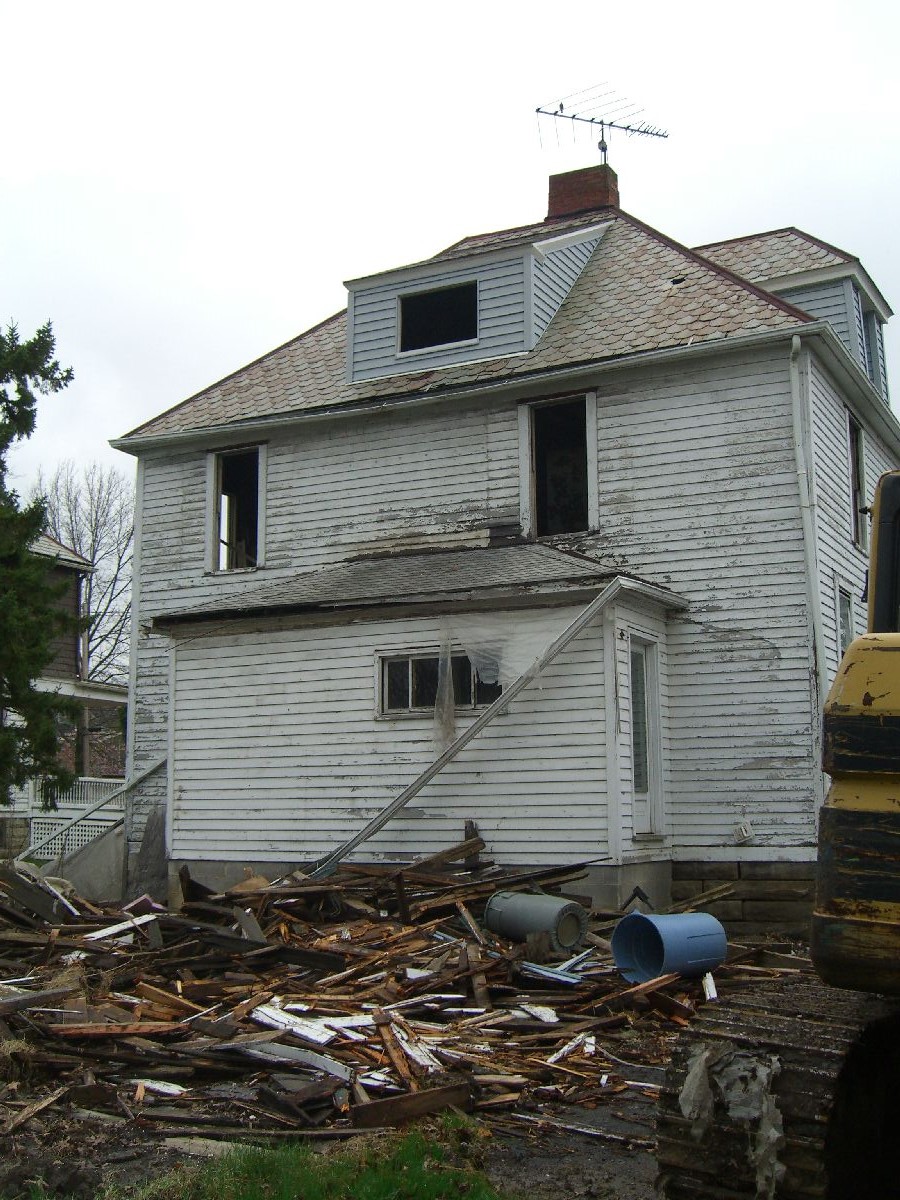
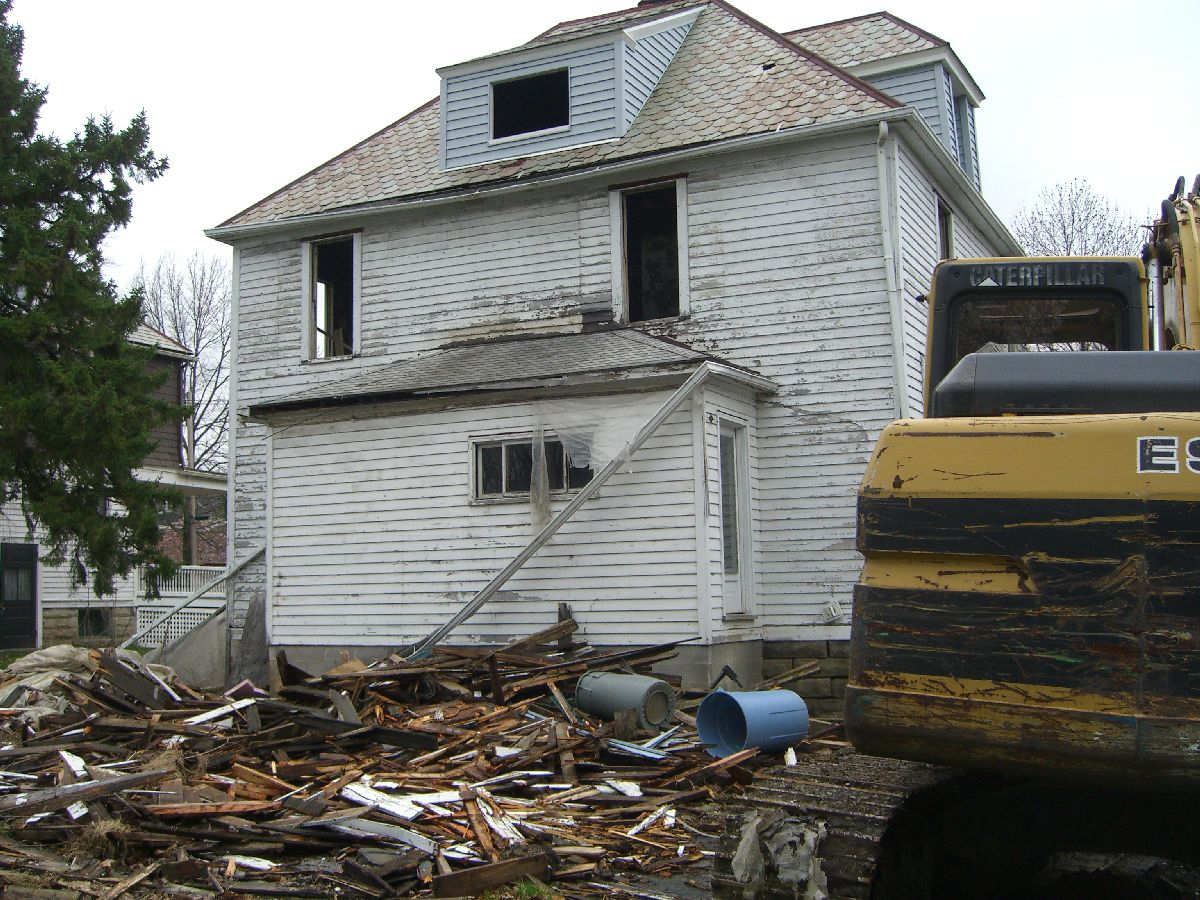
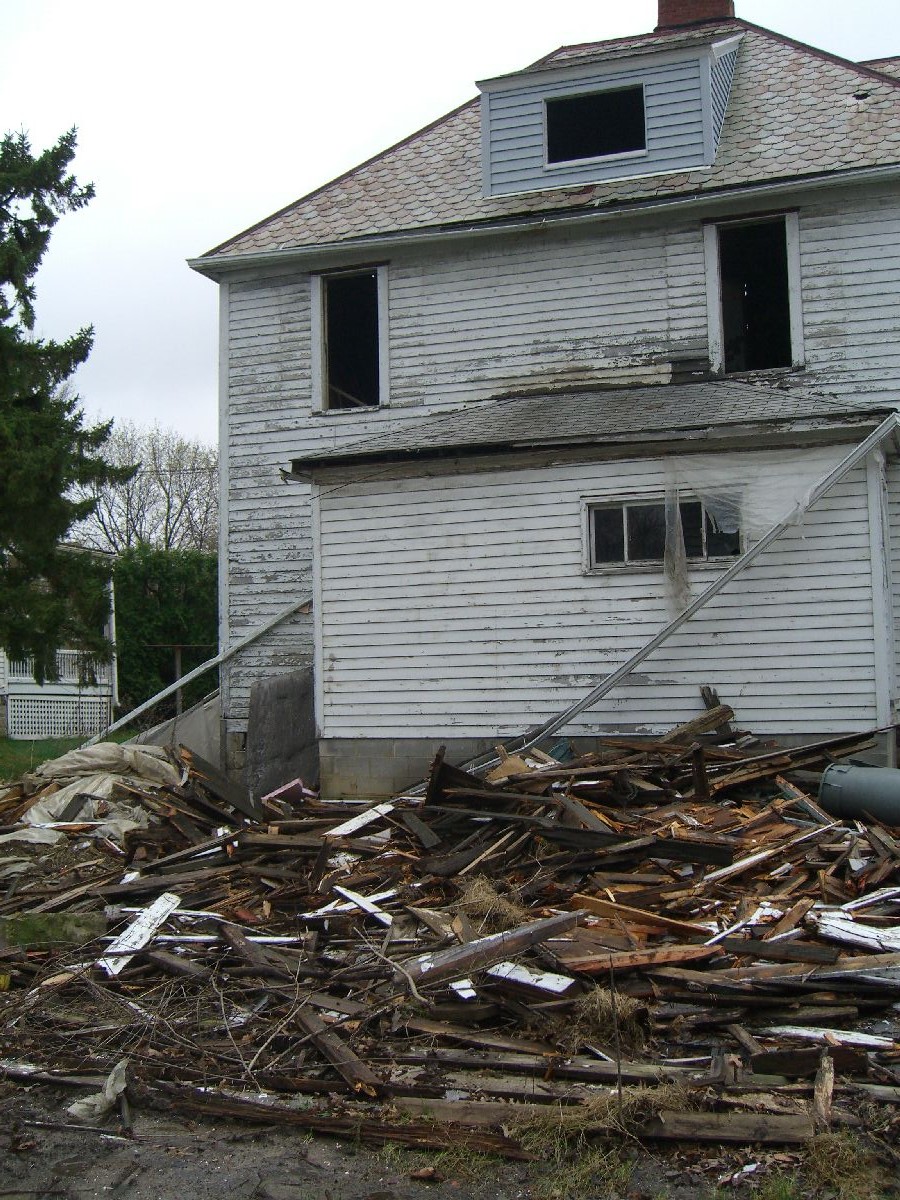
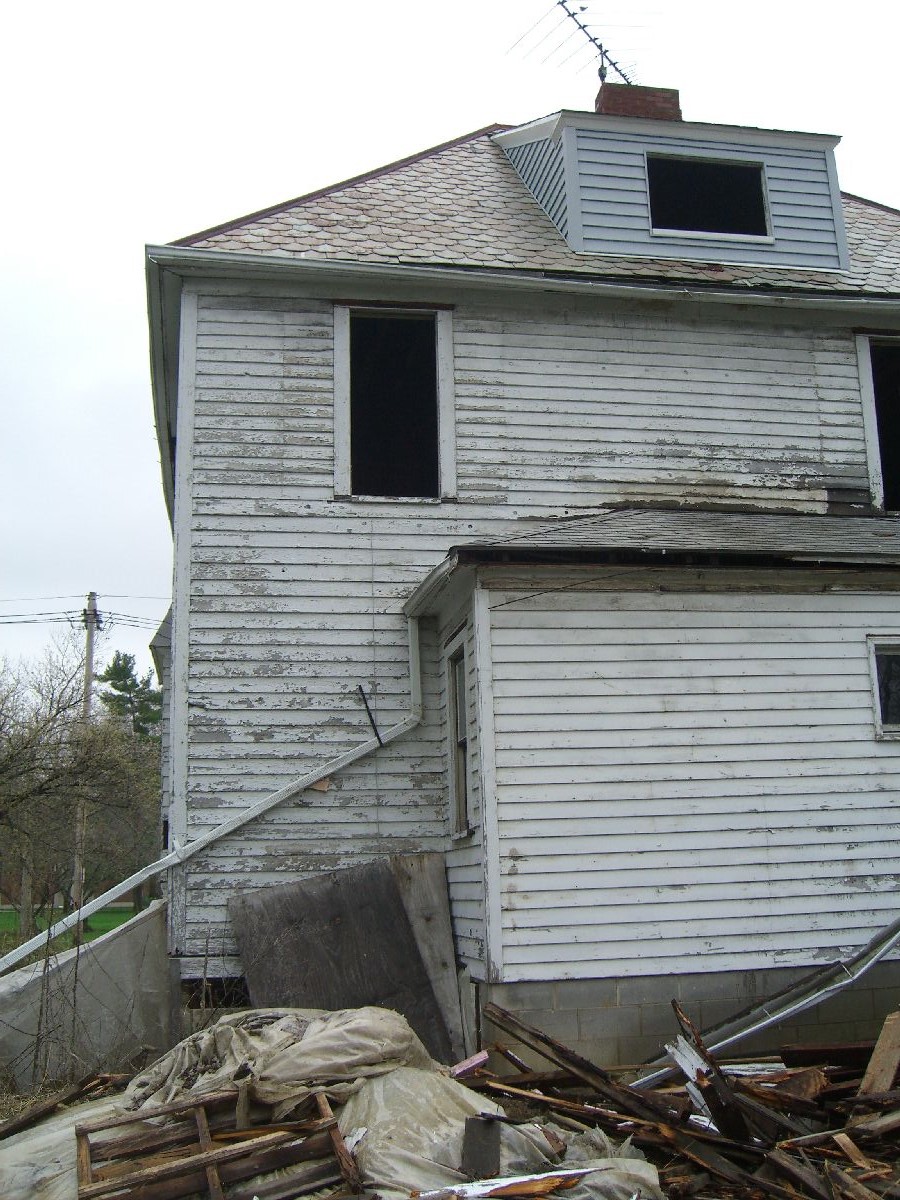
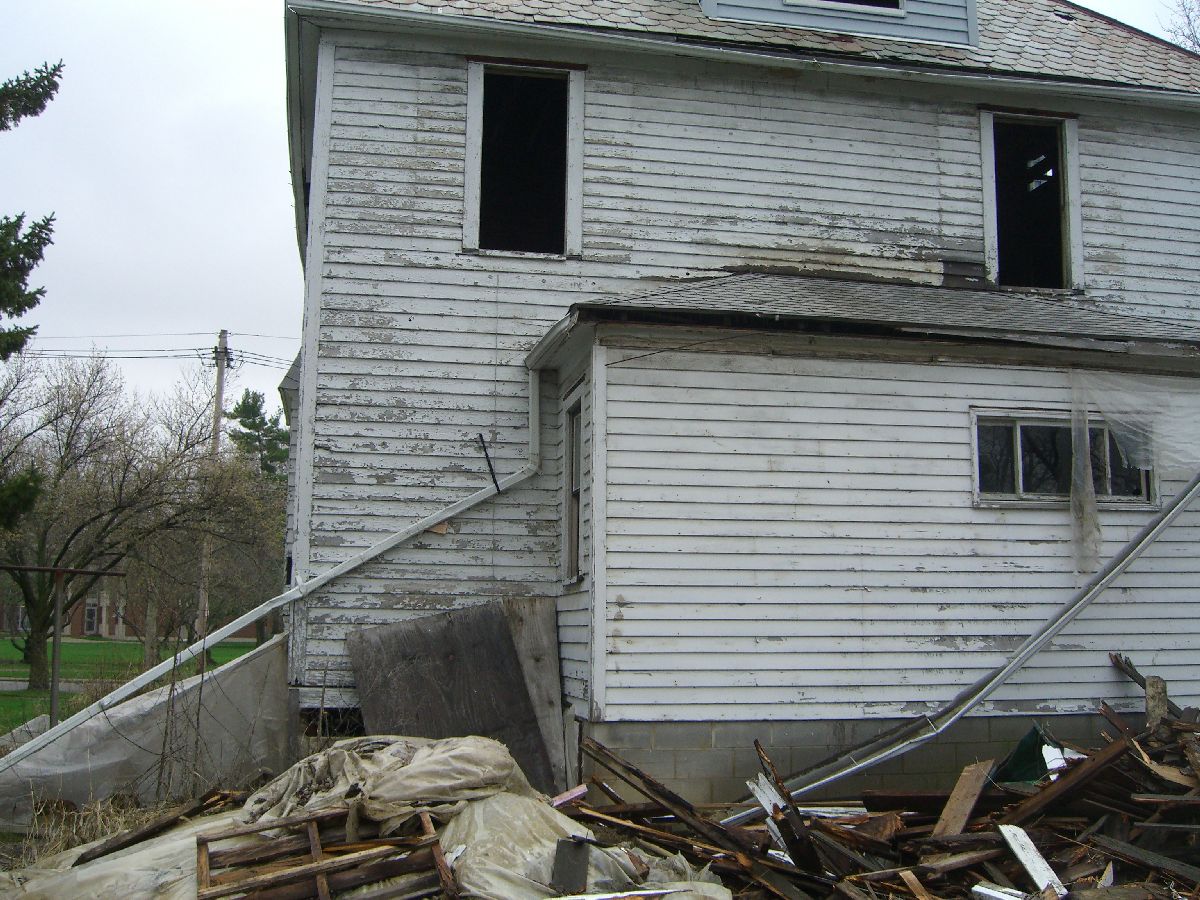
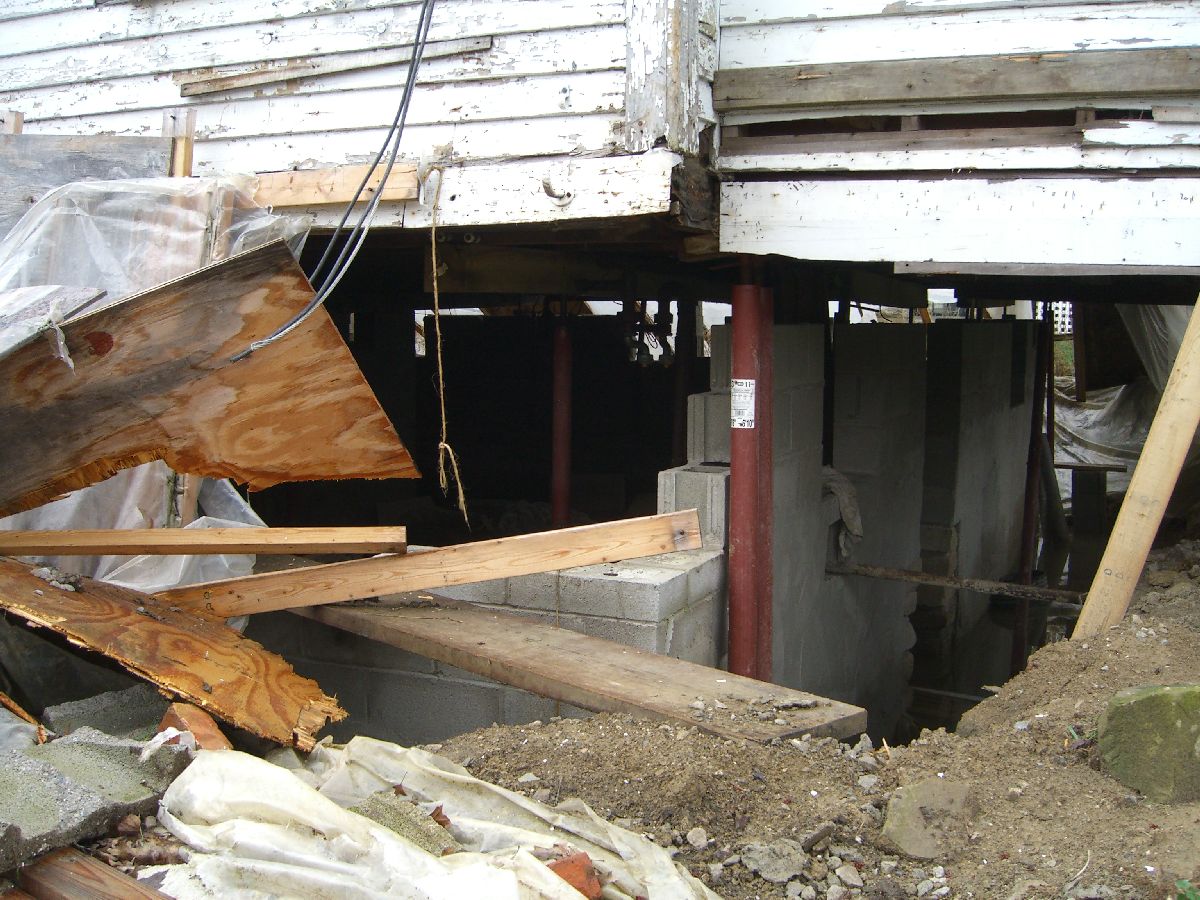
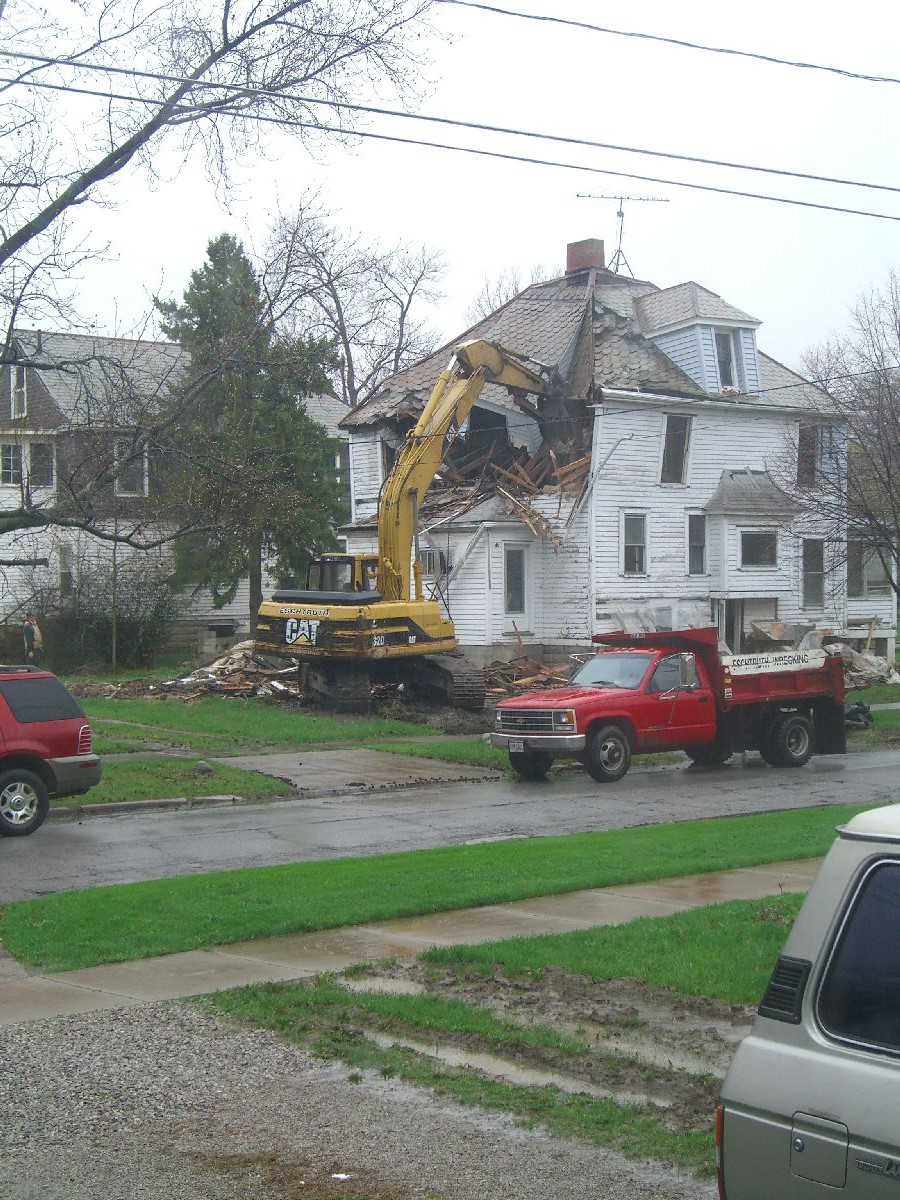
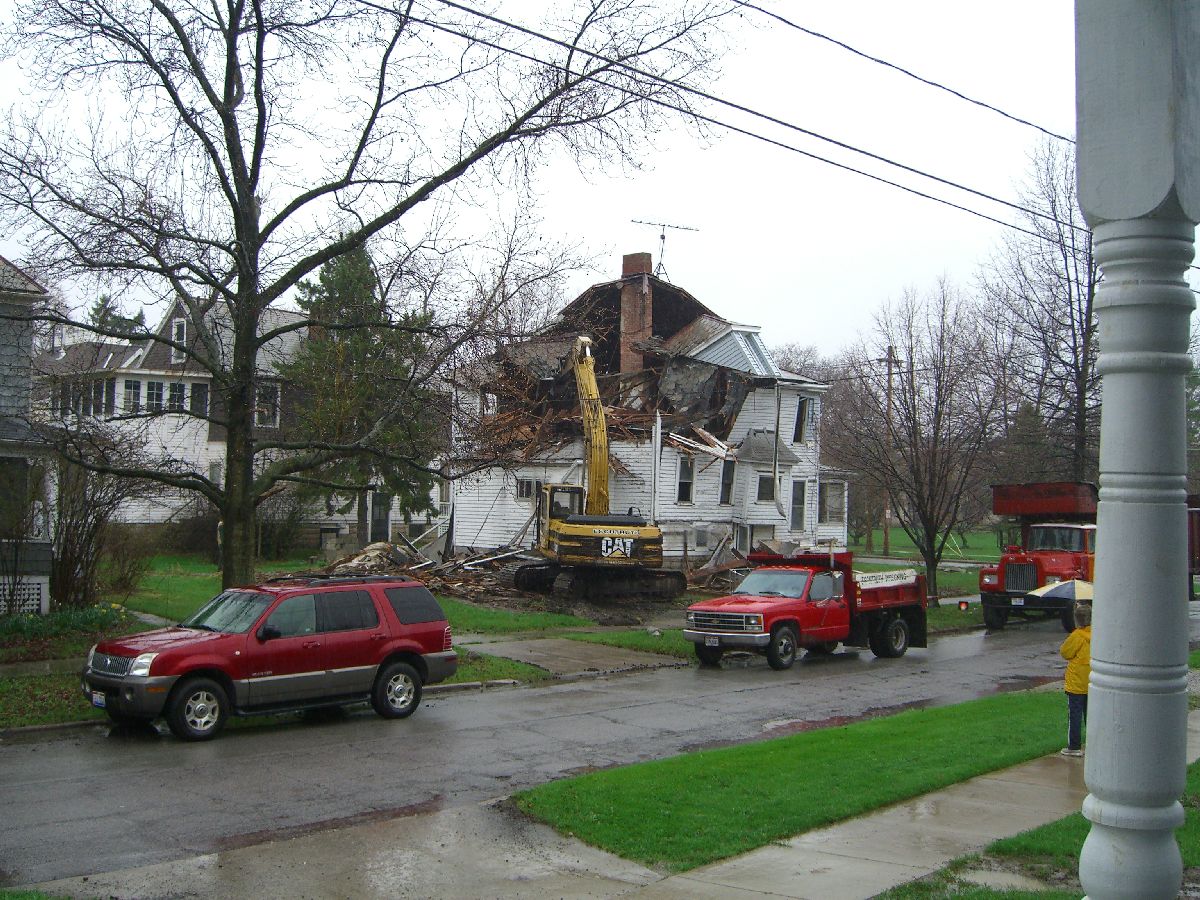
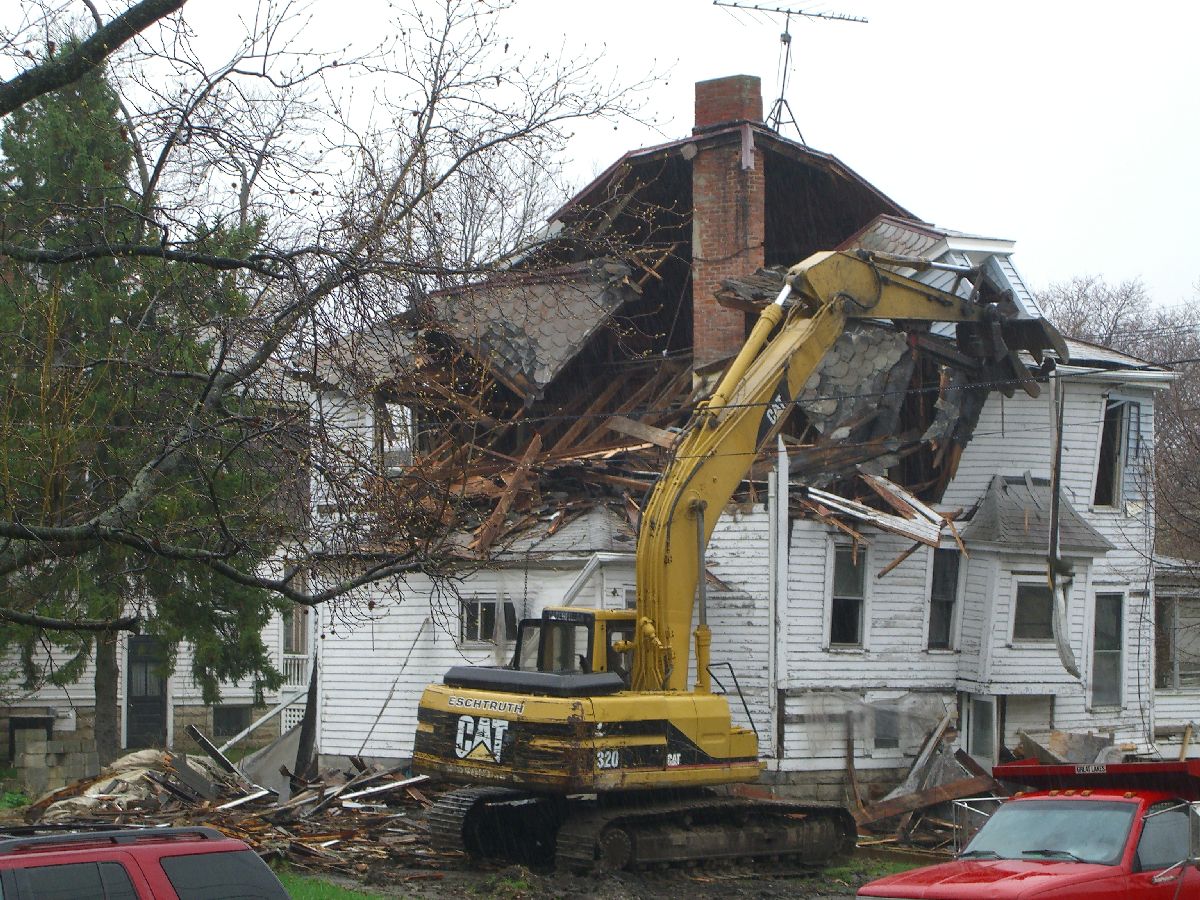
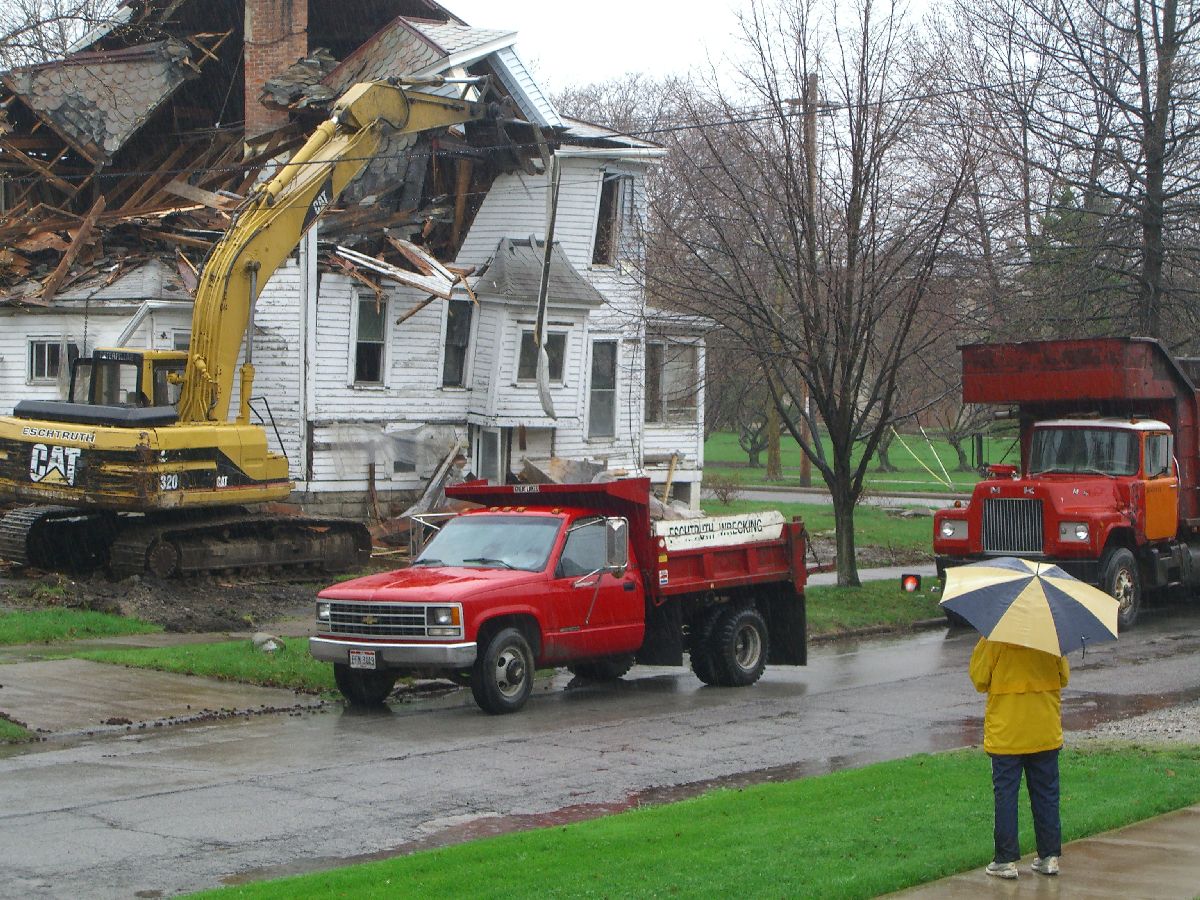
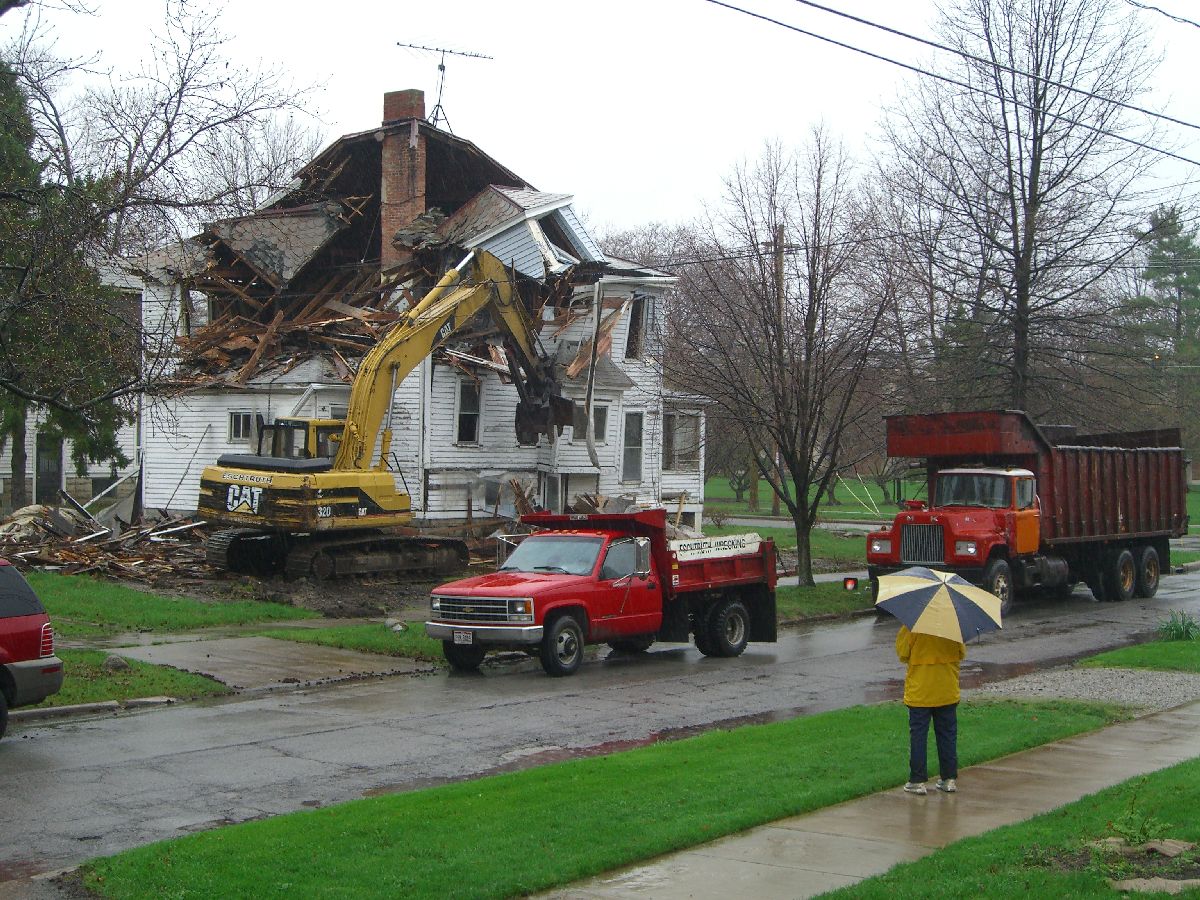
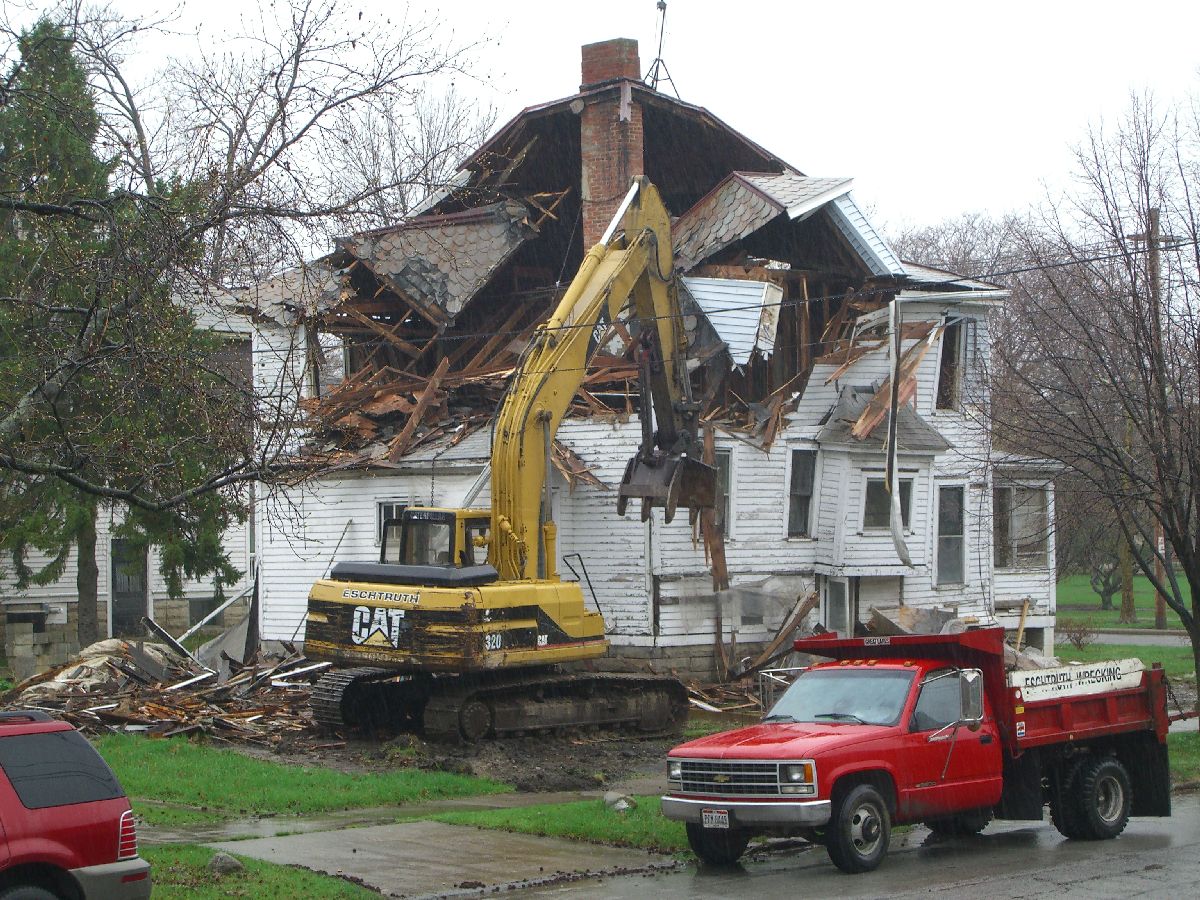
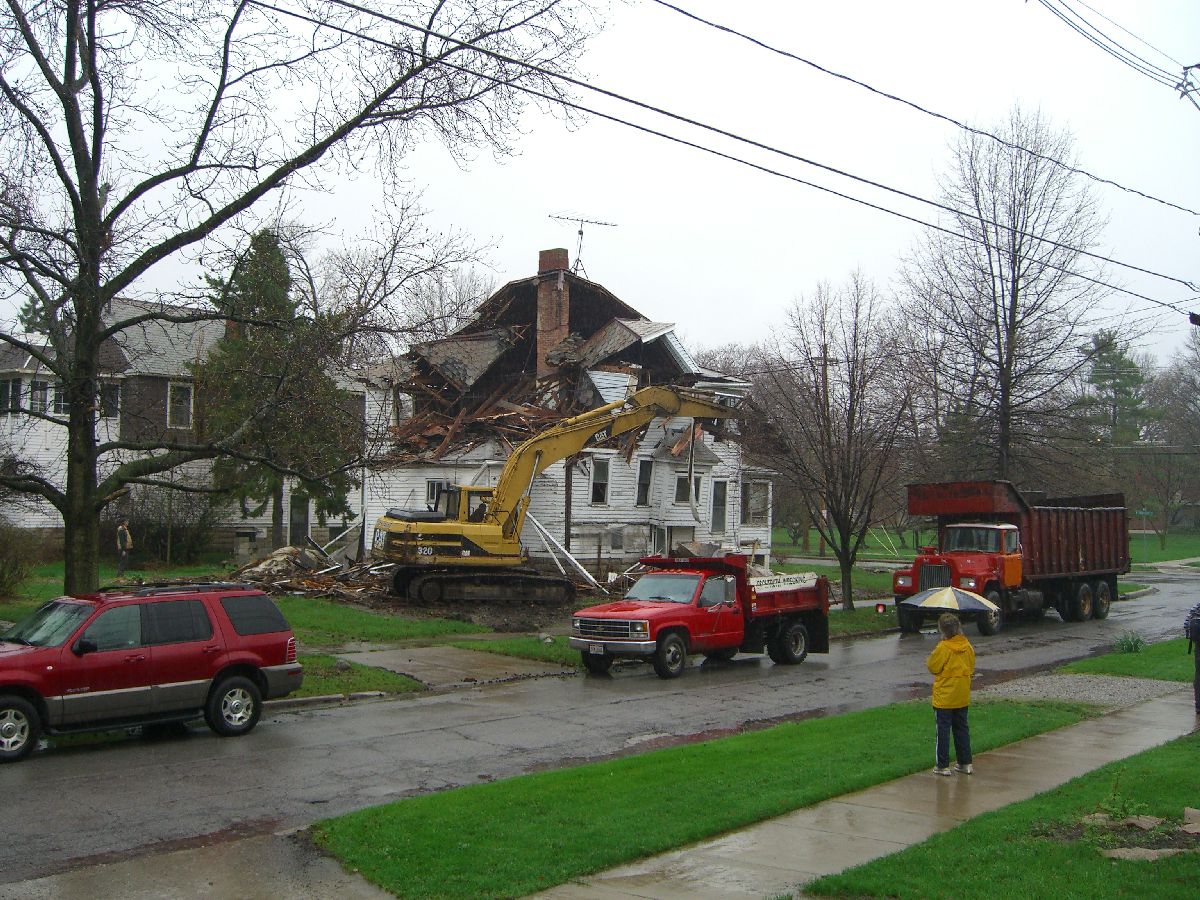
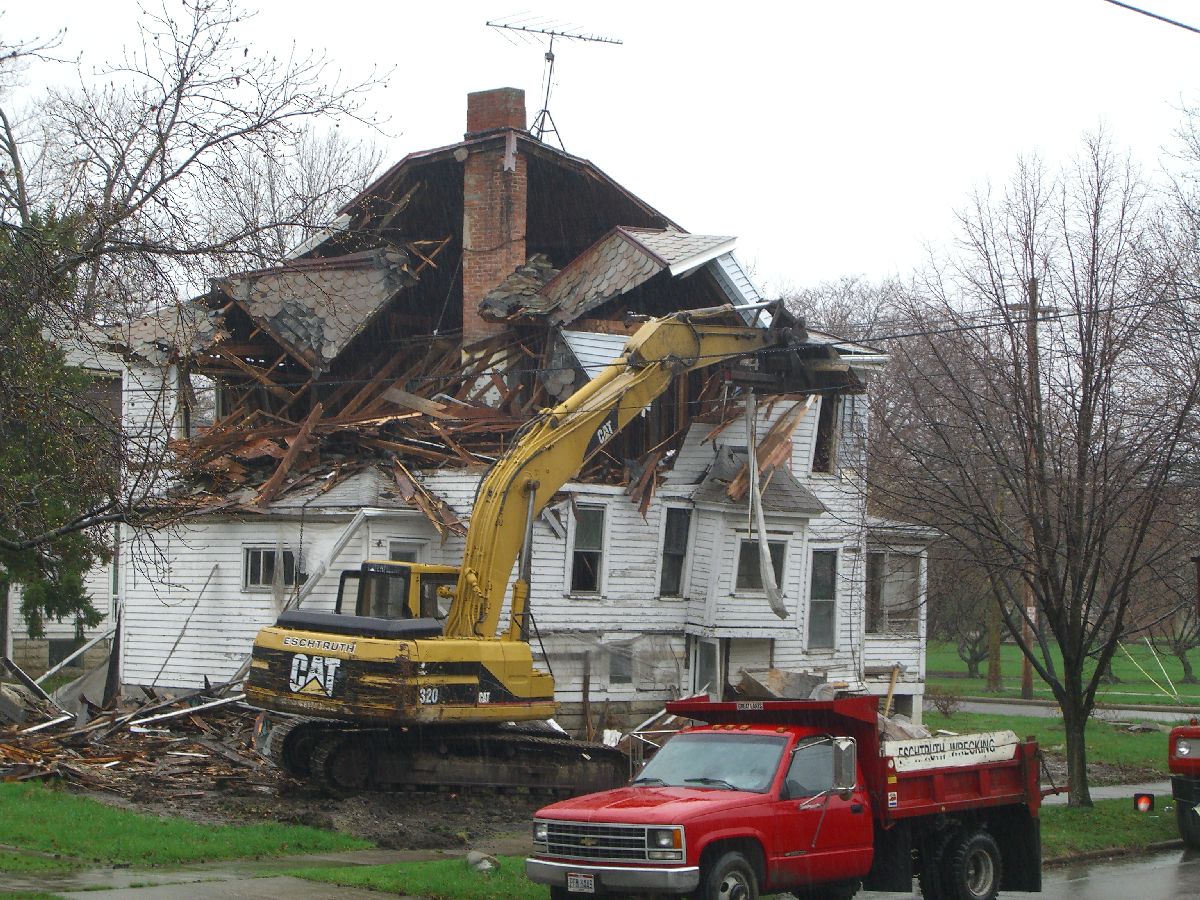
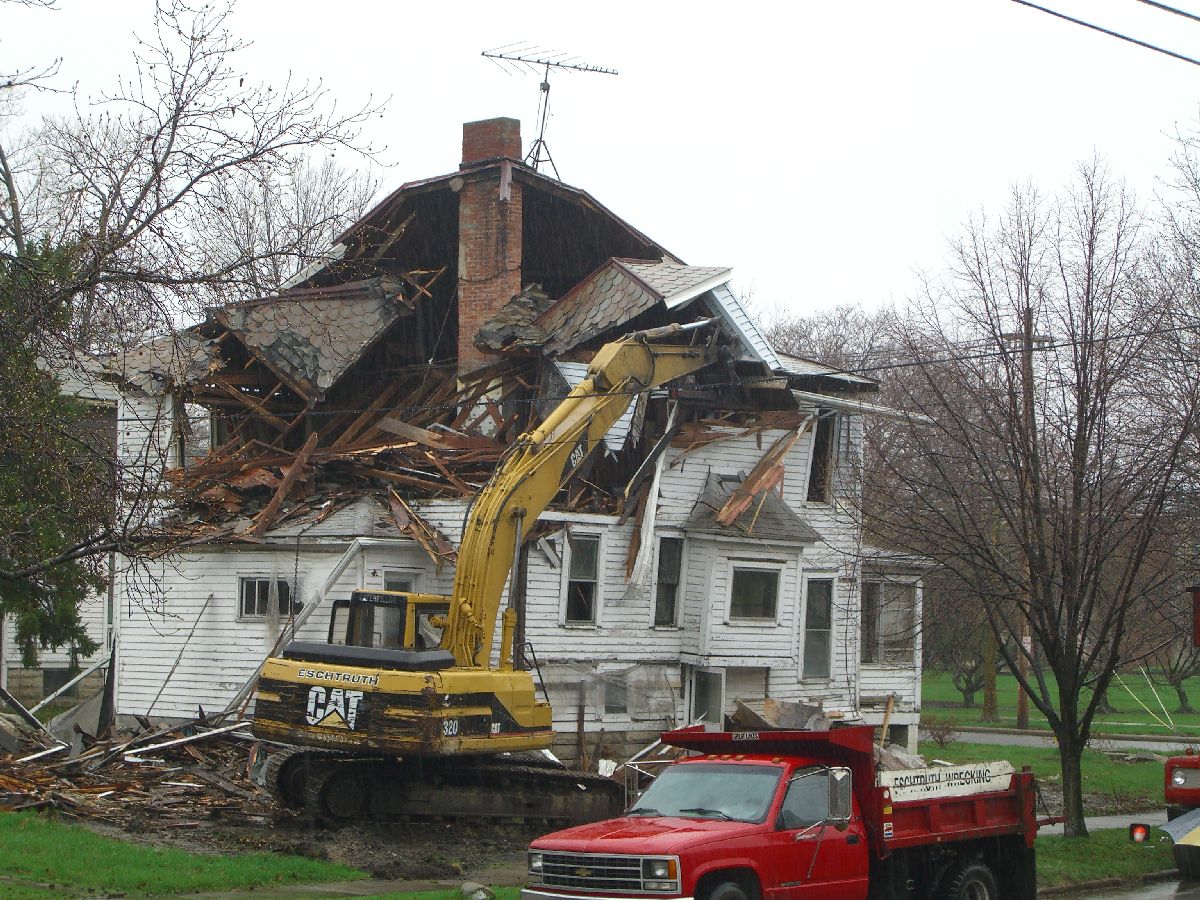
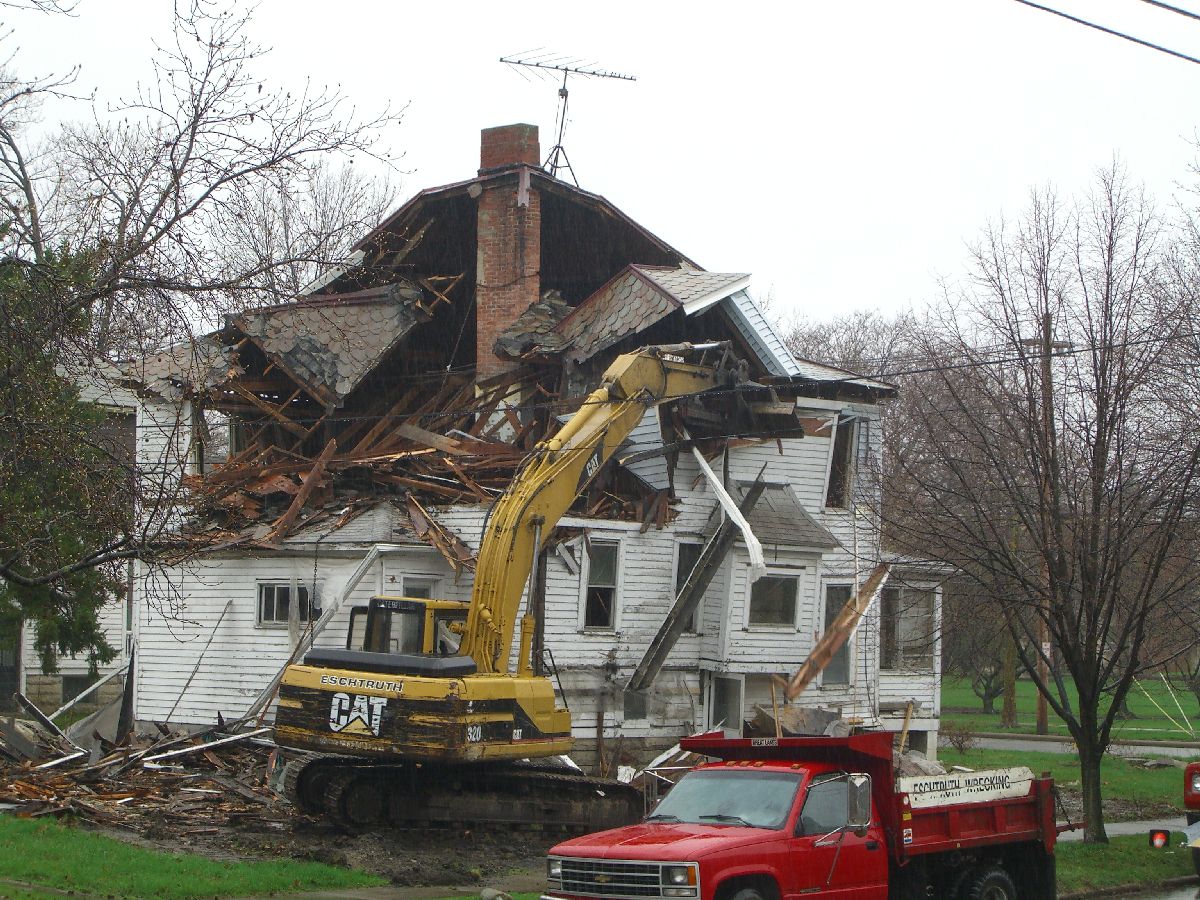
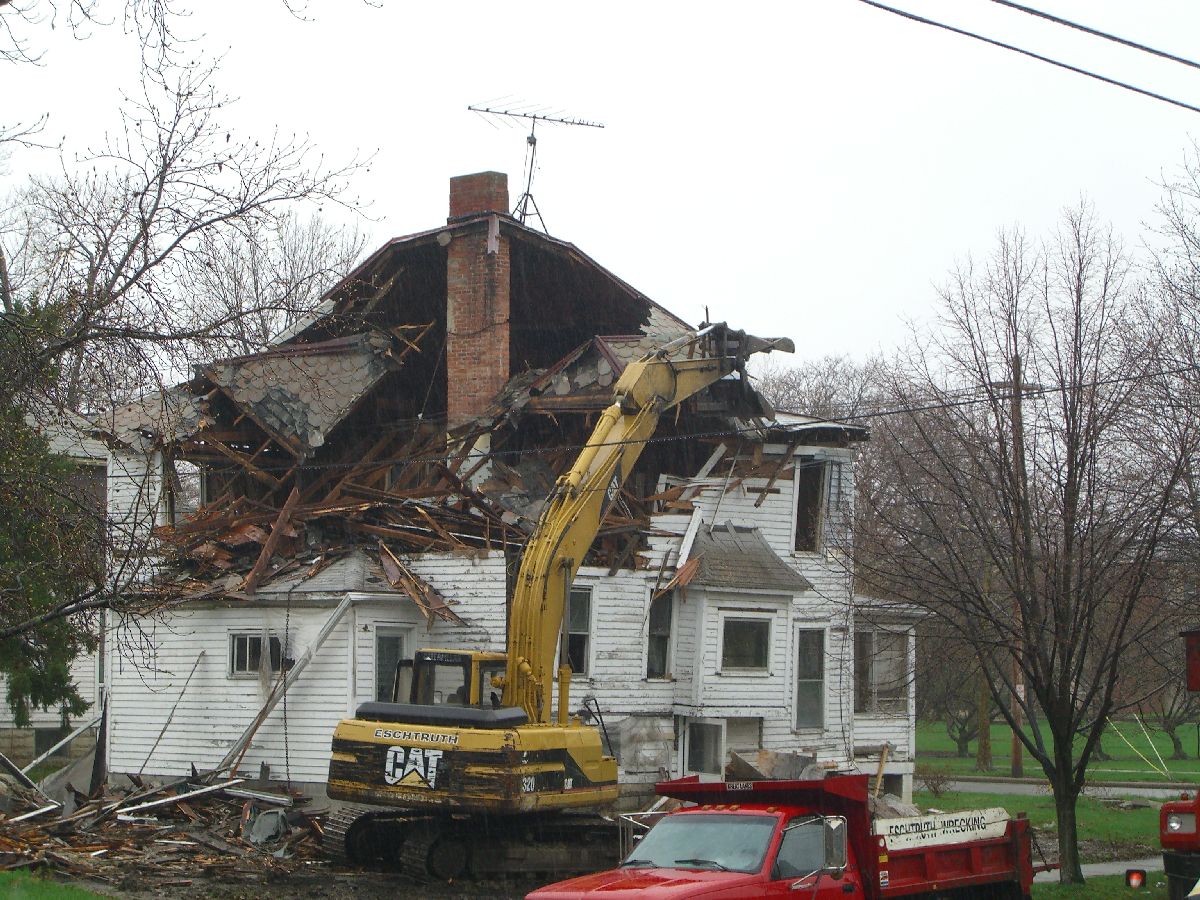
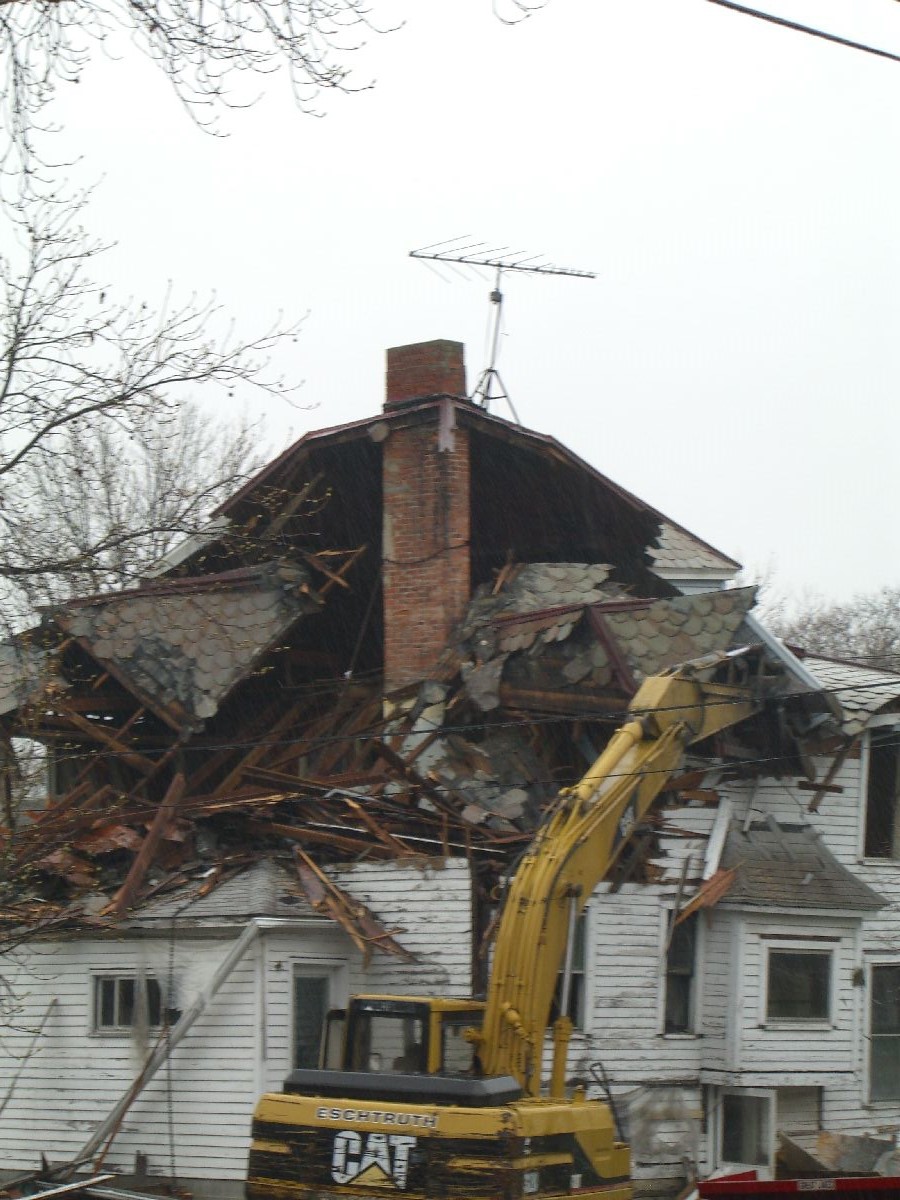
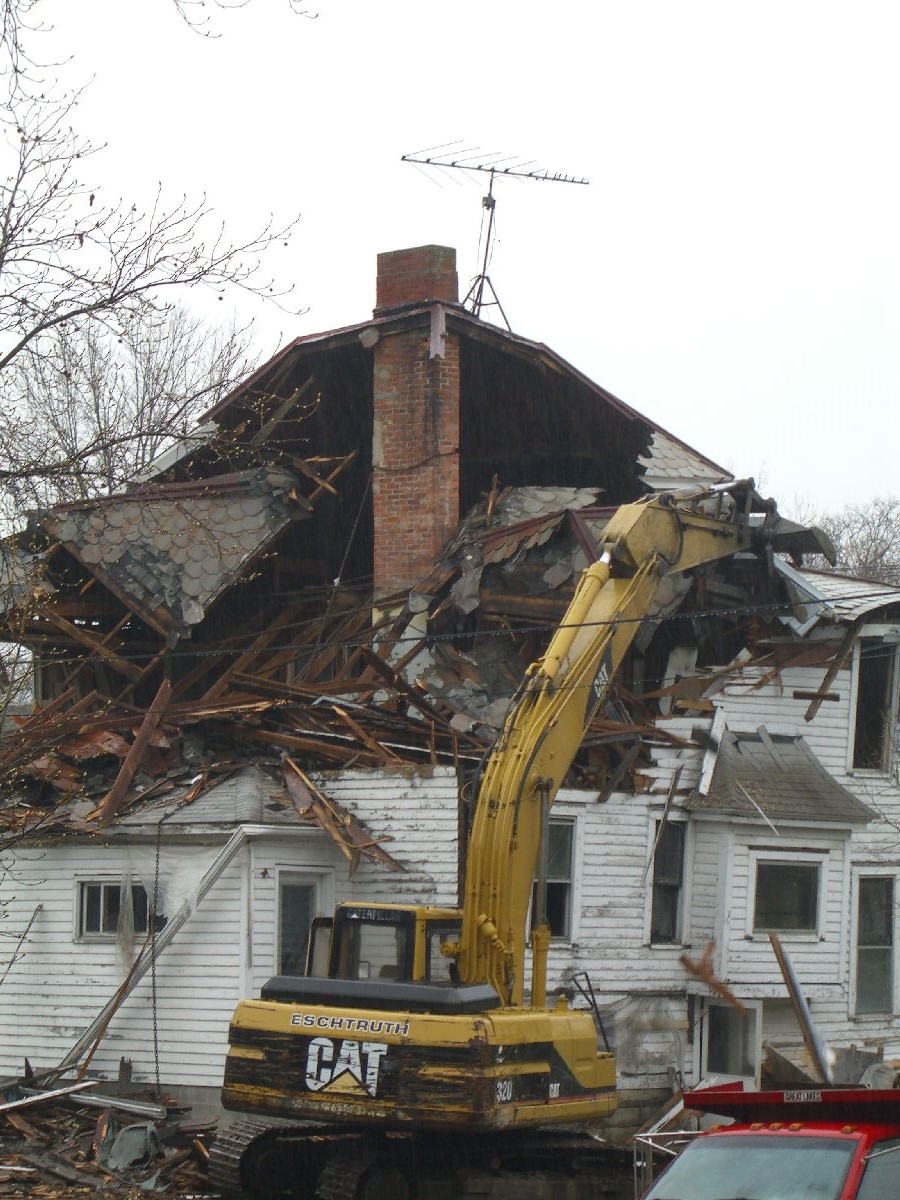
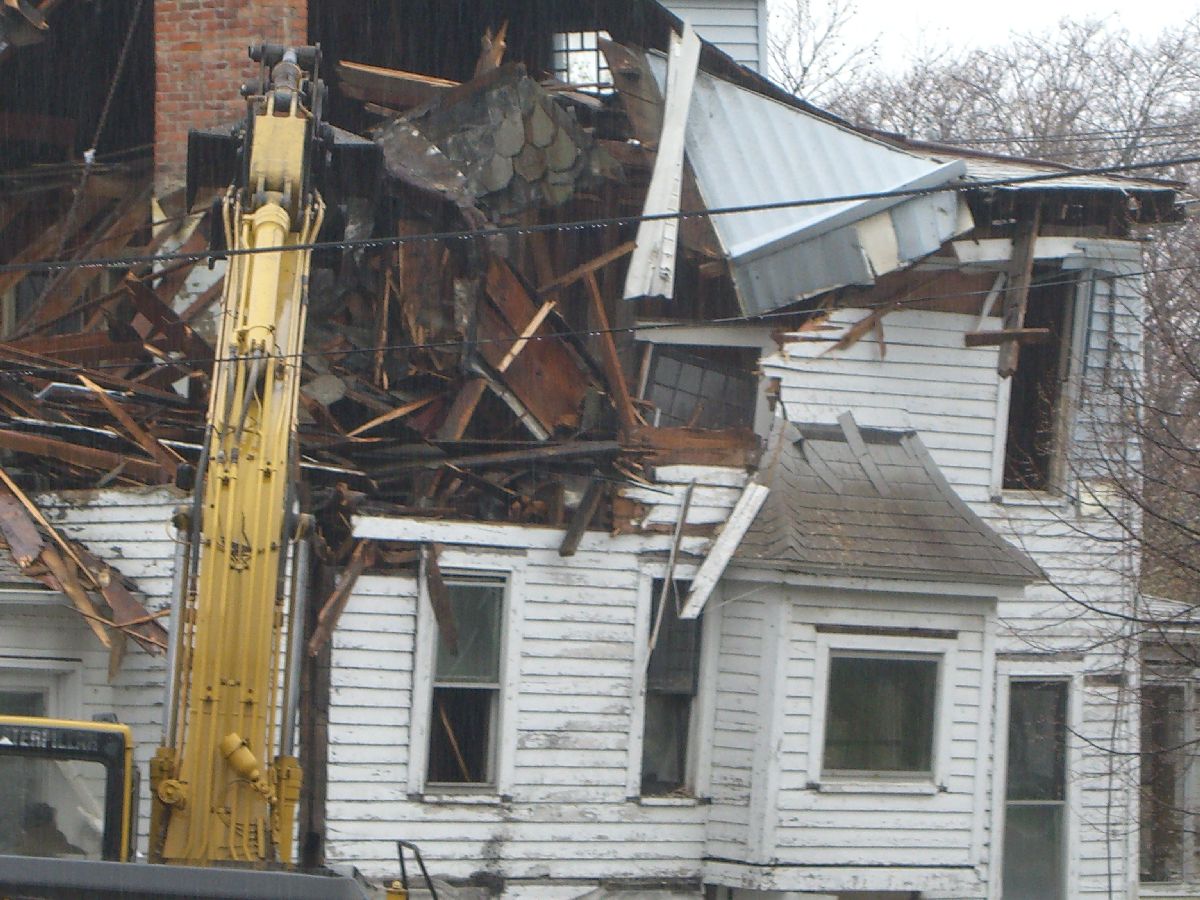
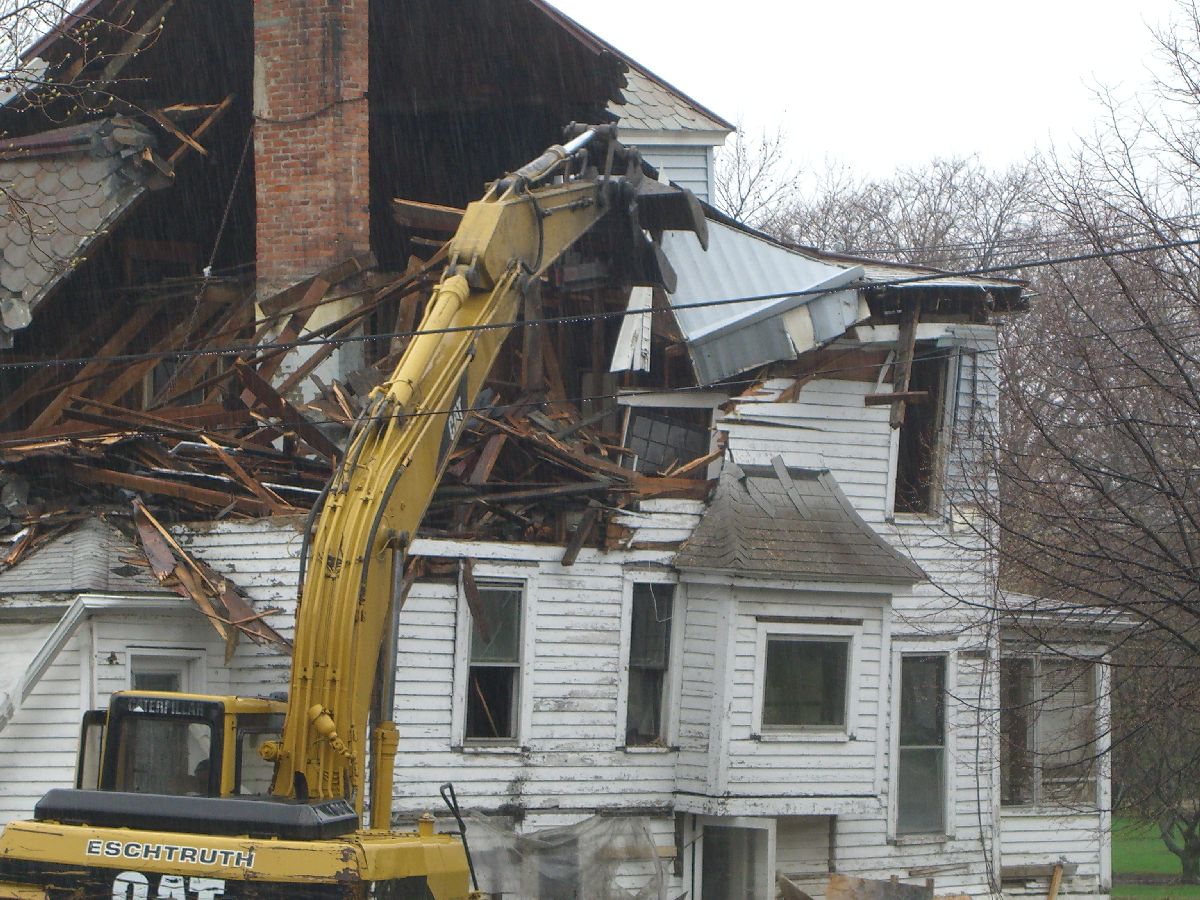
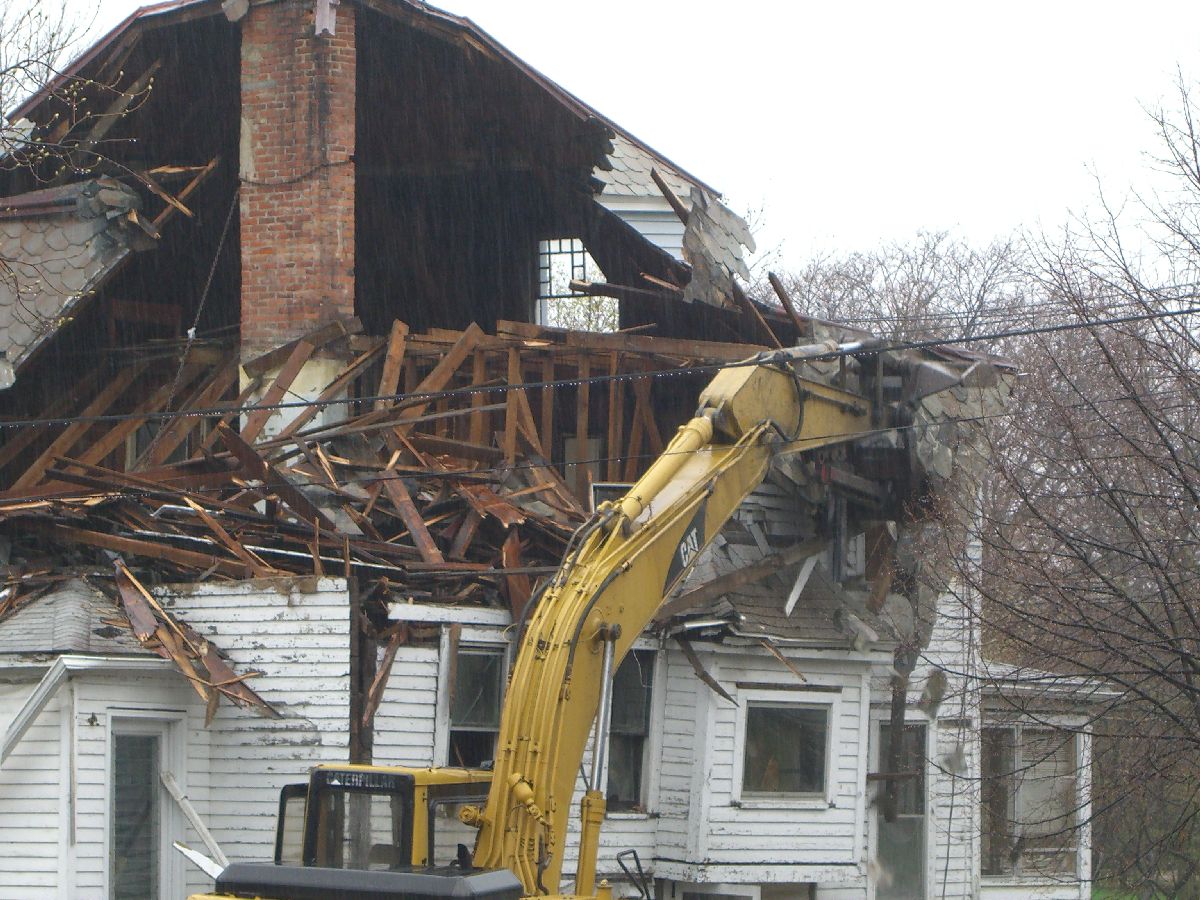
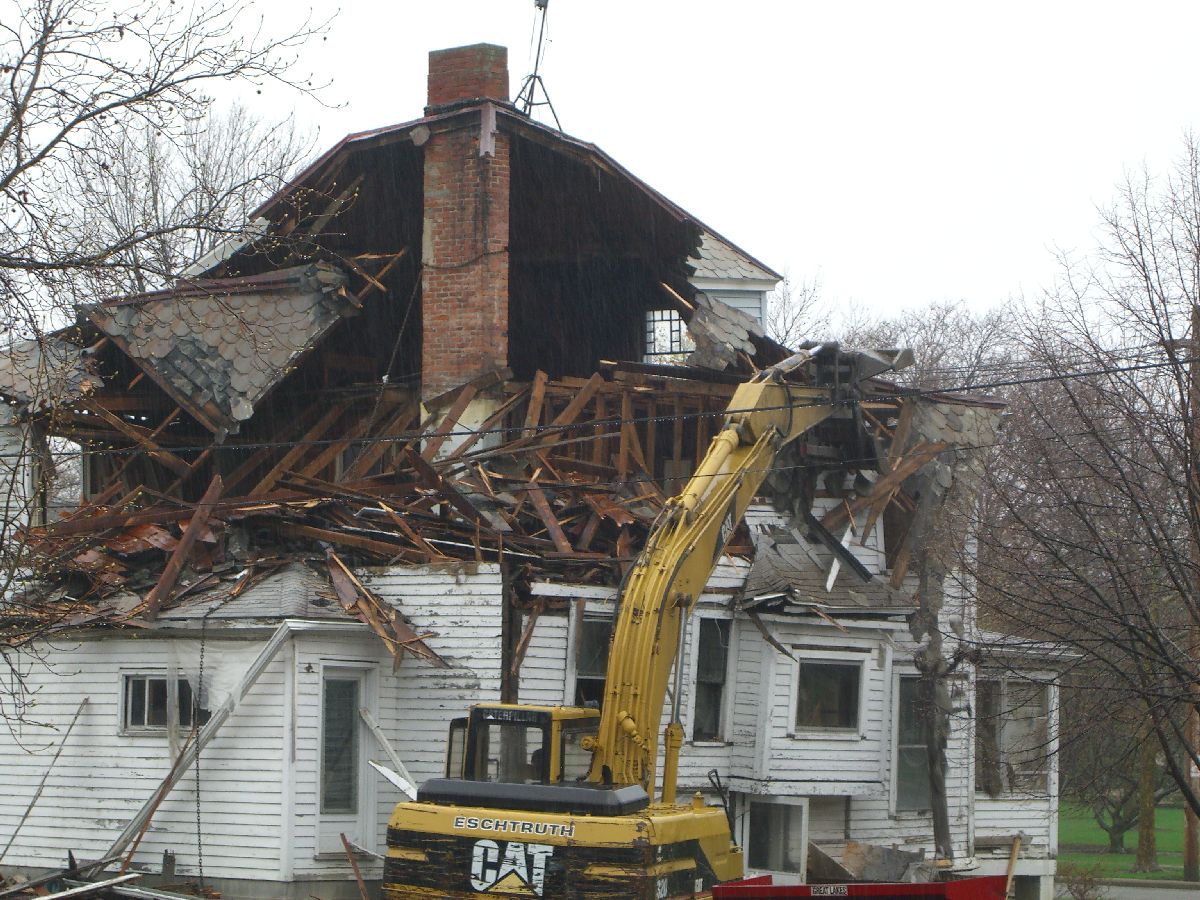
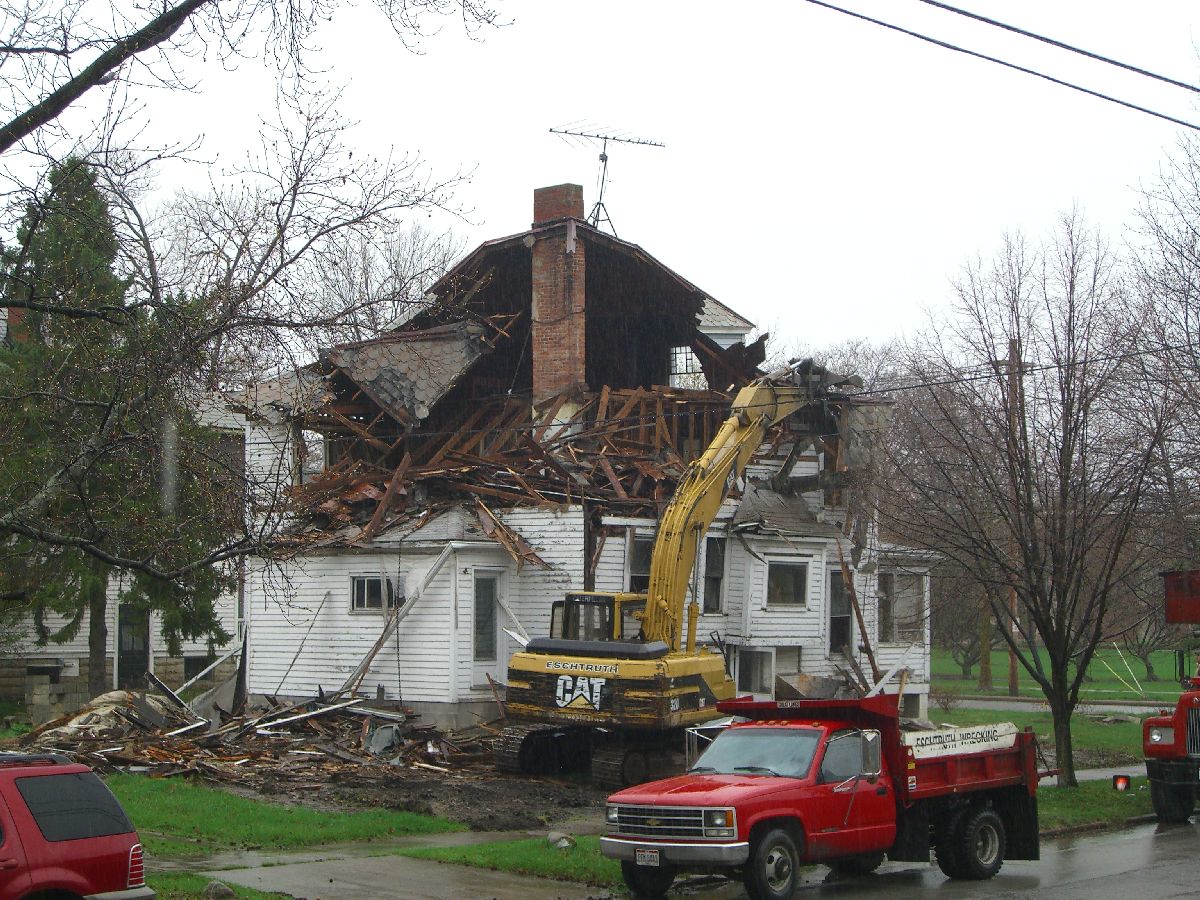
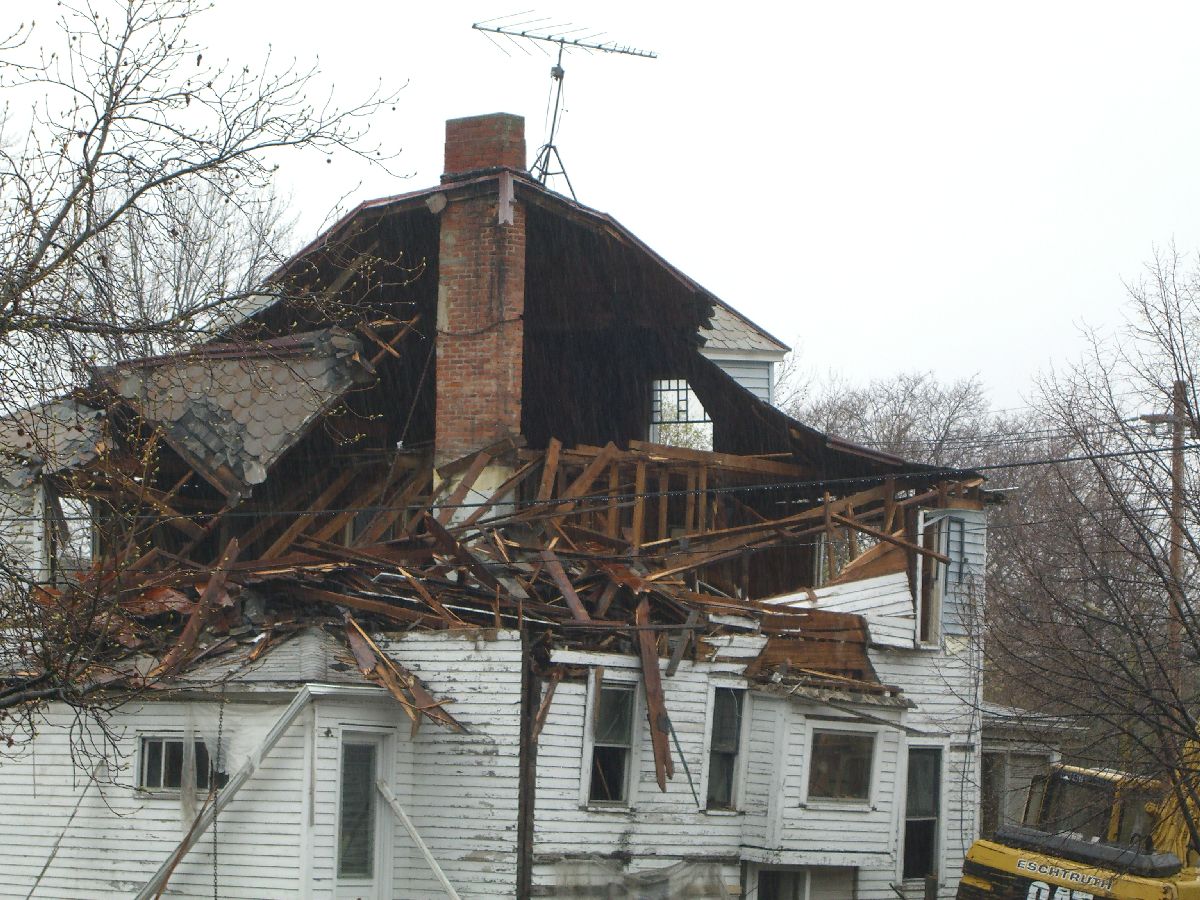
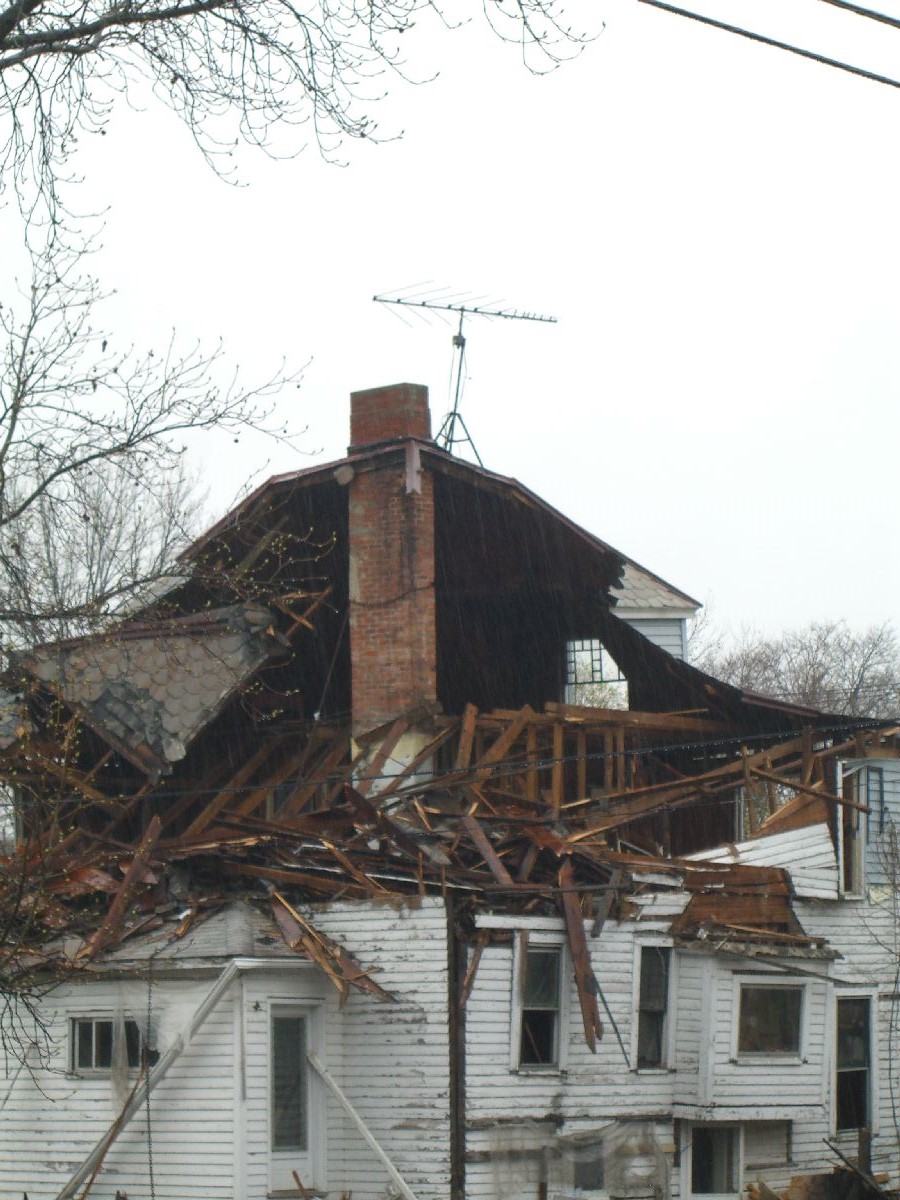
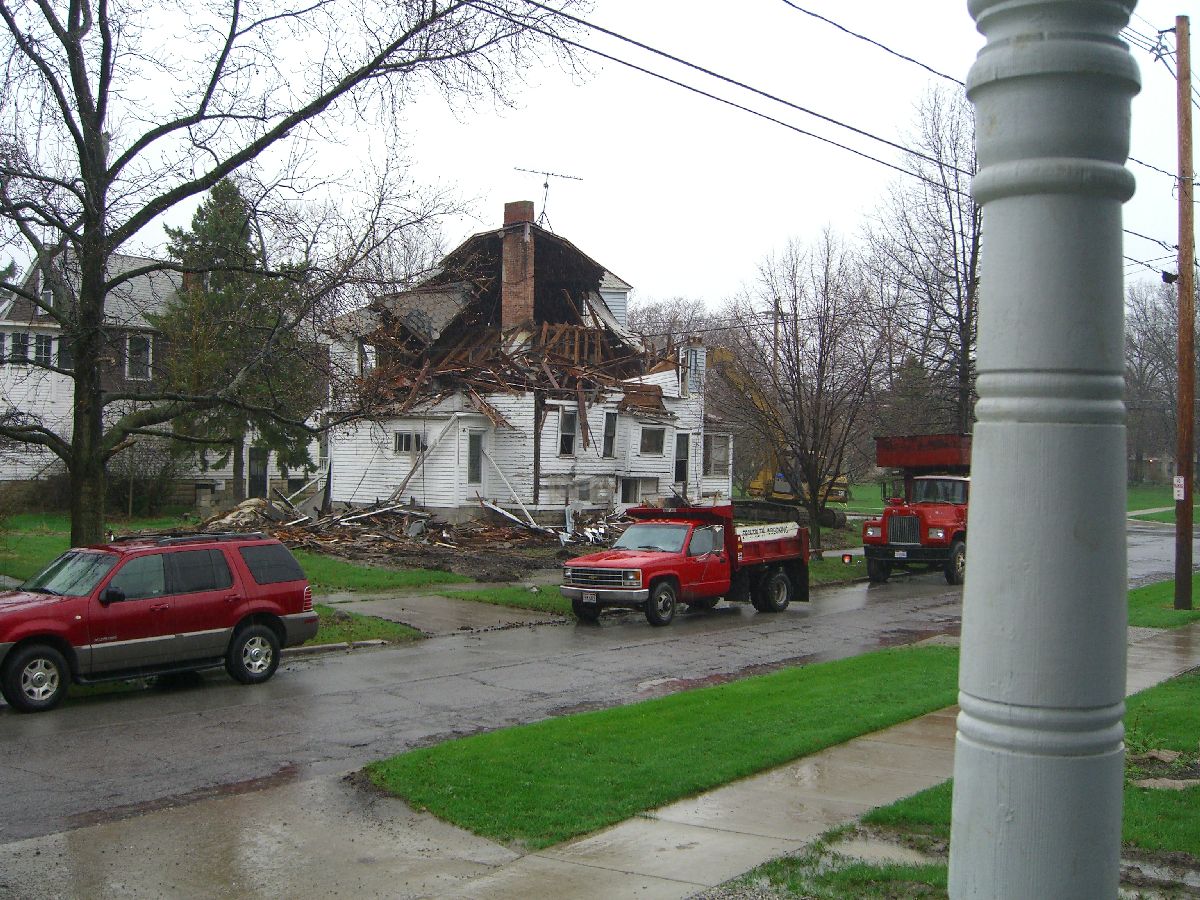
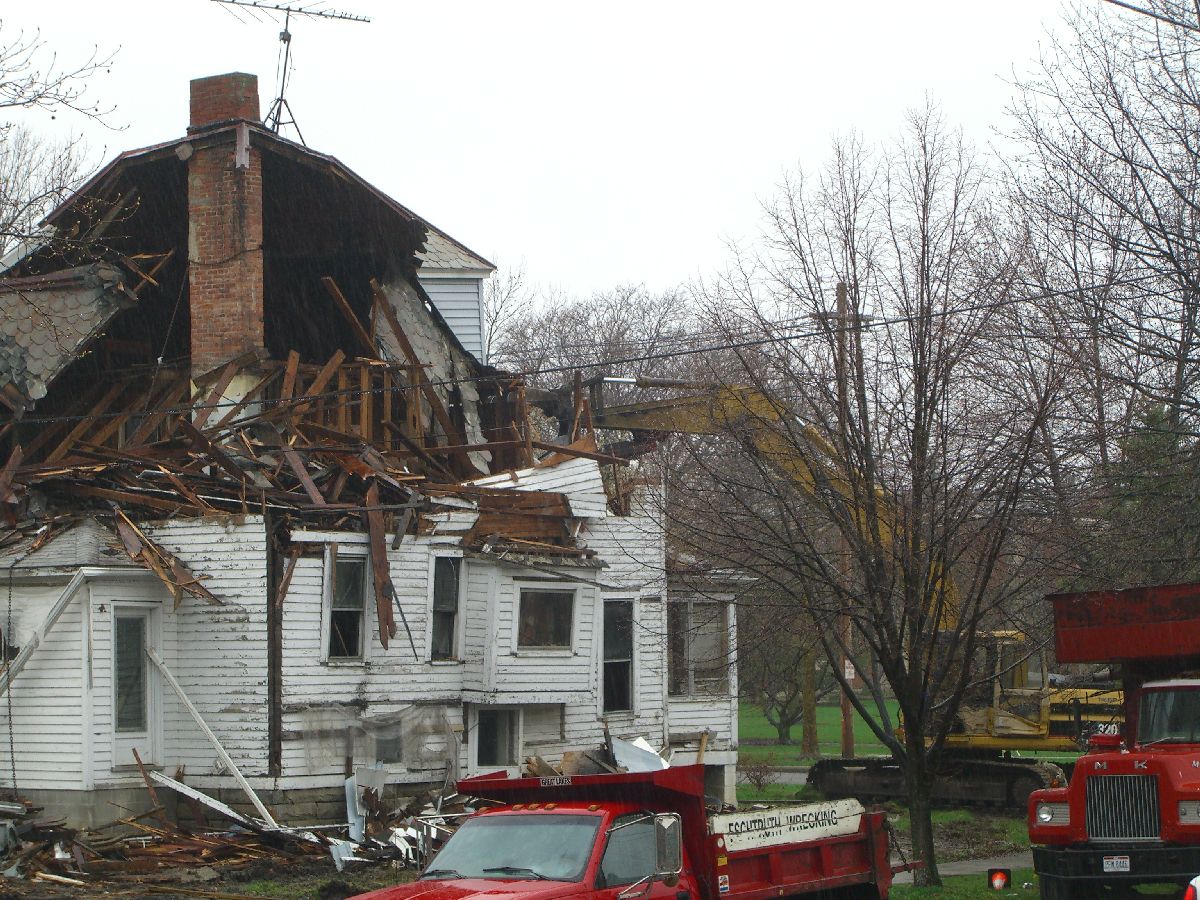
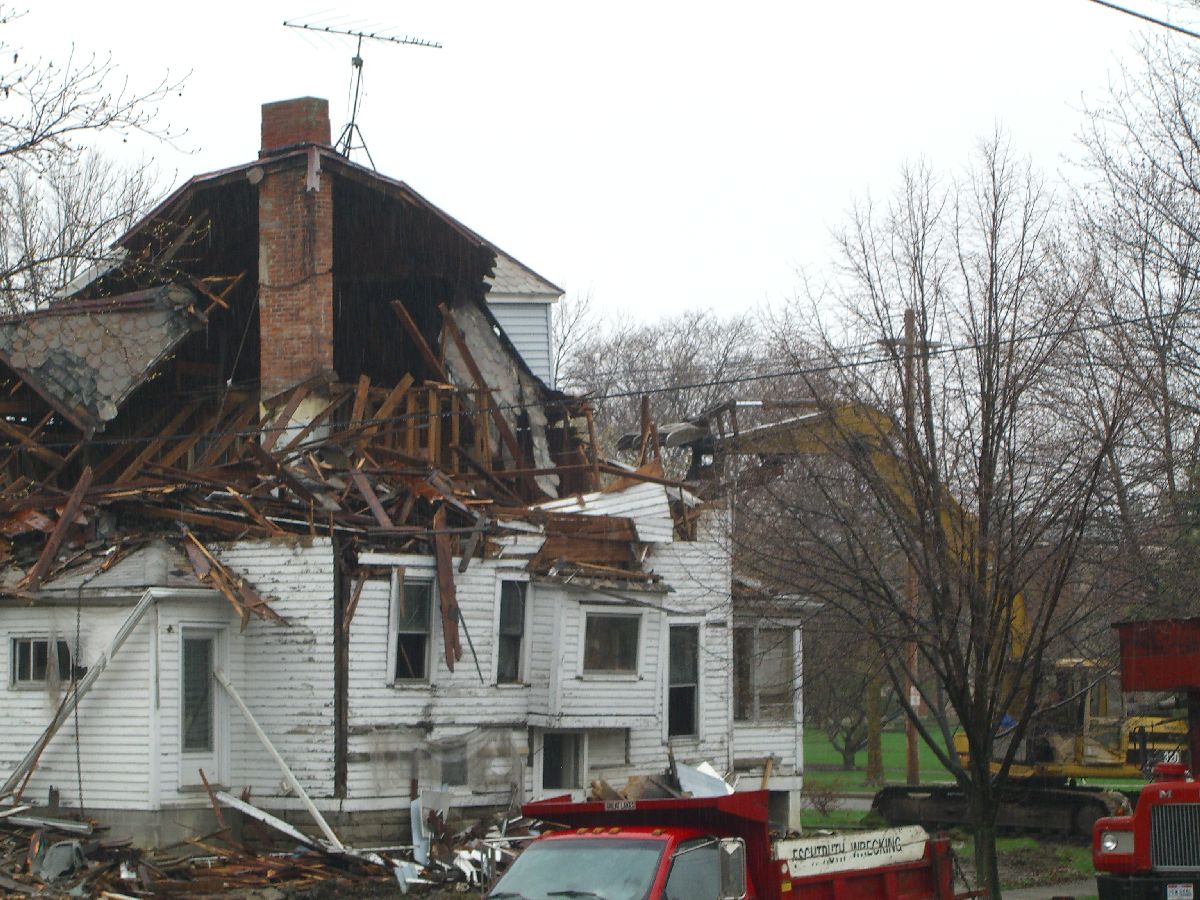
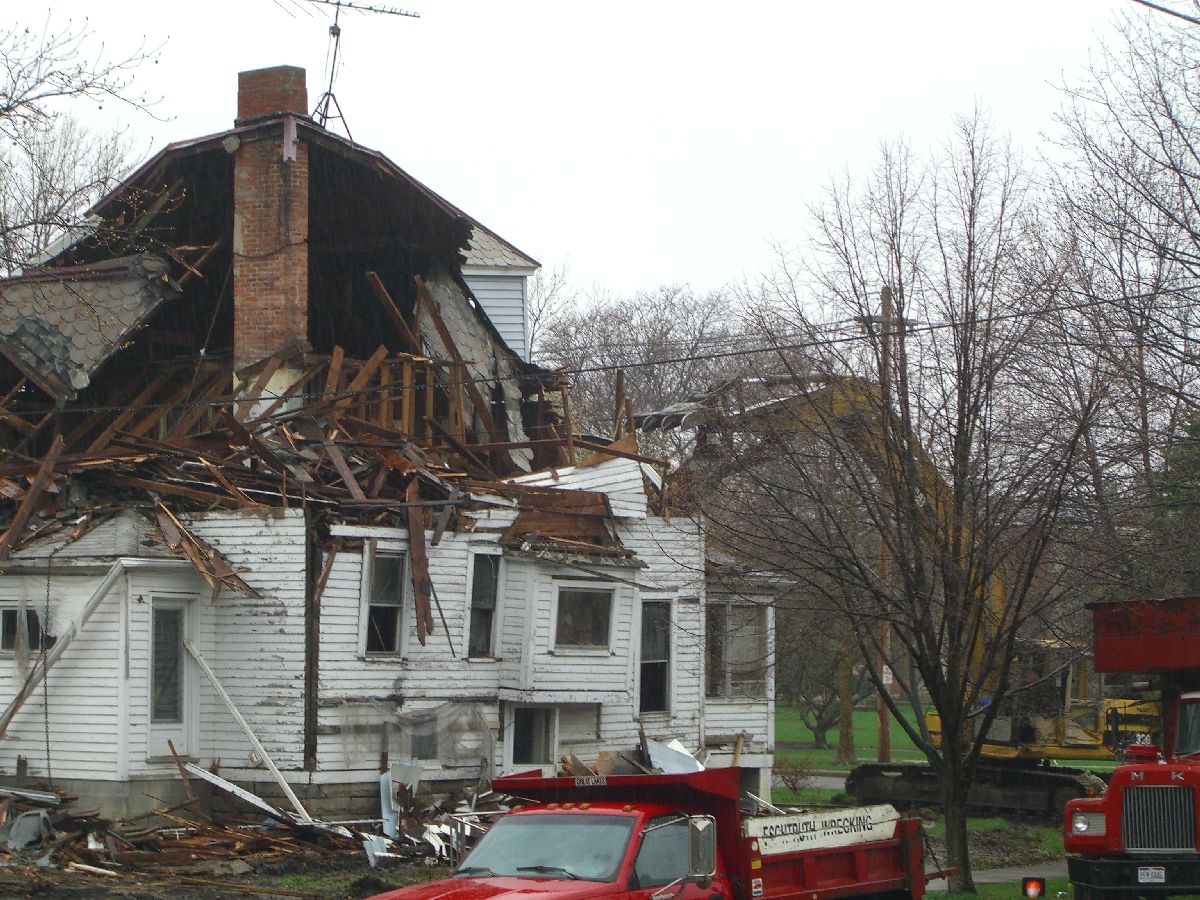
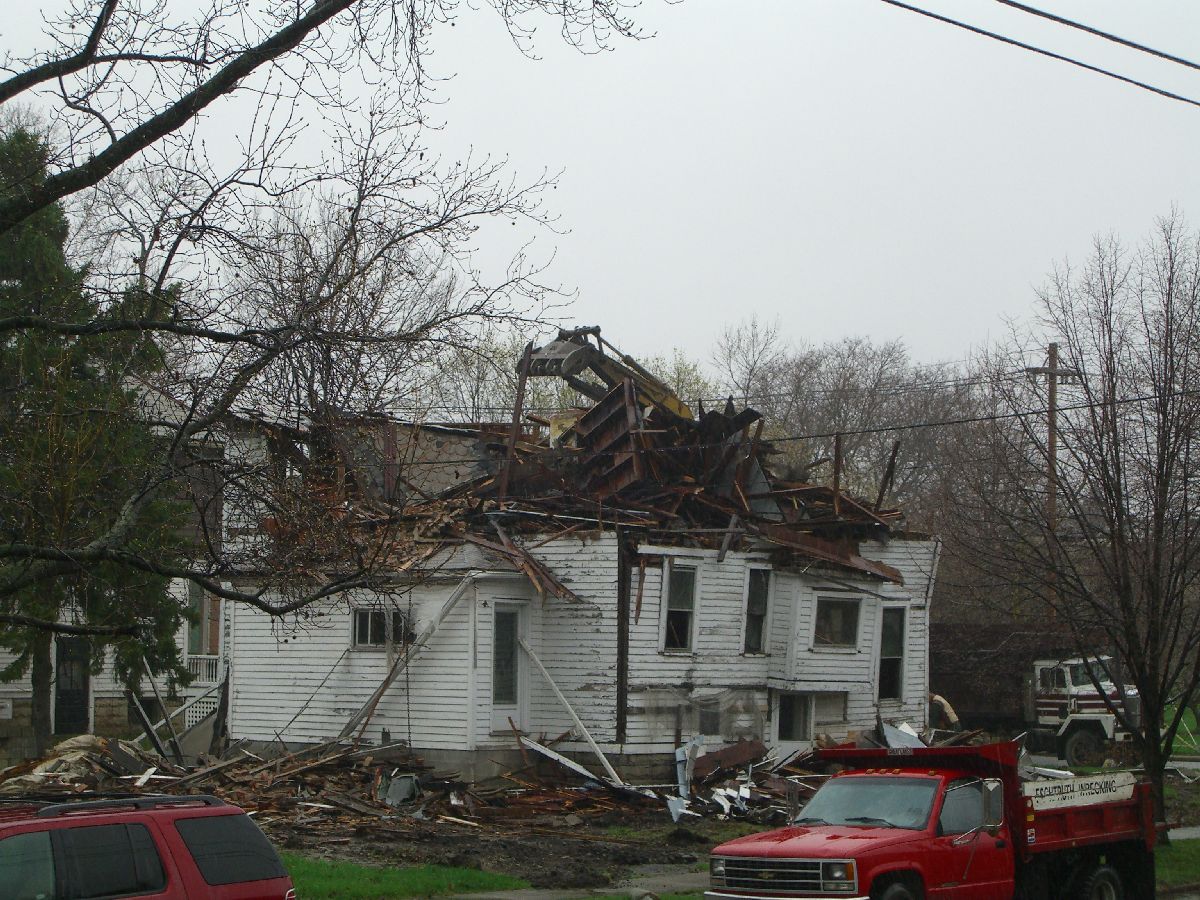
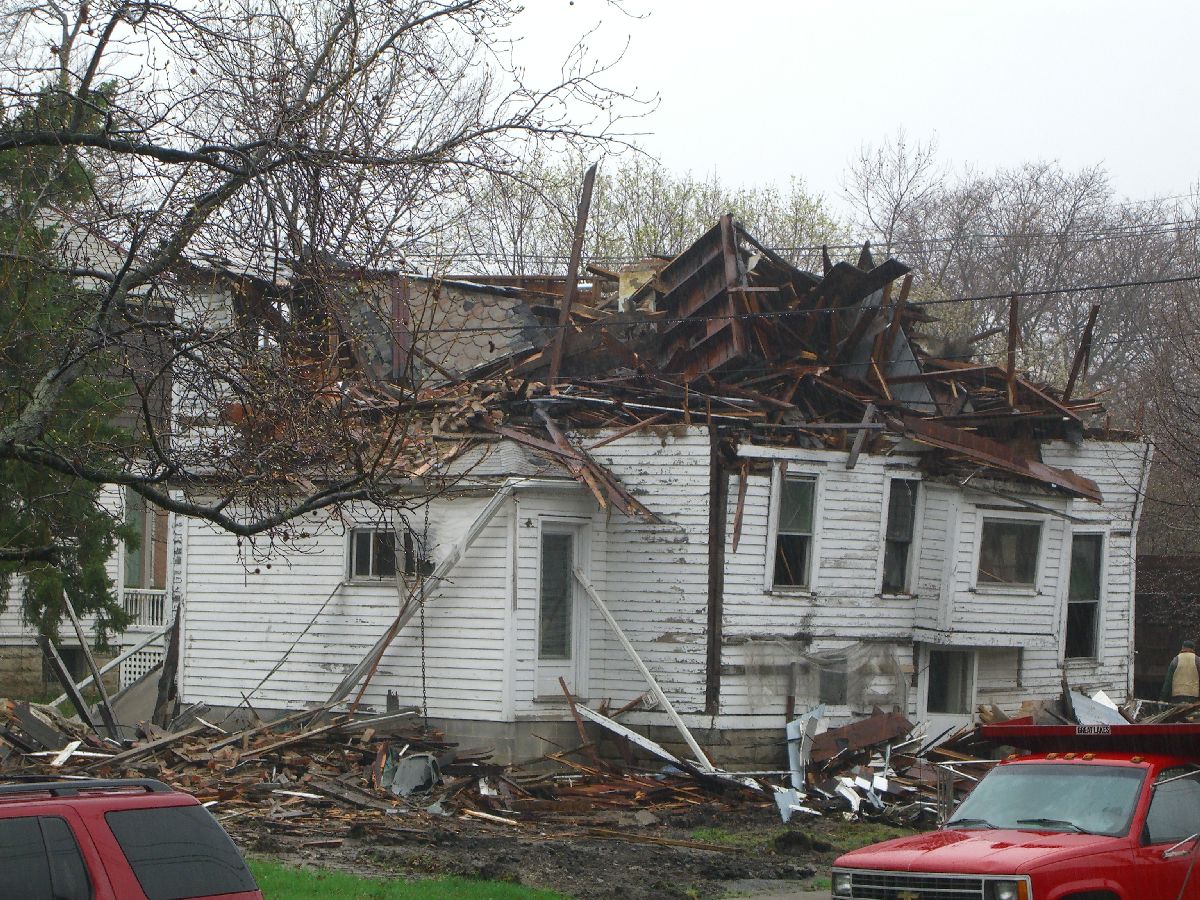
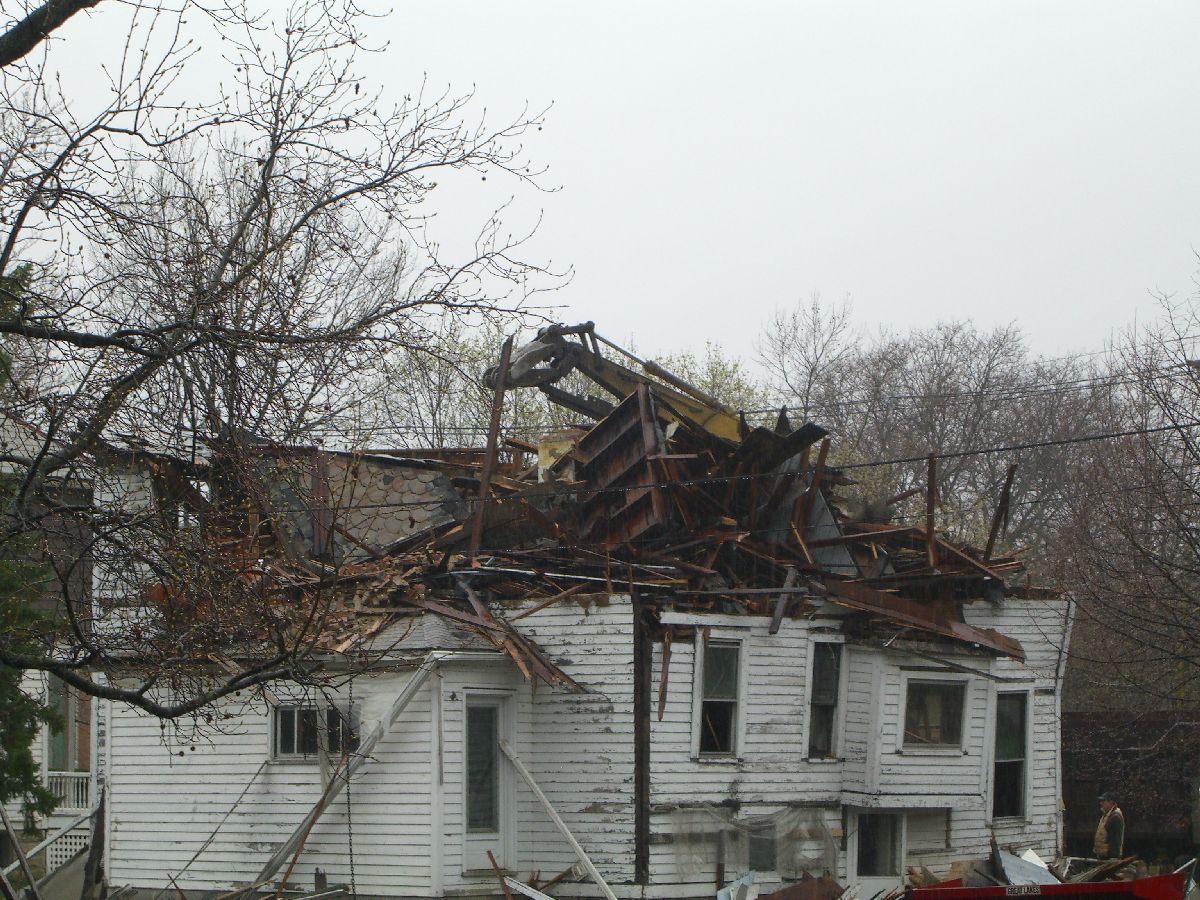
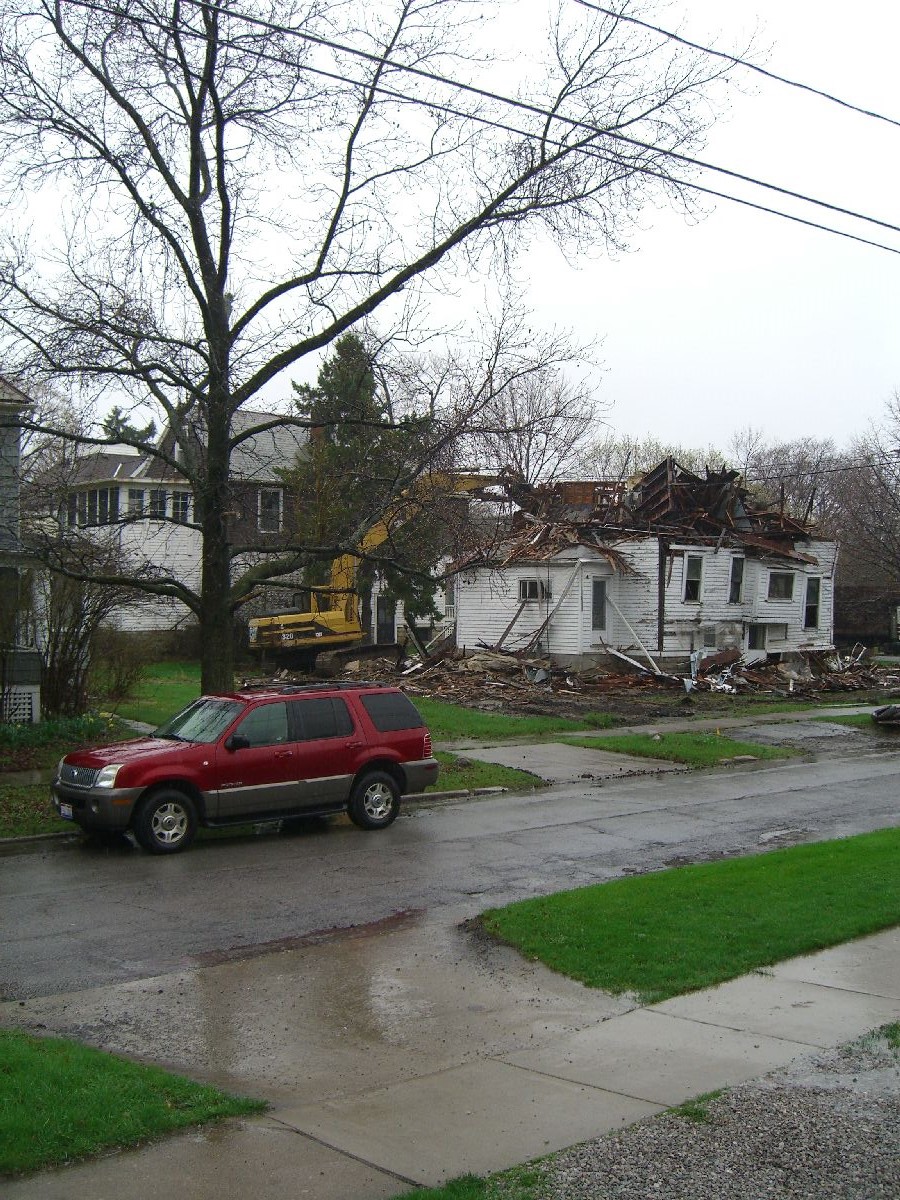
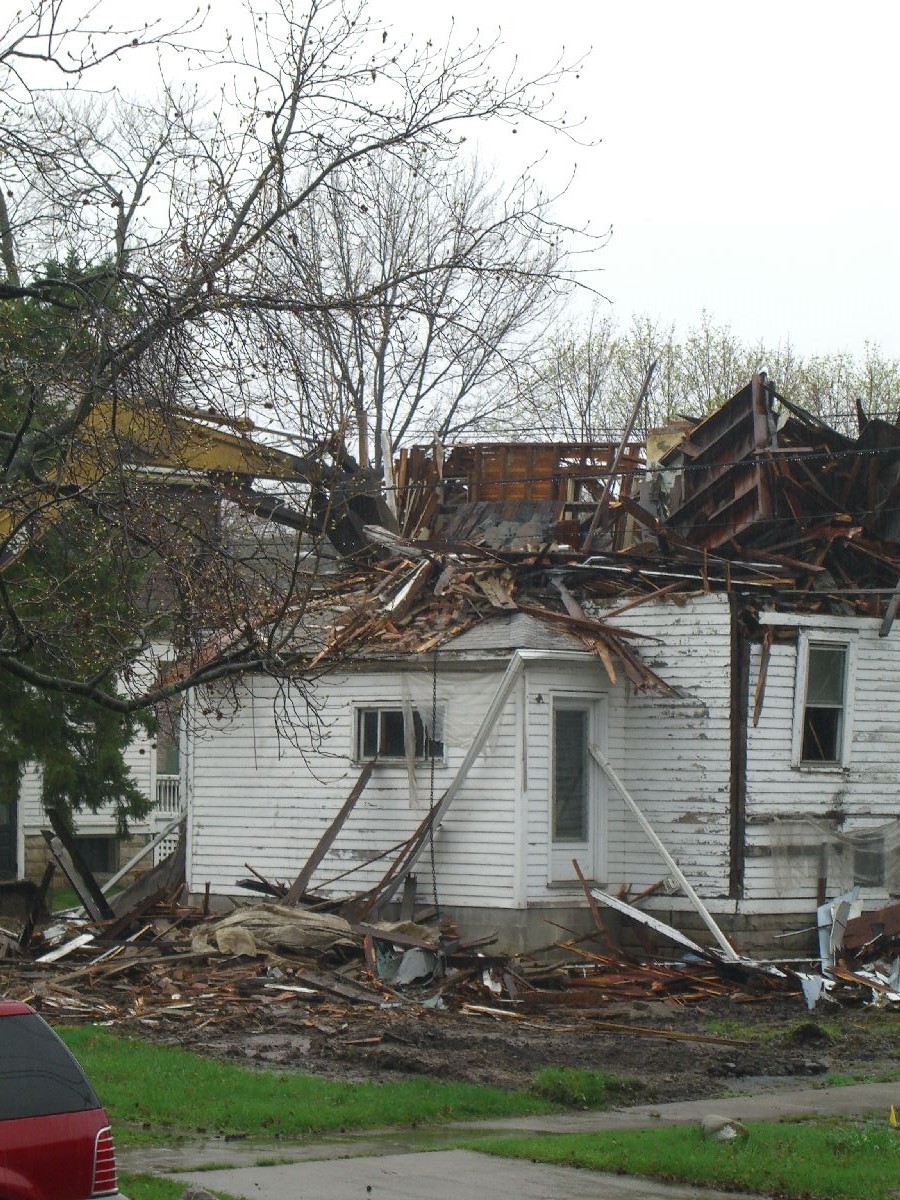
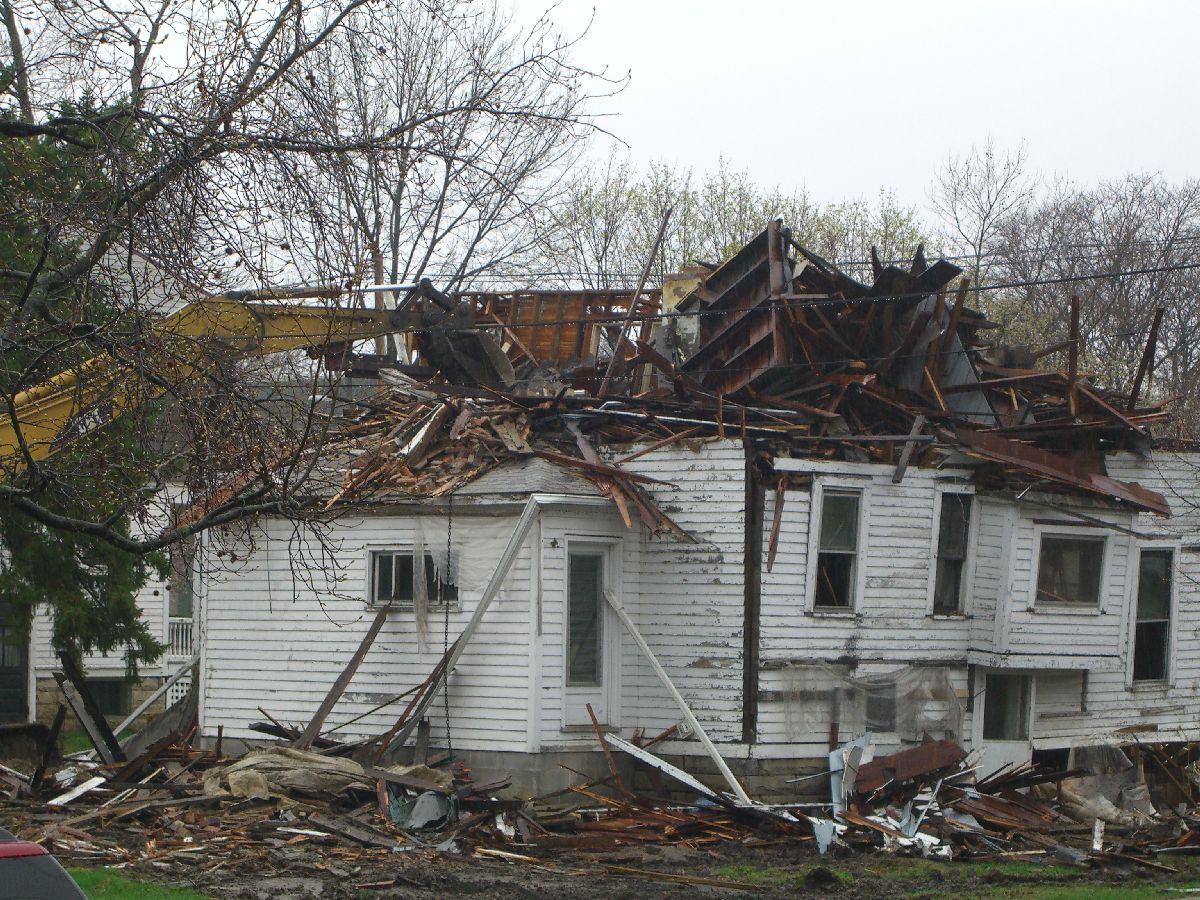
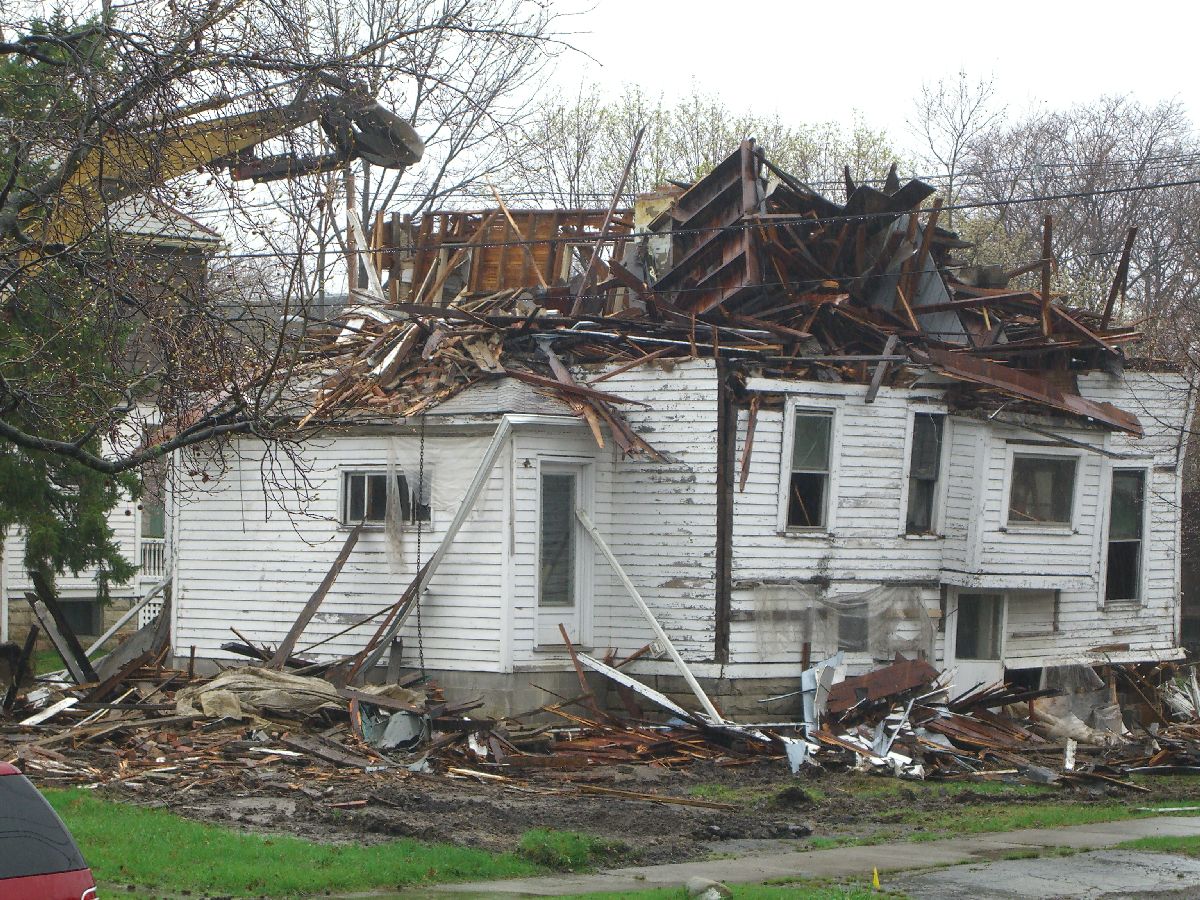
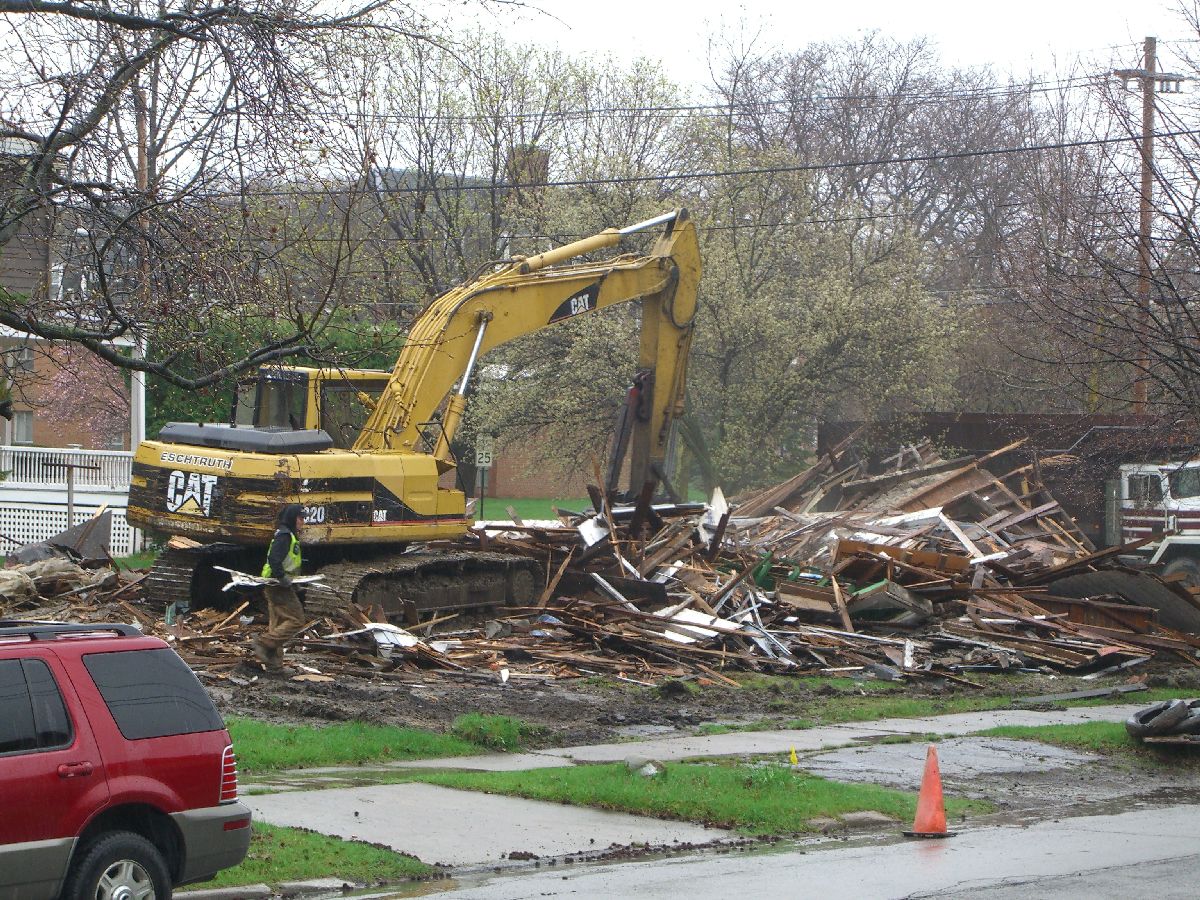
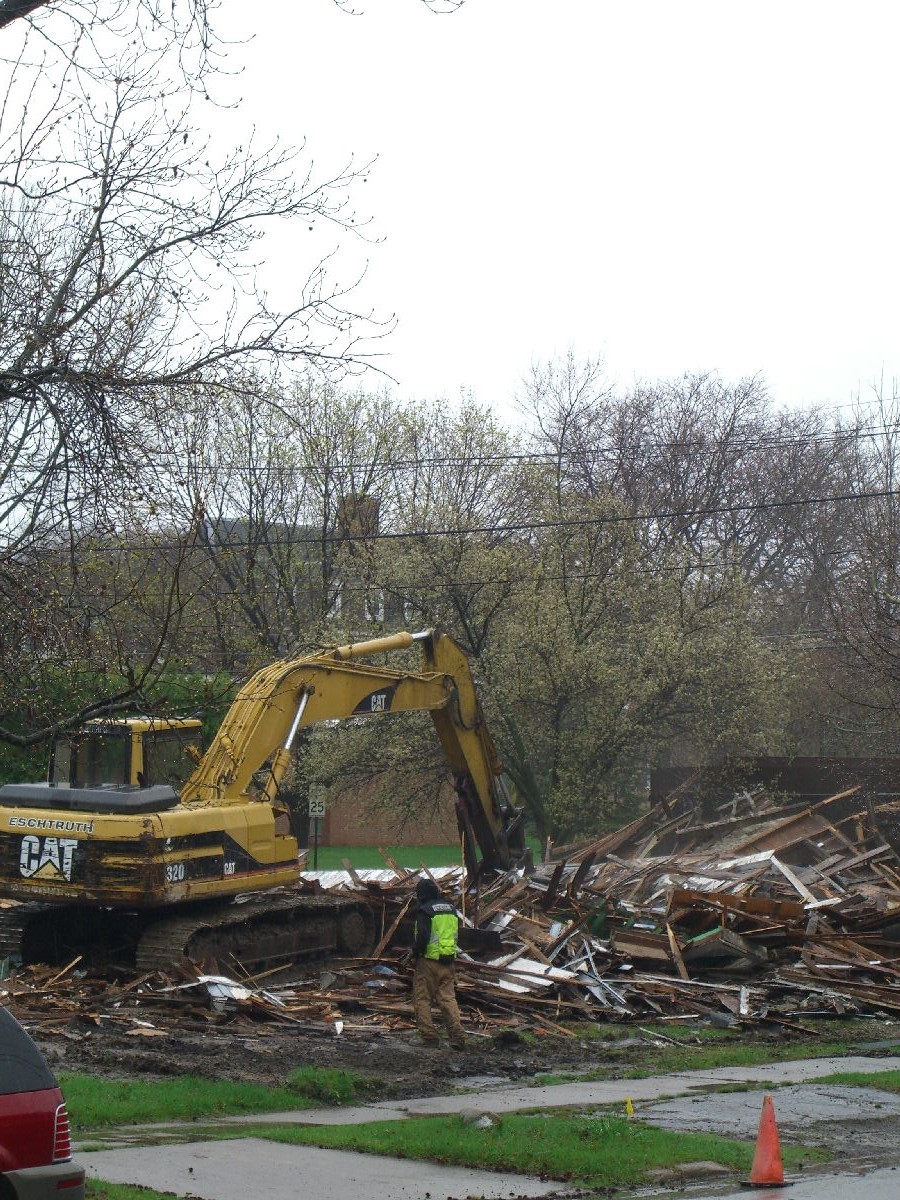
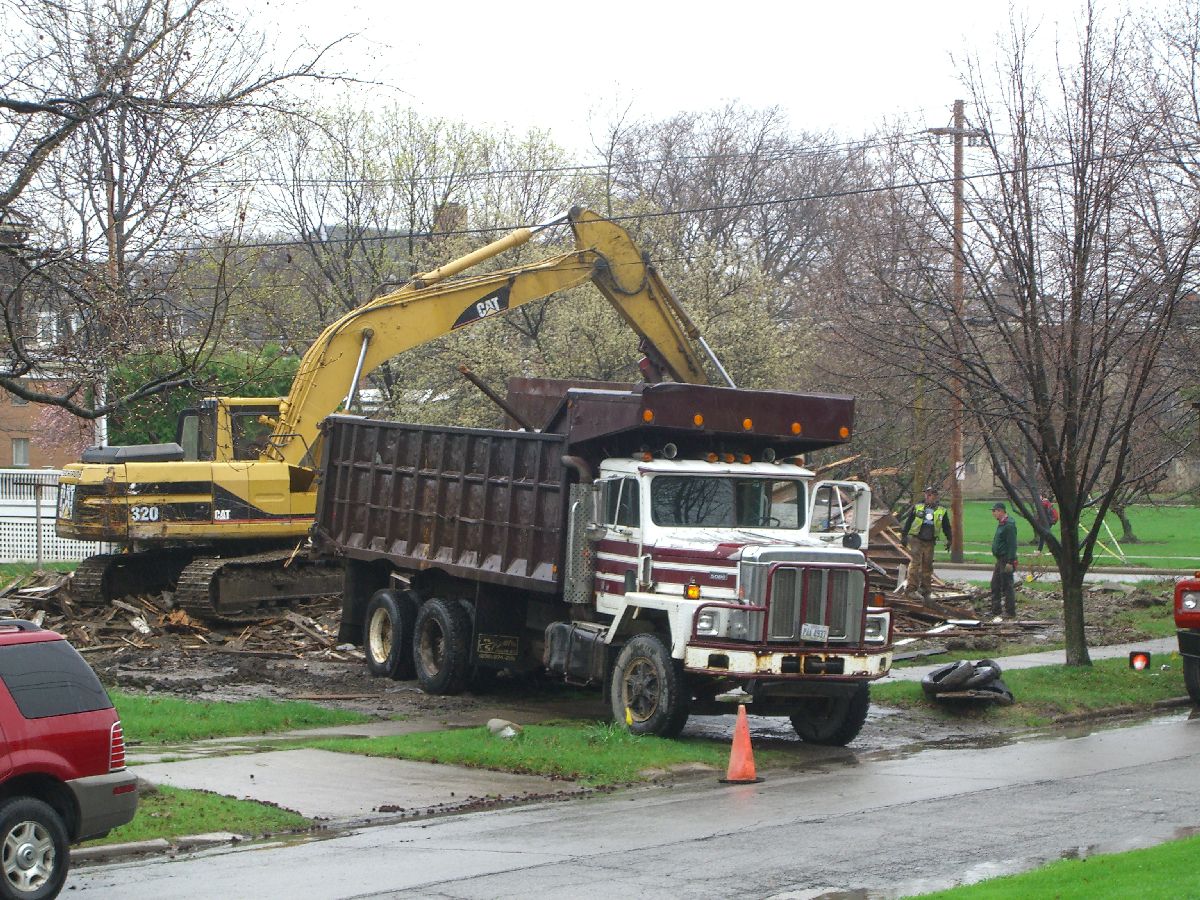
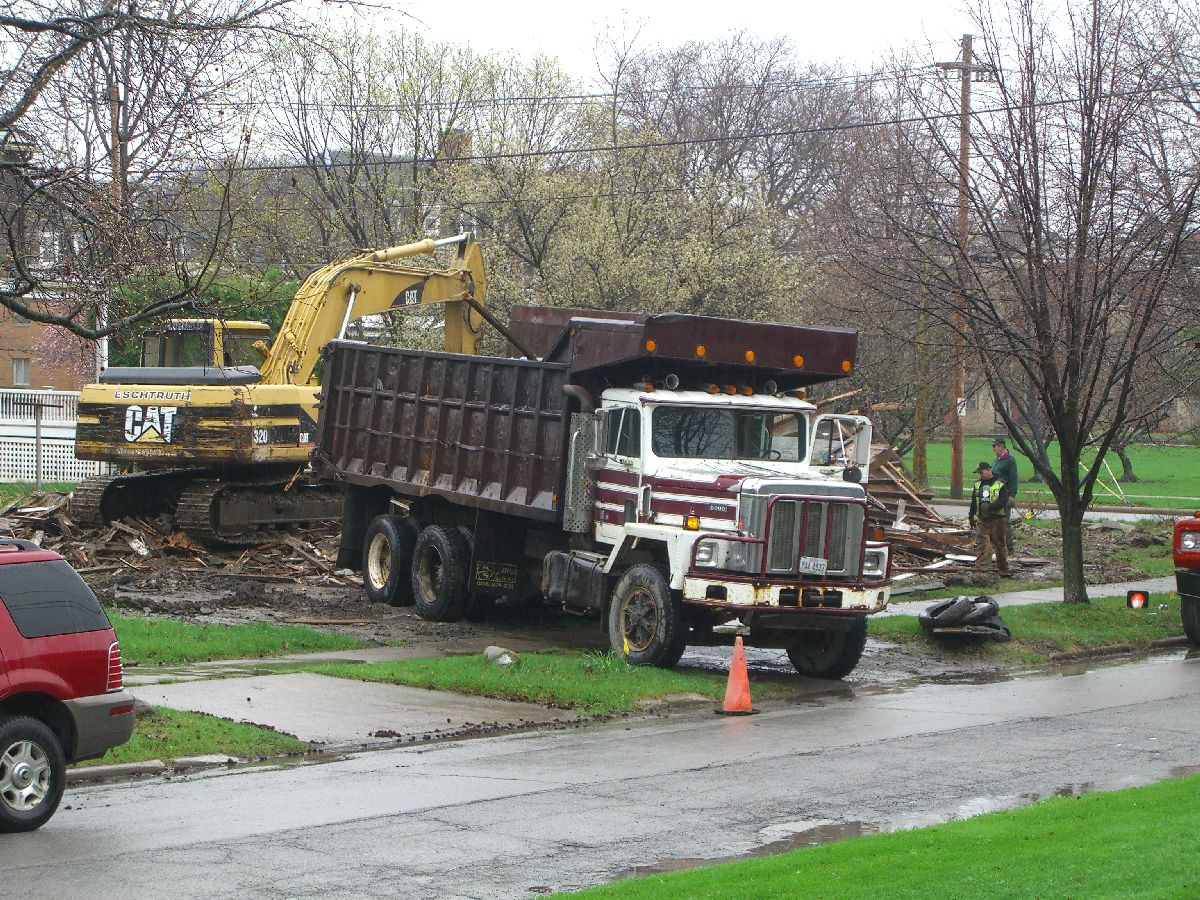
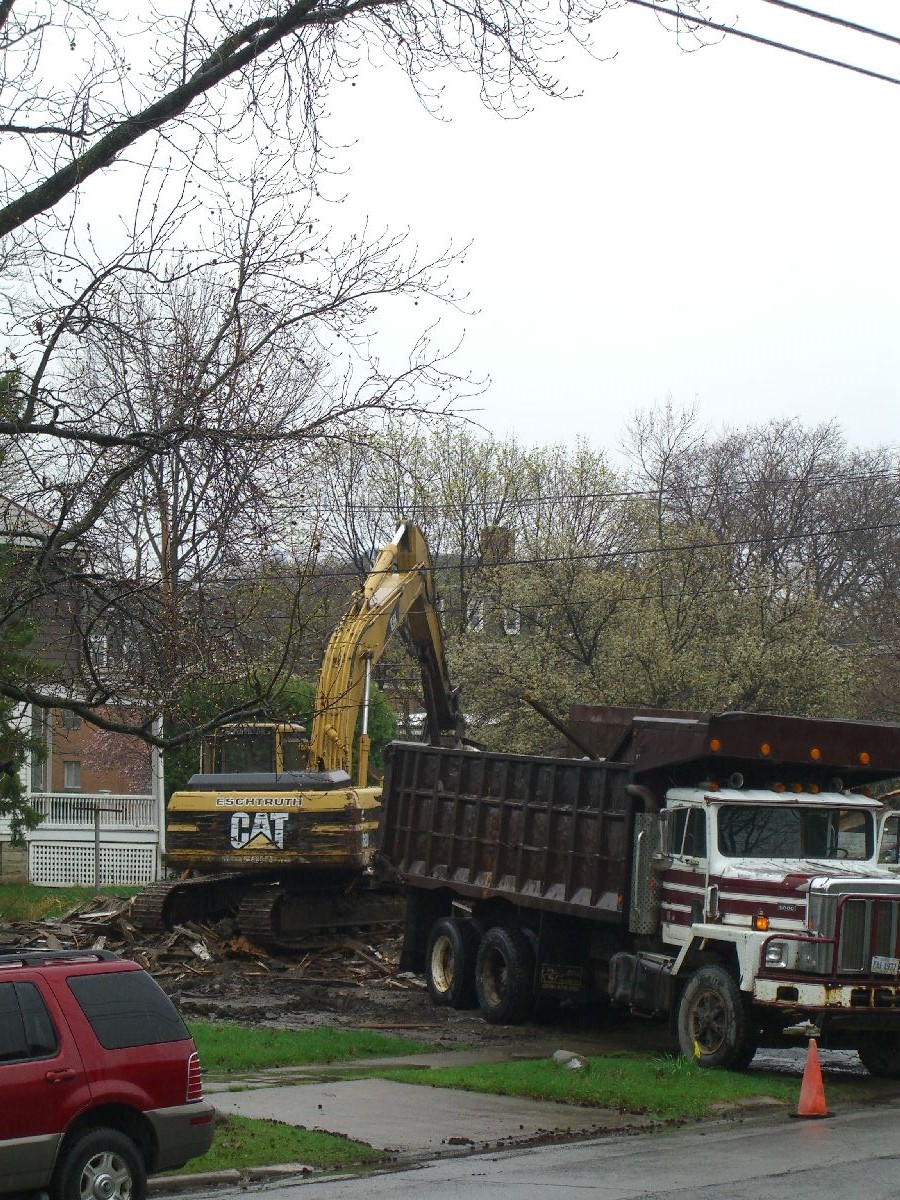
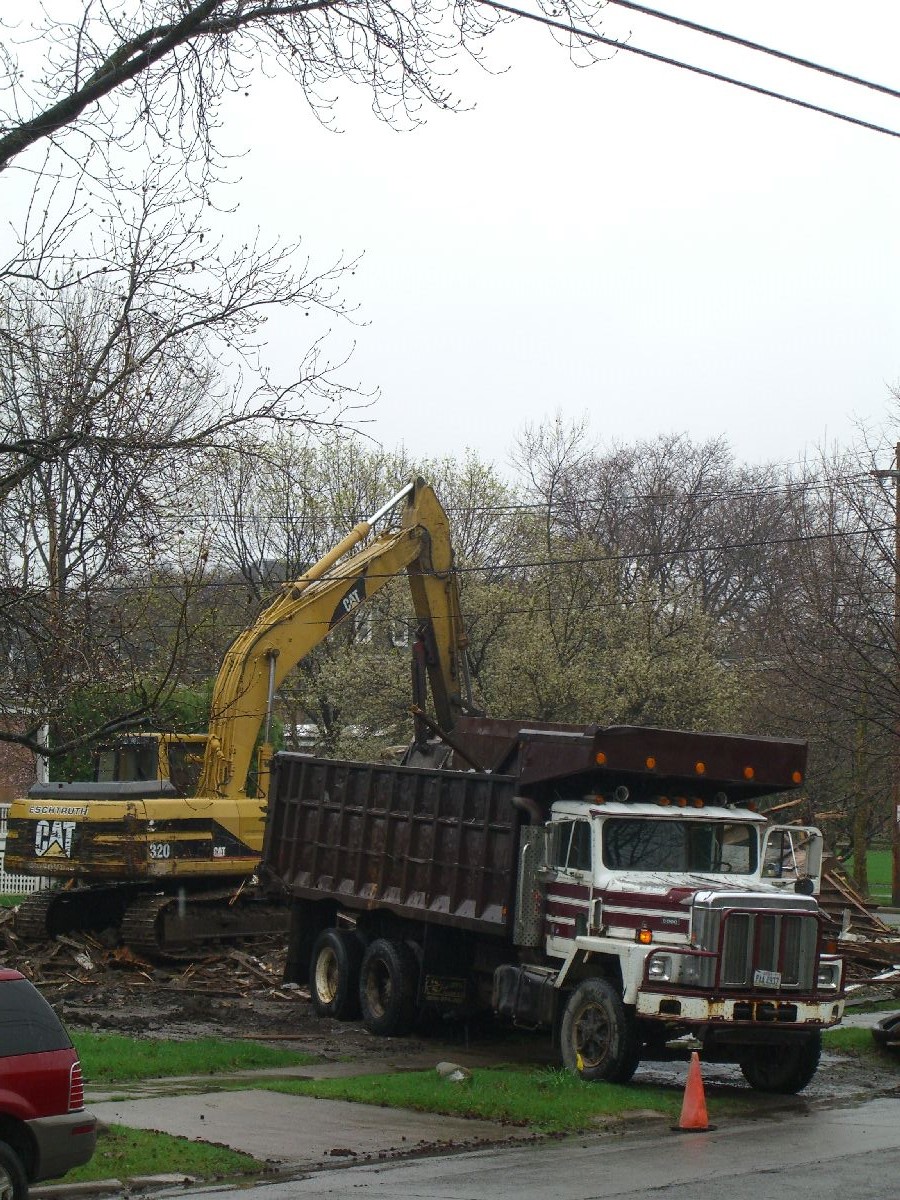
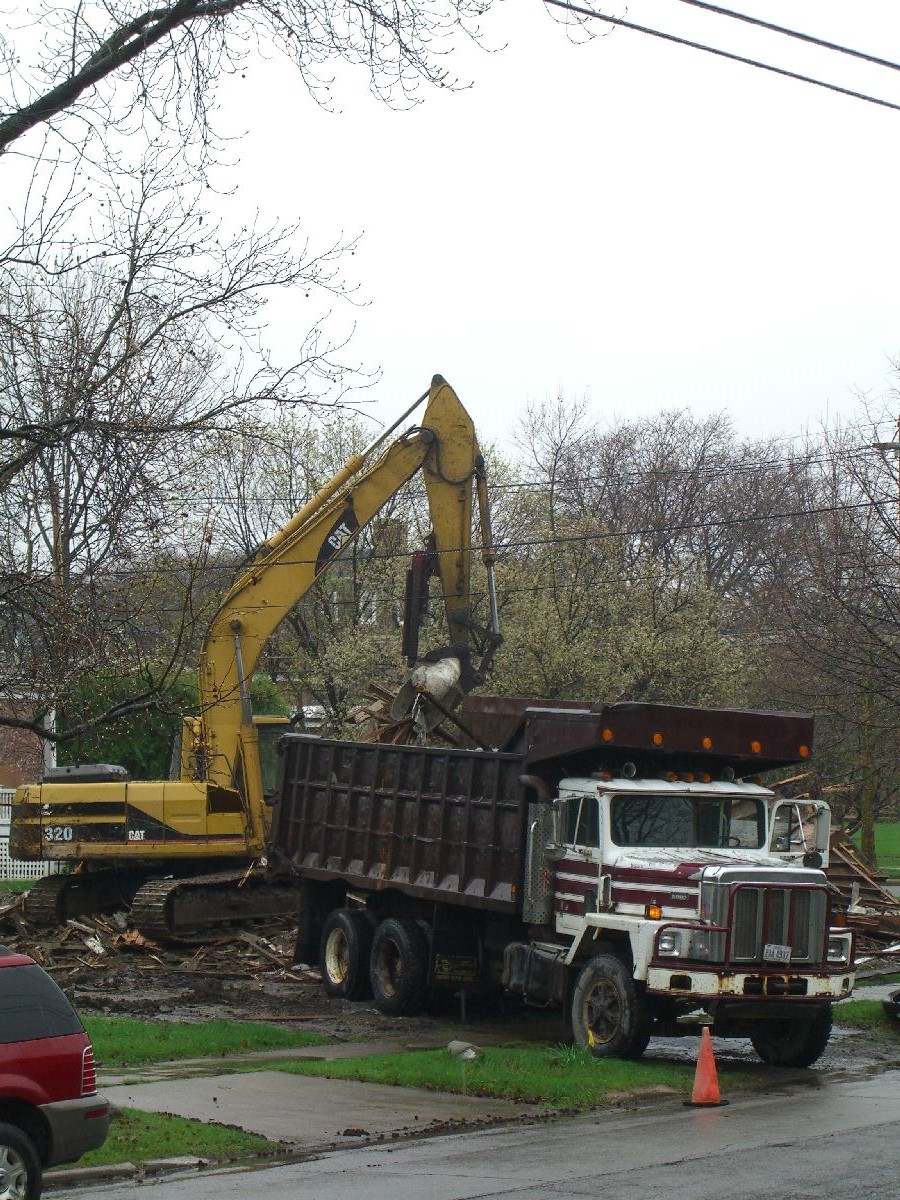
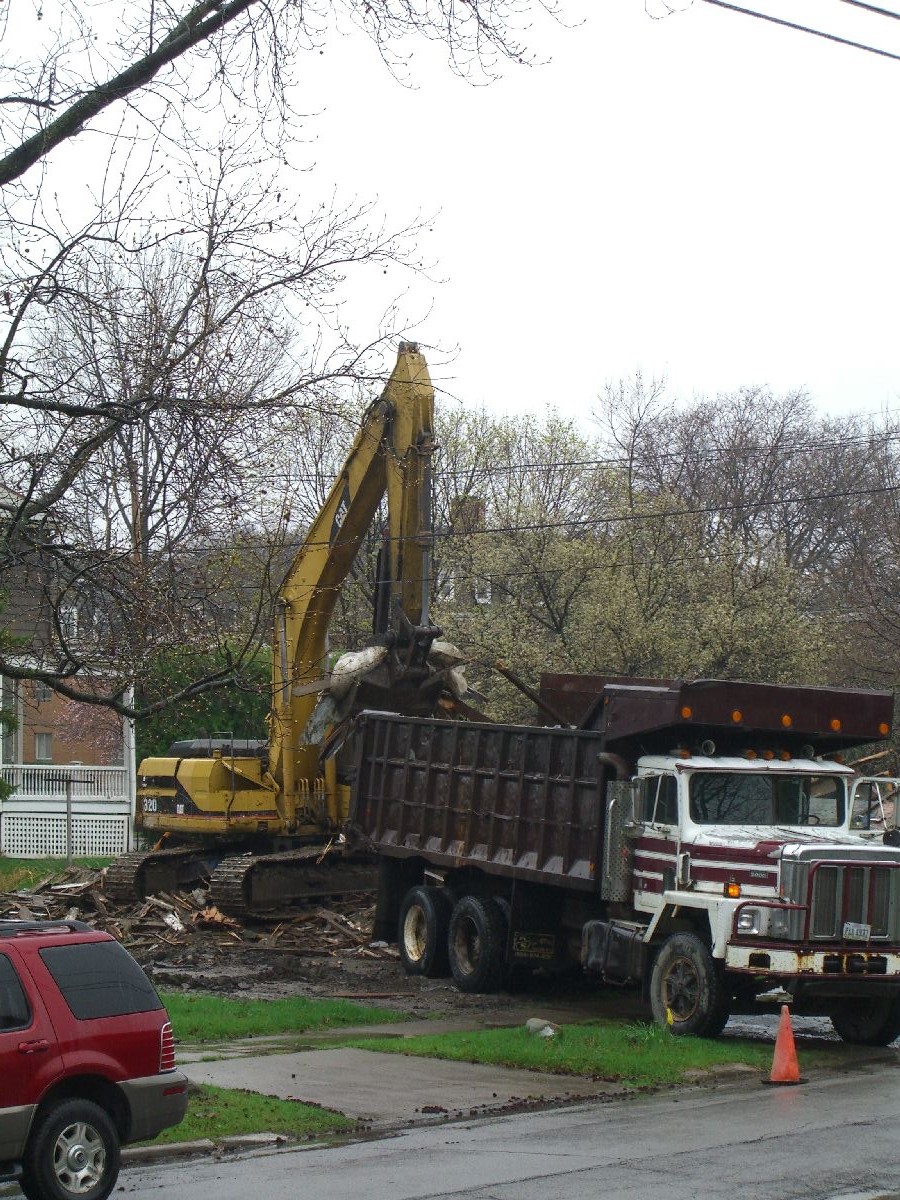
Posted by aaron in neighborhood on 30 March 2011
It’s an easy title, and I’m lazy right now.
A house across the street was under full renovation – interior stripped back to studs, entire structure floating on jacks while a full basement with new, taller foundation was built. Unfortunately the owner – Joe Orbeck, a great man with which to have a conversation, about houses or life – was sidelined for a long while with illness, and the house shell was eventually condemned. It, and a half dozen or more houses around town, was taken down using Recovery Act dollars.
Bruce around the corner, me, and a few others managed to salvage some usable materials before the demo crew came through – with Joe’s blessing of course – but it was still a shame to see those old, strong, straight beams get torn apart and tossed into dump trucks.


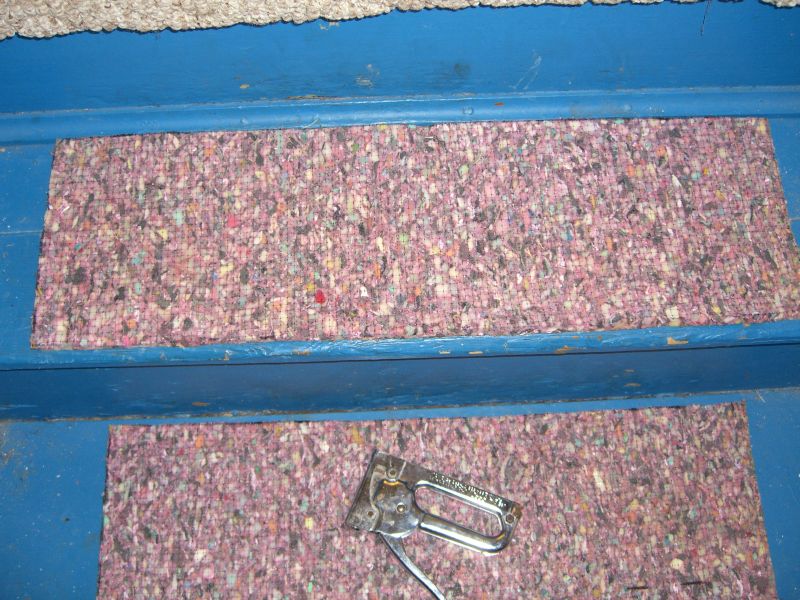
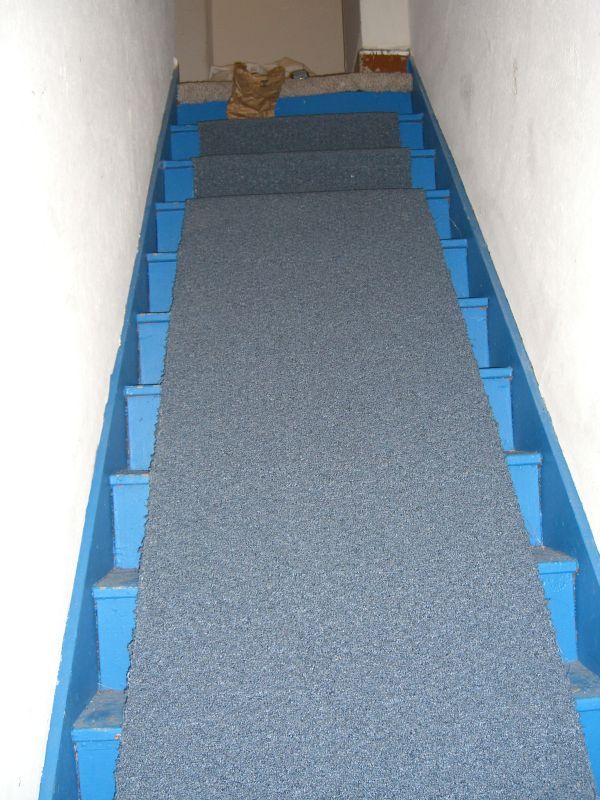
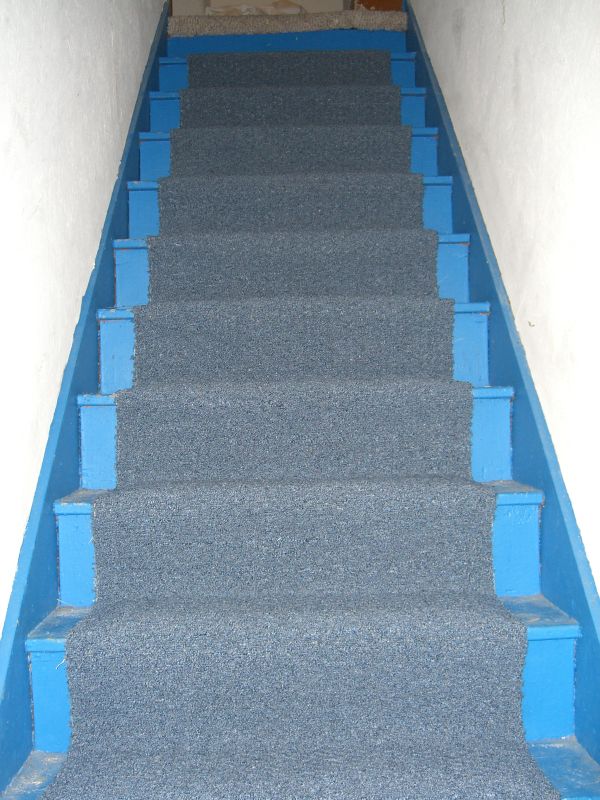
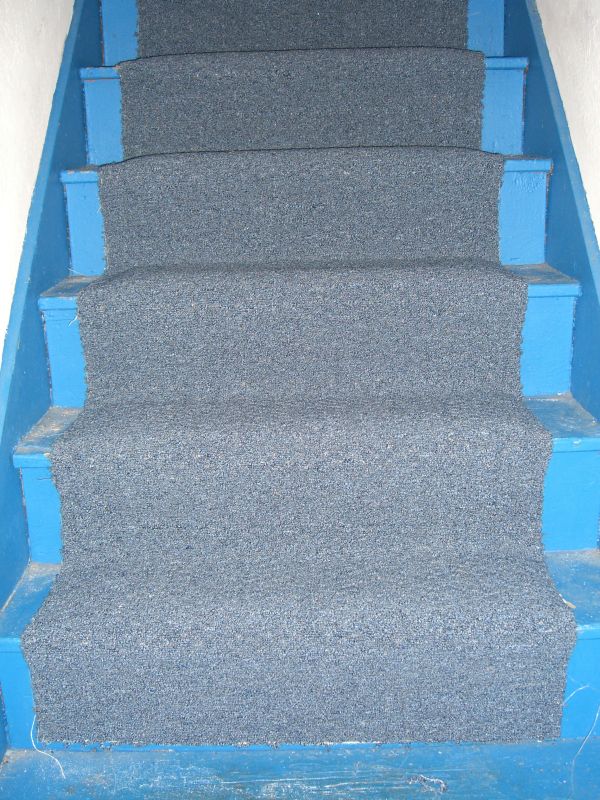
Stair carpeting


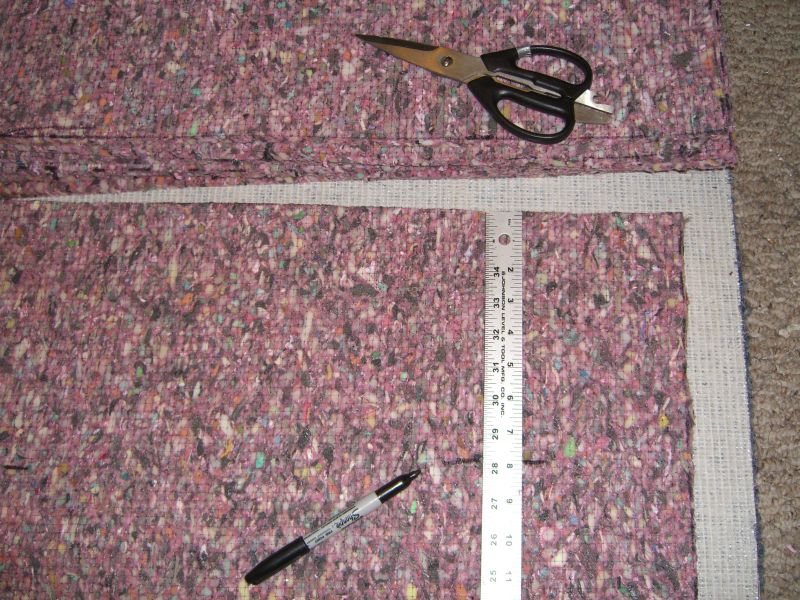

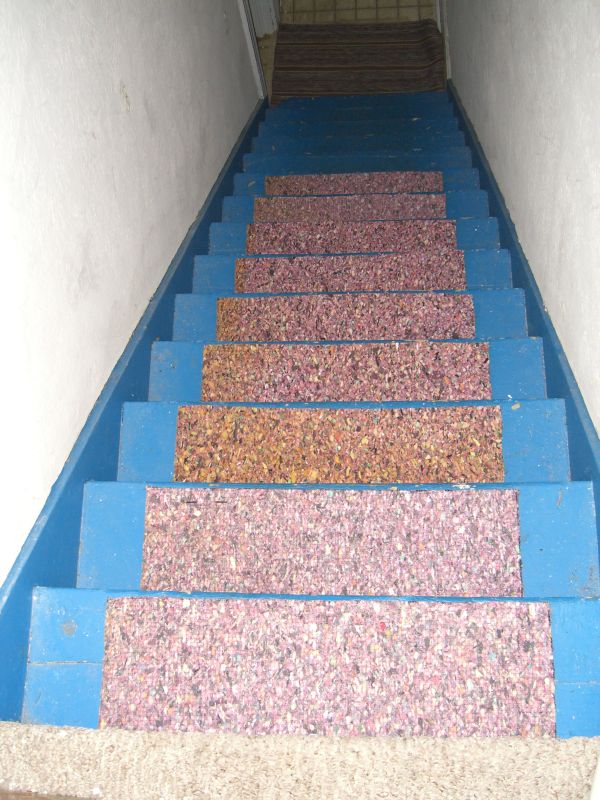

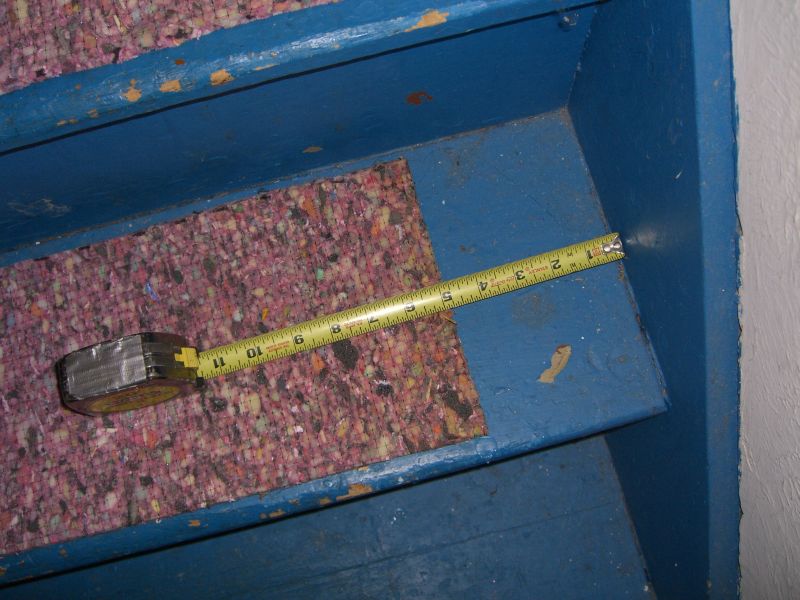
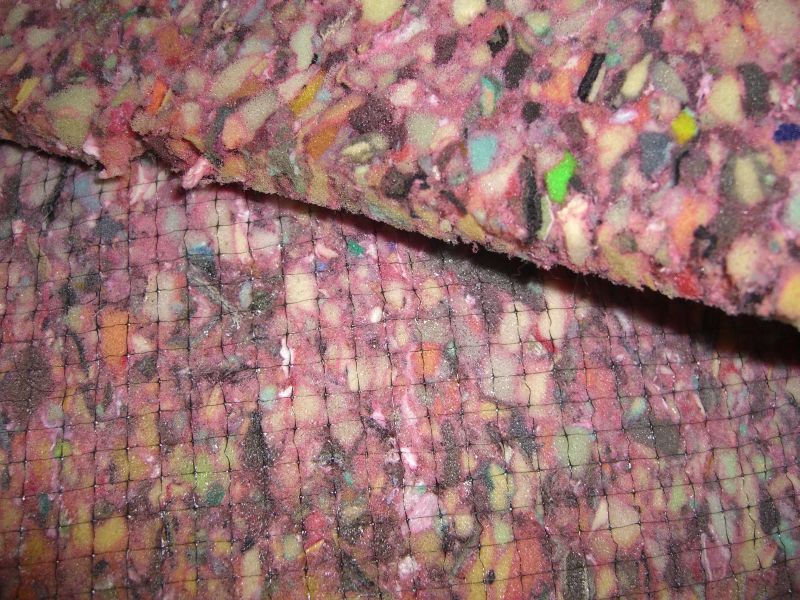
A staple gun with 10mm staples was enough to hold the padding in place. I put at least 10 staples into each piece, four each along the top and bottom, and one additional centered on the sides.