A really old project
I just found these photos from a project I completed in winter 2008-9. The downstairs bathroom was largely complete when I got the house, just missing trim:

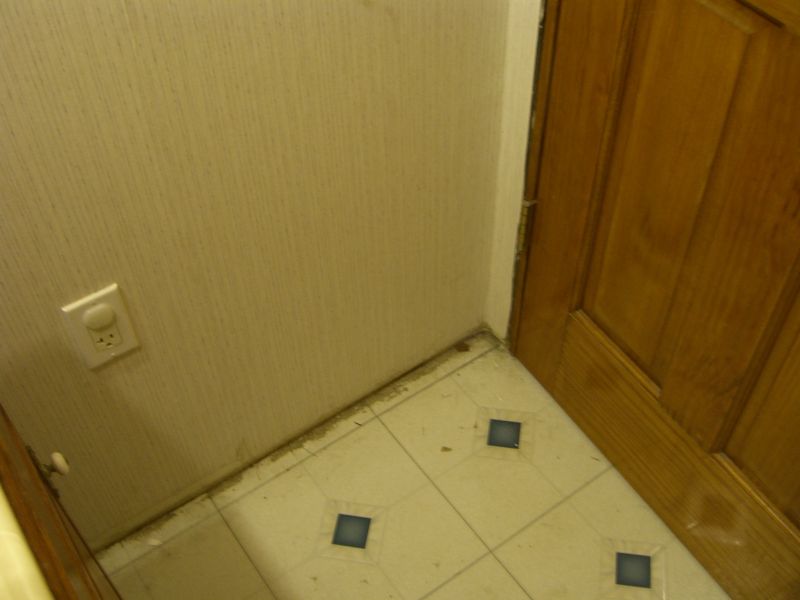
This was a pretty straightforward project. Given that nothing in this century house is quite square, the only thing I would have done differently if I could go back was the order of cuts. Actually, just the measuring, not even the cuts themselves. I’d recommend starting with the door – it will probably have a different trim pattern than the baseboard, so it’s a self contained project:


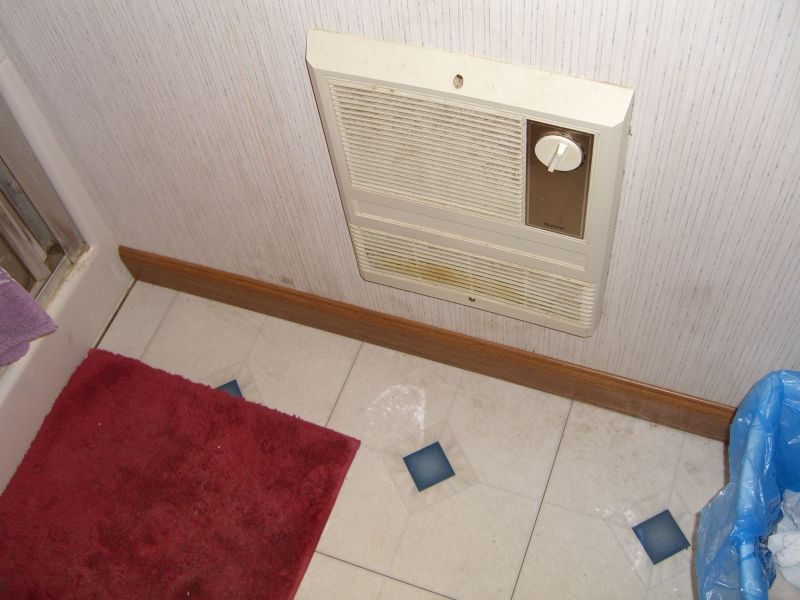
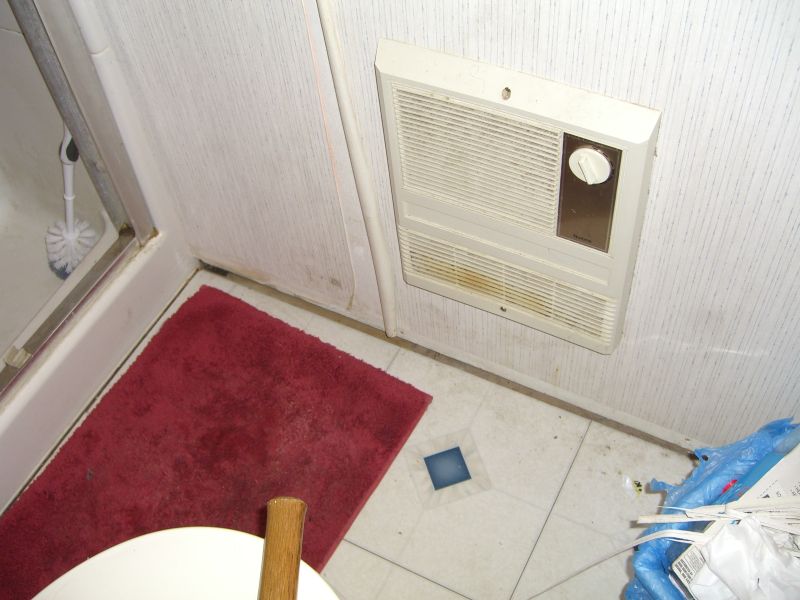
This trim, incidentally, is a composite from Home Depot, attached with Liquid Nails and a couple of very small brads for insurance. While I’d normally go with real wood in any project, this was one of the first house projects I was trying to complete, and I wanted a low-maintenance solution, something that wouldn’t react badly if I missed a bit of paint or sealant. If this bathroom ever gets redone, it would be a top-to-bottom approach and you can bet reclaimed wood would be used for the ‘new’ trim.
No more squirrels!

Plant IDs, please
Posted by aaron in advice wanted, outside on 14 October 2010
Before I start slicing down even more things in the backyard, I thought I’d double check. This is buckthorn, I’m quite certain:
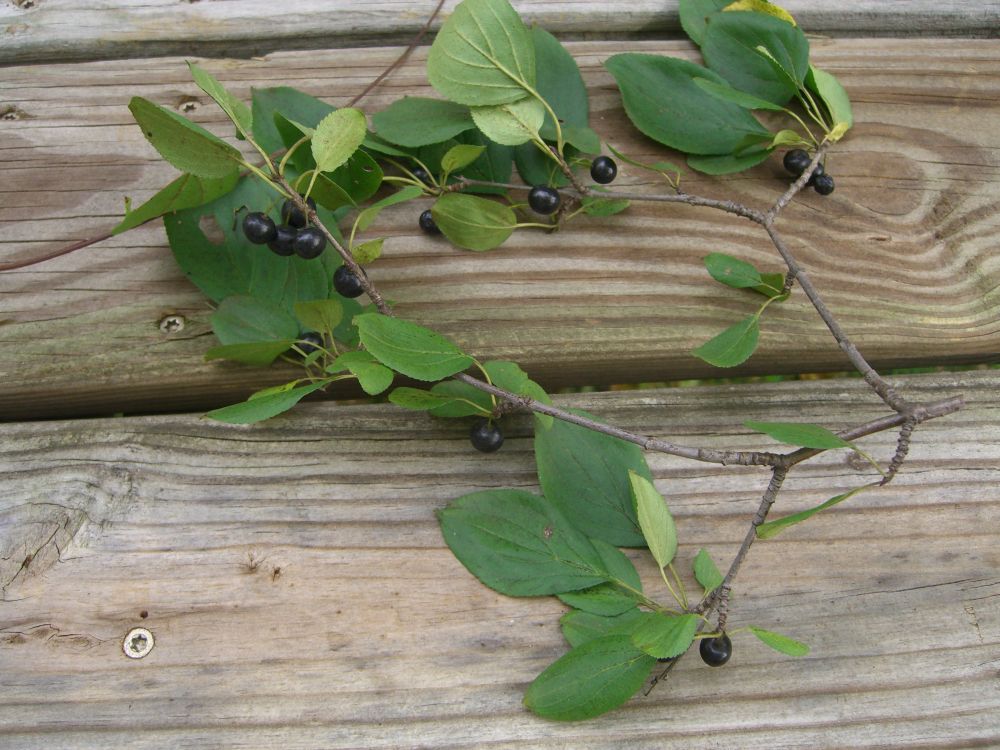
This I’m 90-some-percent certain is also buckthorn:

But these flowers that have suddenly appeared in various parts of the property are new to me. Anyone know what I’m looking at, and especially if it’s an invasive?


Just in time for winter – a picnic table
The table was completed in May, actually, but the post title was far too clever to pass up (right? right?).
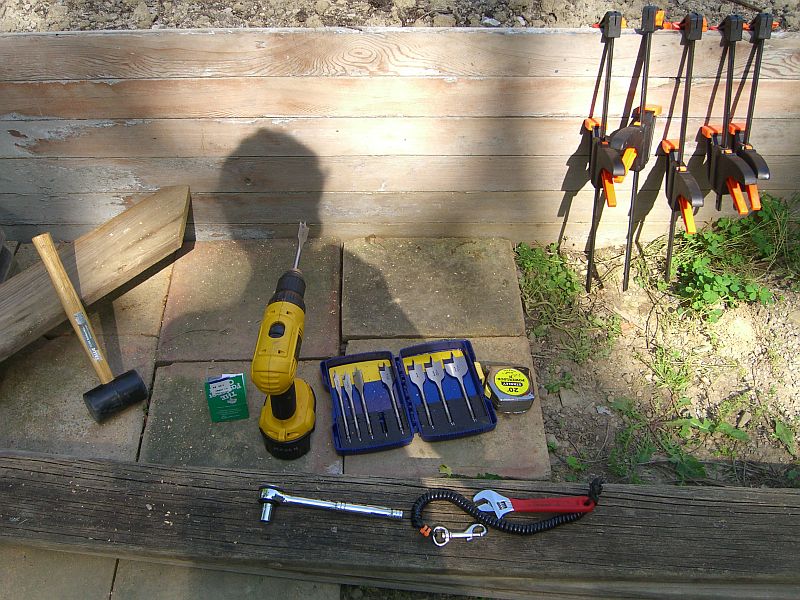
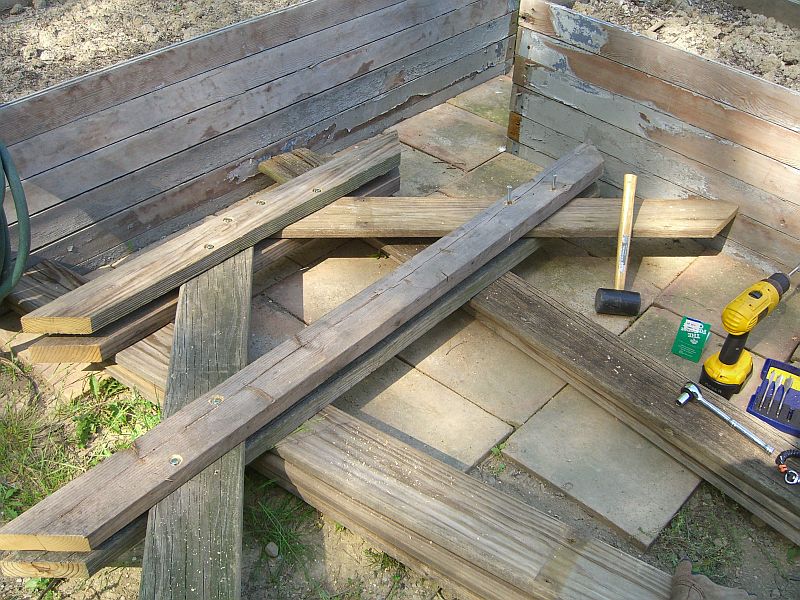
The internet is a wonderful place. Not just for movie trivia and porn and porn movie trivia, no, it also includes dozens (dozens!) of downloadable plans for picnic tables, including at least one document that covers the theory behind picnic table construction. Not theoretical picnic tables – those are littering my backyard right now, next to the imaginary deck and behind the possible archery range – but the concepts and principles behind constructing a table, particular one without cross braces underneath (I just don’t like that design for some reason). This set of plans can also be completed with a few power tools (drill, compound miter, and… that’s it), an added bonus.
Having a well-explained primer on building a particular thing is very handy when, like me, you’re using materials on hand, not buying fresh stock to match specs. The raw materials for this table are almost entirely pressure-treated wood from the old deck benches I took apart last year – 2x4s and and something like 1 1/4x6s This meant both building deeper benches and adjusting the number of planks for the top.
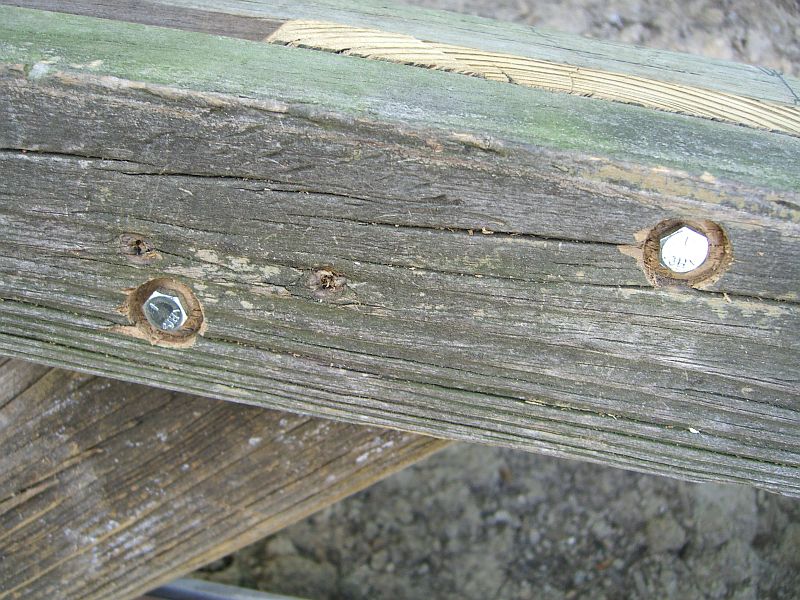
Paddle bits let you sink the bolt heads for a cleaner look:
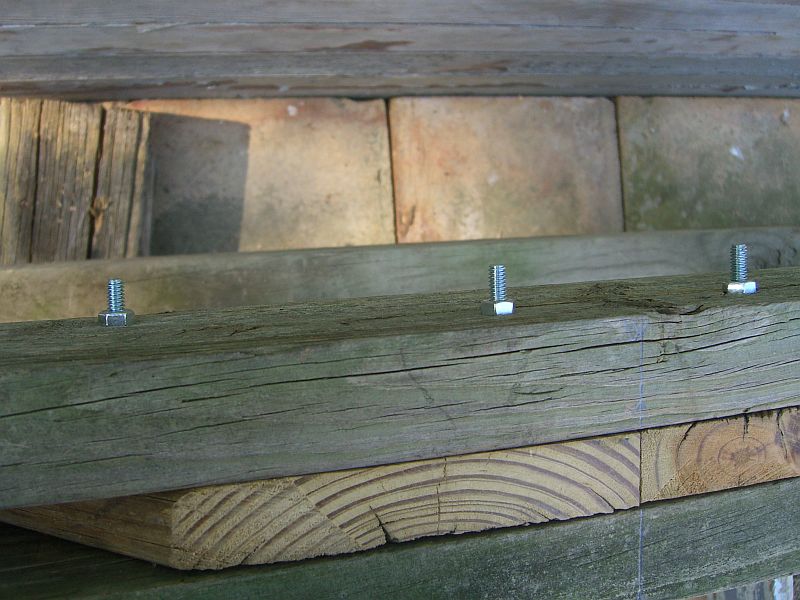
My local hardware store (Watson) lacked the exact length of bolts needed for this thickness of wood, but a little extra length shouldn’t hurt since they’re all on the inside of the frame:
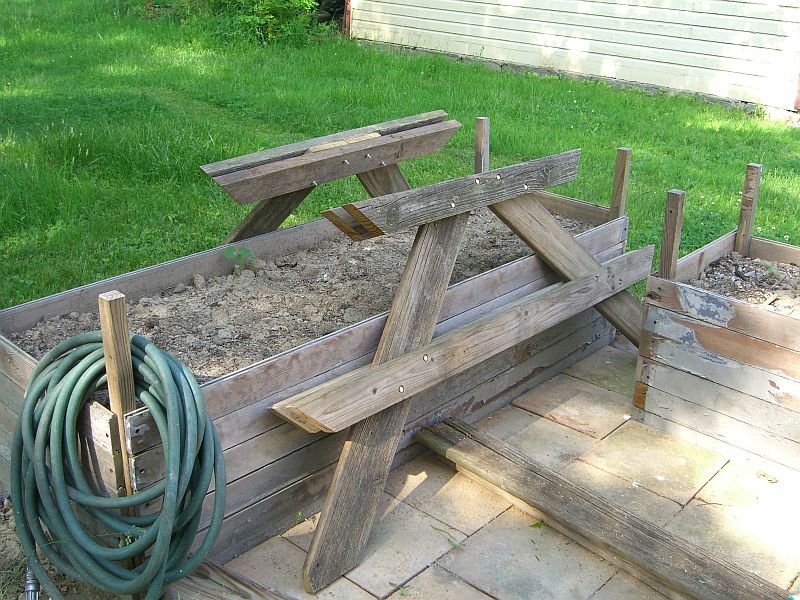
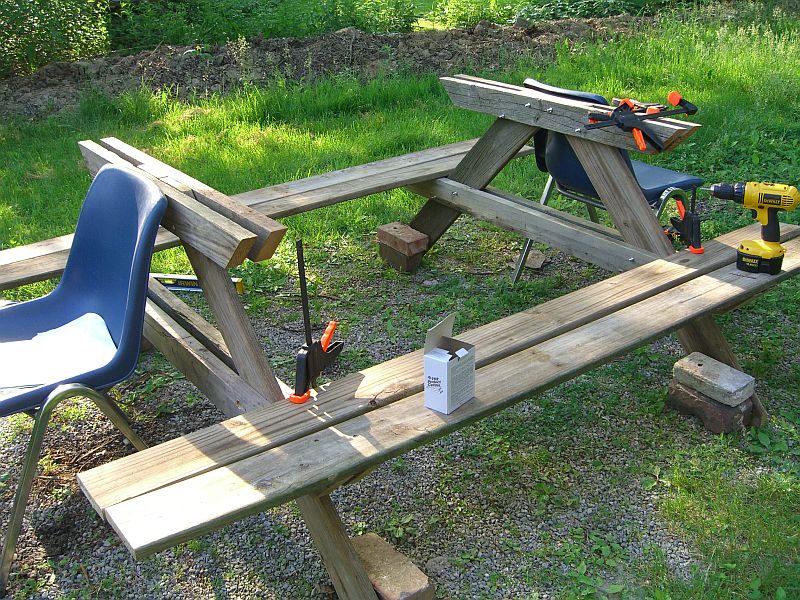
If you don’t have a friend to help level and assemble everything, or a properly equipped shop, find matching chairs:
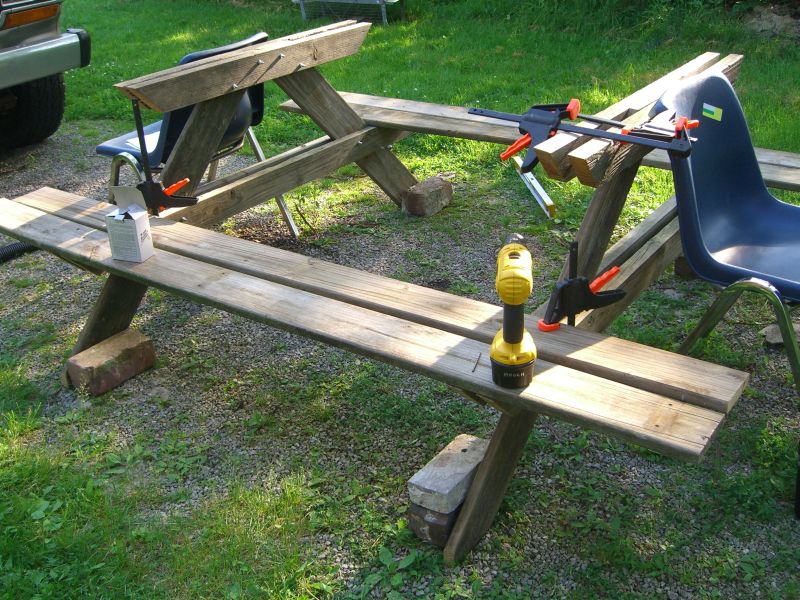
Jerry, Watson’s owner, recommended ceramic-coated screws from the Project Center line – these are great. They’re self piloting, the drill tip means they aren’t likely to split the wood if used near an edge, and the coating makes this table a lot more weatherproof.
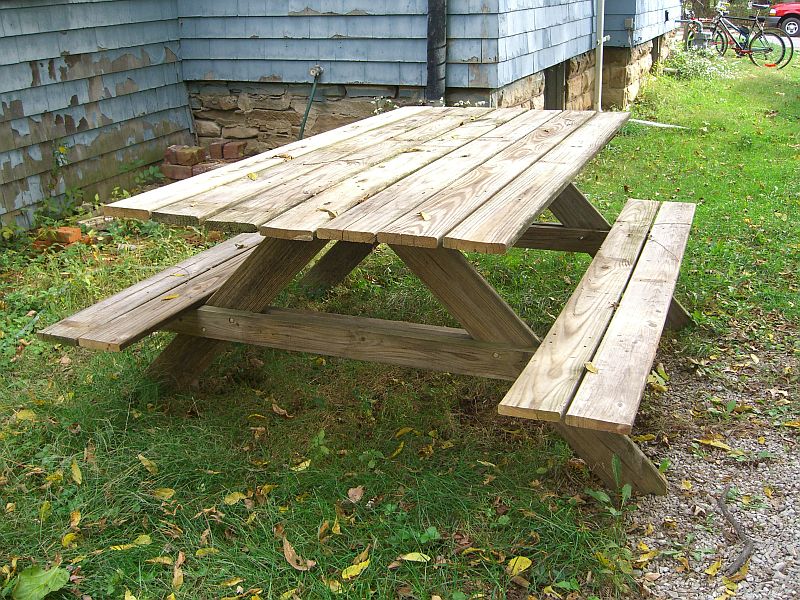
You’ll notice some minor bowing in the top planks – I was working with reclaimed materials, remember. Everything seems to be holding together fine – we’ll see how it survives the coming months.
Total cost: about $20, all for the fasteners.
Spring balances – a note of caution
Posted by aaron in tools and materials on 30 September 2010
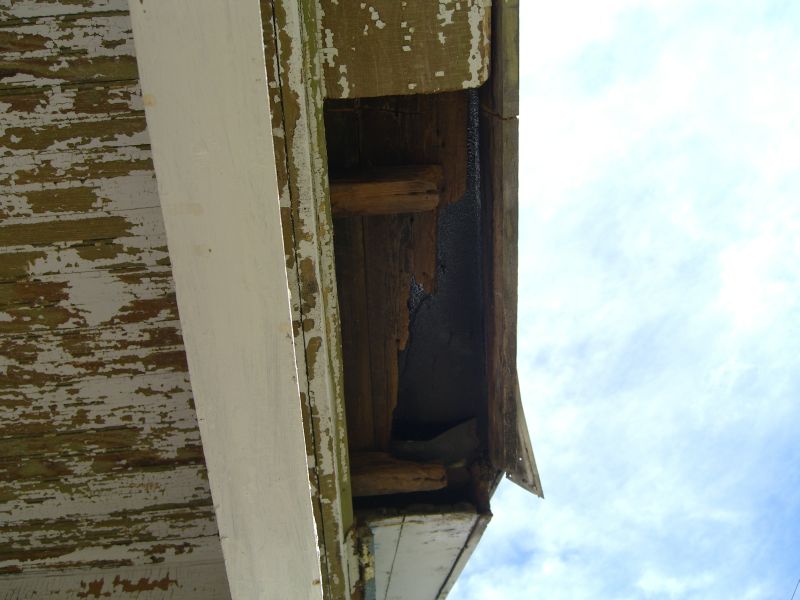
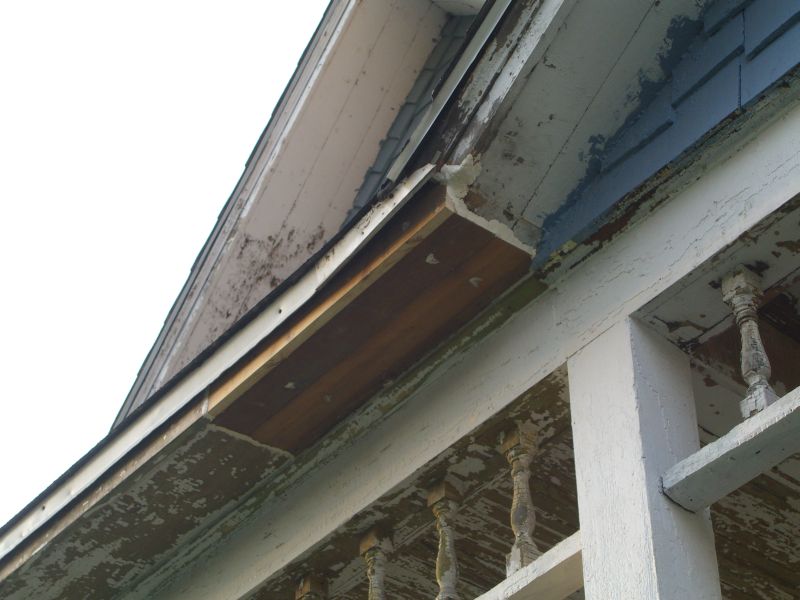
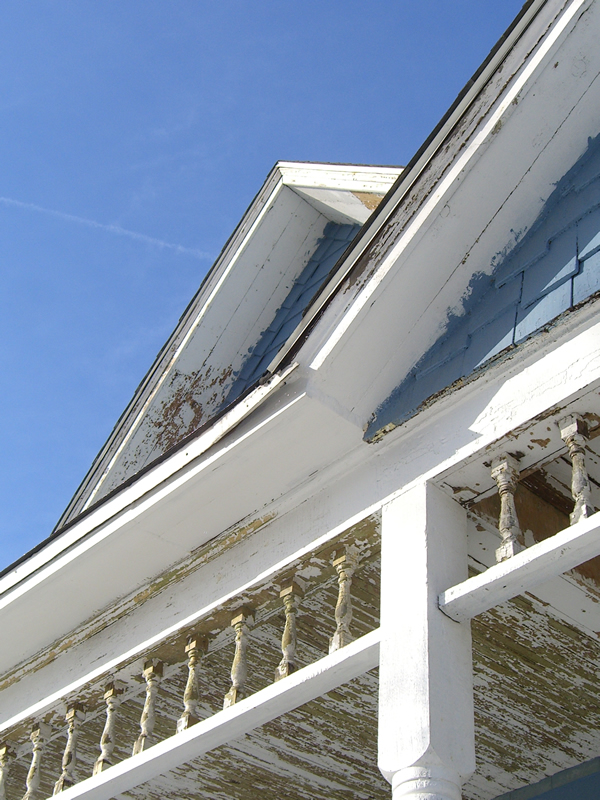
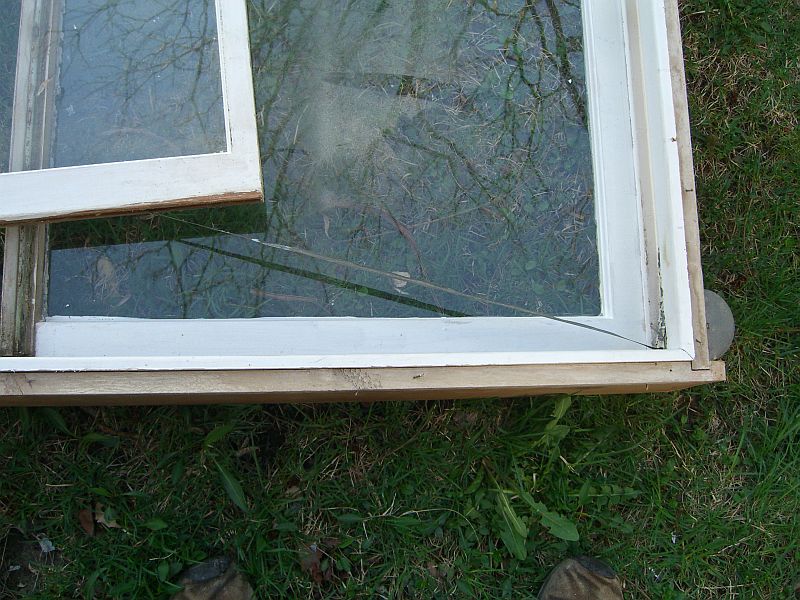
If you’ve skimmed this blog, you know I like salvaging old building materials for new projects. Such was the case with a set of 60s era windows, still in frames, out of a house up by the lake. Disassembling the frames to free up the sashes is pretty straightforward – you just need a little patience to separate the pieces without splitting to much of the wood. The reason for this post is just a bit of fair warning about the object on the top right of the frame in this picture:

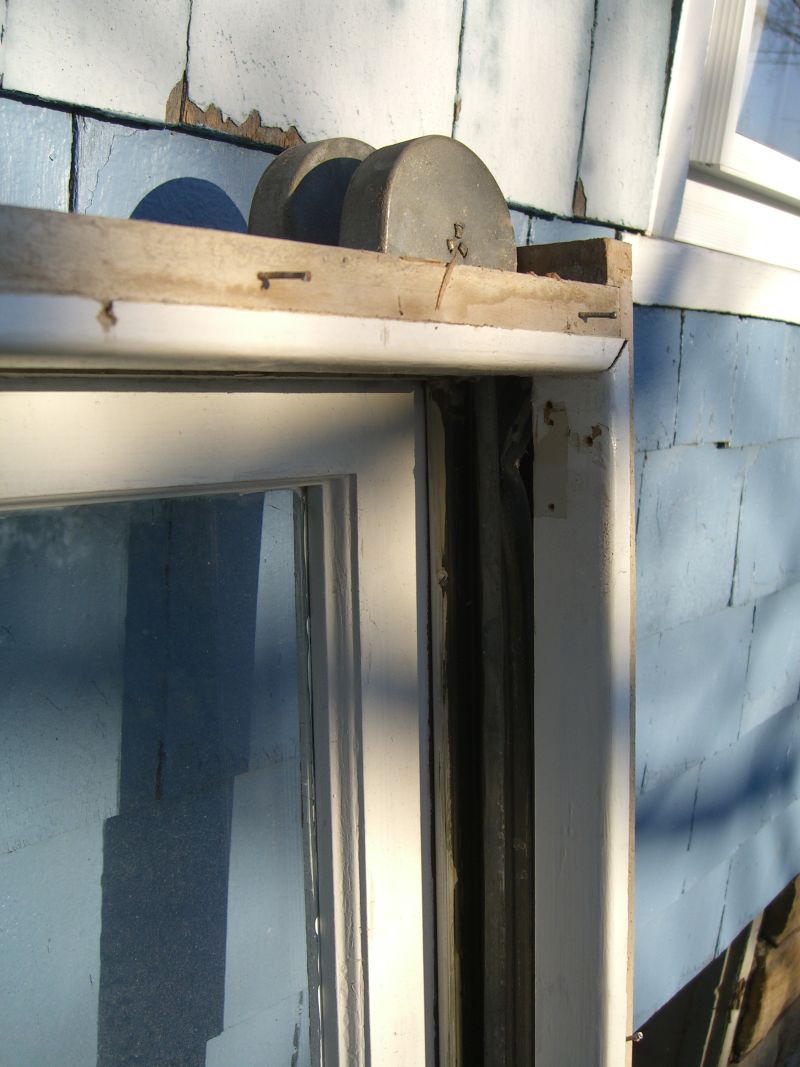
These are spring balances – one per sash – a technology still very much in use today. They are just a strap wound and spring loaded in the case, and attached about a quarter of the way down each sash:
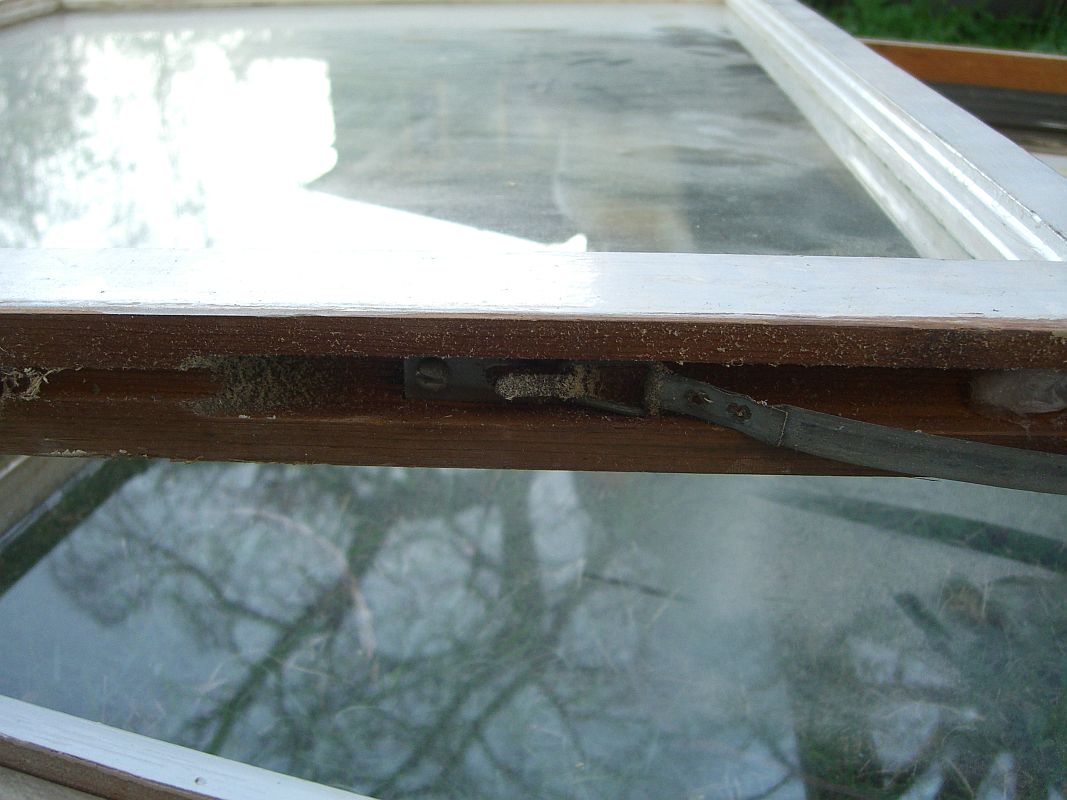
I’ve seen a few of these with rubber straps, but typically they are thin, flat metal. With very sharp edges. The safest way I found to approach these is to relieve the tension on the spring – free the sash from the frame and tilt it so the strap can retract almost all the way (see next to last photo). Then and only then should you try and release it from the hook inside the sash. Wear gloves (seriously) and safety goggles (no reason not to).
Another big pile of wood
Posted by aaron in tools and materials on 8 September 2010
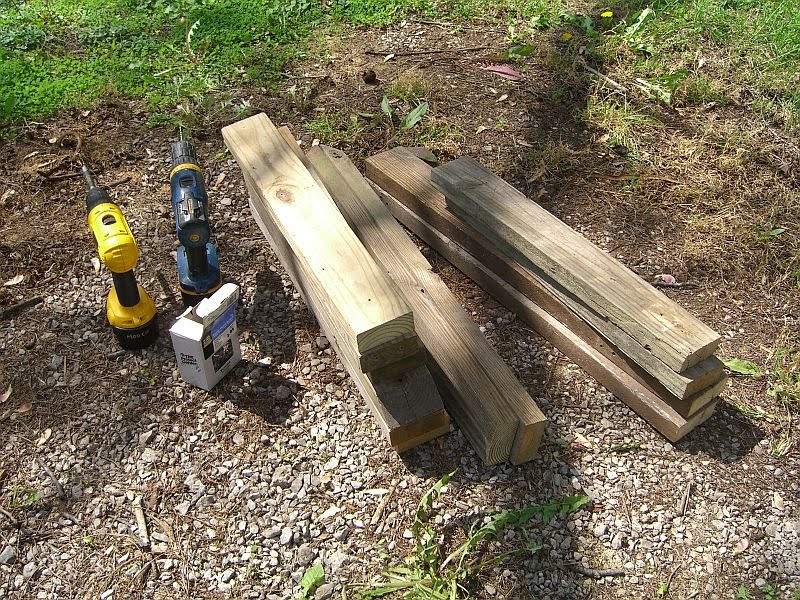
These are actually pretty cool, and I hope they’re in good enough shape that I can get a lot of use out of them. One of the old buildings downtown is being completely renovated. As part of this, they removed and replaced the old floor joists – and I hauled them back to my place for nefarious purposes. In the process, I confirmed that I really want a pickup truck.

After cleaning all this off the planks….

I have 40 or so planks of 4-6+ feet each. They look like oak. They are definitely 100+ years old. And if enough of them are in good enough shape, I think I’ve got a deck, a nice floor for the back room, or at worst some serious shelves and furniture.
And in the critter file, this fierce creature decided to set up house under the original pile. I’ve tried to cover the cleaned wood a little better…

Bike rack
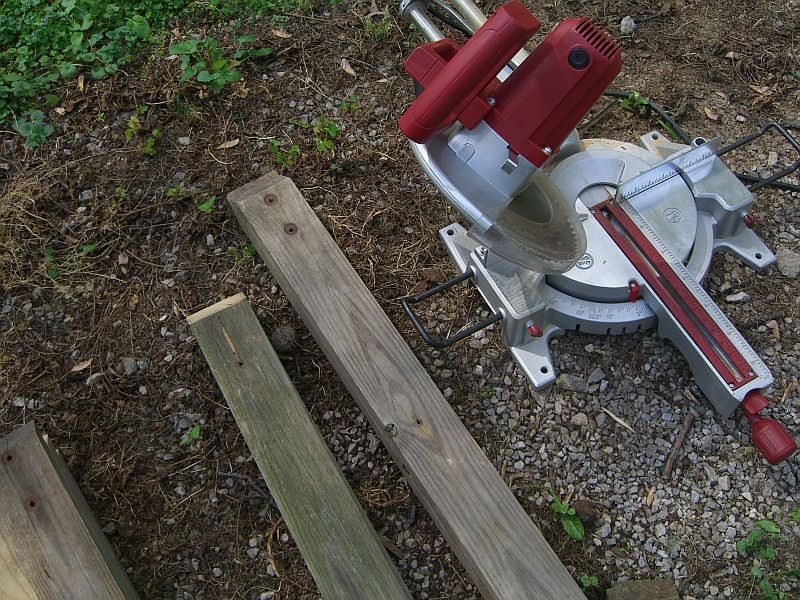
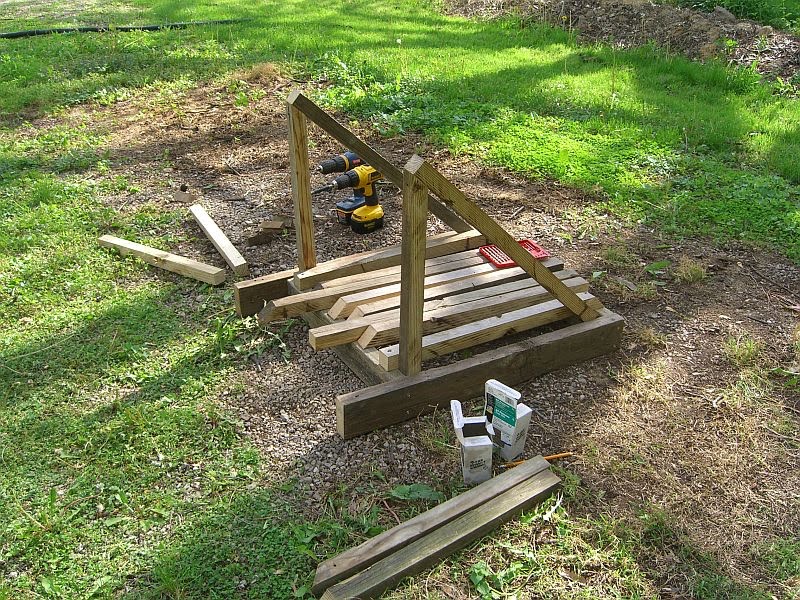
Here’s a quick and easy project I finished a few months ago. The old deck benches – most of which became my picnic table (which is itself an upcoming post) – included a number of 2x4s with 45-degree miters. While flipping through woodworking plans online I found this bike rack plan that included a bunch of 2×2 sticks with 45-degree miters. The gears whirred slowly in my head and I realized I had just about enough pressure-treated wood in lengths that weren’t good for much else, some of which were practically precut.
I won’t recap the whole construction process – the steps in the linked plans are pretty straightforward. Beyond the compound miter in the pictures, I used my trusty Craftsman table saw to rip the 2x4s to something just shy of 2x2s, and they seem to be working fine.
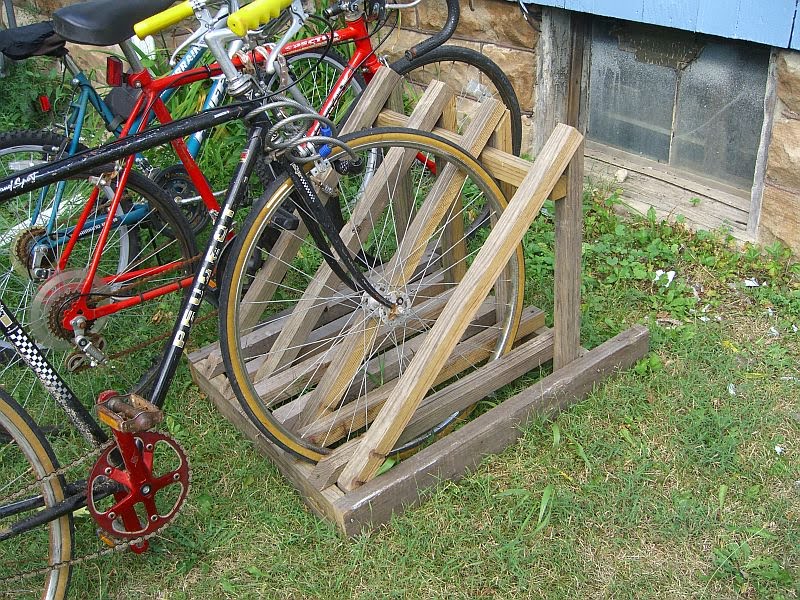
Room for at least three bikes if you tie up to the outsides (as the red one is in this picture).
Raised garden beds
I am now light-years behind on any sort of posting schedule, or non-schedule, or really just posting, period. As a result, several of the next few posts will be horribly outdated: projects I finished months ago – some even last year. I’ll start with some adaptive reuse that’s been feeding me for part of this summer:
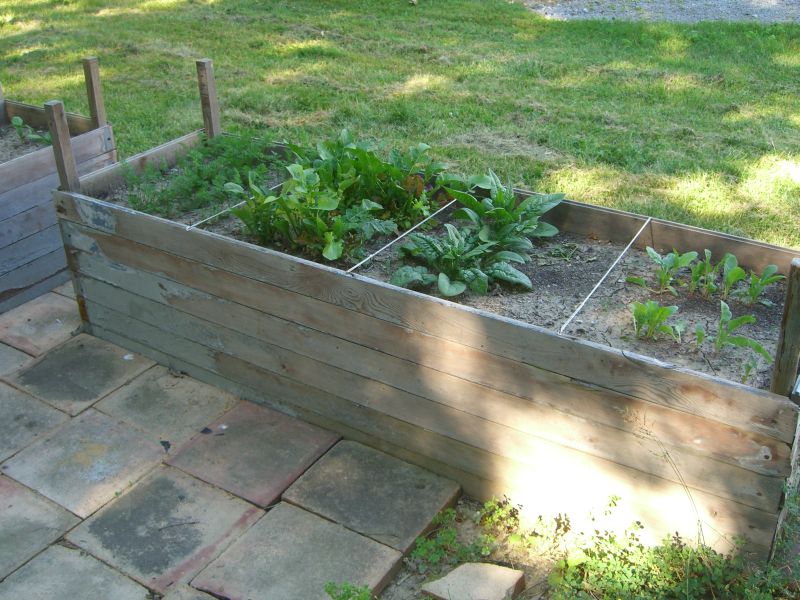
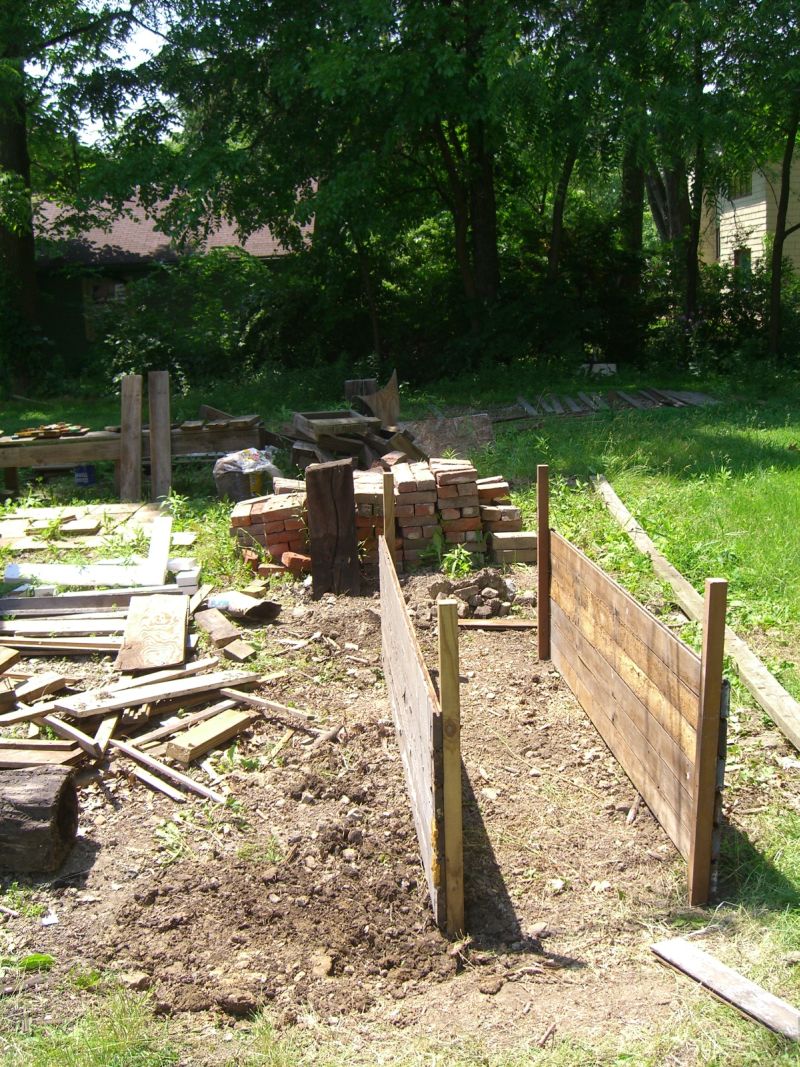
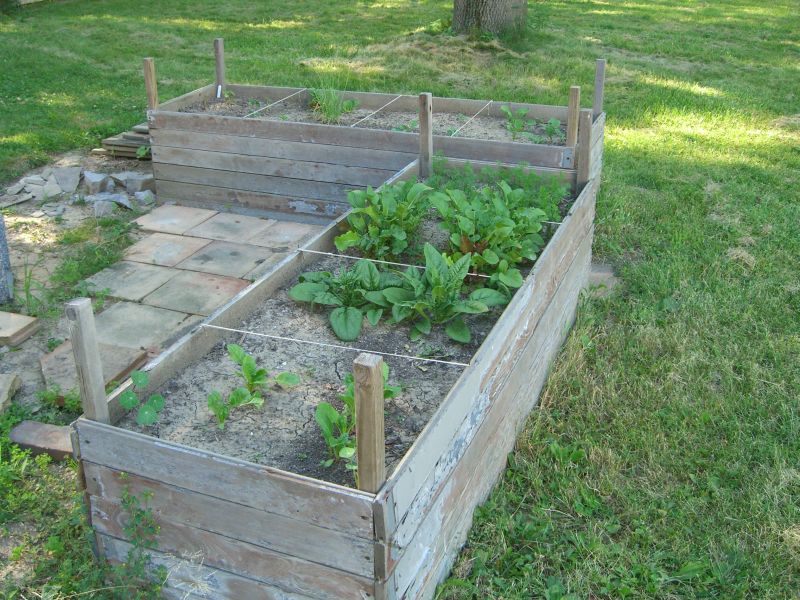
I won’t go into the virtues of raised beds here (plenty of others have said it better than I can right now) – and I’m not even to the point of square foot gardening – but I knew a couple of raised beds were going to be an important feature of my efforts to turn the gravel pit behind my house into something better. These are made entirely from found materials. The stakes – which are roughly 2′ in length each – are the same scrap posts I used for the compost bin last year; each has the same 45-degree miter at one end. The walls used to be a porch up in Elyria. The homeowner had redone his porch but hadn’t thrown out the wood yet, then saw my post on Freecycle looking for tongue and groove planks.
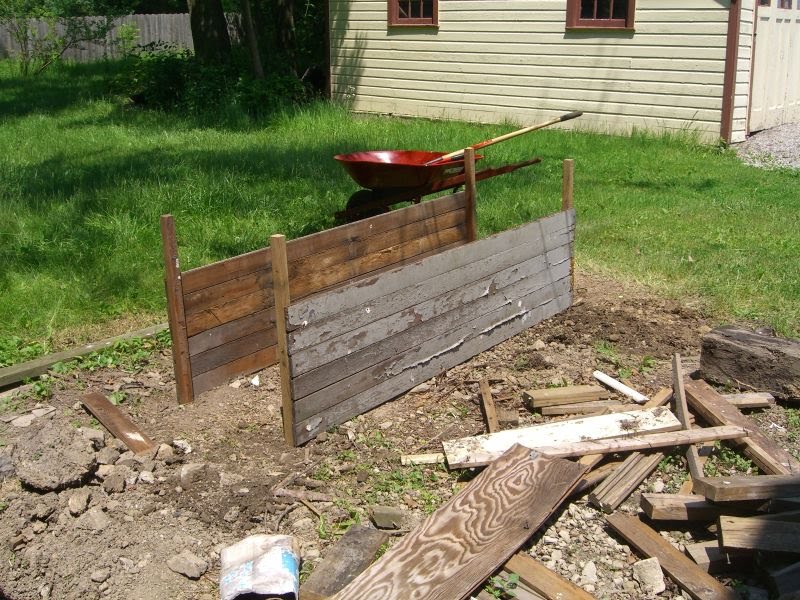
Construction could have gone several ways, each with their own pros and cons. One option would have been to measure off the stake locations and dig/drive them in first, then fit the walls to that skeleton. This would probably wind up with some imperfect corners since you’re looking at keeping things square over a four foot run. Another involves building the entire box in the workshop, moving it, holing out for the stakes, and then hoping you’ve leveled the ground well so it doesn’t skew when set down.
I chose to lay out two stakes on a flat surface, attached the planking for a long wall, then sank that whole wall into the ground. After both long walls were in I attached the short walls, screwing in the lowest plank, then fitting the next plank, screwing it in, etc. It was easier for one person to handle, and a little forgiving of leveling issues. The most important detail in this approach is being as exact as you can in spacing the two walls – otherwise the corners are likely to look ugly.
It’s conceivable that you could build two ‘L’s of one short and one long wall each, then move those into position. Again, that approach will have its own pros and cons.
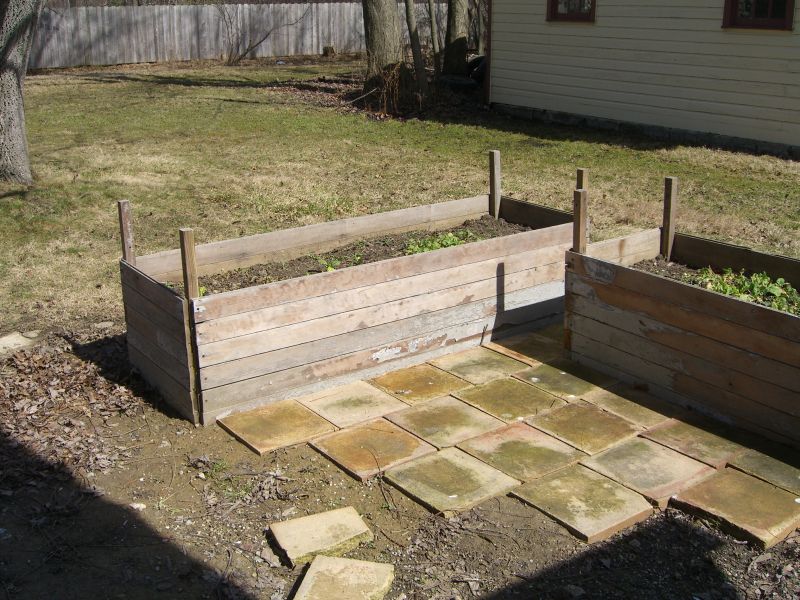

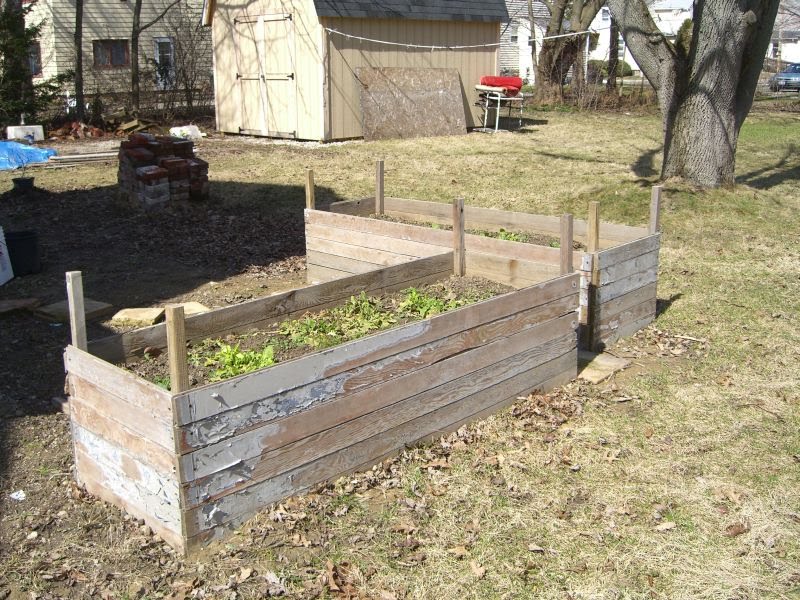
Ultimately, no matter how you build your garden beds, it’s still all about the dirt. These beds are roughly 20″ high so I wasn’t planning to fill them entirely with top soil. I have piles of clay fill from a neighbor’s basement excavation and put in about 15″ of that to fill the lower half. A healthy topsoil mix (river soil and mushroom compost from the local nursery) filled the rest of the box to within an inch or so of the top. Gravel or other drainage materials might have been helpful in the long run, but this mix seems to be working fine.
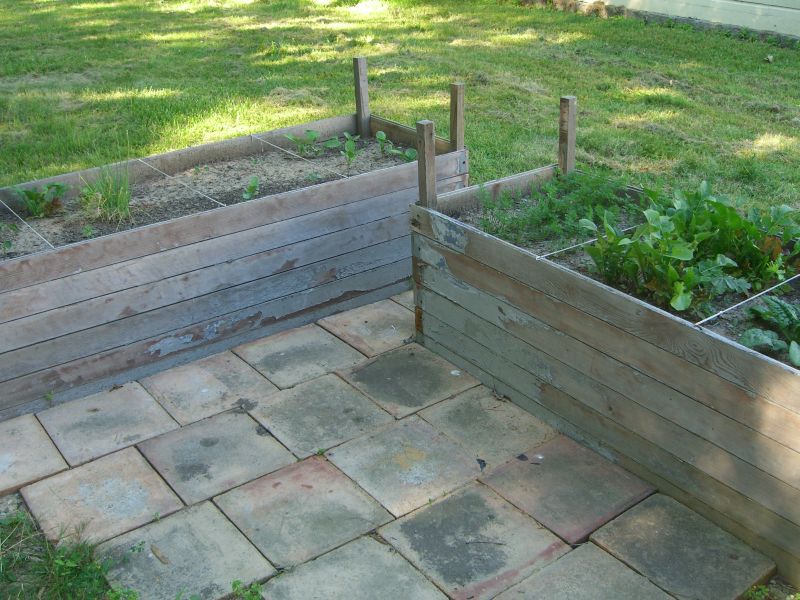
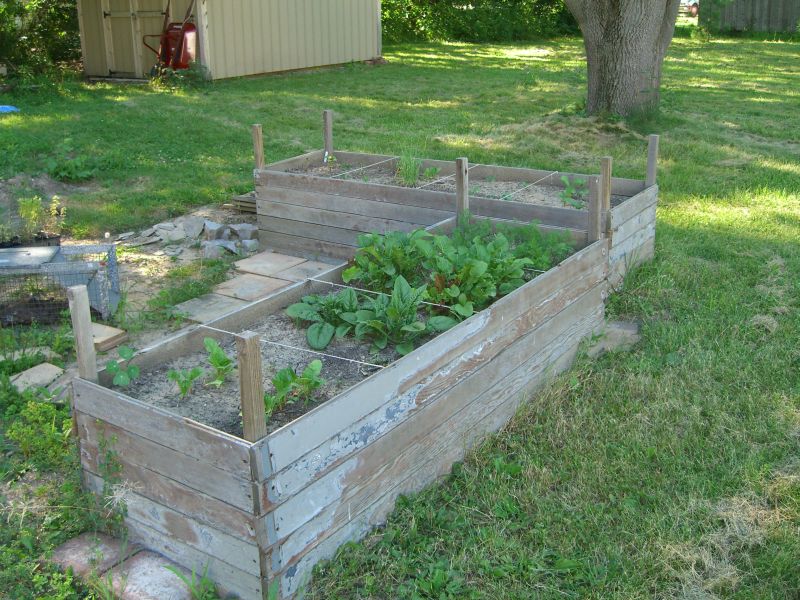
The paving stones were highlighted in the previous post. We’ll see how these beds and that mini patio tie together into the rest of the landscaping plan.
More updates as they are warranted.
Update (warranted):
Never posted these, but here’s the first dish that came out of the garden (cukes were from the front garden beds):


Delicious in butter, sadly not from the garden:

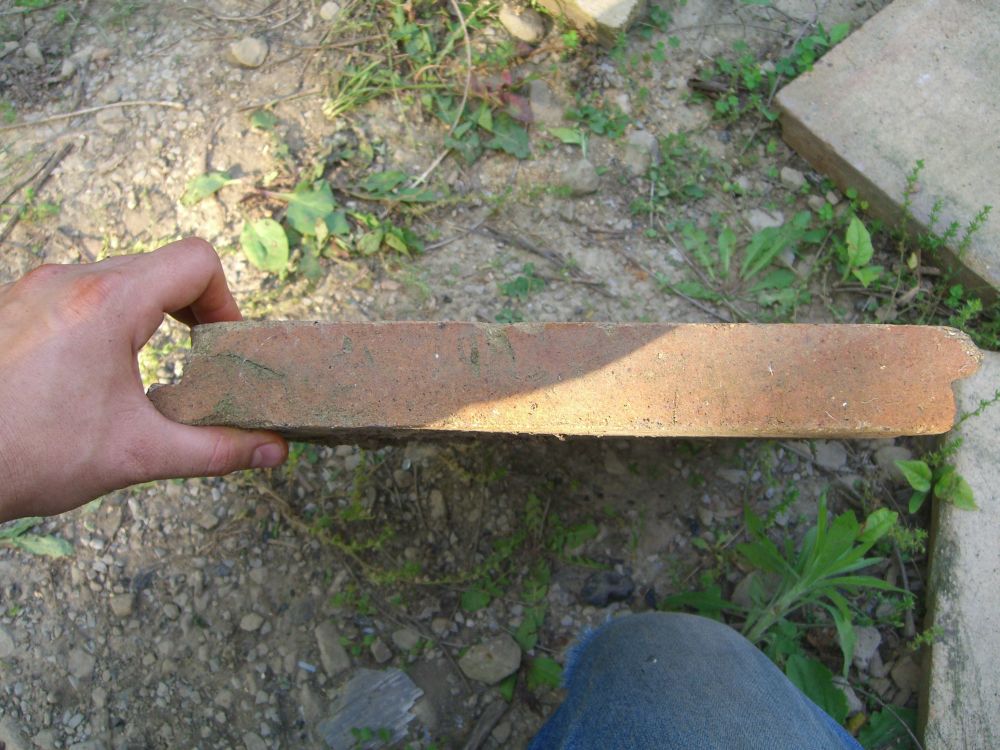
Can anyone identify these paving stones?
Posted by aaron in advice wanted, backyard on 20 June 2010
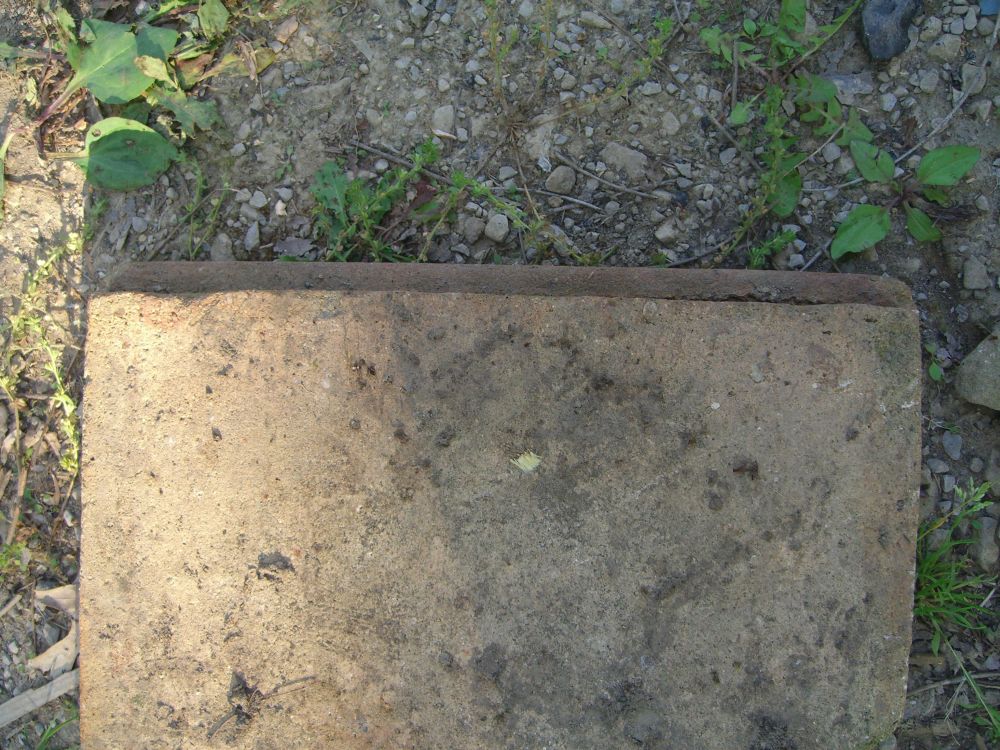
These were salvaged and quite likely discontinued, but I’d like to get more that match if possible – problem is I don’t know what the type is called so I can’t search for suppliers. If anyone knows, and has any recommendations on where to buy, it’s much appreciated.
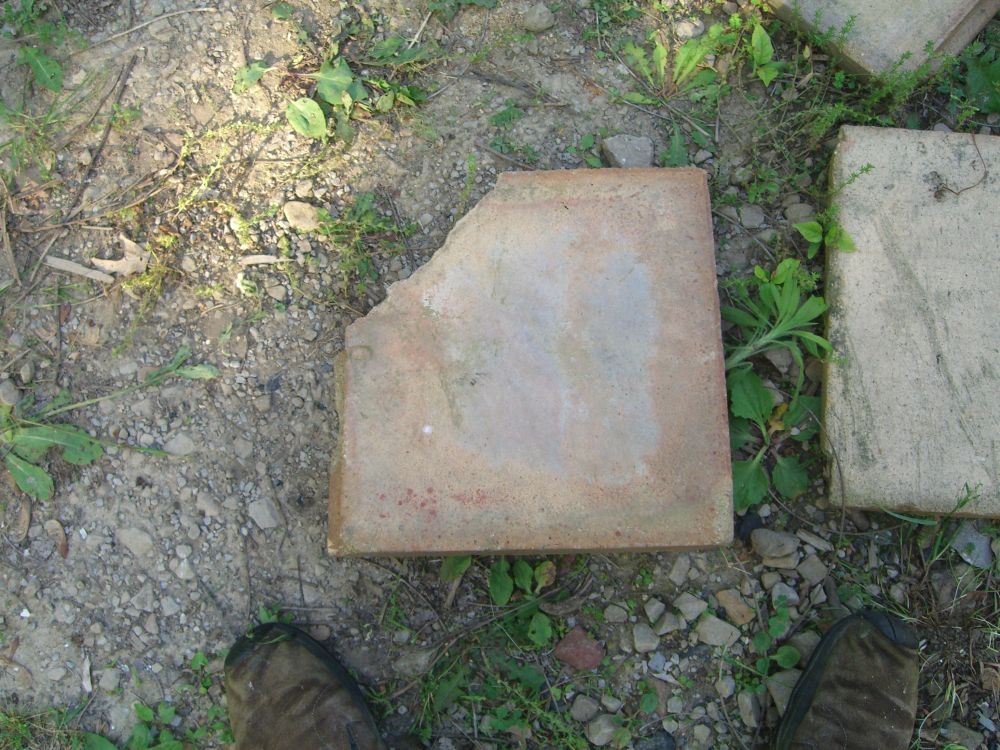
Pavers are roughly 1′ square and an inch thick with – and this is the feature I can’t match anywhere – half inch deep ‘ledges’ on alternating sides that allow you to lay them in an interlocking fashion without needing mortar. The sample in the picture has a broken corner, but otherwise should give (I hope) an idea of what I’m dealing with.
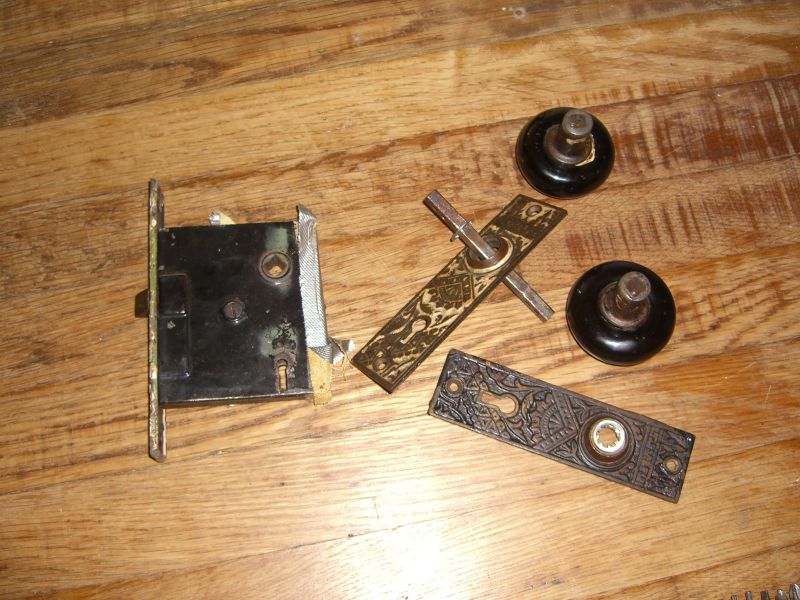
There’s a clever post title involving the word ‘doorknob’ around here somewhere, I just know it…
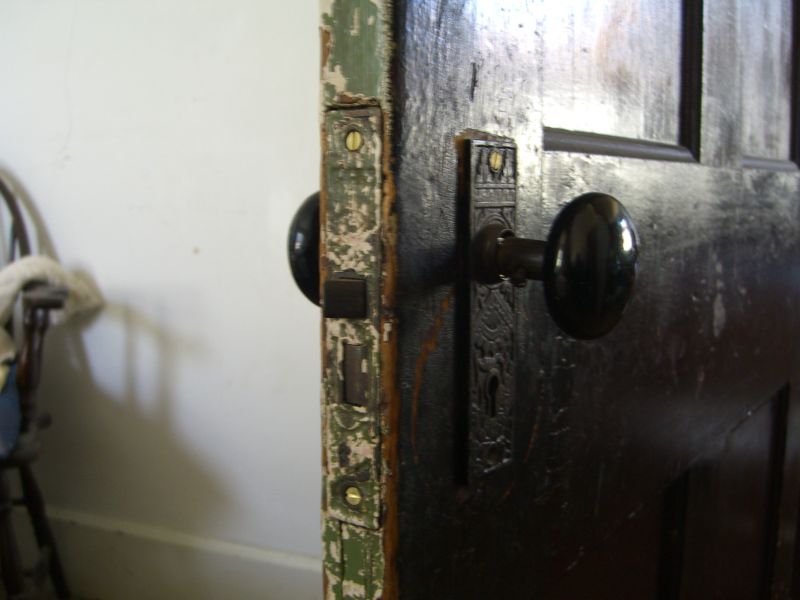
This is quite an old post, but I finally remembered to take a picture of the finished project. Old house, old doors, old door latch mechanisms – and plenty of neglect by tenants over the years. Screws had stripped out so the knob and latch on my bedroom door was barely held in place anymore:
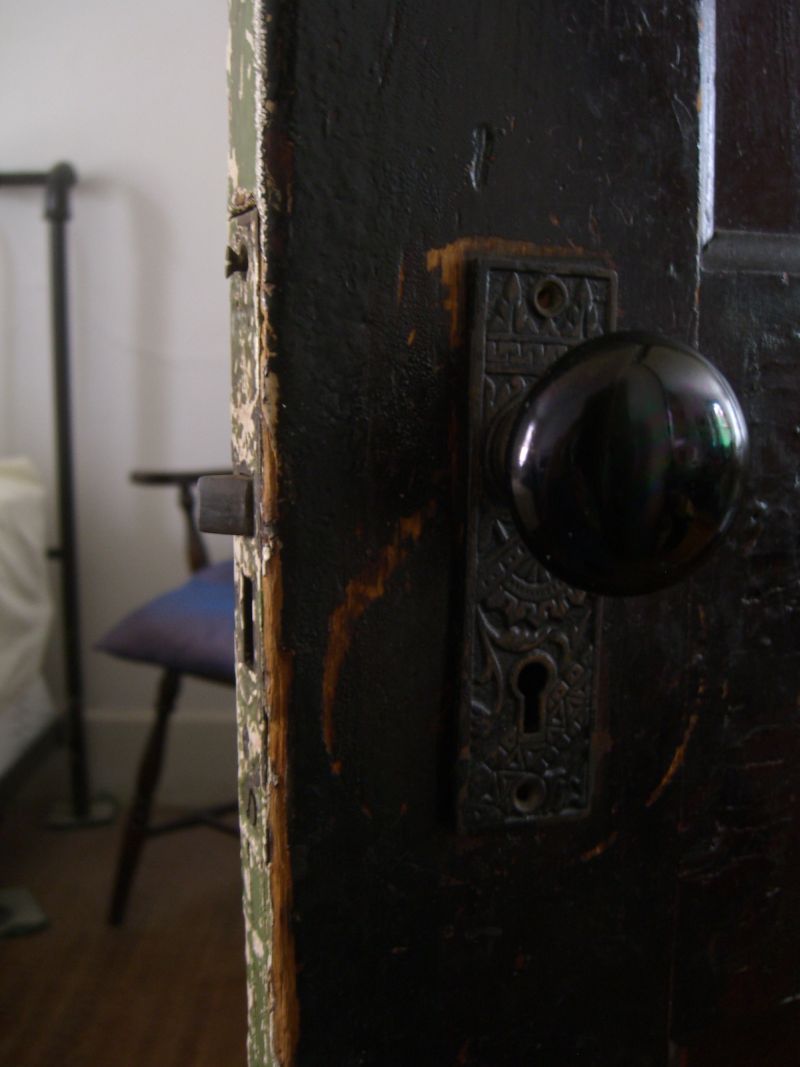
Attempts to fix it over the years look to mostly have involved larger and larger screws, which just gouged the wood more each time the door banged closed:

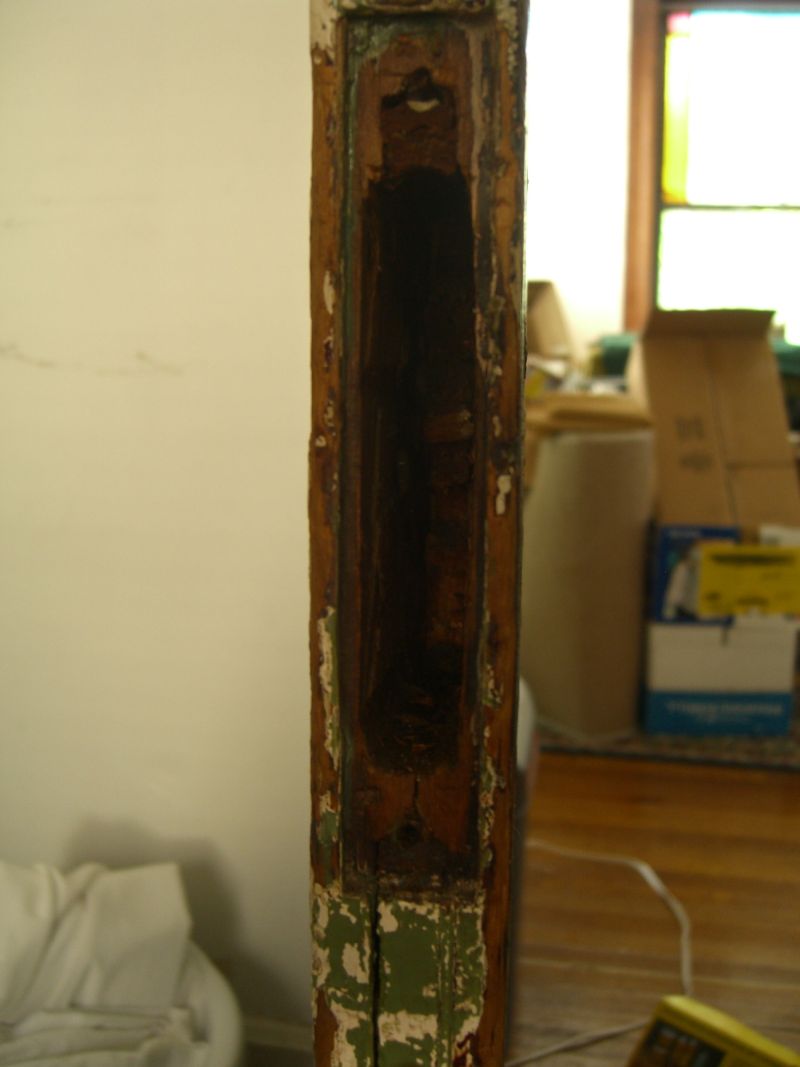
This was another fairly quick repair, thanks again to Abatron‘s wood epoxy (putty) which I can’t recommend enough for these sorts of small replacement jobs. Side note: This is the second time I’ve linked to Abatron in this blog and both times I’ve linked to the Wood Epox directly; they also make a sister product called Liquid Wood which helps harden soft or rotted wood, and is recommended for use on the area where you’ll apply Wood Epox. Just so you don’t feel I’ve led you astray, consider buying both products at the same time – I often use both, but sometimes, frankly, I’m lazy.
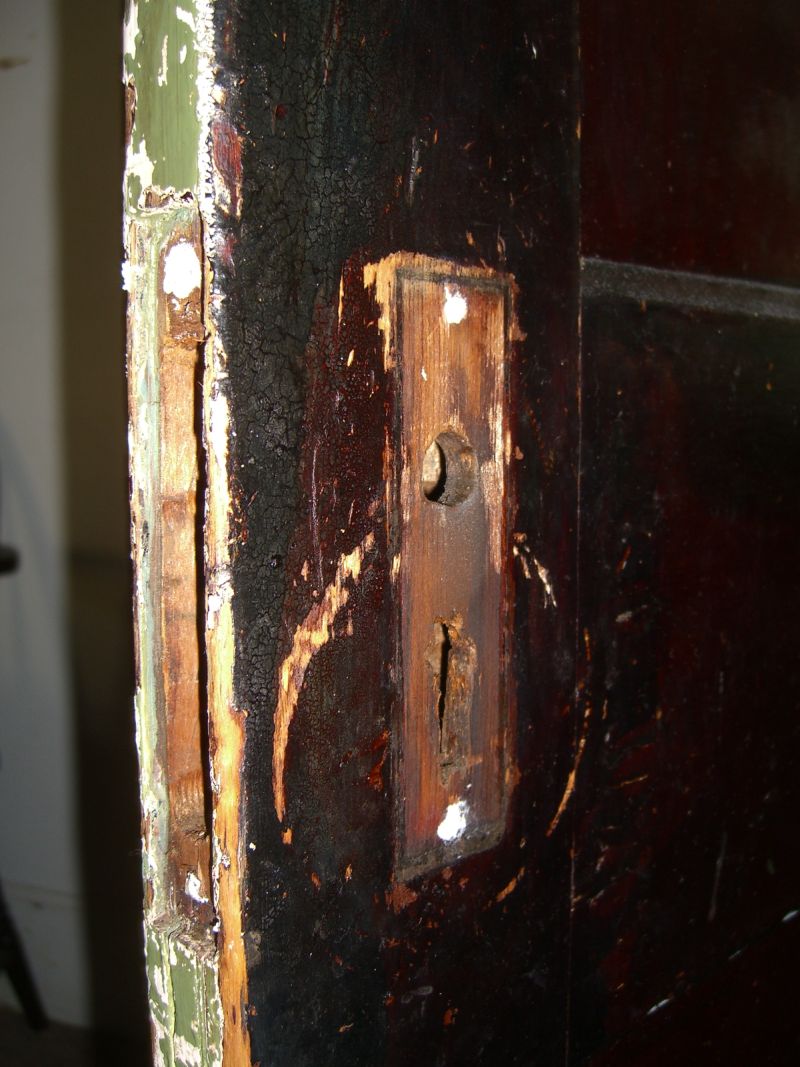
Now it was just a matter of fitting all of these pieces back together correctly:
…with one small stop to the workroom. The back of the warded lock block had broken years before, and someone had attempted a fix with duct tape:
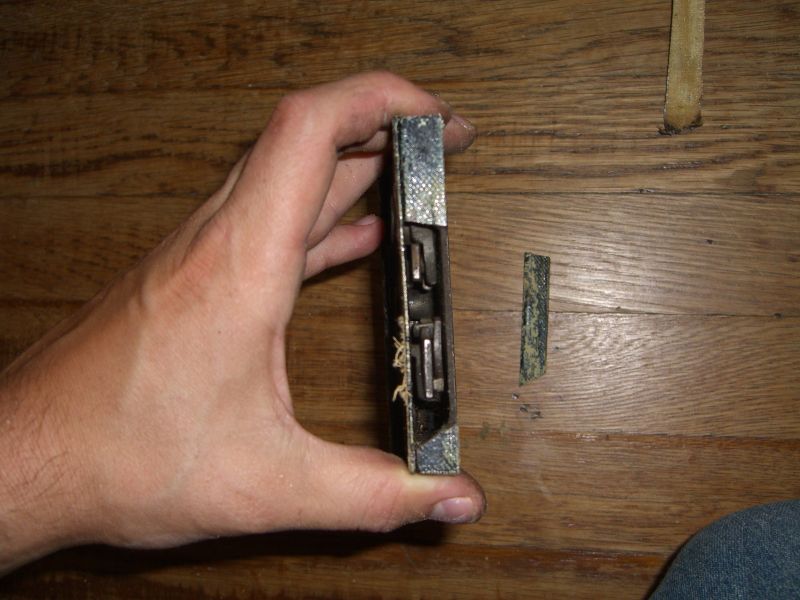
This was a more crucial part of the repair than it might immediately seem. Without a full, strong back ‘wall’ to this block, the whole internal mechanism could shift just far enough back and into the block that the latch wouldn’t always spring free and catch in the door jam. This, too was easy enough to deal with – some Goo-Gone to clean up the surfaces, a quick filing job to make sure the broken piece fit snugly back onto the block, and a bit of SuperGlue to hold it in place. Yup, SuperGlue works just fine on these old metals:
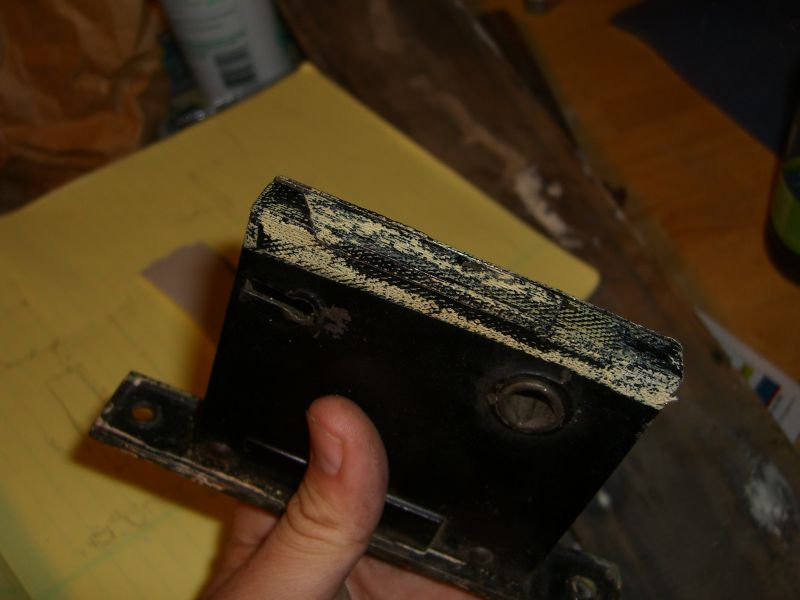
Reassemble everything, and sink a few new screws into the rebuilt ‘wood’. Voila! Working door knob: