Posts Tagged minor
…and then I hotwired my house.

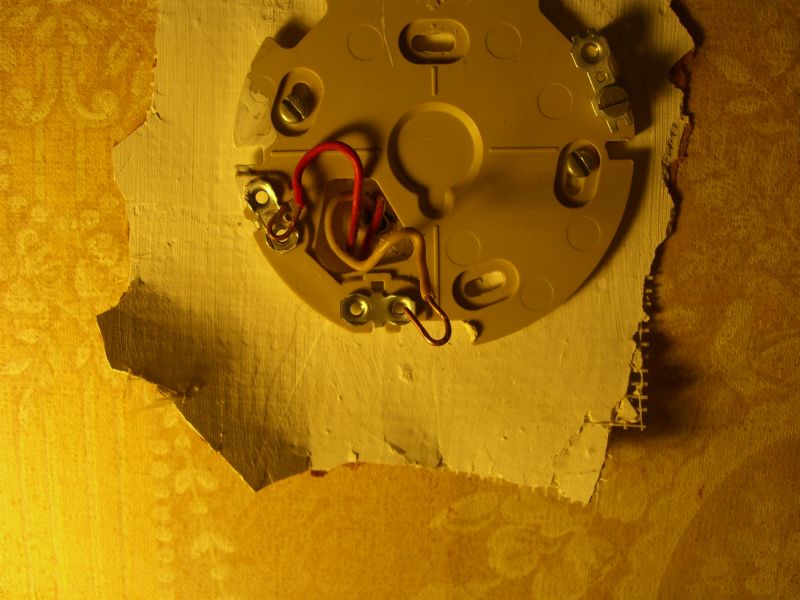
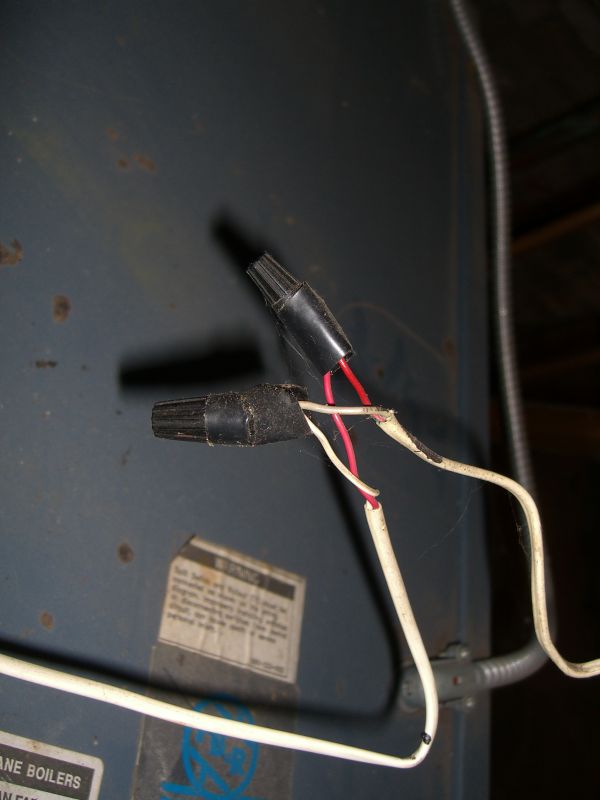
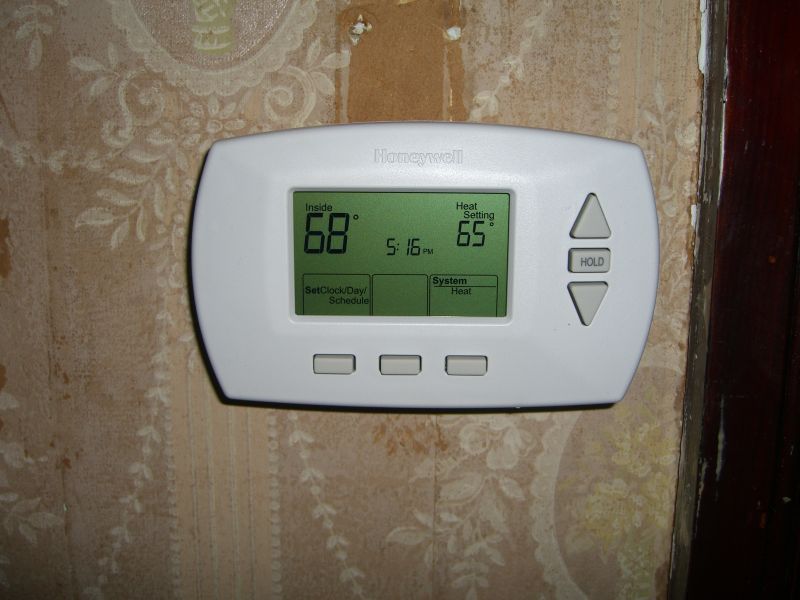
Tracing the wires from the living room wall to the boiler, I found a splice – important to note because it told me I was now looking for where the red and white wires connected to the boiler controls, instead of the red and yellow wires from the living room wall. This is truly an important but subtle distinction when you see where all this was leading:
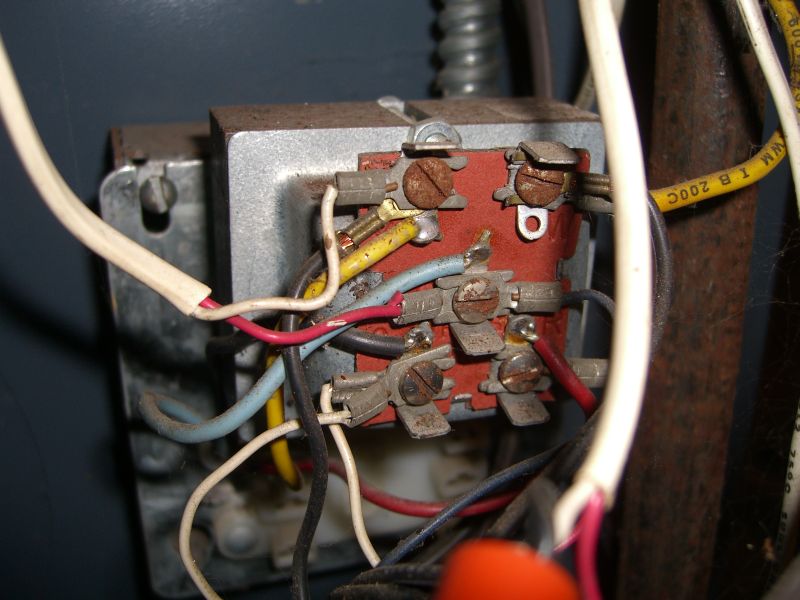
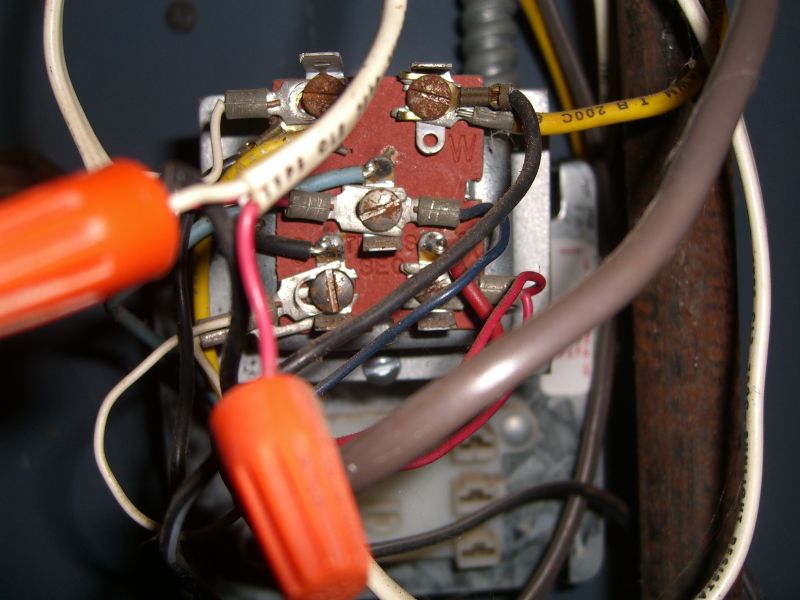
With the power already off, it was a simple(ish) matter of unscrewing the terminals where the red and white wires (from the bundle on the top left) ran. Some of the terminal labels were easy to see:


So much for that schedule…
The blog-updating one, not the house-working-on one. Apparently I didn’t make a single post while on vacation (surprise, surprise), so I’ll have to catch up … some other time. Meanwhile, let’s get the typing started again with, if nothing else, a not-very-elucidating list of things I did around the house today.
– husked the last of the walnuts
– raked the last of the leaves from the front and side yards
– plugged the couple of carpenter bee holes from last summer with that savior of old houses, Abatron
– created more tool hooks in the back room
More stuff later, as always.
Shelve it
The good news is I’m doing things around the house. The bad news is I’m doing many things around the house (as well as client work, the very start of ObieGame planning, and a campaign) so updates will probably be horribly behind going forward.
Yes, that made sense.
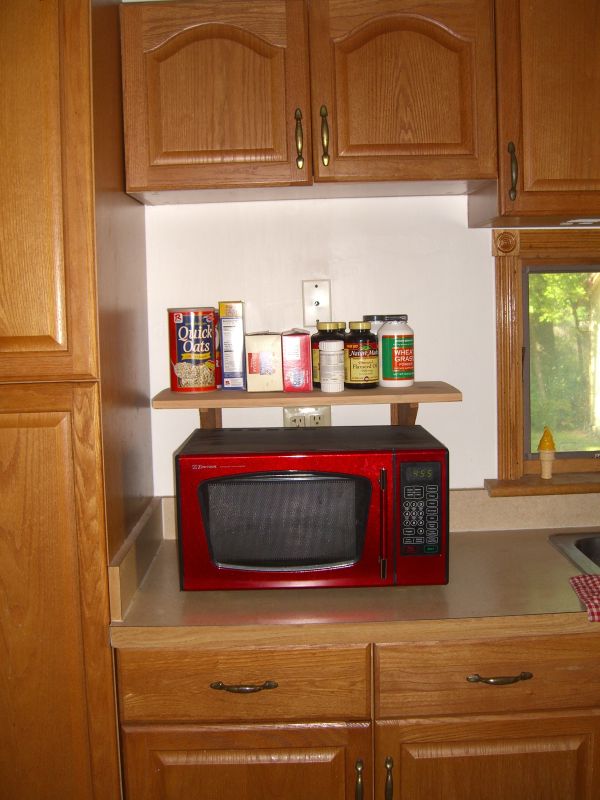
Here’s a project from the other week that, of course, was more involved than I expected. The newer cabinetry in the kitchen included a microwave shelf – handy, but it made the counter space in that area feel too cramped. I decided to pull it and put in a simple open shelf in its place.
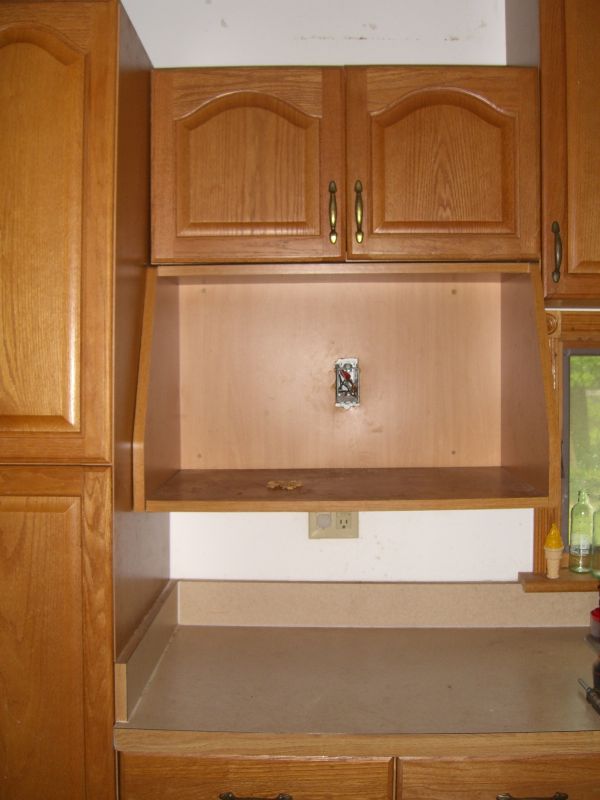 Taking it down was a little tricky. The shelf, and the cabinet above it, were screwed into a stud on one side, but didn’t line up with one on the other. They were mounted, as you do, by sandwiching screws with heads coming out the back of the units between two pieces of 3/4″ particle board screwed to the studs and into the wall with plastic anchors. I should have taken a picture for you, but the short of it was to get to this point:
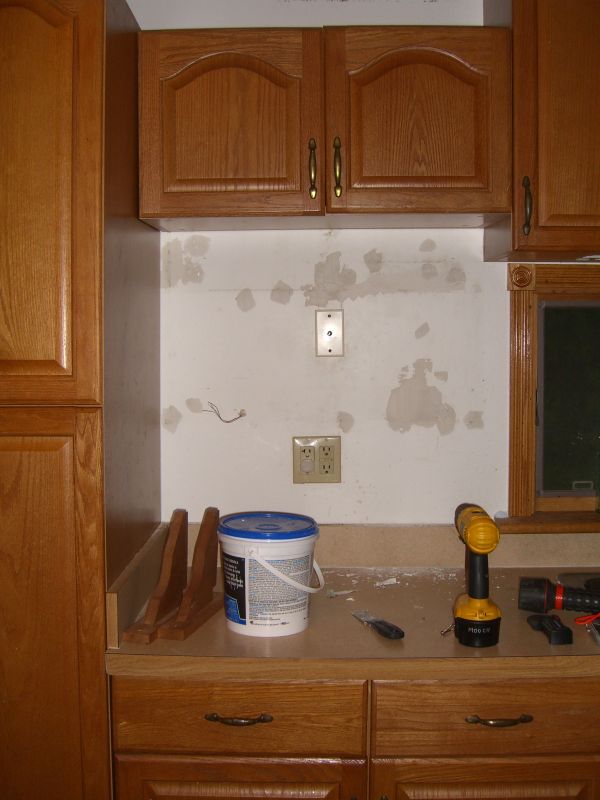 … took half an hour so the wall wasn’t damaged more than it needed to be. Some spackle in the screw holes and in scraped areas, a cover plate for the outlet I decided to remove, and we’re in good shape.
Oh, the outlet – it’s on the same circuit as the pair below, and it was real easy to deal with. Turn off the breaker, remove the faceplate, pull the outlet out of the box, unhook all wires – there will be many more than you’d expect since it’s in series – and simply attach all wires of the same color to each other (all blacks together, all grounds together, all whites together) making sure they’re capped and taped so the only exposed wire in the box is the ground (which should be pigtailed to the box still). Push the bundles back into the box and you’re done.
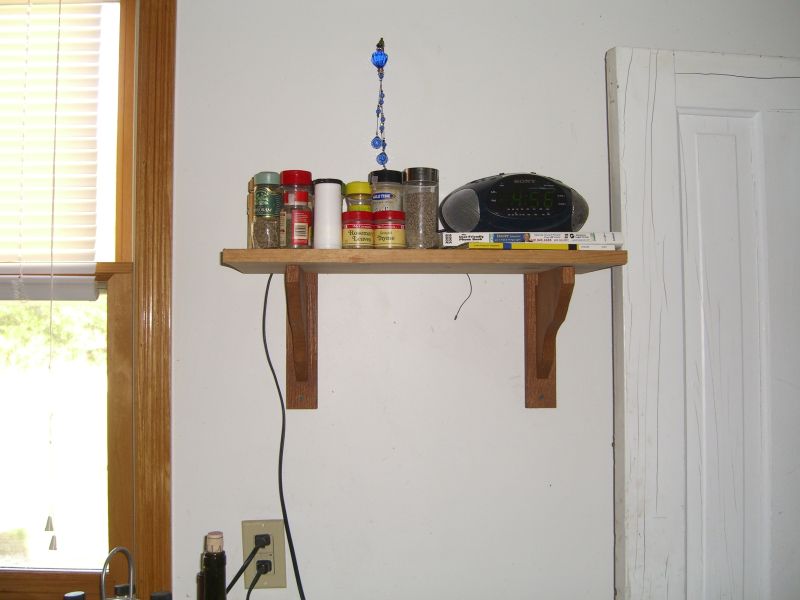
 Wall painted (thanks to Mike for hauling reclaimed remainders of a variety of useful products down from Michigan; I love freecycling) a nice plain white. The shelf supports are actually from my local garden supply store – the simple design stood out last summer when I wanted to install another simple shelf in the kitchen (see bottom of this entry). Both had to be mounted using plastic anchors into the drywall – this is one of the redone walls of the house so it has drywall over insulation as opposed to the heavy plaster and lathe elsewhere.
 The shelf is reclaimed pine from what looks like it was a shed shelf many years ago (there was a finish applied that had weathered in much the same way your wooden school desk might have looked, and faded bracket mount prints on one face). A half hour out back with the random orbit sander, and this thing looks pretty good, if I do say so myself. I may stain it at some point (installation involved one screw per support, so it’s pretty easy to take apart if need be).
No more parentheses. Here’s it’s sibling from last summer:
Baseboard – your key to not looking like a hovel
The previous owner had mostly redone the upstairs bathroom, but, among a few other things, hadn’t had the chance to install baseboard. While prepping the composite baseboard I was planning to install, I realized that there was no stud located at a convenient enough place to put a doorstop, giving me the opportunity to add a small architectural flourish:
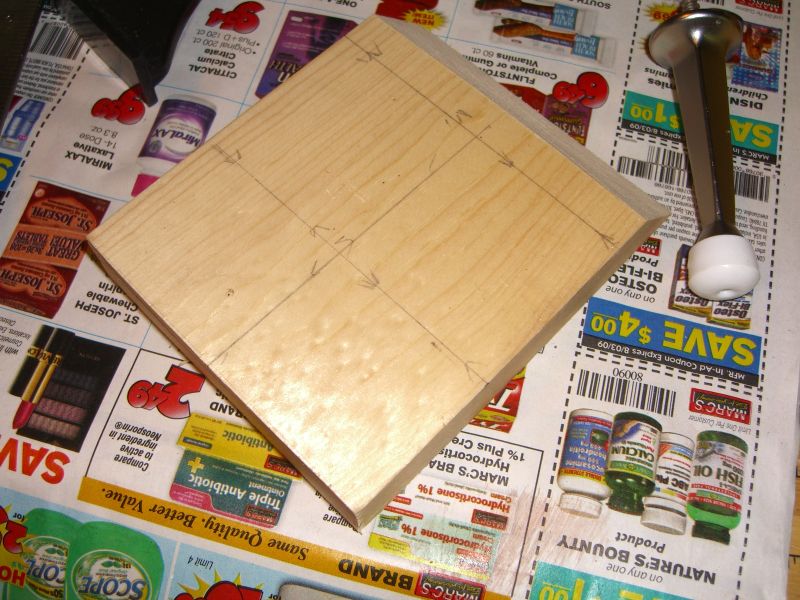 I suspect you could do the same thing with an already milled corner block or the like to directly match the profile of your baseboard, but making your own is pretty easy. A simple 45-degree mitre at the top edge will match most simpler baseboard styles. I cut this block about an inch taller than the surrounding baseboard.
 Mark off and pre-drill for the doorstop itself.
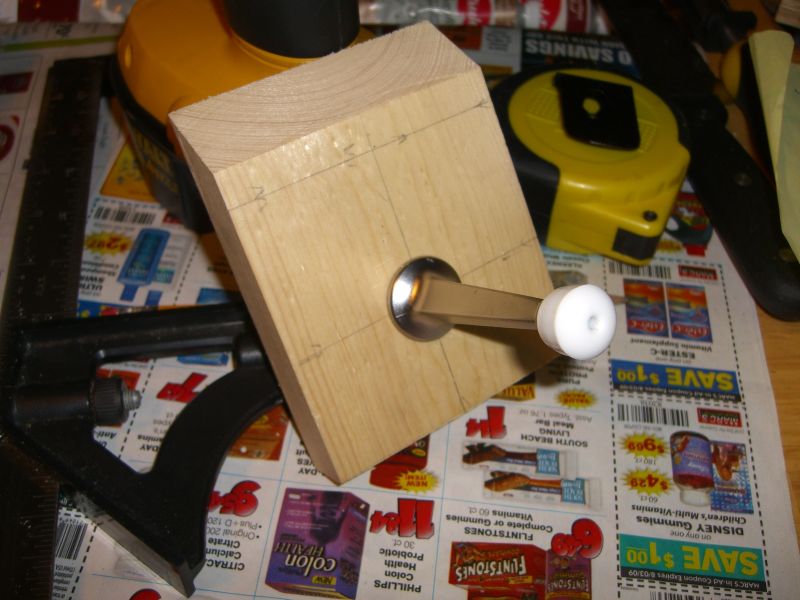 Testing to make sure it’s straight and centered. Remove the doorstop, paint, and voila:
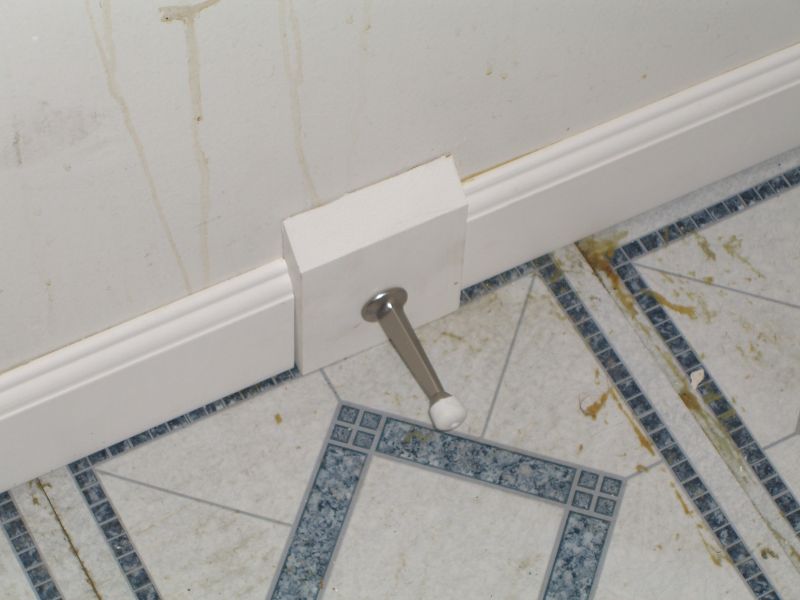 Ignore the lousy linoleum and odd spots on the wall, if you would. The entire bathroom will probably be redone in the next few years.
Jeepers…
 These trees are three stories tall. All of the brown leaves are (now dead) creeper vines. I was so busy with the summer theater festival back in July that I didn’t notice the massive infestation that was threatening to envelop the trees. Fortunately my dad was in town and pointed it out (thanks dad!) When I delved into the bush to find the main stem, it turned out to be a dual stemmed monstrosity about an inch thick. Heavy pruning shears did the trick, but not without a fight.
Let this be a lesson to us all – have your parents visit more often.
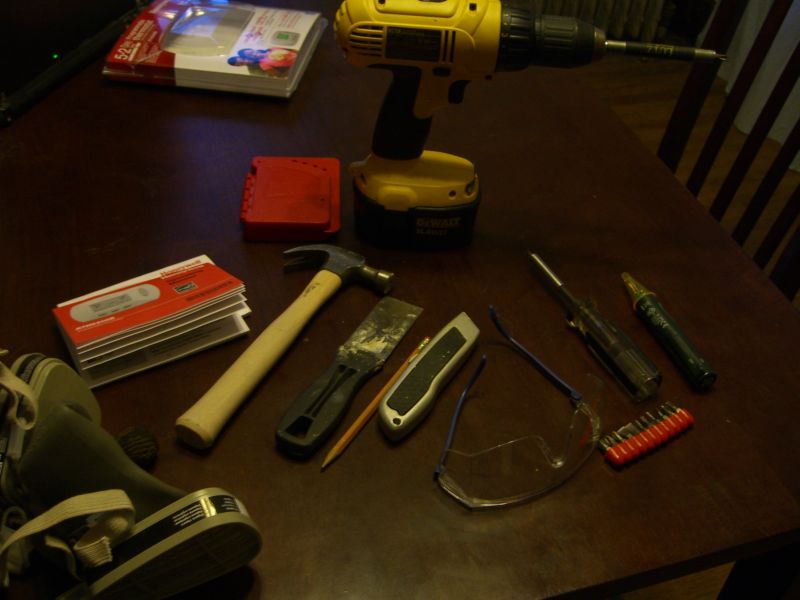
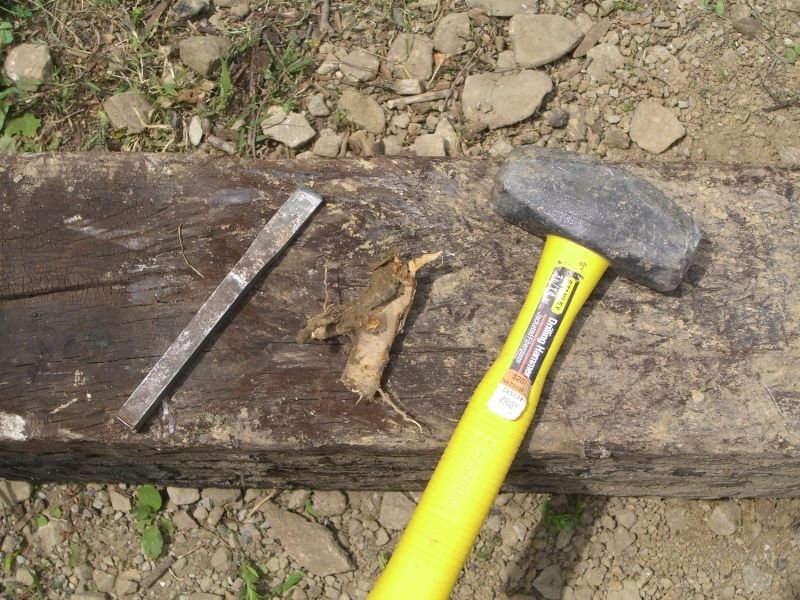
When the only tool you have is a hammer…
You really need to go to the flea market. Amongst the other tools I picked up was a cold chisel. While digging out one of the pilings in my backyard, I ran into a series of tough roots. The smaller ones split under the shovel, but the thicker ones just sheared off a layer and stayed put. Cold chisel plus hammer plus two or three taps at each point on the root equals no more root.
Back to it
Today:
– attached all supports for main shelf in shed
– moved scrap shelf from back room to shed
– hung ladder on shed wall
Tomorrow:
– basement workshop. Seriously.
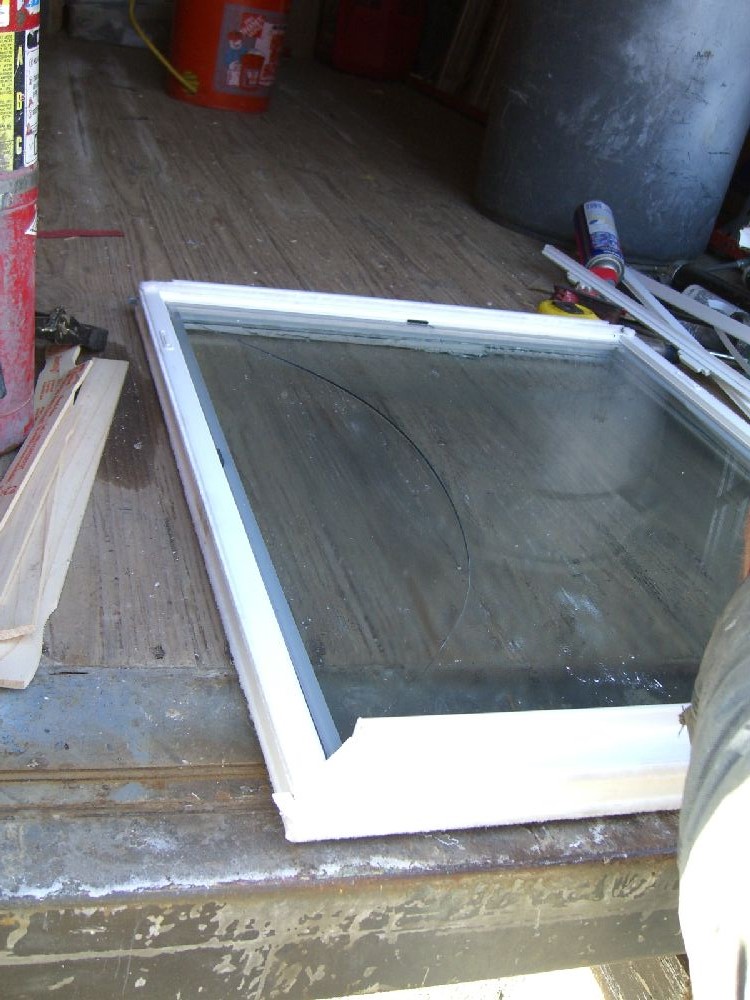
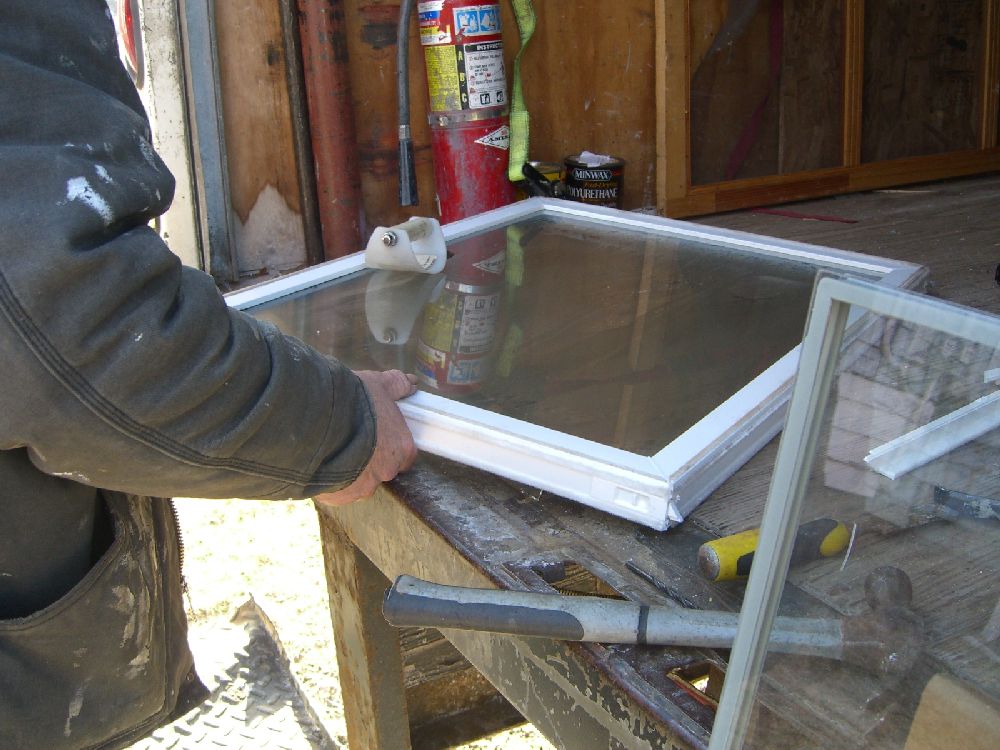
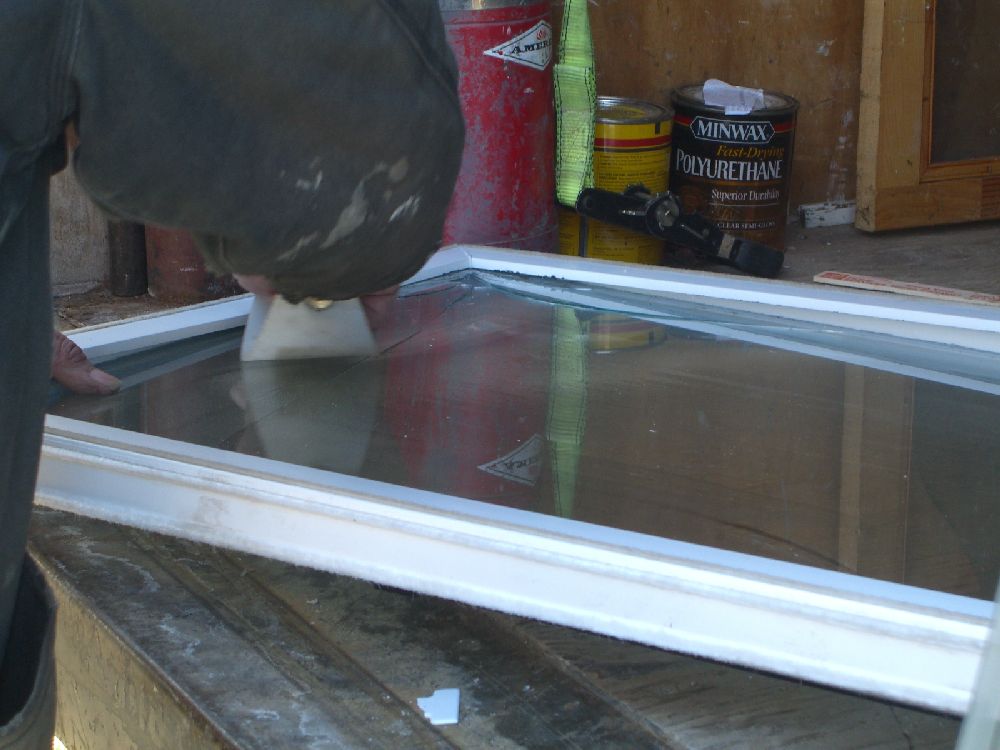
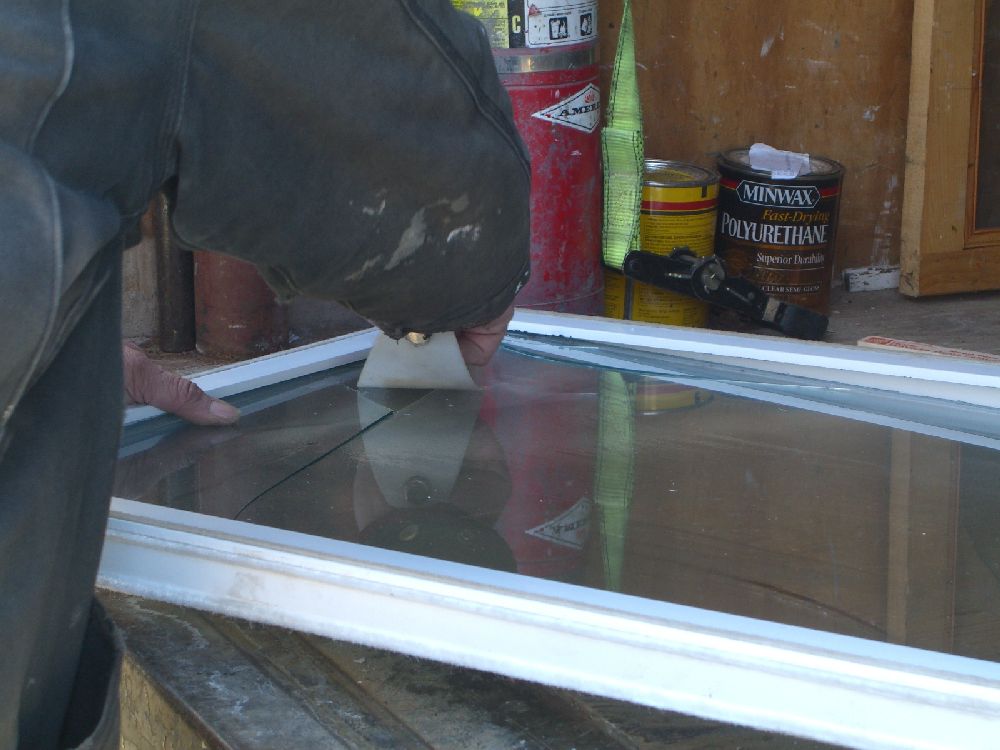
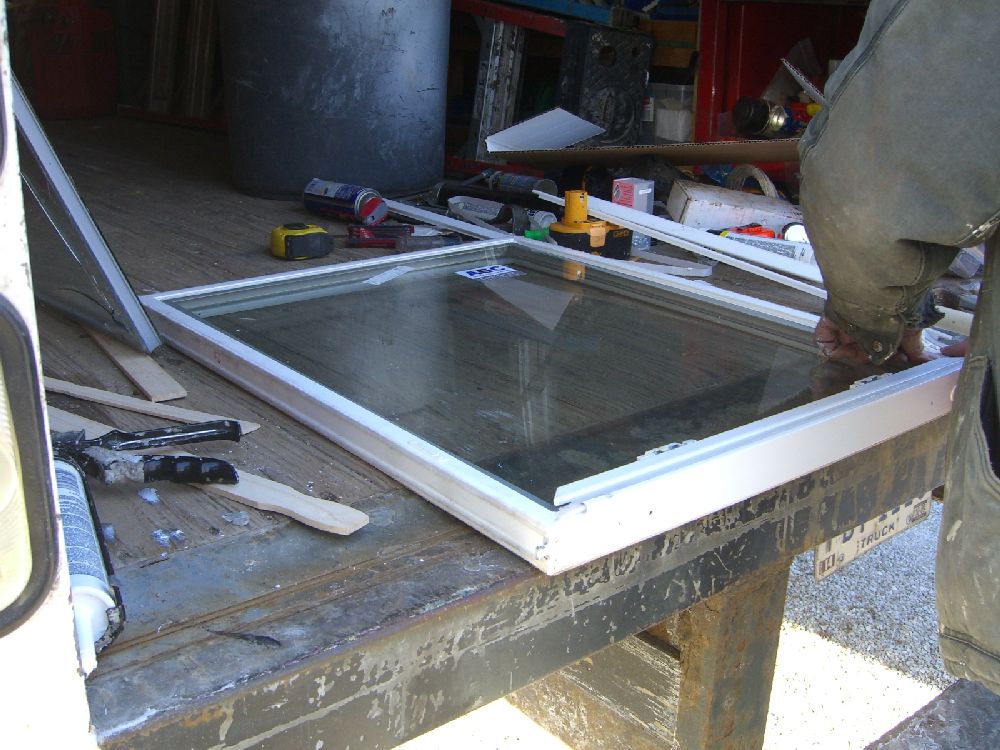
Cracked glass
One of the new windows upstairs developed a massive crack, seemingly overnight. Since it’s still under warranty, the window company sent someone (the same person who installed the windows, actually) to replace the pane. When he’d disassembled the vinyl cladding to insert the new piece of glass, he found his initial suspicions as to the failure confirmed – an inch-and-a-half long chunk of glass was nicked out, probably during factory construction. This created stress points that the cold weather exacerbated and caused the pane-length crack.


Doors as far as the eye can see…
Posted by aaron in Uncategorized on 12 February 2009
I need to do a catch-up post soon and clear off my camera. In the meanwhile, here’s an attempt to start posting again with a rundown on today:
– cut wood for shelf supports in shed
– cleared basement some more (tires out back; scrap metal to the pile)
– tacked plastic over the thin window in the living room – last night there were extremely heavy winds (55mph+) and the ill fitting storm for that window was no longer holding up. I need to shop around for storm windows – the company I used for the two picture windows was fine, but I think there might be better options
– moved a few things to the attic; still plenty of space on just the reclaimed lumber partial floor I put in
– discovered three more doors in the basement, bringing the total number of doors in the house but not in a doorway to six, not counting screen panels. No, I have no idea either…
The best $70 I’ve spent on this house so far
Posted by aaron in laundry room on 27 January 2009
I never posted about this, probably because it seems so insignificant in the scheme of things. My washing machine a) was noisy as heck on the old wooden beams of the house and b) liked to take a walk every time it was used. A search online reveled only one really good sounding option, and man were they worth every penny. You can still hear both the washer and the dryer, but it no longer sounds like they’re about to crash through the ceiling. The washer hasn’t moved an inch since I installed these things. Plus the company is family run, they pack their product in those corn-starch-based packing peanuts that dissolve in water, and they donate some of their profits to charity. It’s like Ben and Jerry’s for hard rubber disks. Brilliant, and highly recommended.