I am now light-years behind on any sort of posting schedule, or non-schedule, or really just posting, period. As a result, several of the next few posts will be horribly outdated: projects I finished months ago – some even last year. I’ll start with some adaptive reuse that’s been feeding me for part of this summer:
I won’t go into the virtues of raised beds here (plenty of others have said it better than I can right now) – and I’m not even to the point of square foot gardening – but I knew a couple of raised beds were going to be an important feature of my efforts to turn the gravel pit behind my house into something better. These are made entirely from found materials. The stakes – which are roughly 2′ in length each – are the same scrap posts I used for the compost bin last year; each has the same 45-degree miter at one end. The walls used to be a porch up in Elyria. The homeowner had redone his porch but hadn’t thrown out the wood yet, then saw my post on Freecycle looking for tongue and groove planks.
Construction could have gone several ways, each with their own pros and cons. One option would have been to measure off the stake locations and dig/drive them in first, then fit the walls to that skeleton. This would probably wind up with some imperfect corners since you’re looking at keeping things square over a four foot run. Another involves building the entire box in the workshop, moving it, holing out for the stakes, and then hoping you’ve leveled the ground well so it doesn’t skew when set down.
I chose to lay out two stakes on a flat surface, attached the planking for a long wall, then sank that whole wall into the ground. After both long walls were in I attached the short walls, screwing in the lowest plank, then fitting the next plank, screwing it in, etc. It was easier for one person to handle, and a little forgiving of leveling issues. The most important detail in this approach is being as exact as you can in spacing the two walls – otherwise the corners are likely to look ugly.
It’s conceivable that you could build two ‘L’s of one short and one long wall each, then move those into position. Again, that approach will have its own pros and cons.
Ultimately, no matter how you build your garden beds, it’s still all about the dirt. These beds are roughly 20″ high so I wasn’t planning to fill them entirely with top soil. I have piles of clay fill from a neighbor’s basement excavation and put in about 15″ of that to fill the lower half. A healthy topsoil mix (river soil and mushroom compost from the local nursery) filled the rest of the box to within an inch or so of the top. Gravel or other drainage materials might have been helpful in the long run, but this mix seems to be working fine.
The paving stones were highlighted in the previous post. We’ll see how these beds and that mini patio tie together into the rest of the landscaping plan.
More updates as they are warranted.
Update (warranted):
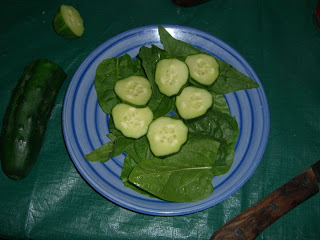
Never posted these, but here’s the first dish that came out of the garden (cukes were from the front garden beds):
Delicious in butter, sadly not from the garden:


