The Great Bedroom Closet Project of Aught-Twelve
Wherein I start a project, discover a trap door, and eventually realize I need a better plan than ‘build some shelves’.
So in other words, Tuesday.
Years ago I cleared floor space with the brilliant discovery that an old dresser fit neatly in my bedroom closet. Between that, a tie rack discovered… somewhere, and existing hooks and nails, the closet had functioned fine, if somewhat unimpressively, for storing the bulk of my clothes.
Where there is no floor
I recently checked my folder of ‘for the blog’ pictures and found three-year-old shots that were forgotten about in the midst of forgetting about posting. Ridiculous. Unacceptable. Unacceptably ridiculous, I say. This is the first of (hopefully) a series of ‘in progress’ posts, an effort to just write more and thereby reflect the amount of work actually getting done.
We’ll see if this works at all.
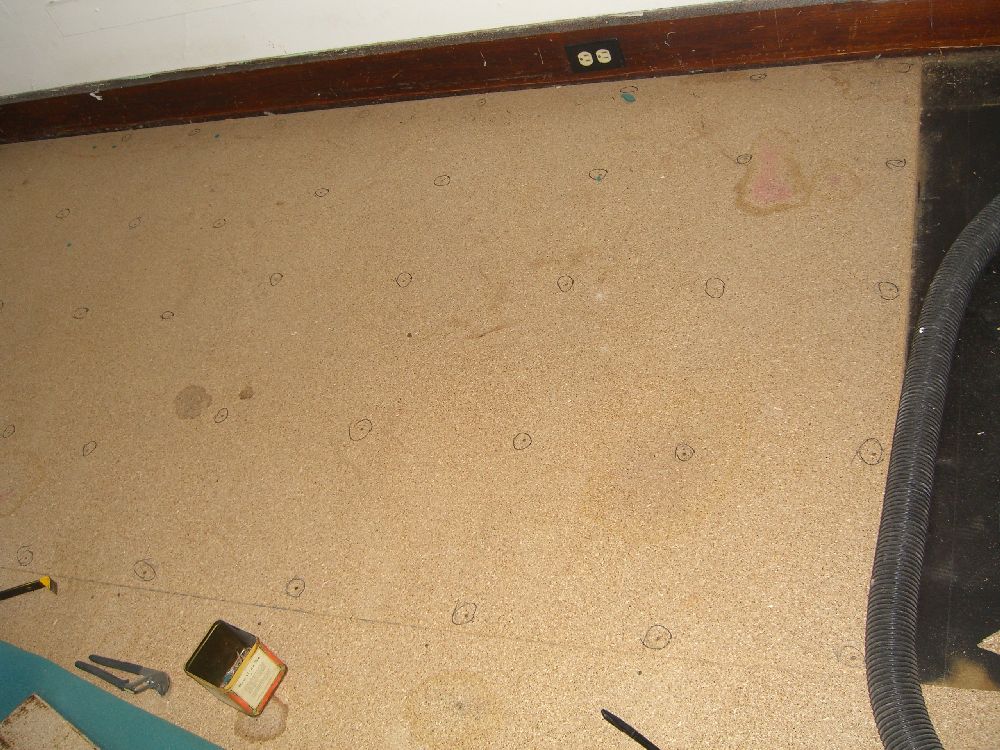
Let’s start this off with a side project on a much larger (and also still in progress) project. While pulling up carpet in an upstairs bedroom, I discovered that the 1920s addition on the back of the house wasn’t… quite… complete:

How to pull old nails out of particle board
Posted by aaron in tools and materials on 20 June 2013
I’m not going to think up a ‘clever’ title for this one – it’s purely instructional.
Particle board or plywood sheets are common as subflooring. Properly, they’d be nailed down every foot to 18 inches along each rafter or joist. That means a lot of nails:
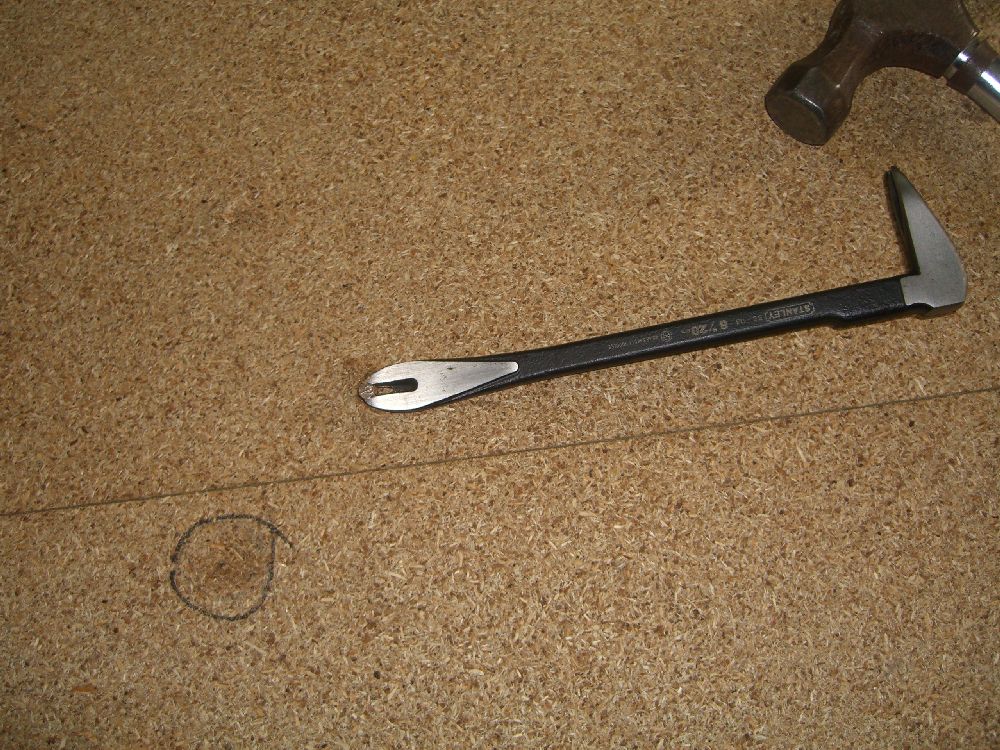
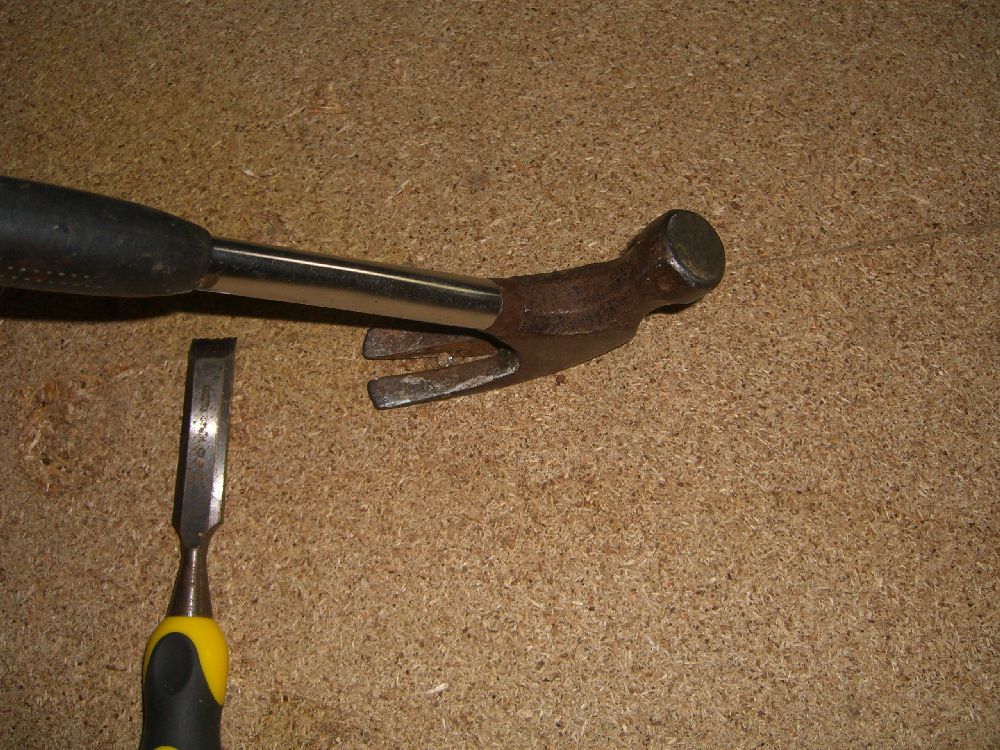
Here’s the fastest way I know to get a job like this done and done well – buy a cats paw:
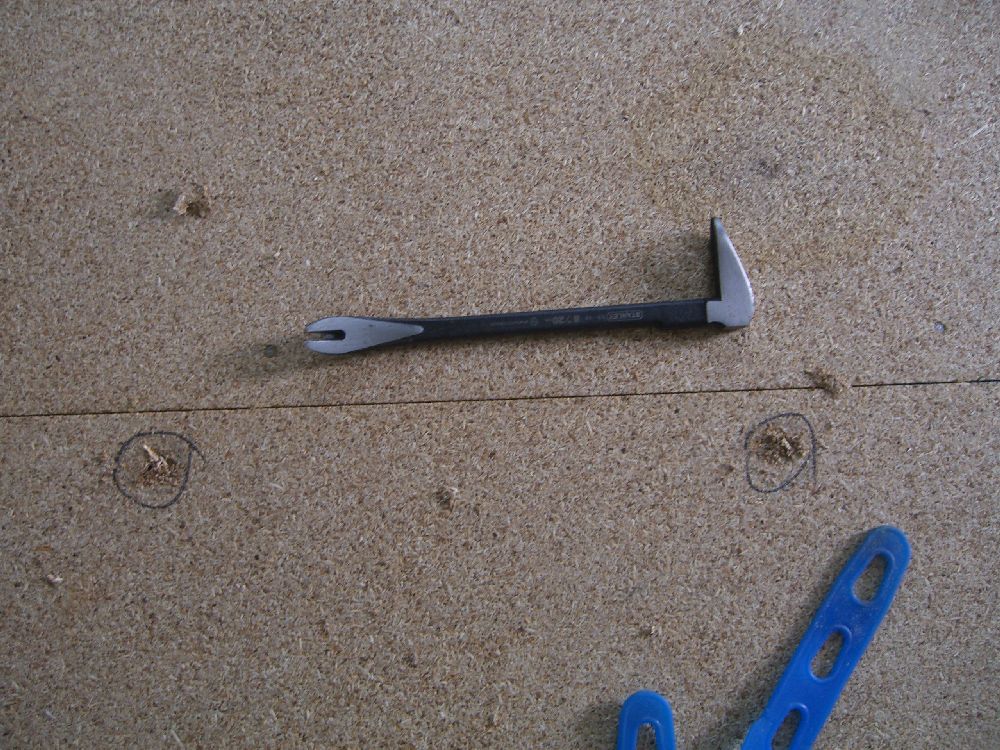
These are designed to easily get the tines around a nail or screw head and then maximize leverage to make pulling it out a breeze. They’re also made out of a solid piece of steel, so a couple of light taps with a hammer is all you need to set the tool:
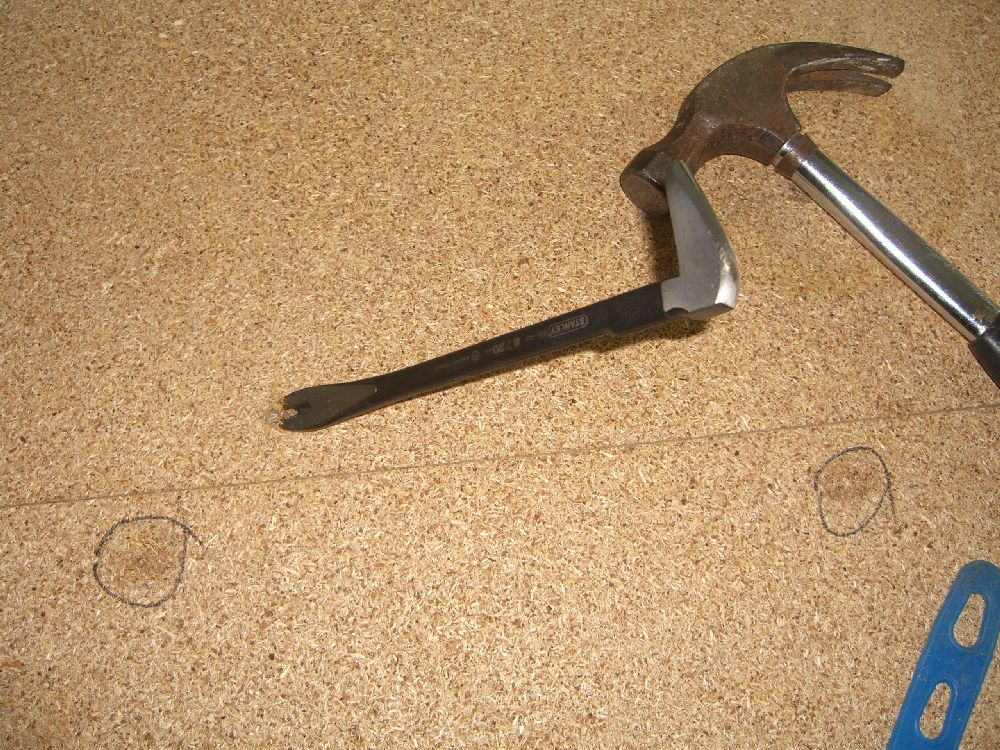
Then lean – lightly, even – on the other end and the nail should pull right out:
But, you say rhetorically, can’t I do this with the tools I have on hand? I don’t want to buy a new tool for a simple project! Well, I reply, first of all you’re lying if you’re a do-it-yourselfer and say you don’t want to buy a new tool. Second, would it kill you to support your local hardware store? And third and most importantly, sure there’s an alternative – and it’s a pain in the neck. And the knuckles. And tears up the boards much more than necessary.
Sure you can always use a claw hammer or a small pry bar to pull the nail loose. It’s the getting the tool under the nail head that’s the difficulty. You need to free up space around the nail head since neither the claw hammer nor the pry bar will penetrate the surface neatly or at all. Start with a chisel:

Then hammer the pry bar into the wood to snag the nail head. This is the point at which you’ll miss once or thrice and bust the knuckles on the hand that’s holding the bar in place.
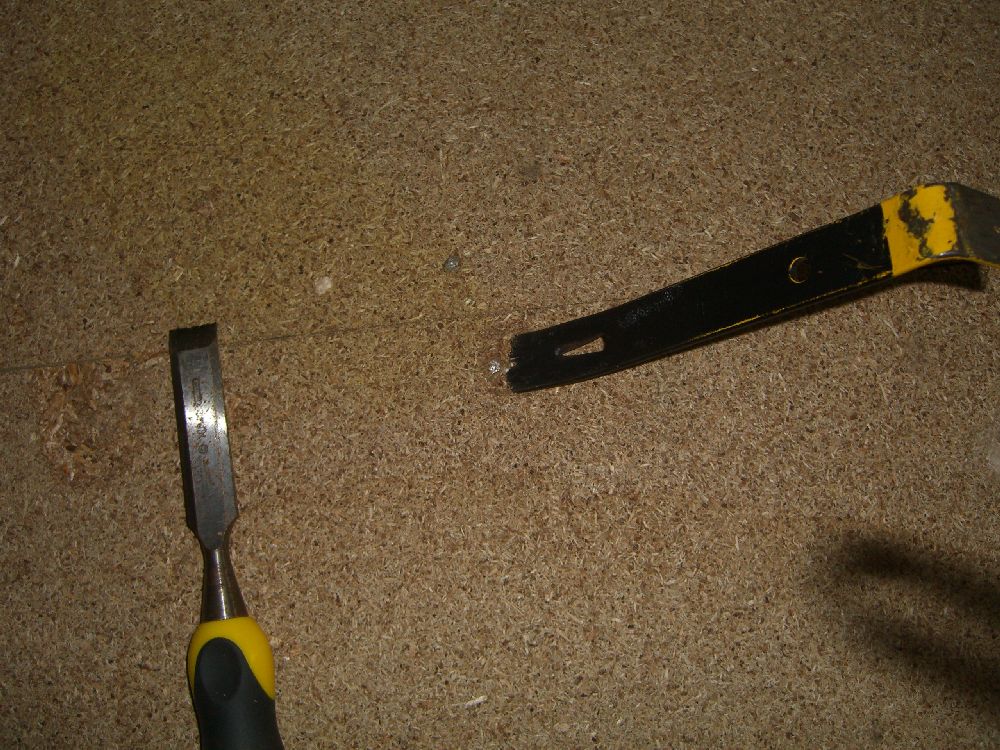
*Then* lever the nail up as far as you can with this tool, which won’t be much with a pry bar of this size. *Then* use a claw hammer to finish pulling the stubborn nail out of the &#*$@# board.
Just buy a cats paw – I got the whole room done in about half an hour.
Layers upon layers
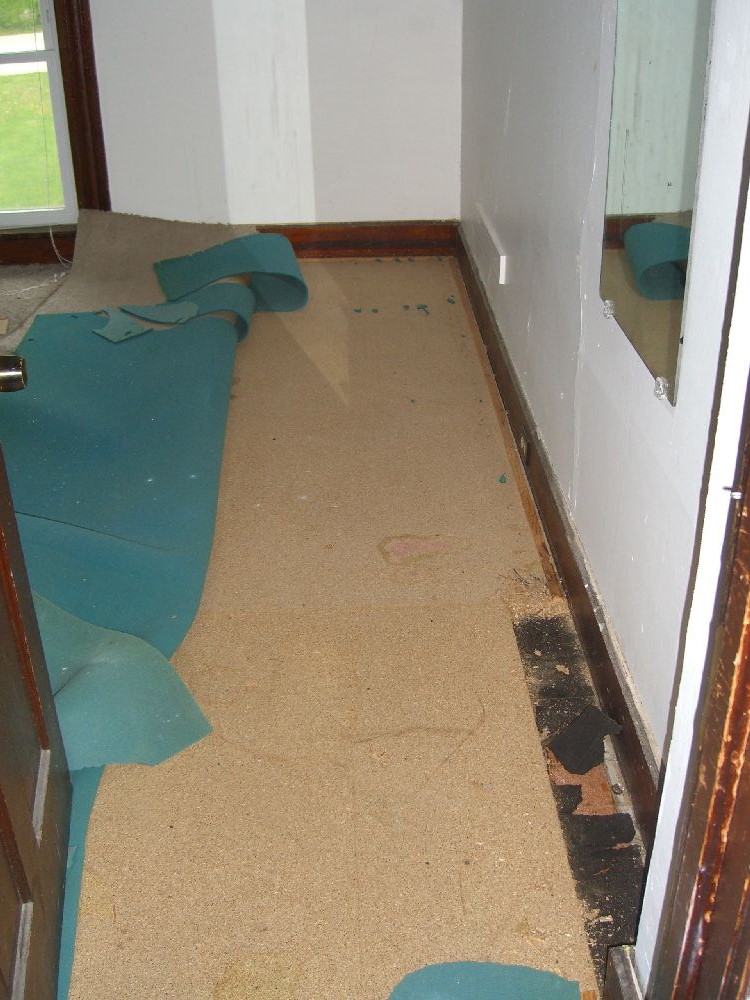
An unexpected vacancy in one of my upstairs units prompted me to consider what more I could do with the space. The carpet was always more functional than anything else, so I decided to see what the floorboards underneath looked like and go from there.
Curiosity may have killed the cat, but here it just sent me down a rabbit hole of hard work, muffled curses, and occasional laughter at yet another roadblock. (Spoiler: it all ends well.) The previous owner’s recollection of what was under the carpet he’d laid was ‘the heaviest padding [he] could get’. Marvelous, I thought. Pull up the carpet and the padding, and the floorboards will be mine!
The carpet wasn’t tacked, just attached to tack strips on the edge. The padding underneath was… very, very thin, but perhaps, thought I, it was just pounded flat after years of use. And then I saw what was under the padding:
Five-eighths inch thick particle board. When you absolutely, positively
have to frustrate every [person] working on the project… accept no substitutes.
I debated stopping the project and shopping for new carpet instead, but decided to expose at least a little bit of the old floor. If it the original boards looked to be in good condition, it was probably worth proceeding. If there was laminate, or deeply scarred boards, or ugly knotted pine or something else, then carpet it would be.

Beneath the particle board seemed to be just a layer of tar paper, and then original, 100+-year-old nice, wide floorboards. The project would move forward…
… slowly. There were four full 4’x8′ sheets of particle board, several large sections, and a couple of smaller fills. Each was thoroughly nailed down:
So to recap: pull up the carpet, roll and remove; stuff 120+ square feet of padding into trash bags; pull a lot of staples from the particle board; pull all the nails from the boards; then lift and remove all these heavy boards (cutting up some water-damaged ones for disposal).
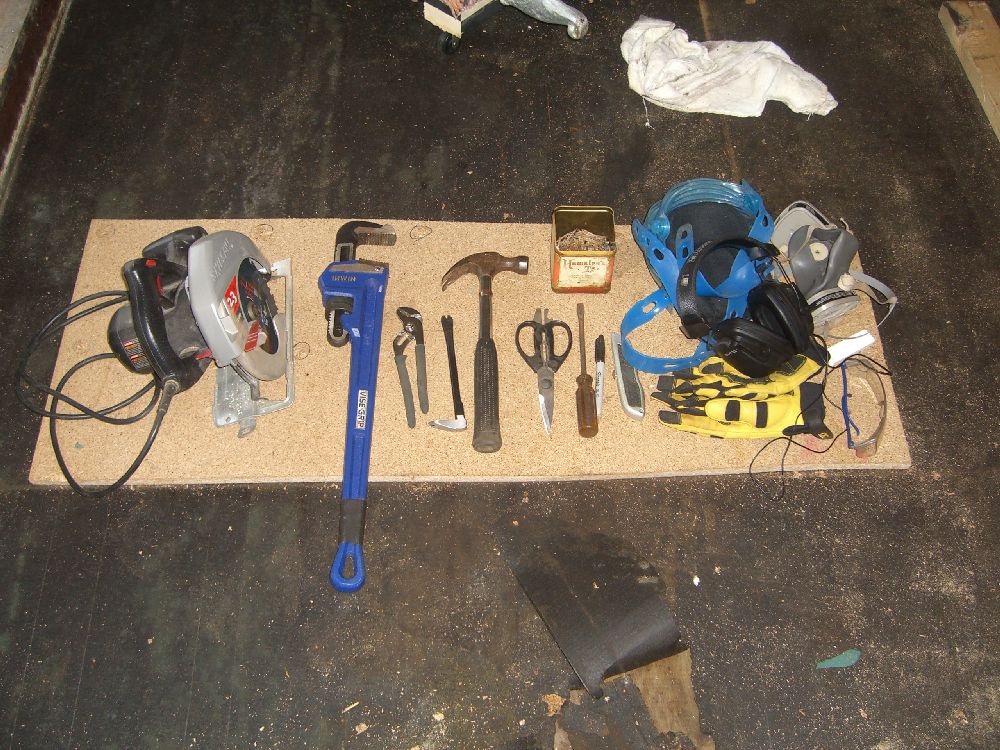
No, I don’t think I have too many tools, thankyouverymuch.
All the effort was, I think, well worth… the… effort. Aside from this one cracked board – the result of a window being left open during one or more storms years ago and water soaking into the particle board underneath a heavy cast-iron radiator – the old floorboards are in pretty good shape.
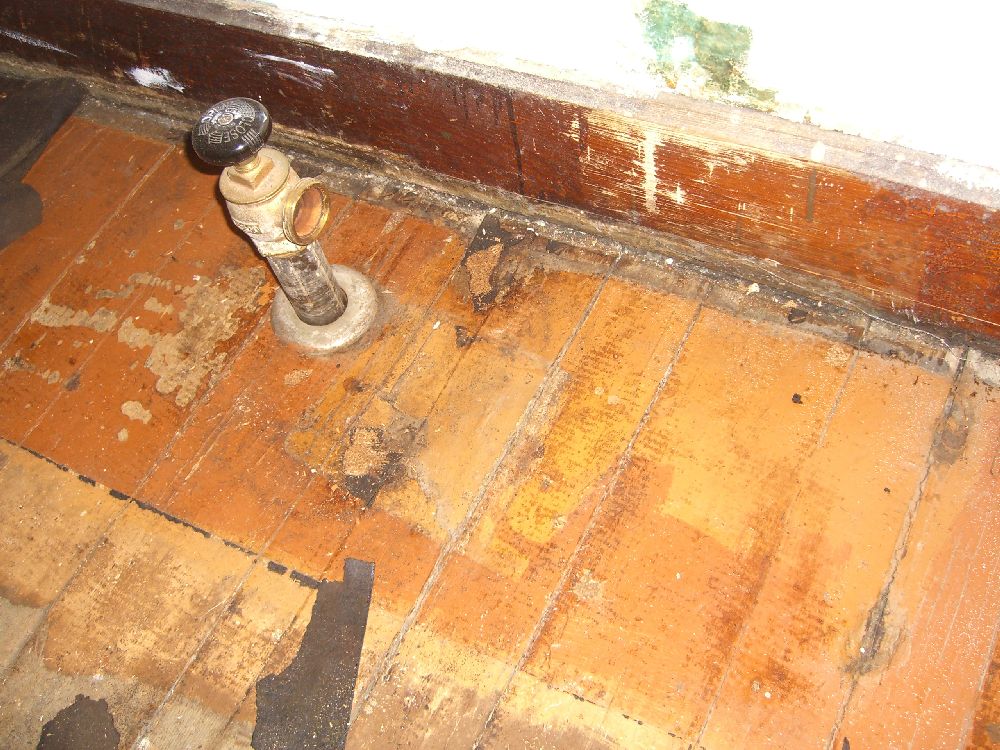
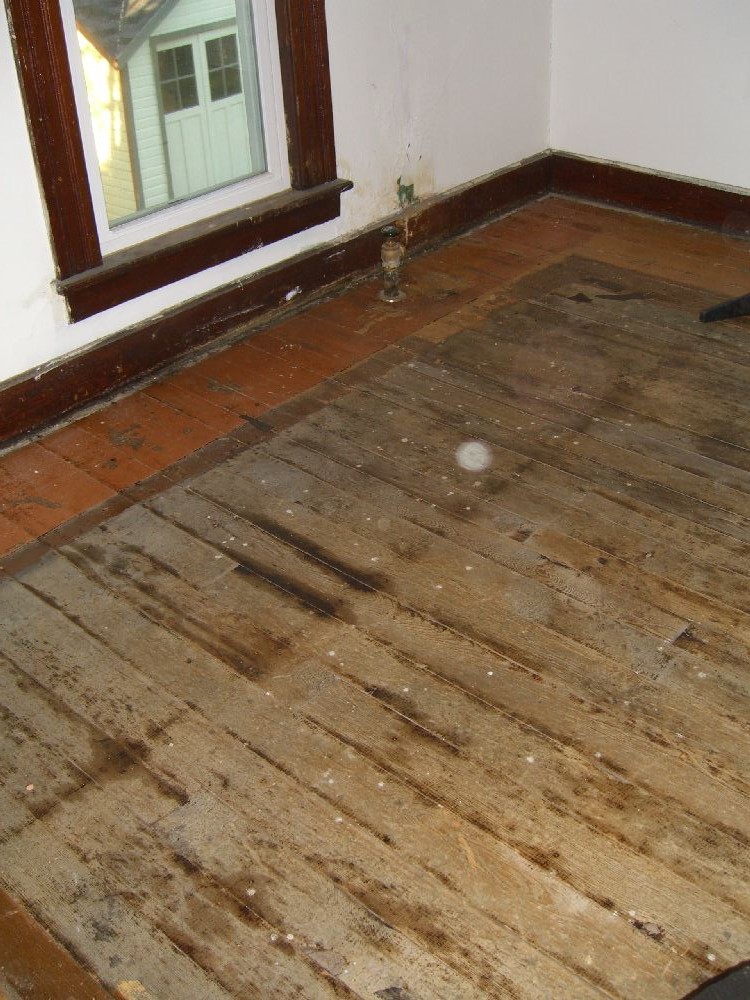
The floor – and quite likely the floors in the other upstairs rooms – were partly painted, a common decorating approach a century ago. A large area rug covered the center of the room and the floorboards were only painted around the rug. In this case, the room was redecorated at least once – a slightly different sized rug was used and a new color painted over most of the existing ‘frame’. You can still see the earlier brown color inside the orange that was used later.
The boards in the center were never finished in any way and have just grayed with time – they look to have interesting grain, and with their age they’ll be nice and hard regardless of the type of wood used. This’ll wind up looking good.
Eventually.
So that you know I am not dead…
Posted by aaron in Uncategorized on 14 December 2012
…I will post to say a) I am alive, b) the house remains standing, and c) things are continually being done both inside and out. But I keep forgetting to take pictures, so a several-months-long list of things like:
- expanded garden beds, did some light landscaping
- hours upon hours of scintillating work scraping off old wallpaper to reveal even older wallpaper
- old stuff of finishing painting the eaves on the front of the house
- even older stuff about rerouting gutters
- minor flooring additions to the attic
- repair of a return pipe on the boiler
- storing of lumber and beautiful walnut branches in the basement
- … and no doubt much more.
It’s so comfortable…
Posted by aaron in backyard, furniture, outside, tools and materials on 30 September 2012
… and make something both functional and aesthetically pleasing:

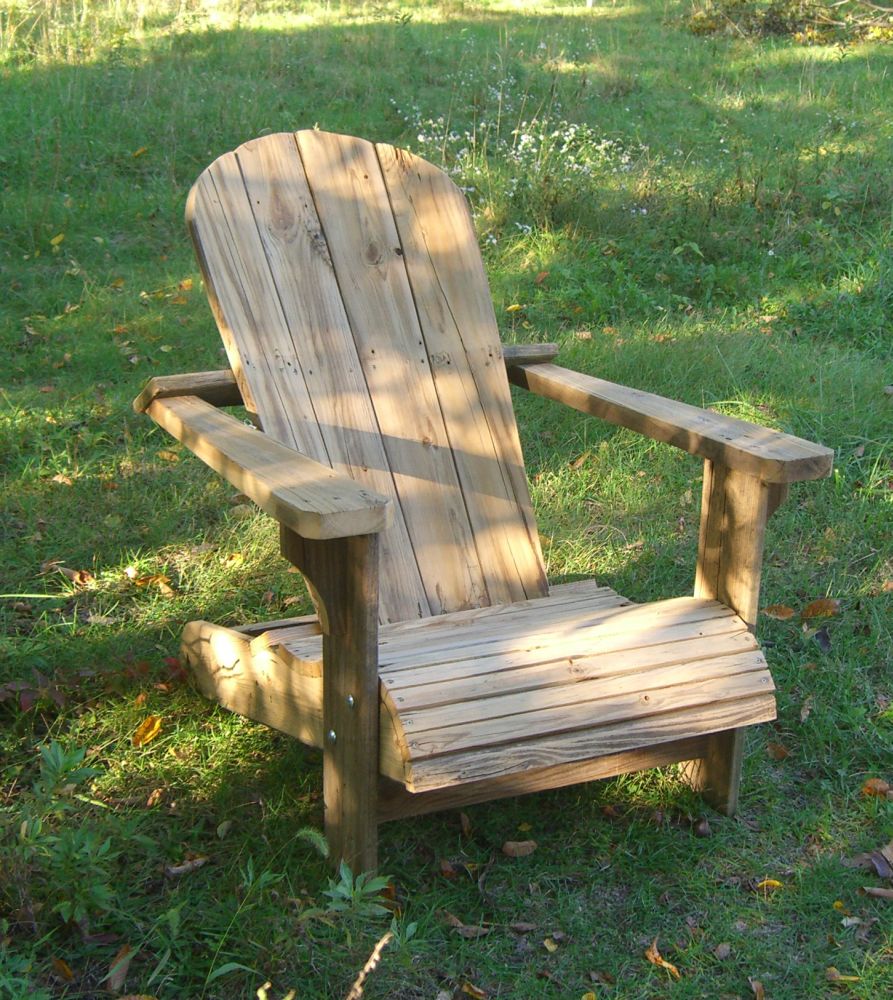
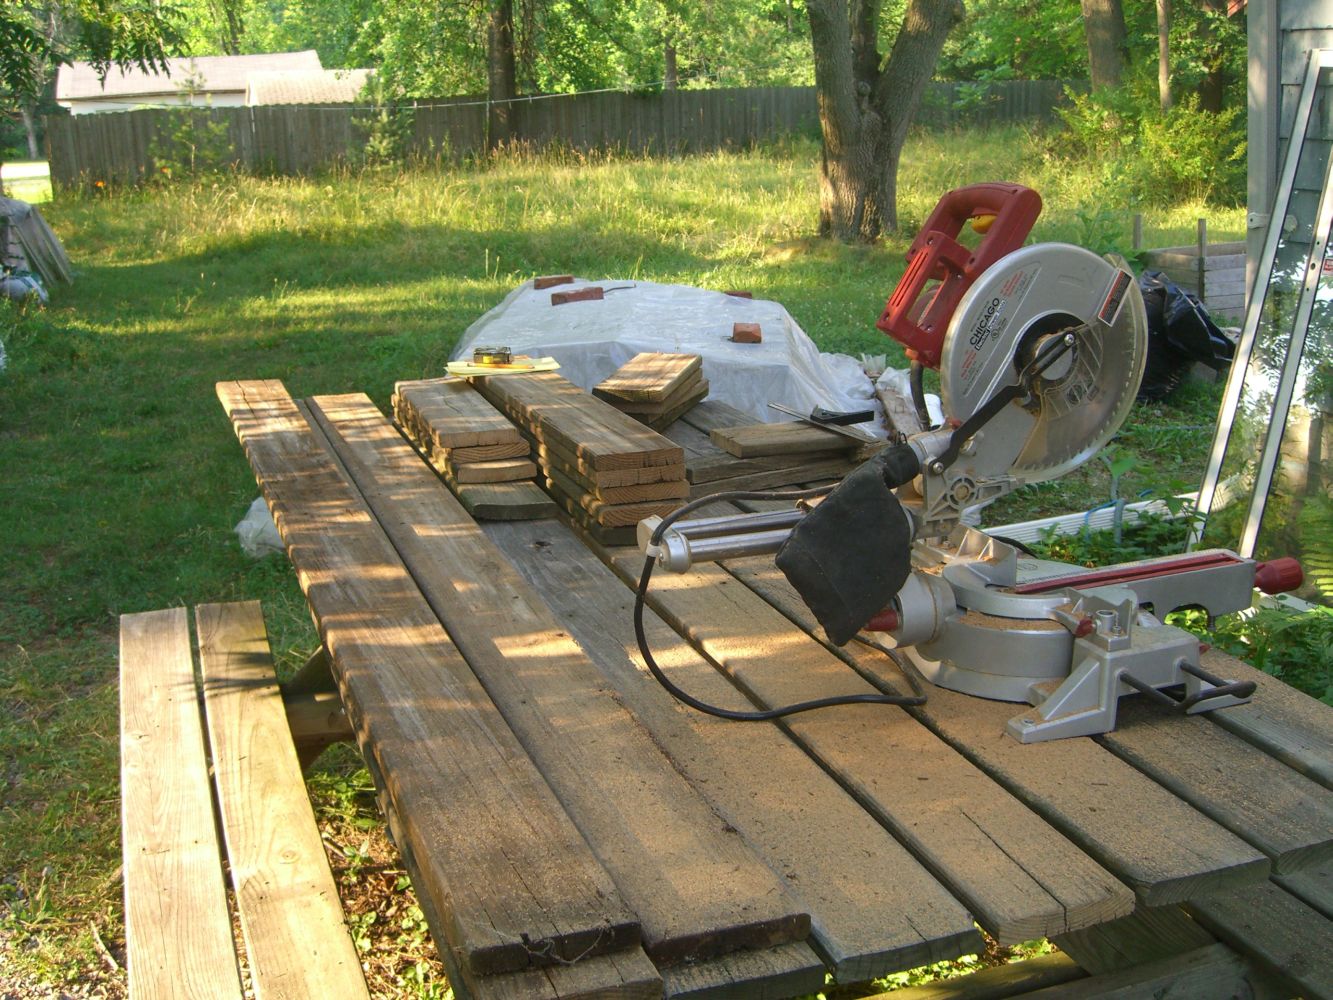
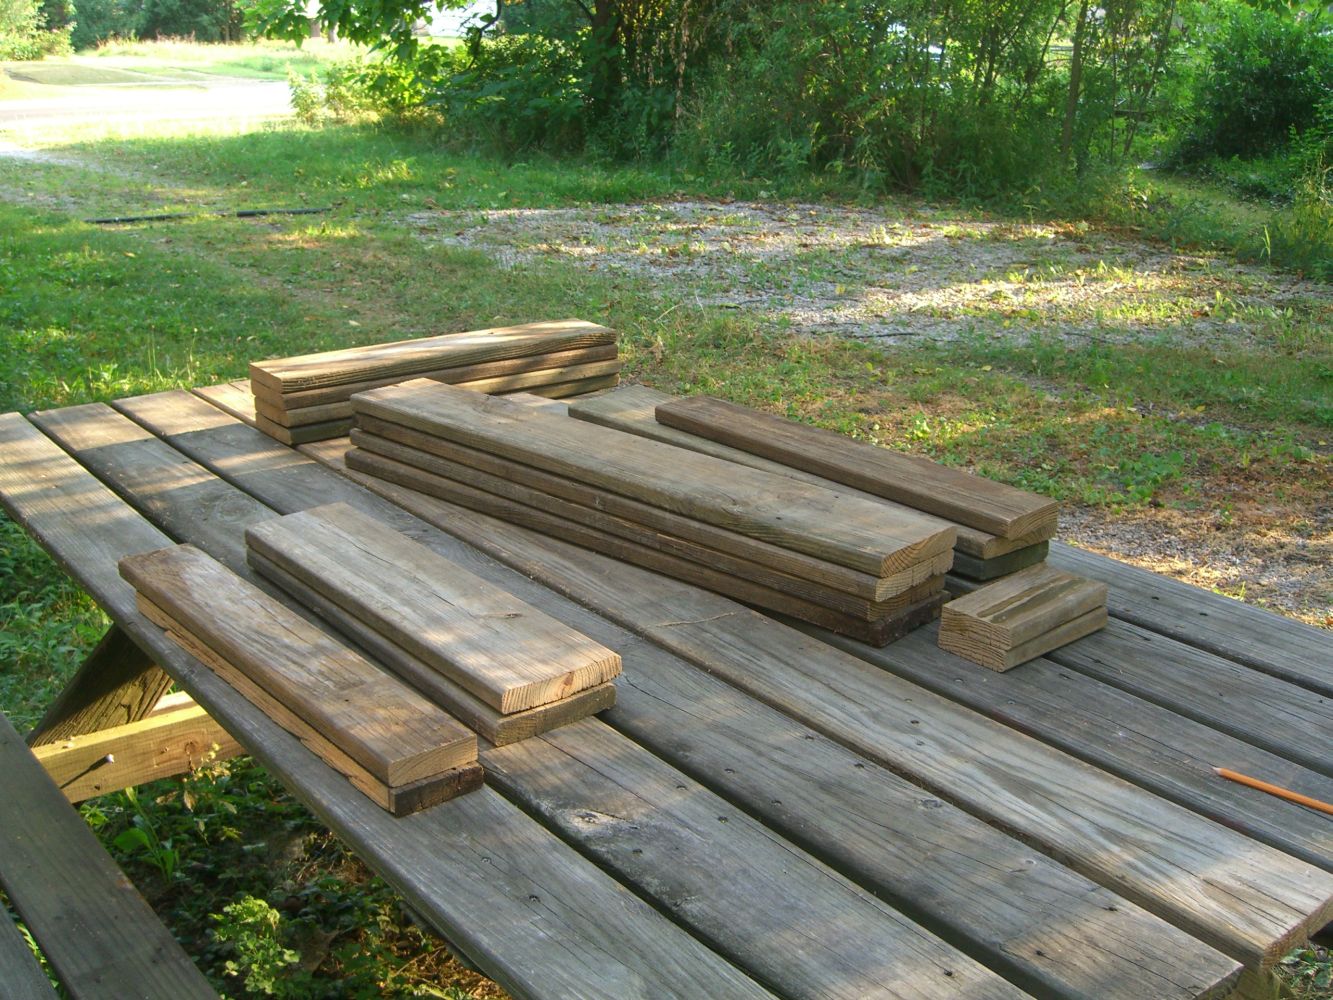
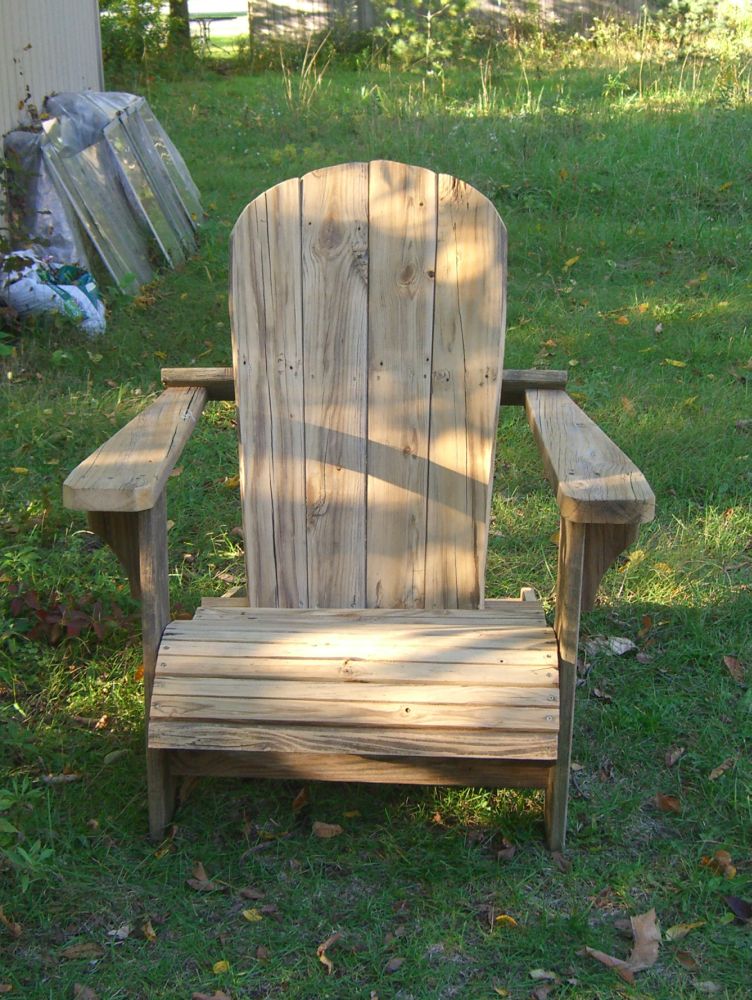
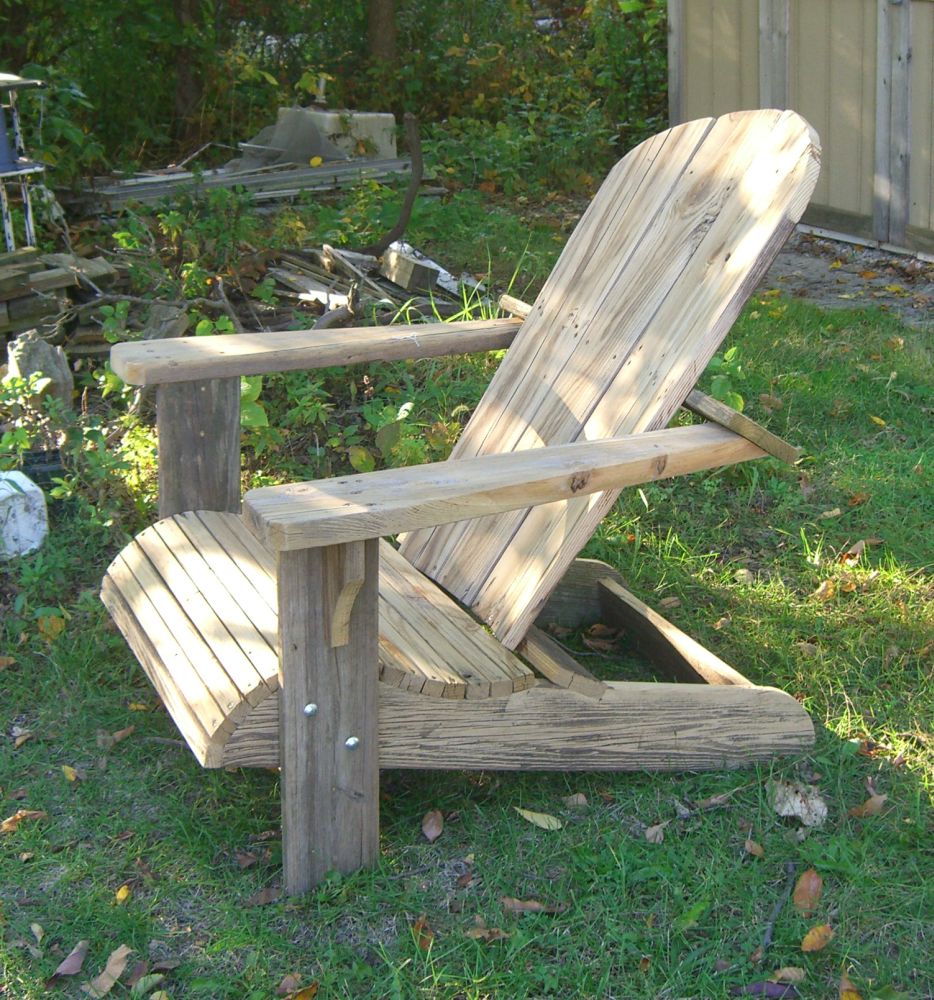
Even after completing that picnic table several years ago I still had maybe a dozen 8-foot lengths of almost 1×6 (I’ll explain the almost later) and a desire to create a sitting space other than my front porch. I’ve always liked the look and feel of Adirondack chairs (variants sometimes called Cape Cod-style, or Muskoka apparently) – the wide arms, the curved seat (not always a standard design element, FYI), the high backs, and the rustic quality, plus I used to go to Boy Scout camp in the Adirondack Mountains. So there we are.
Searching for chair plans online brought up literally dozens of options. I settled on this plan for its look – it really seemed the most comfortable of the designs I viewed – and its largely complete instructions set including three excellent options for creating the cut templates.
Depending on the wood you buy, 38 feet of 1×6, 8 feet of 1×4, and 68″ of 2×6 could wind up costing $100+ easily. Because these chairs are meant to be used outdoors – and therefore may be painted – this is a great project to use reclaimed or even scrap lumber. It’s even better if you have ‘spare’ pressure treated (or, heaven forbid, redwood or other traditional outdoor furniture woods) boards. $10 in fasteners and several hours of work later and you’ll have a conversation piece from which to have very relaxed conversations.
This project got stopped and started several times due to other work, but I’d estimate it as doable by one person in four hours (not counting sanding) IF you have all the tools and space so you don’t get in your own way.
Tools:
- Mitre saw
- Table saw (at minimum, the seat slats need to be ripped)
- Jigsaw
- Drill with paddle bit and predrill bit
- Circ saw
- Workbench with adjustable opening in top. (If your table saw can cut a shallow enough angle for the back slats and arms, you won’t need this or the circ saw)
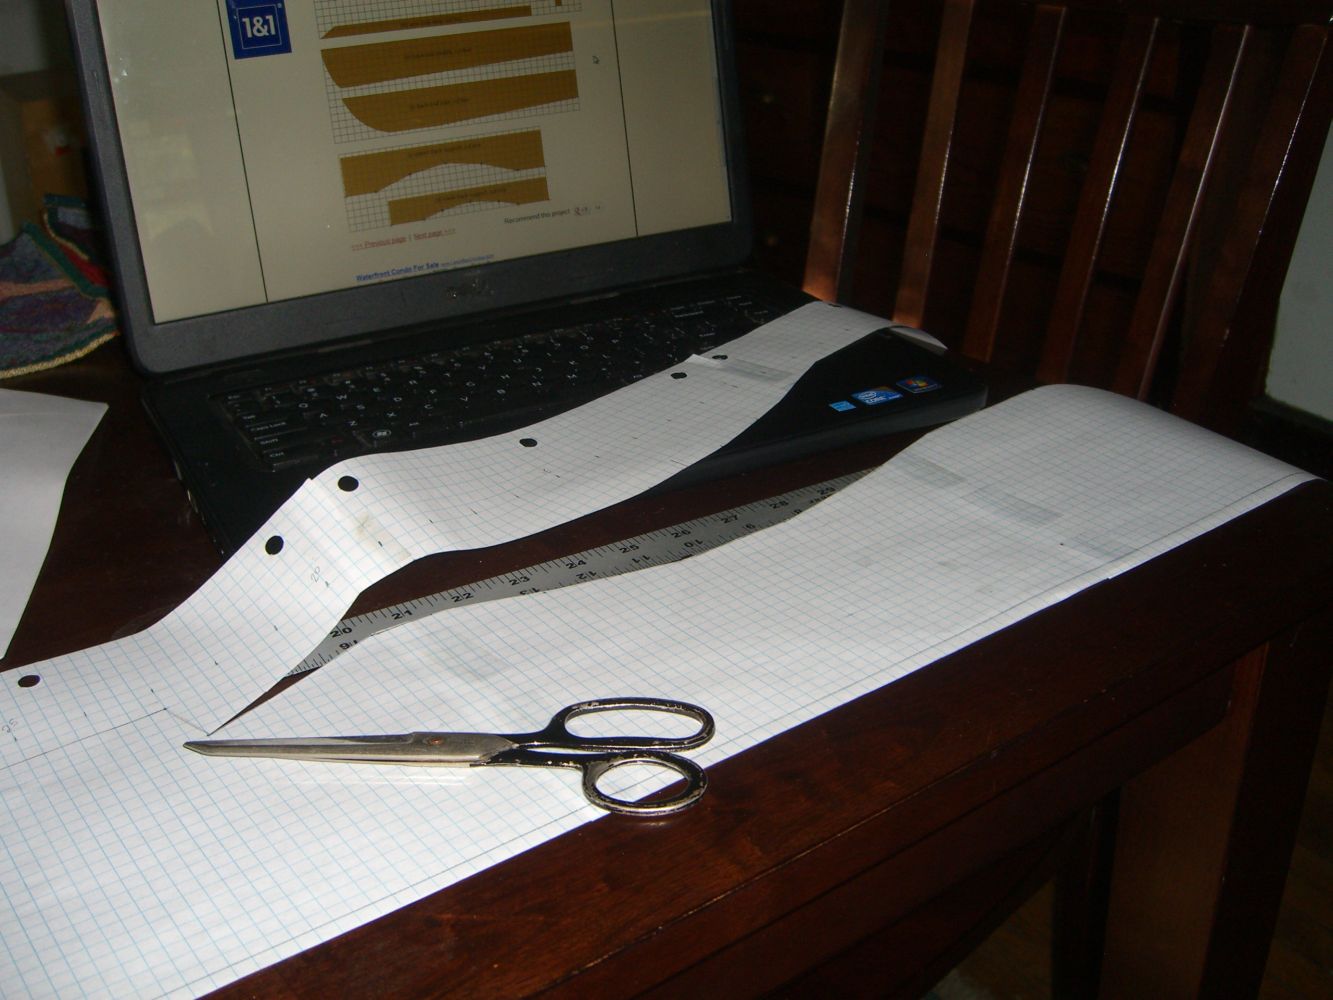
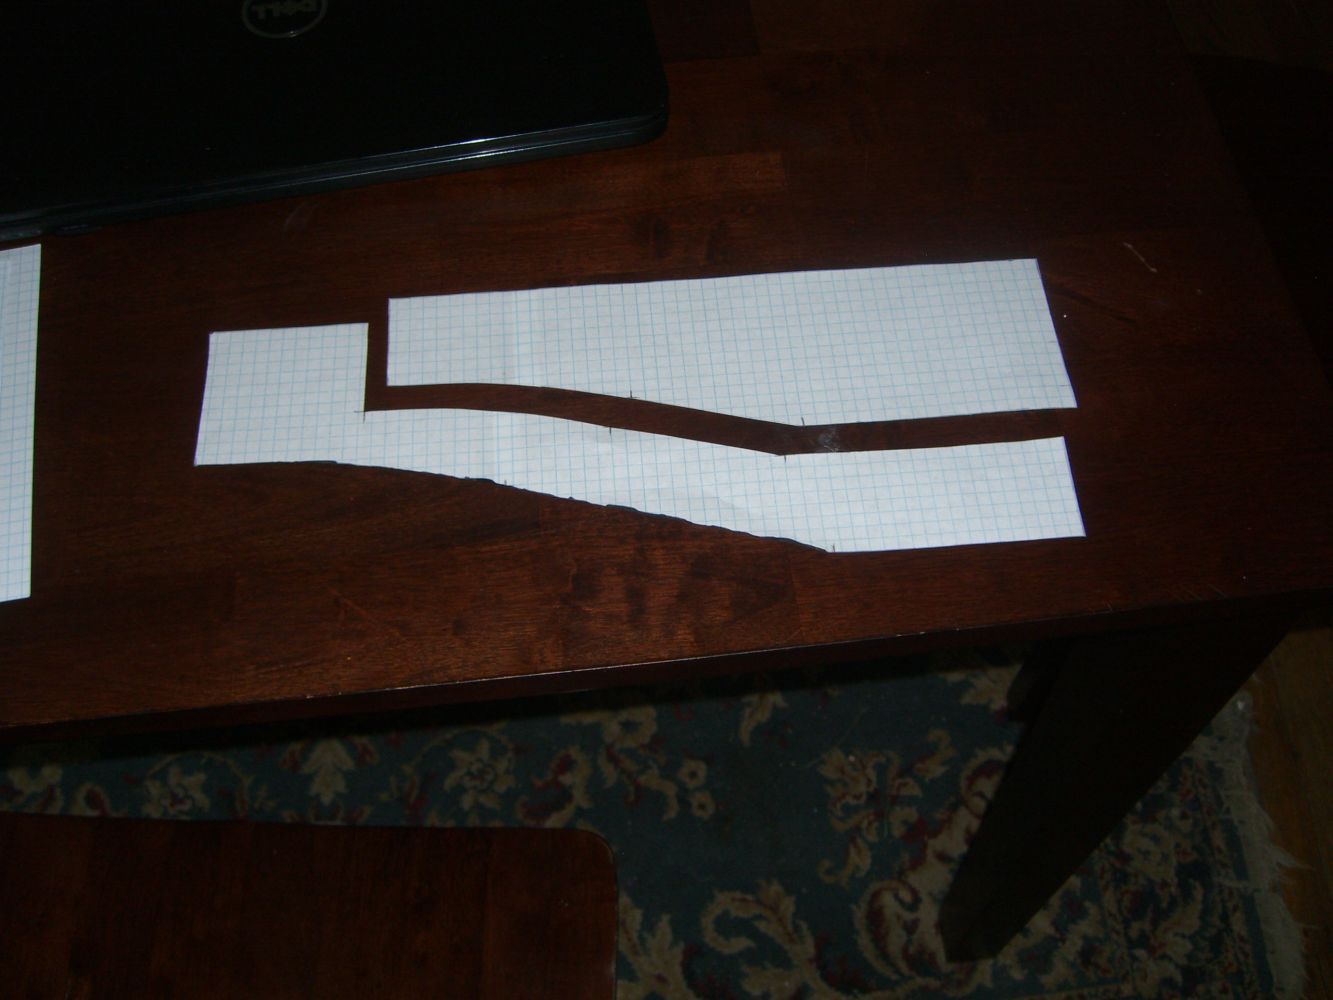
Saves time and paper, but does require a bit of spatial reasoning. Above, the upper and lower back supports.
Not much else to report – the online plans (and handy pictures) were easy to follow and made a lot of sense. Two adjustments, and then another pro tip. First, I skipped the part in the instructions where they suggested temporarily attaching the sides to the leg/arm unit and using temporary spacers to keep the right width. I just maneuvered everything into place, clamped, and attached the bolts directly, several steps early. It’s possible I lucked out and got everything pretty square by accident. If anyone sees a good reason to do things the way the instructions say, I’m all ears.
That should be my mantra.
Second adjustment – I was sloppy in measuring the salvaged wood. The boards are actually 1 1/4x6s – so one inch thick instead of 3/4″ thick. This had virtually no impact on the construction, save for the rear spacer which had to be cut down a half inch (1/4″ on either side) to fit. As always, measure twice, cut once, then remeasure, realize your mistake, and cut again.
No, I was wrong. That’s my mantra.
Quickly now – pro-tips all around:
- Narrow scrap wood should be a mainstay of every shop – easiest way I know to guide a circ saw along a long angled cut, like for the back slats.

- Invest in a good saw blade for said circ saw. If you’re cutting pressure treated wood or heavy hardwoods, get a new blade, period. My old blade was bucking and binding when trying to cut the arms especially. $11 at the hardware store later and the cut took less than three seconds.
- Finally, if you’re using reclaimed wood, take advantage of the ravages of time. Knots, gouges, nicks – don’t sand them all away. And with weathered pressure-treated wood, experiment with not sanding down too far to allow for multiple colors and graining to emerge. The arms (which I have no idea where that wood came from, just that I had almost the perfect lengths sitting on my shelf) have three or four colors, like desert wood, from yellows to grays (of course) to even a bit of reddish purple. And the sides (second shot below) are tiger-striped because of how deep the worn ridges in those boards were. Great accents to the piece, I think.
How to keep yourself sane at night
When you’ve replaced a smoke detector and stuck the old one somewhere with vague intentions of recycling or properly disposing of it or whatever, take that extra moment to remove the battery. This way you will avoid spending your 2am hour going up and down stepladders replacing perfectly fine batteries in all of your other smoke detectors.
The more you know…
More things that can be built with 2x4s
Posted by aaron in outside, tools and materials on 25 August 2012
A ramp for the shed which *should* be capable of supporting the industrial drill press that’s currently in there.
Quick (stackable) sawhorses using these plans, currently minus the plywood caps.
Updates (and pictures) to follow.
Quick updates
I won’t get in the habit of posting about the house if I don’t get in the habit of posting about the house.
QED.
Recent work, as opposed to rearranging stuff to make room for the NY stuff, includes:
- painting the porch eaves
- painting the sides of the house to at least the top of the second story windows
- various sealing and puttying on eaves and trim
- installation of some new shelves in the laundry room
One thing led to another…
Posted by aaron in tools and materials on 14 August 2012
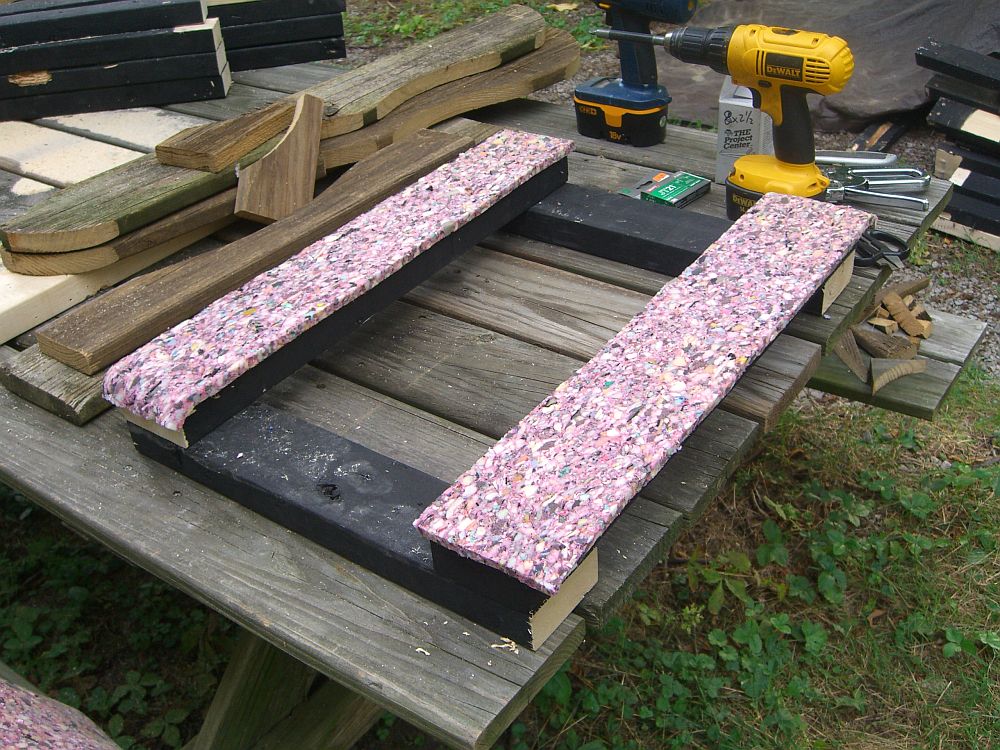
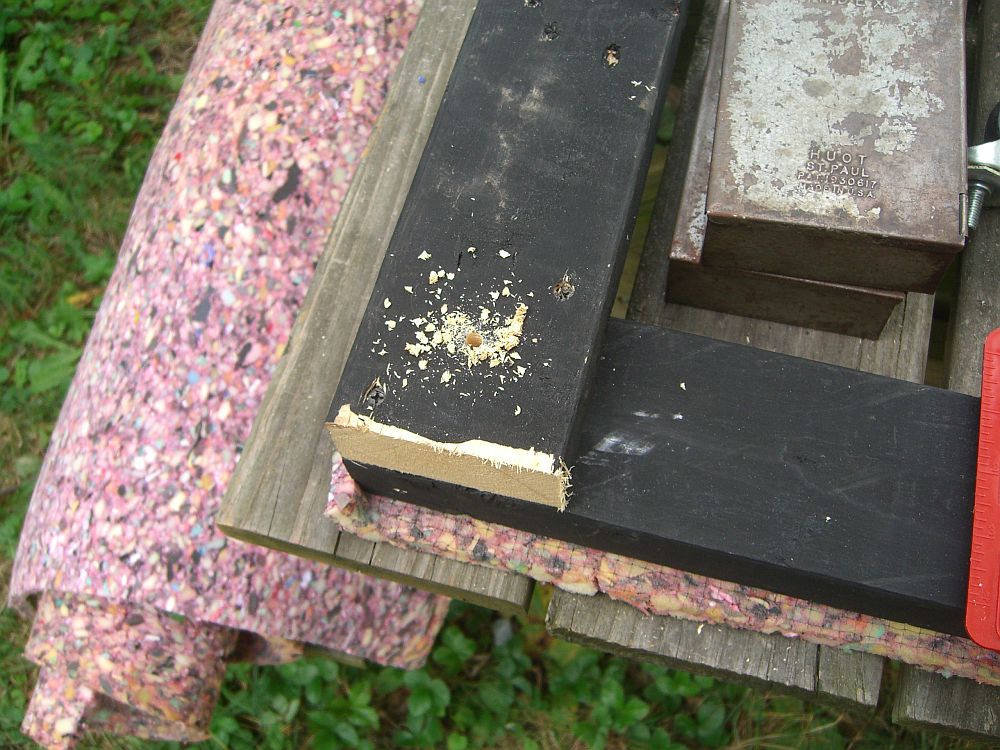
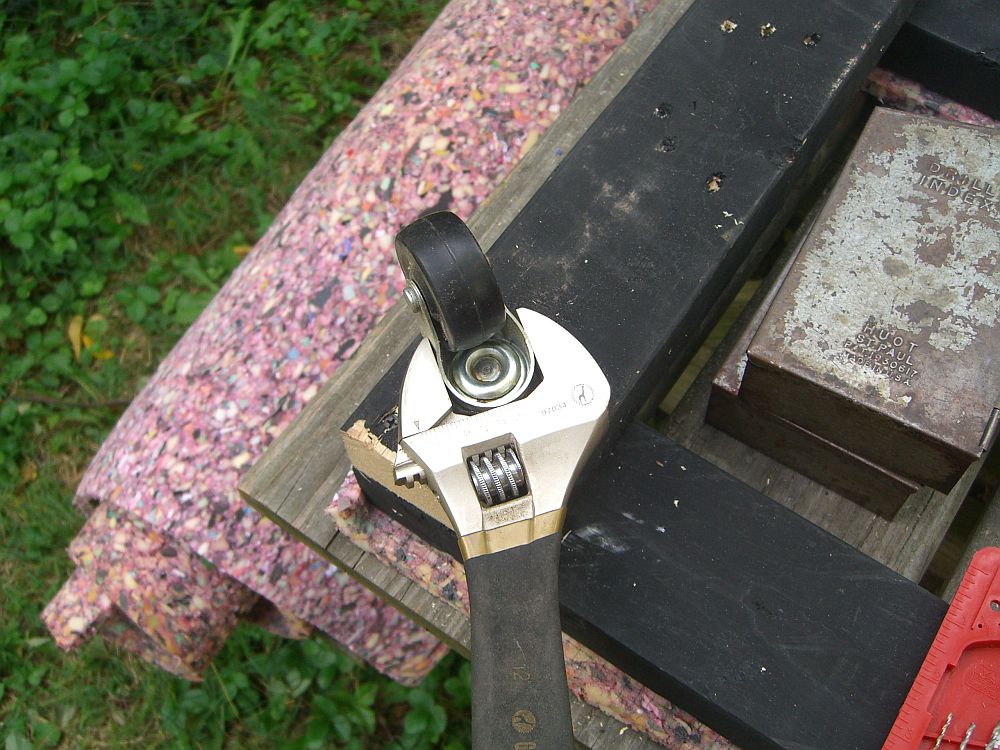
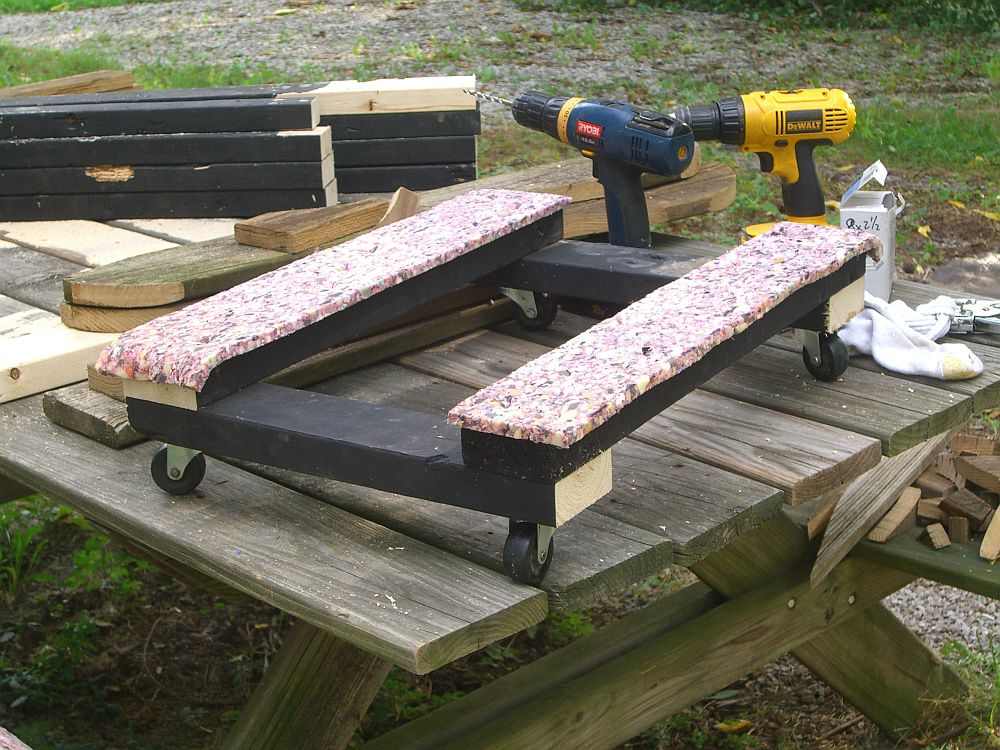
I built a dolly:
- Box up books in one corner of living room. Consider placing them temporarily where the desk is currently located.
- Realize the bookshelves that are also coming from NY would fit well where the desk is, and decide to place something else in that space, something that will be gone before the shelves arrive.
- Decide to take all the stuff I agreed to store for someone for the month of August and put it in the place where the desk resides currently. Plan to move other things to the foyer where the stored stuff is currently.
- Realize all this is contingent on moving the desk.
- Remove everything from the corner where the desk will go.
- Empty desk drawers, clean top, finally unplug and put away various electronic devices atop the desk that are no longer being used.
- Find that desk is too heavy to move by myself.
- Mutter ‘I could do this if I had a dolly.’
- Decide to build a dolly.
- Get sidetracked for an hour sorting all the lumber I rescued from the theater festival strike by size, even though I only need four pieces of wood.
- Finally begin this fifteen minute construction project:
- 2x4s (I went with 2@18″ and 2@25″)
- four casters
- carpet padding or scrap carpet
- staple gun and staples
- 2.5″ screws
- power drill and bit set