Posts Tagged medium
Bike rack
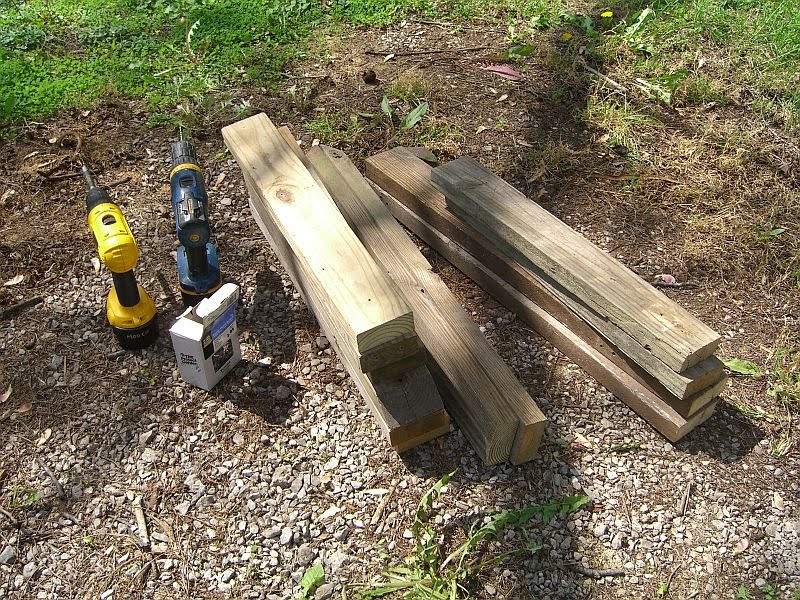
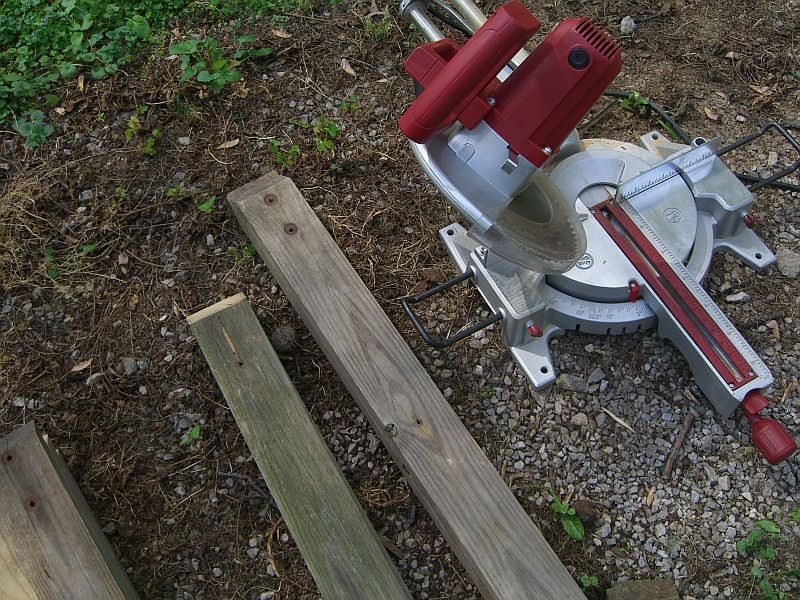
Here’s a quick and easy project I finished a few months ago. The old deck benches – most of which became my picnic table (which is itself an upcoming post) – included a number of 2x4s with 45-degree miters. While flipping through woodworking plans online I found this bike rack plan that included a bunch of 2×2 sticks with 45-degree miters. The gears whirred slowly in my head and I realized I had just about enough pressure-treated wood in lengths that weren’t good for much else, some of which were practically precut.
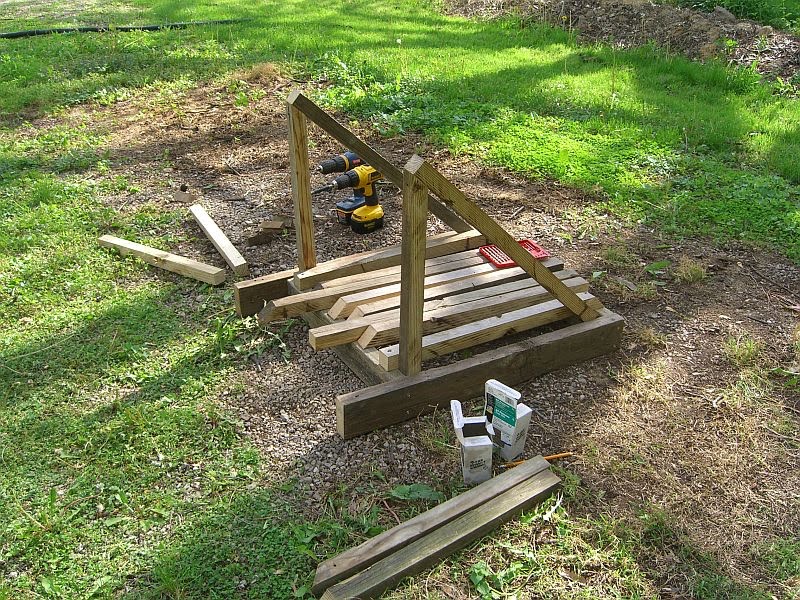
I won’t recap the whole construction process – the steps in the linked plans are pretty straightforward. Beyond the compound miter in the pictures, I used my trusty Craftsman table saw to rip the 2x4s to something just shy of 2x2s, and they seem to be working fine.
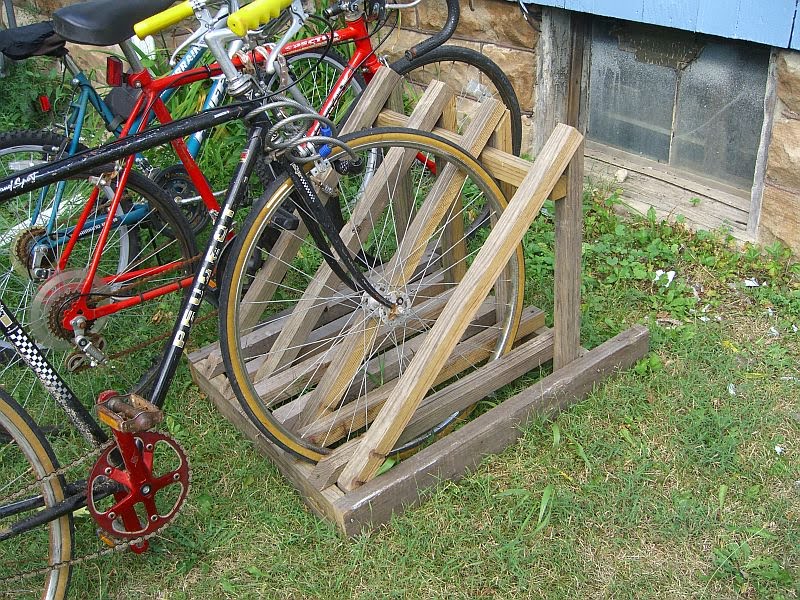
Room for at least three bikes if you tie up to the outsides (as the red one is in this picture).
Raised garden beds
I am now light-years behind on any sort of posting schedule, or non-schedule, or really just posting, period. As a result, several of the next few posts will be horribly outdated: projects I finished months ago – some even last year. I’ll start with some adaptive reuse that’s been feeding me for part of this summer:
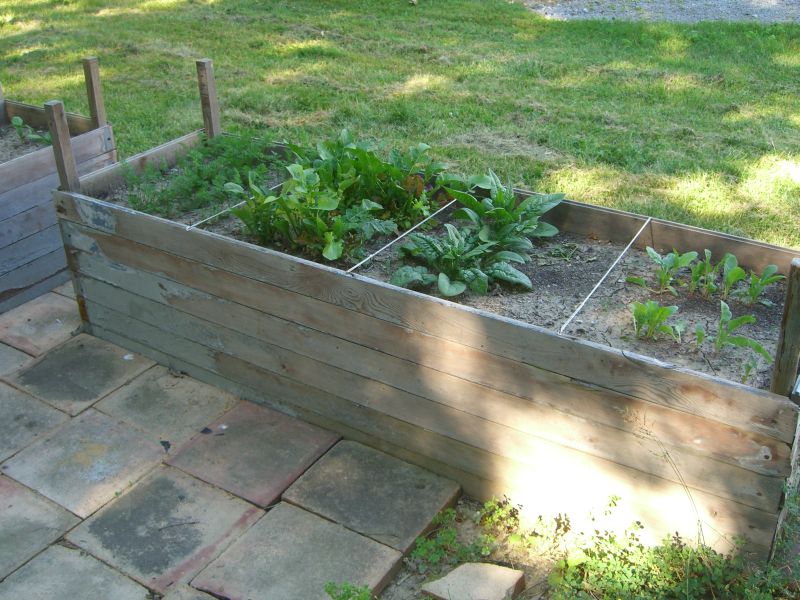
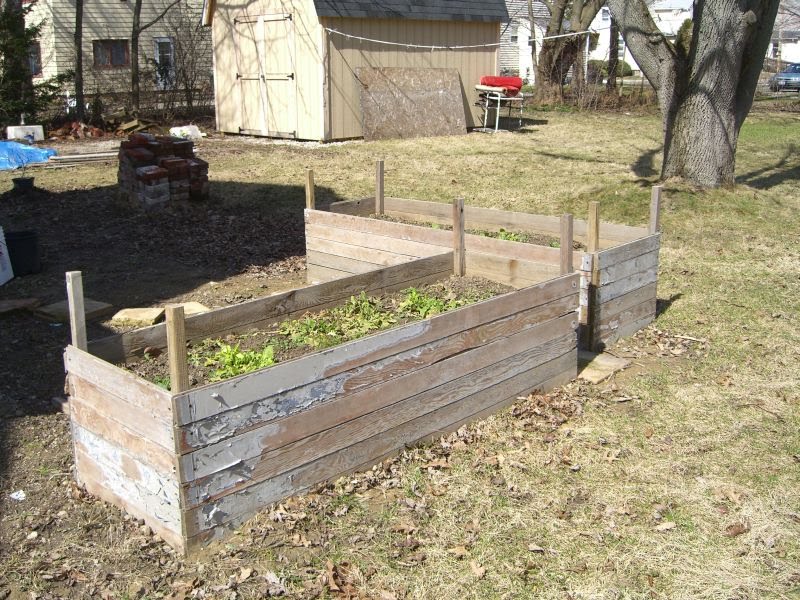
I won’t go into the virtues of raised beds here (plenty of others have said it better than I can right now) – and I’m not even to the point of square foot gardening – but I knew a couple of raised beds were going to be an important feature of my efforts to turn the gravel pit behind my house into something better. These are made entirely from found materials. The stakes – which are roughly 2′ in length each – are the same scrap posts I used for the compost bin last year; each has the same 45-degree miter at one end. The walls used to be a porch up in Elyria. The homeowner had redone his porch but hadn’t thrown out the wood yet, then saw my post on Freecycle looking for tongue and groove planks.
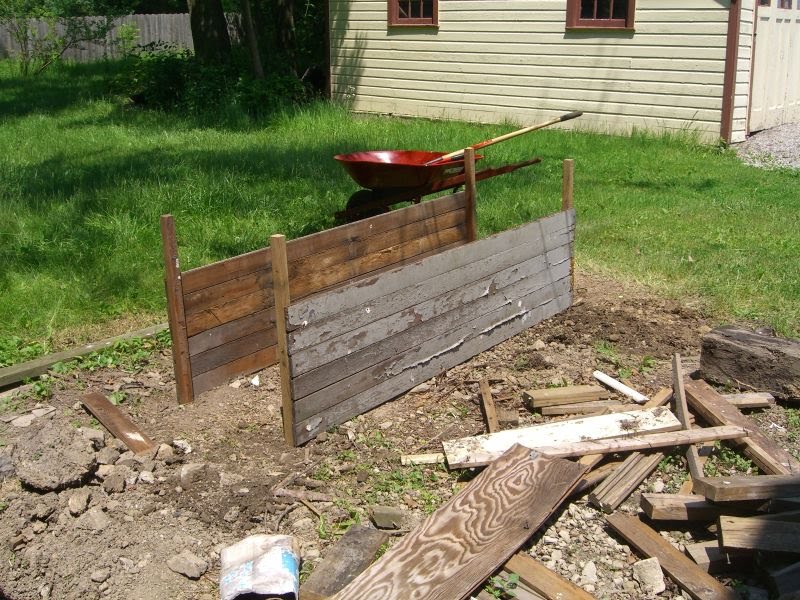
Construction could have gone several ways, each with their own pros and cons. One option would have been to measure off the stake locations and dig/drive them in first, then fit the walls to that skeleton. This would probably wind up with some imperfect corners since you’re looking at keeping things square over a four foot run. Another involves building the entire box in the workshop, moving it, holing out for the stakes, and then hoping you’ve leveled the ground well so it doesn’t skew when set down.
I chose to lay out two stakes on a flat surface, attached the planking for a long wall, then sank that whole wall into the ground. After both long walls were in I attached the short walls, screwing in the lowest plank, then fitting the next plank, screwing it in, etc. It was easier for one person to handle, and a little forgiving of leveling issues. The most important detail in this approach is being as exact as you can in spacing the two walls – otherwise the corners are likely to look ugly.
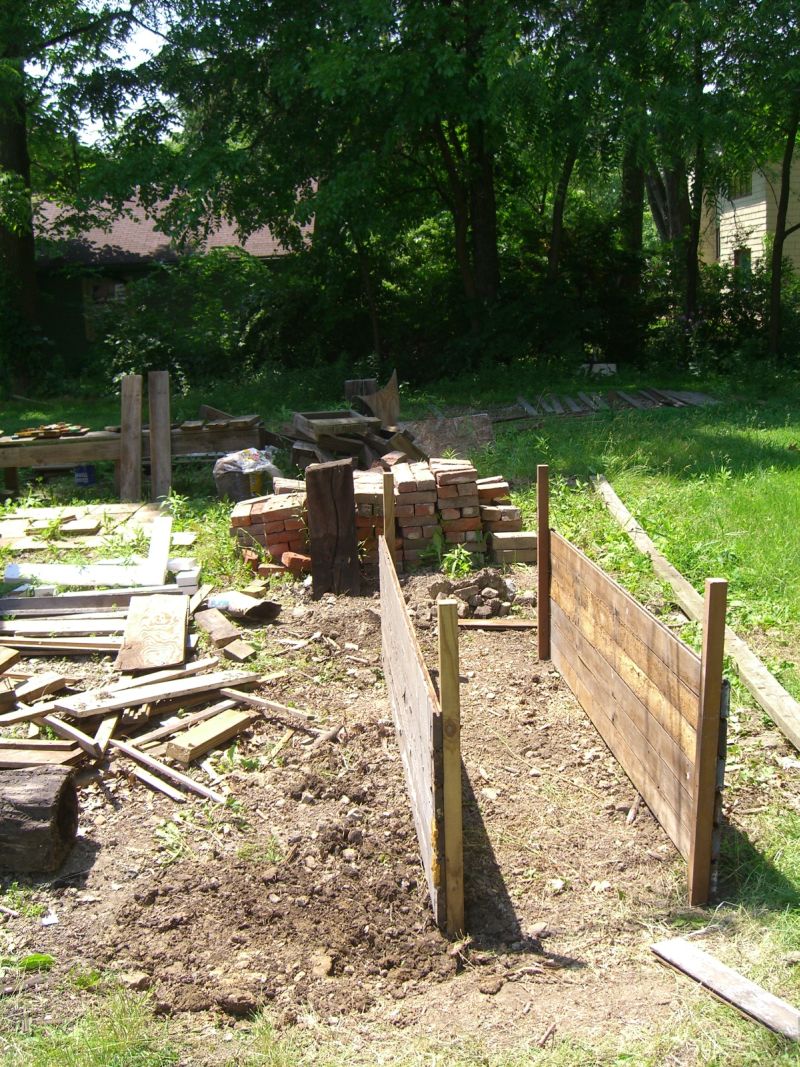
It’s conceivable that you could build two ‘L’s of one short and one long wall each, then move those into position. Again, that approach will have its own pros and cons.
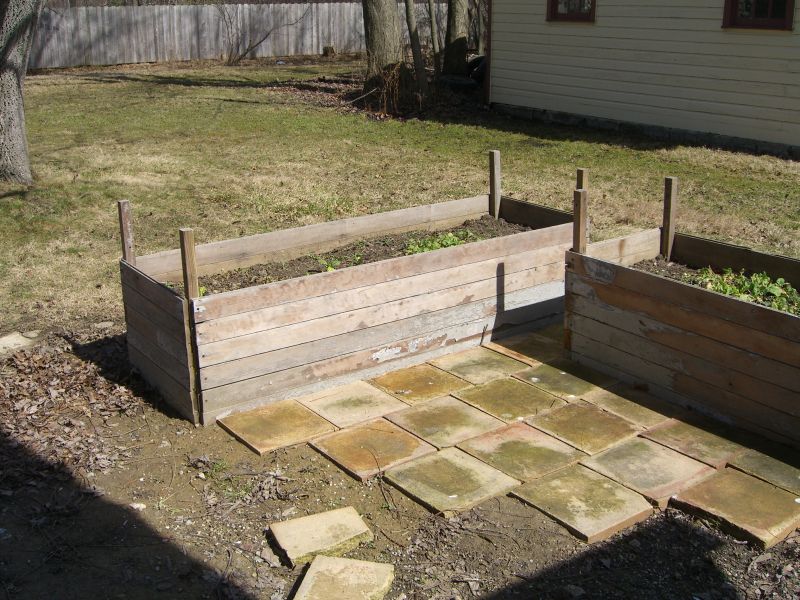

Ultimately, no matter how you build your garden beds, it’s still all about the dirt. These beds are roughly 20″ high so I wasn’t planning to fill them entirely with top soil. I have piles of clay fill from a neighbor’s basement excavation and put in about 15″ of that to fill the lower half. A healthy topsoil mix (river soil and mushroom compost from the local nursery) filled the rest of the box to within an inch or so of the top. Gravel or other drainage materials might have been helpful in the long run, but this mix seems to be working fine.
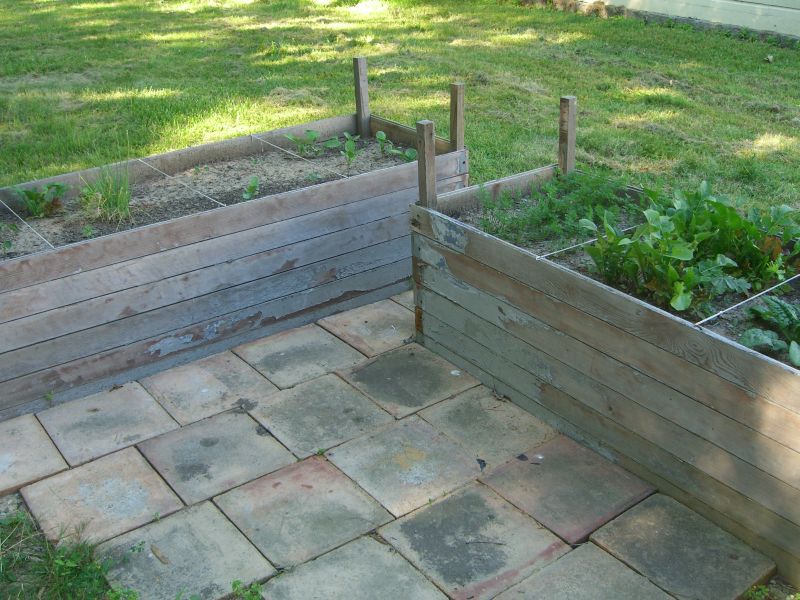
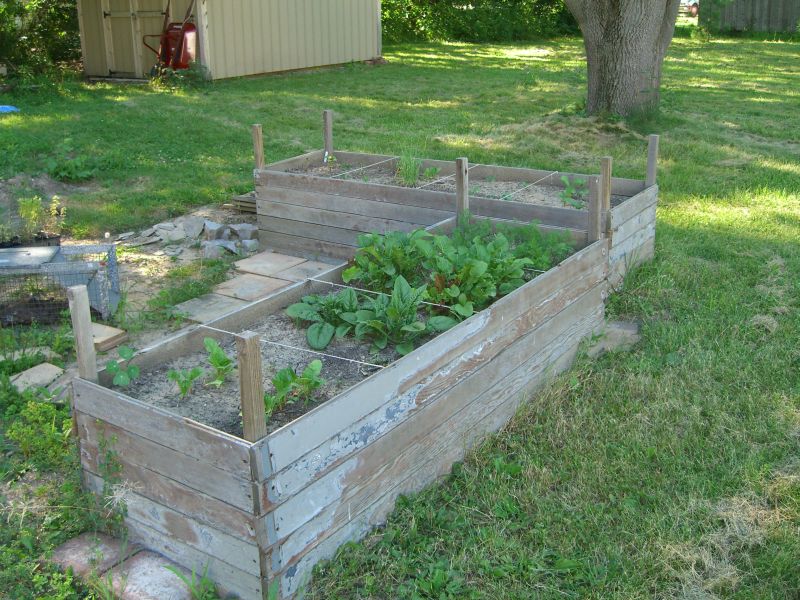

The paving stones were highlighted in the previous post. We’ll see how these beds and that mini patio tie together into the rest of the landscaping plan.
More updates as they are warranted.
Update (warranted):
Never posted these, but here’s the first dish that came out of the garden (cukes were from the front garden beds):


Delicious in butter, sadly not from the garden:

There’s a clever post title involving the word ‘doorknob’ around here somewhere, I just know it…
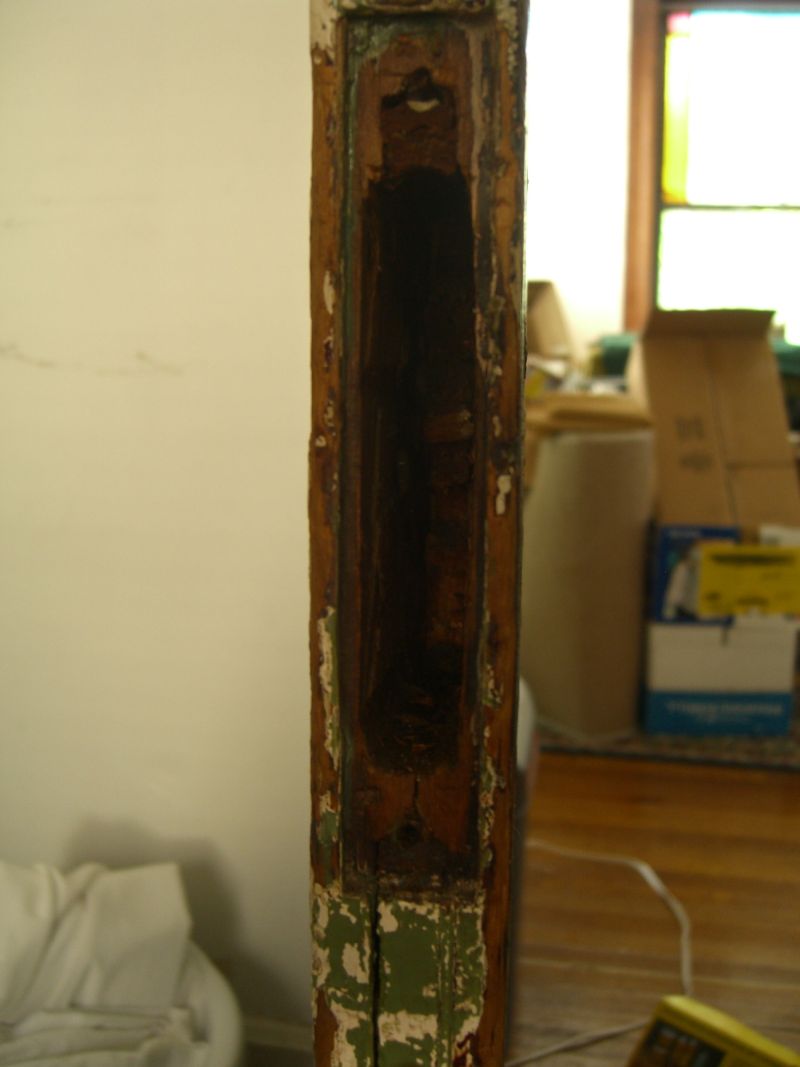
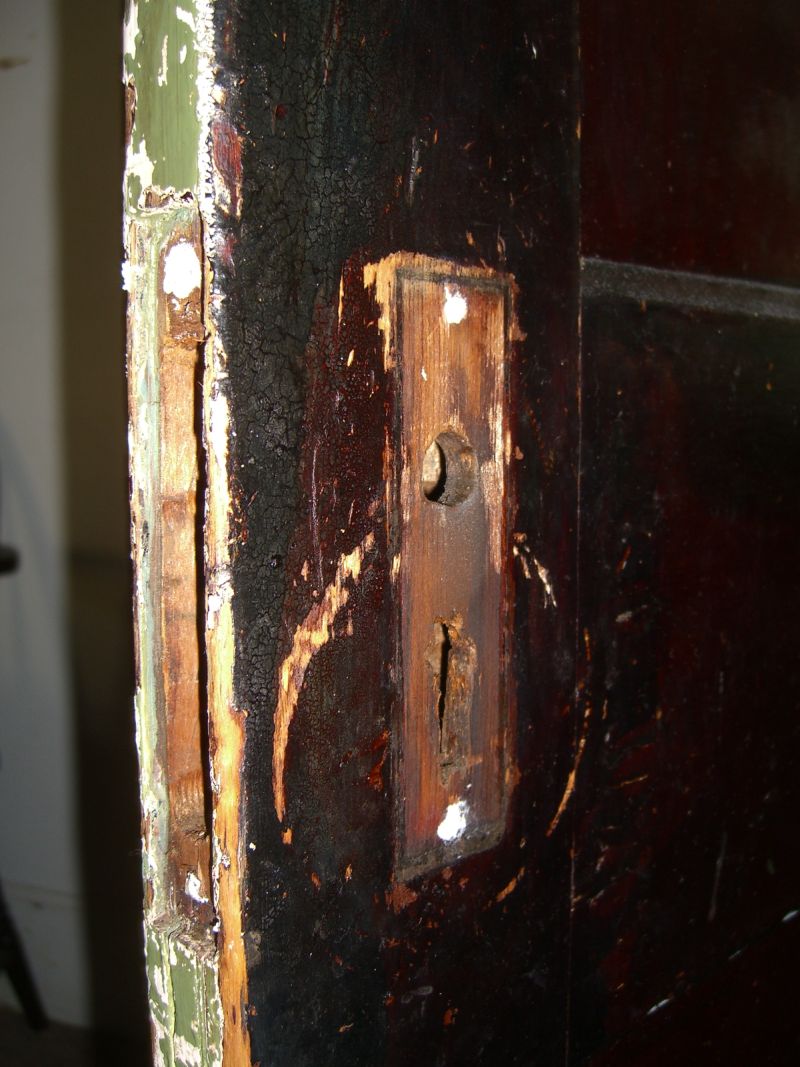
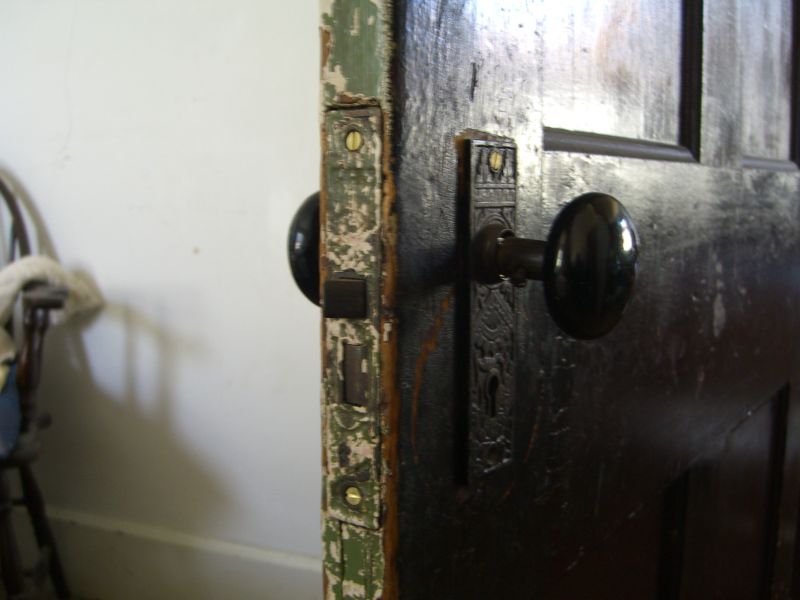
This is quite an old post, but I finally remembered to take a picture of the finished project. Old house, old doors, old door latch mechanisms – and plenty of neglect by tenants over the years. Screws had stripped out so the knob and latch on my bedroom door was barely held in place anymore:
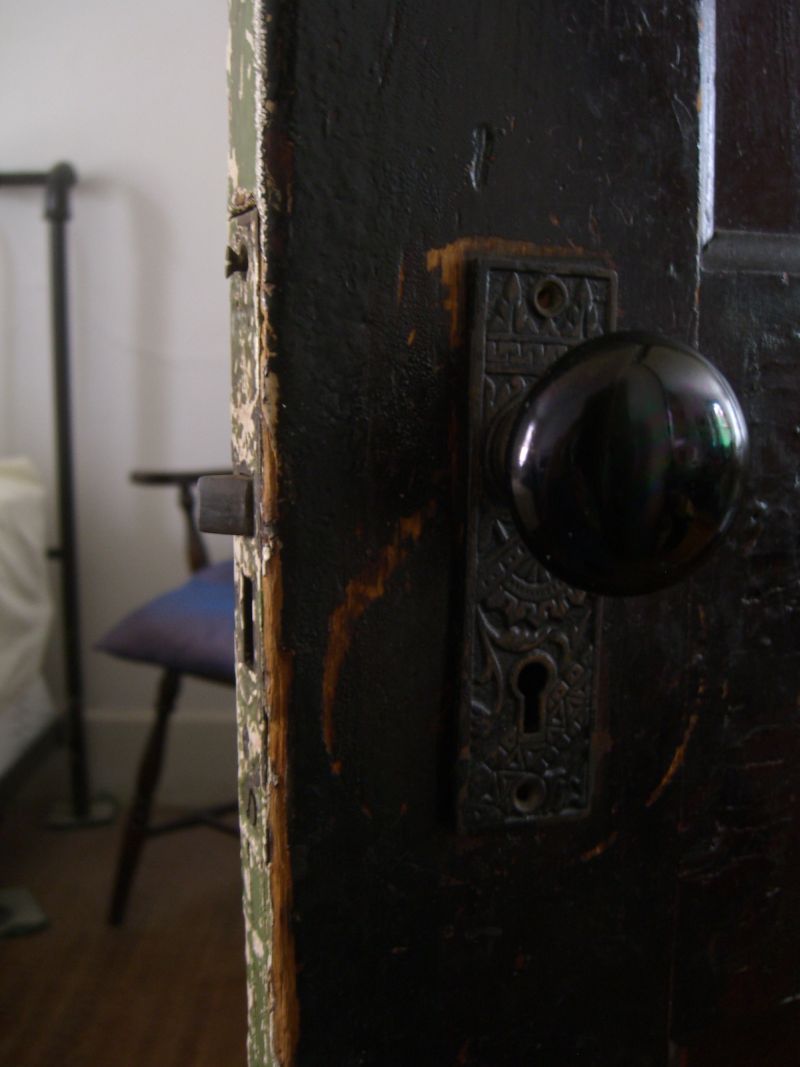
Attempts to fix it over the years look to mostly have involved larger and larger screws, which just gouged the wood more each time the door banged closed:

This was another fairly quick repair, thanks again to Abatron‘s wood epoxy (putty) which I can’t recommend enough for these sorts of small replacement jobs. Side note: This is the second time I’ve linked to Abatron in this blog and both times I’ve linked to the Wood Epox directly; they also make a sister product called Liquid Wood which helps harden soft or rotted wood, and is recommended for use on the area where you’ll apply Wood Epox. Just so you don’t feel I’ve led you astray, consider buying both products at the same time – I often use both, but sometimes, frankly, I’m lazy.
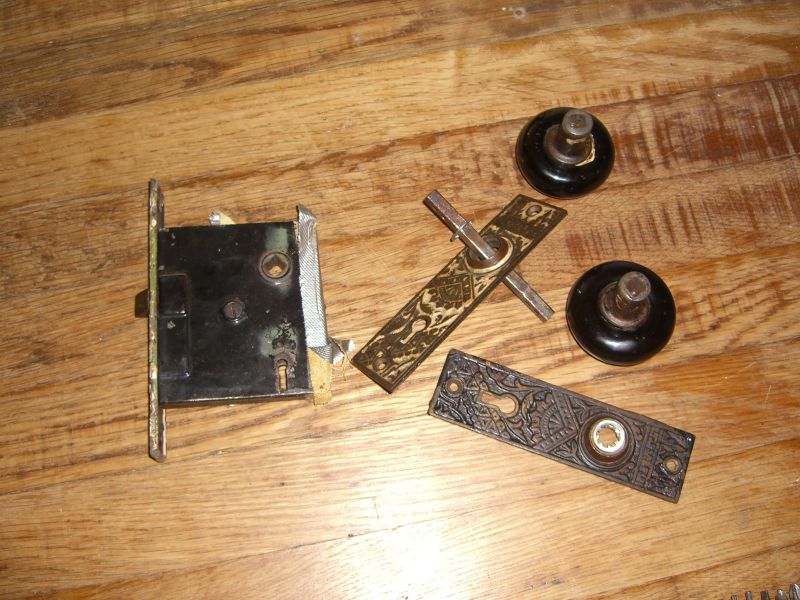
Now it was just a matter of fitting all of these pieces back together correctly:
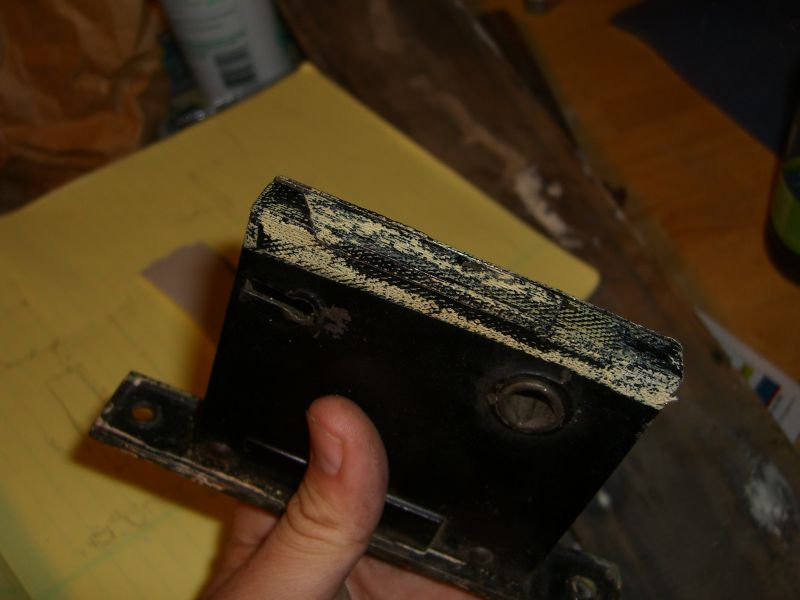
…with one small stop to the workroom. The back of the warded lock block had broken years before, and someone had attempted a fix with duct tape:
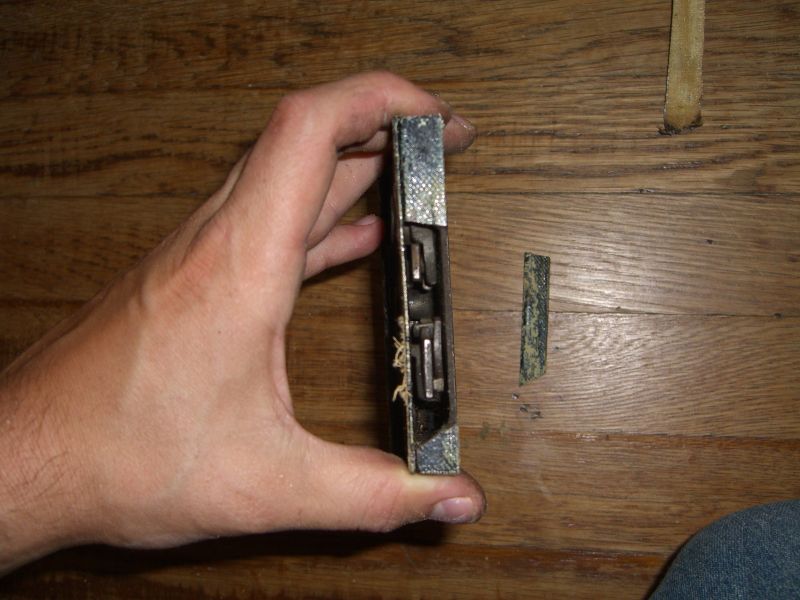
This was a more crucial part of the repair than it might immediately seem. Without a full, strong back ‘wall’ to this block, the whole internal mechanism could shift just far enough back and into the block that the latch wouldn’t always spring free and catch in the door jam. This, too was easy enough to deal with – some Goo-Gone to clean up the surfaces, a quick filing job to make sure the broken piece fit snugly back onto the block, and a bit of SuperGlue to hold it in place. Yup, SuperGlue works just fine on these old metals:
Reassemble everything, and sink a few new screws into the rebuilt ‘wood’. Voila! Working door knob:
Flora
Wow. Has it really been two months since I posted anything? The mini vacation I’m taking will give me a chance to catch you all up I’m sure. Meanwhile, here’s a little bit of what grows on three tenths of an acre (untended for a few years):
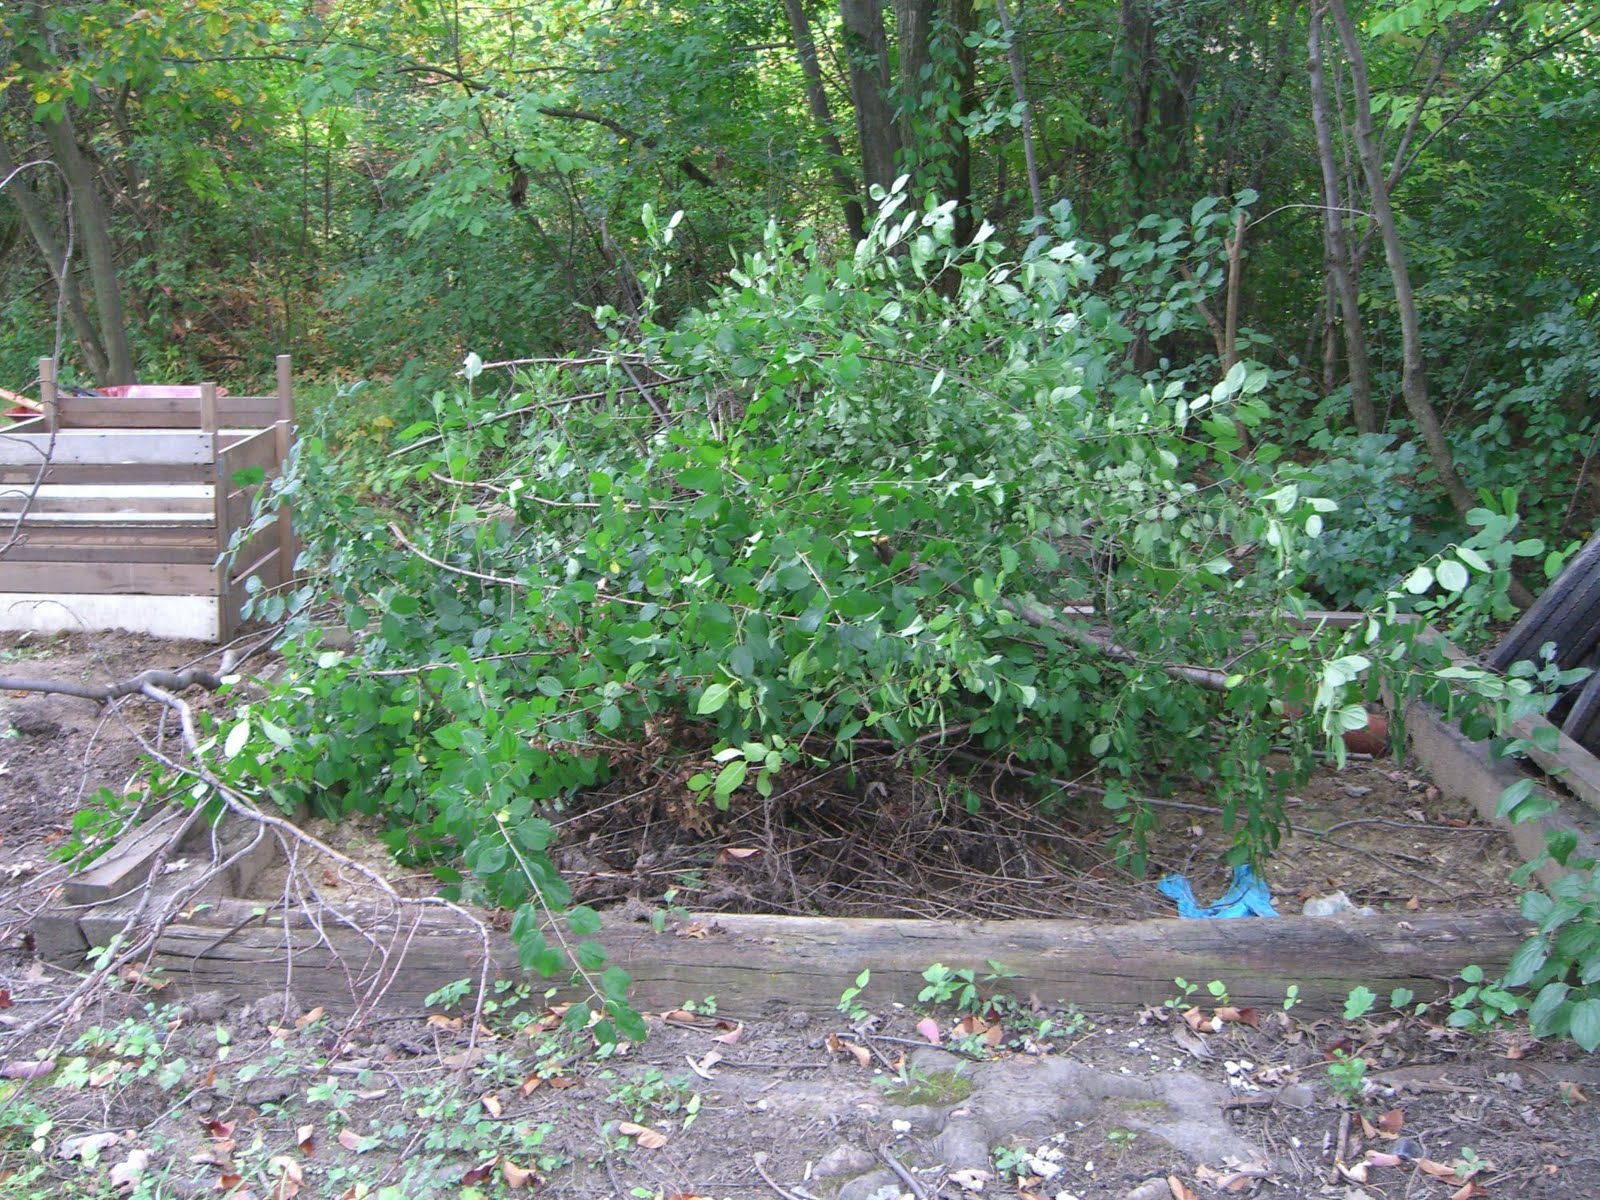
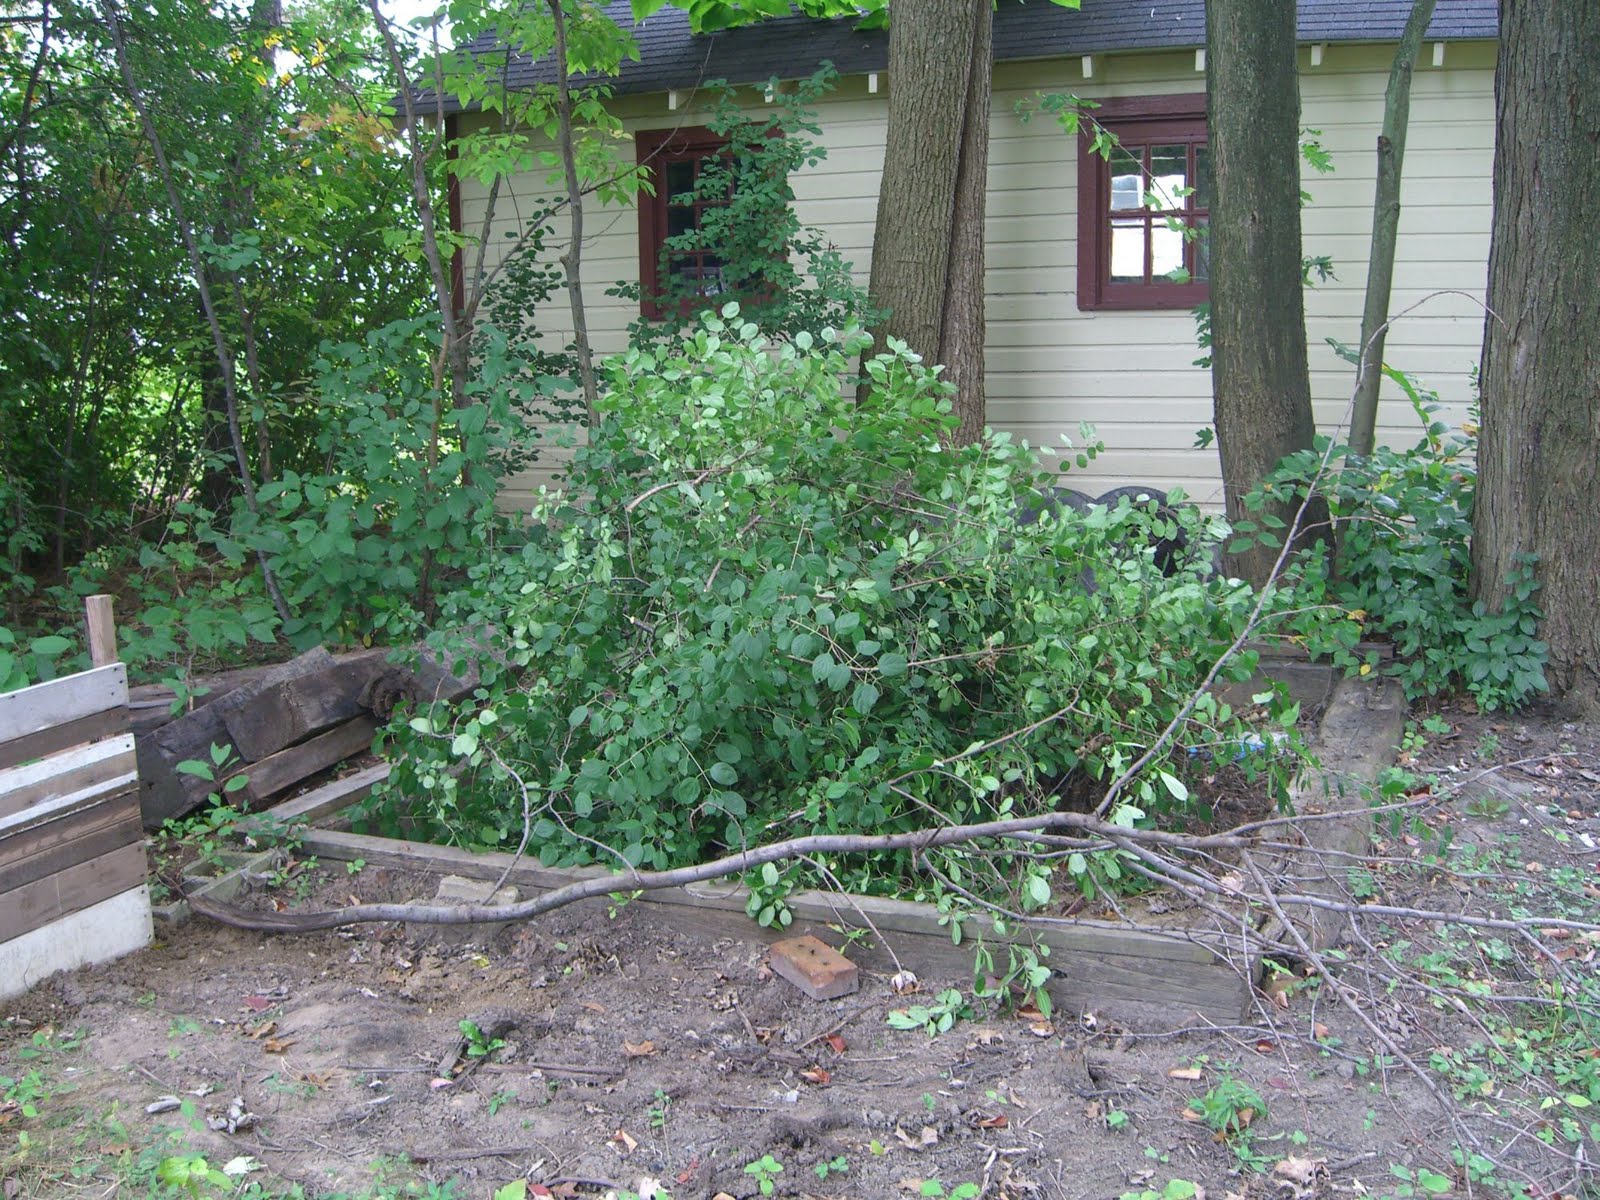 That’s a vast amount of buckthorn pulled out of the area around the old shed foundation. There’s some more on the west edge of the property, but I’m not going to deal with that until I decide what I’m planting over there.
And here’s most of the leaves that fell in the yard. I know! This blog is just so scintillating sometimes:

Pump piping
Loyal readers (hi Ezra!) will recall last summer’s adventure with my sump pump, and later issues with the hose getting tangled and once getting frozen. I said last year that I should just replace the hose with PVC piping – and now I’m finally getting to it.
First things first, turn everything off, pull the pump, and see if the pit can’t be dug a bit deeper. This will keep the water level lower in relation to the basement floor. I’d poked at this last year and thought the pit had a concrete bottom – meaning no digging. Upon closer inspection though, turns out there was just a LOT of accumulated silt…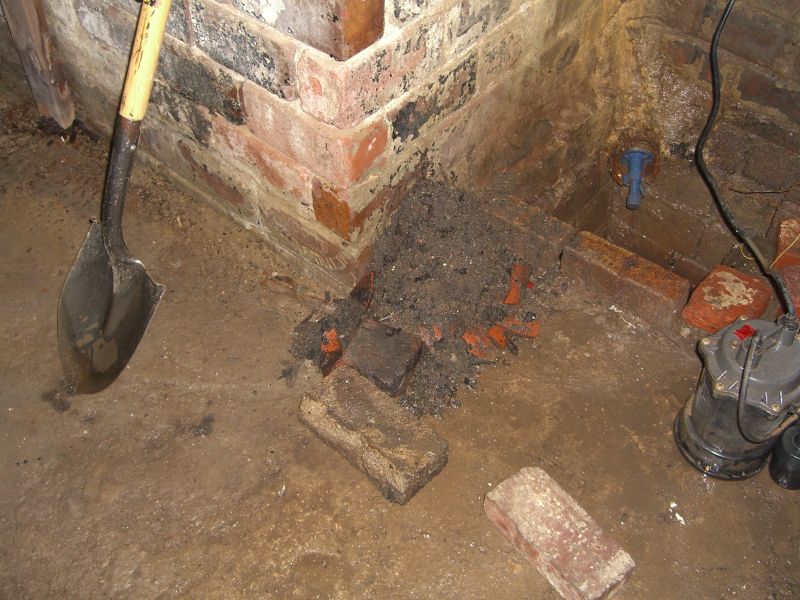 and two large bricks acting as a ledge on the dirt bottom (not pictured). Pull everything, dig some more, find two bricks of equal depth, place them carefully, lower sump pump. Now we’re getting somewhere.
As usual, these project require way more tools and equipment than one might think. Ignore the caulk gun – that was actually for something else.
 Here came the fun part. The sump pump manual has a basic diagram for setting up piping. It calls for a roughly 15″ run of pipe running from the pump to the check valve (a one way valve, necessary to keep your pump from getting slammed over and over with water still in the pipes) with a small relief hole drilled into it; then the check valve, then a run of pipe to an elbow joint, then a run from the joint to the outside. This is actually fairly straightforward and should take about 15 minutes, cutting included, EXCEPT most check valves I’ve seen have one threaded end and one smooth end. I found it easier to buy a couple of connectors to make the whole system a) fit and b) be somewhat disassemble… able.
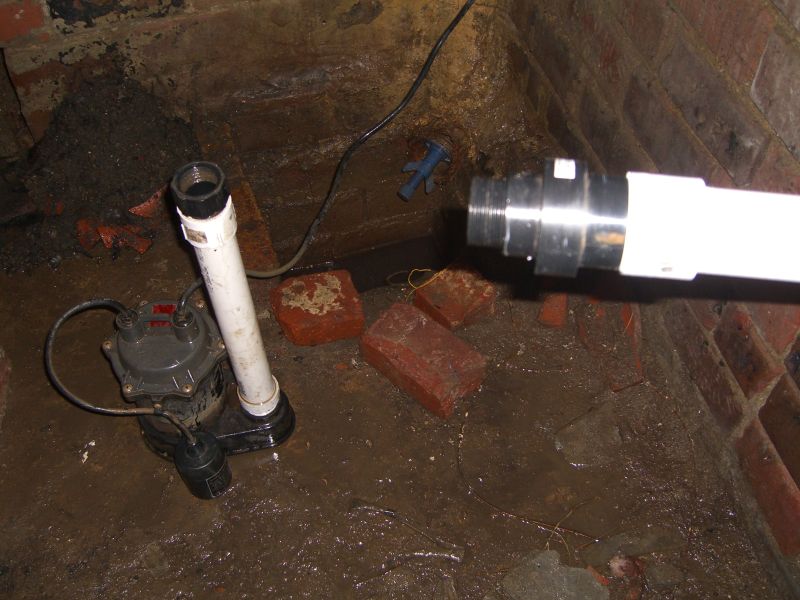 The above pic shows the end result. A male thread connector at the bottom going into the pump itself, cemented to the short run of PVC. Two different connectors (you might be able to do it with one, but this is what the hardware store had) ending up with a female thread end pointing up. The check valve will screw into this, and on its other end it’s cemented to the longer run of pipe with one last connector.
Yes, I did finish this project:
 One last important note: I put PVC cement on everything at the bottom of this contraption since I knew how it would fit together. I held off on cementing the check valve to the pipe (which requires all-purpose cement, incidentally – the check valve is made out of a different kind of plastic) and on cementing the pipes at the top (the elbow joint) together so I could make sure the whole thing was placed correctly, allowed for a slant on the horizontal run (to reduce the chances of anything freezing closed this winter), etc. This was a good idea since I discovered that a couple of additional trims and refittings would reap benefit in the long-term. HOWEVER – I was measuring and refiguring and left this all fit together, but not cemented, overnight – and of course that night it rained. Even PVC fittings you have to wrench apart may not be snug enough to withstand repeated pushes of water against the joints – in other words, the following morning, the joint finally separated and water spilled onto the floor a couple of times. No big deal for my unfinished basement, but if you’re doing this project you might want to try and complete everything, including cementing, as soon as you can.
Why it took four weeks to get a porch swing
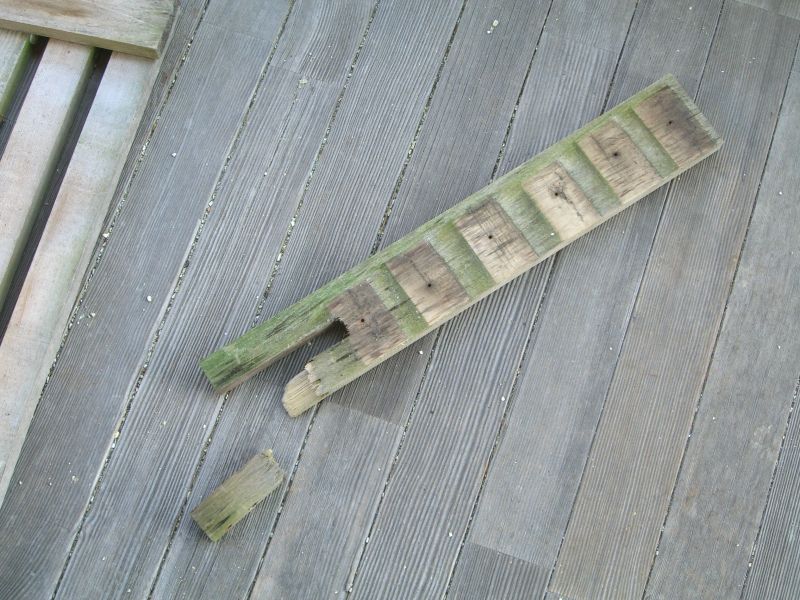
I have high hopes for building a porch swing from scratch one of these days, but the initial idea was to use wood from a black walnut in the backyard which a friend and I have yet to examine and see if it can be milled. Meanwhile, my neighbors tossed a broken porch swing a few months ago and I figured a rebuilt swing was better than no swing, at least until I carve my own swing straight from the raw timber of my land.
The swing is a bit old but in overall good shape save for the four cracked boards that connect the back of the seat to the bench: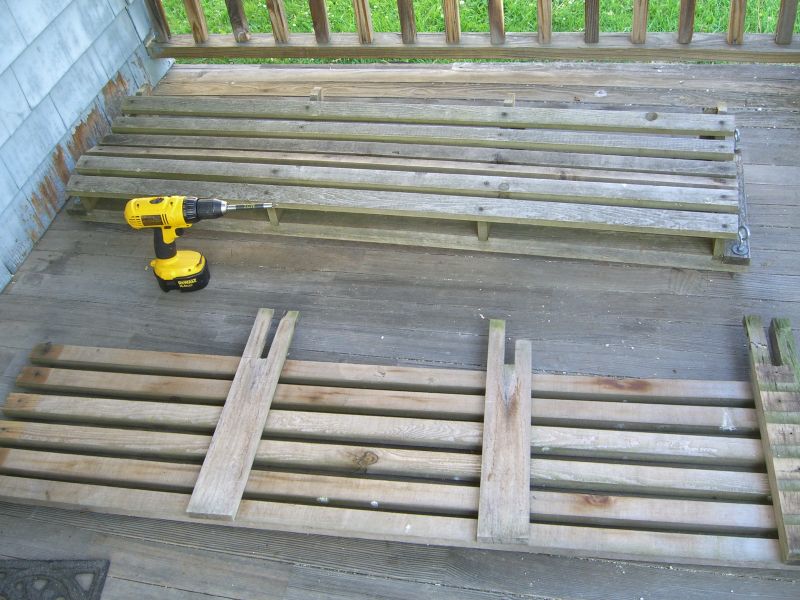
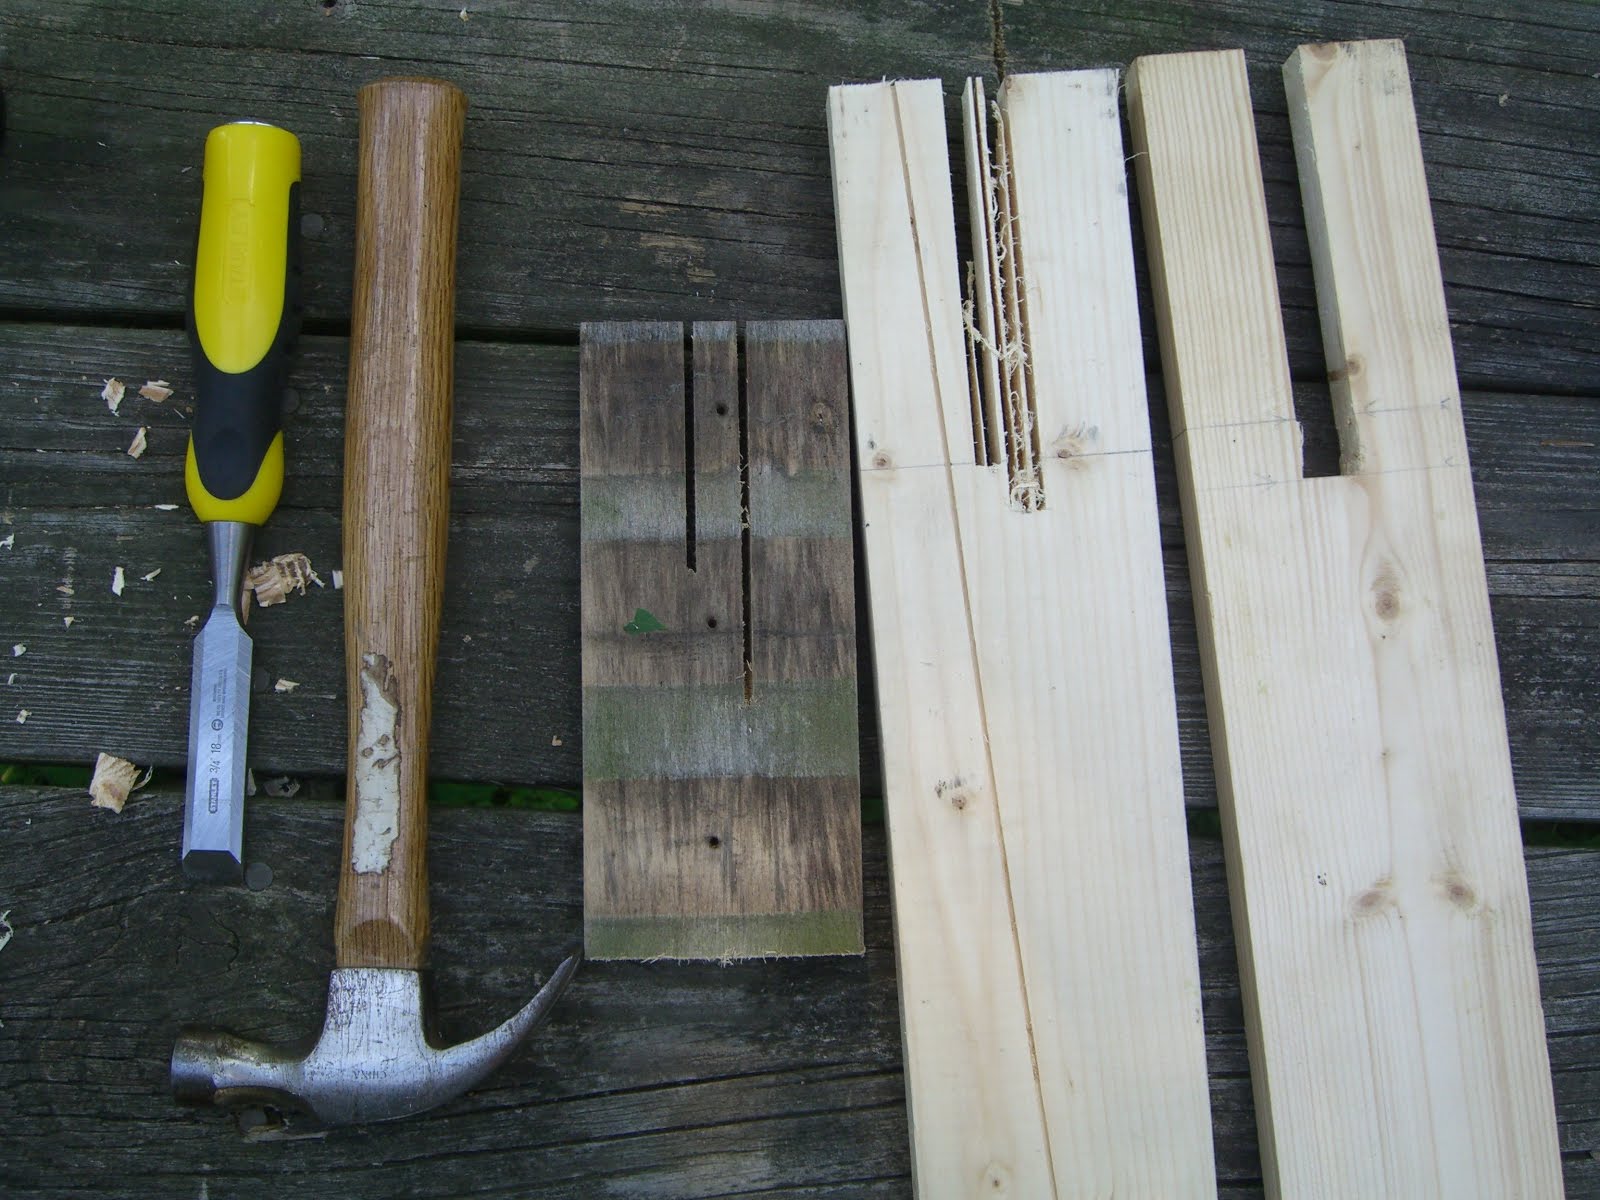
No problem, thought I – I have enough 1×4 (which is wider than the existing boards, but that’s not an issue) and I can even use my new dado blade set to easily carve the groove. Of course it wouldn’t be so simple. The arbor nut on the table saw didn’t want to budge, so I was forced to improvise using just the normal blade. I ran each board through multiple times, shifting the cut width to cut the outer edges of the groove and remove some of the wood in the middle, then used a chisel to clean everything out. The only tricky thing, really, is to remember that the blade will cut further on the underside of the board than on the top – I marked a second line further down the board to compensate and tell me when to stop.
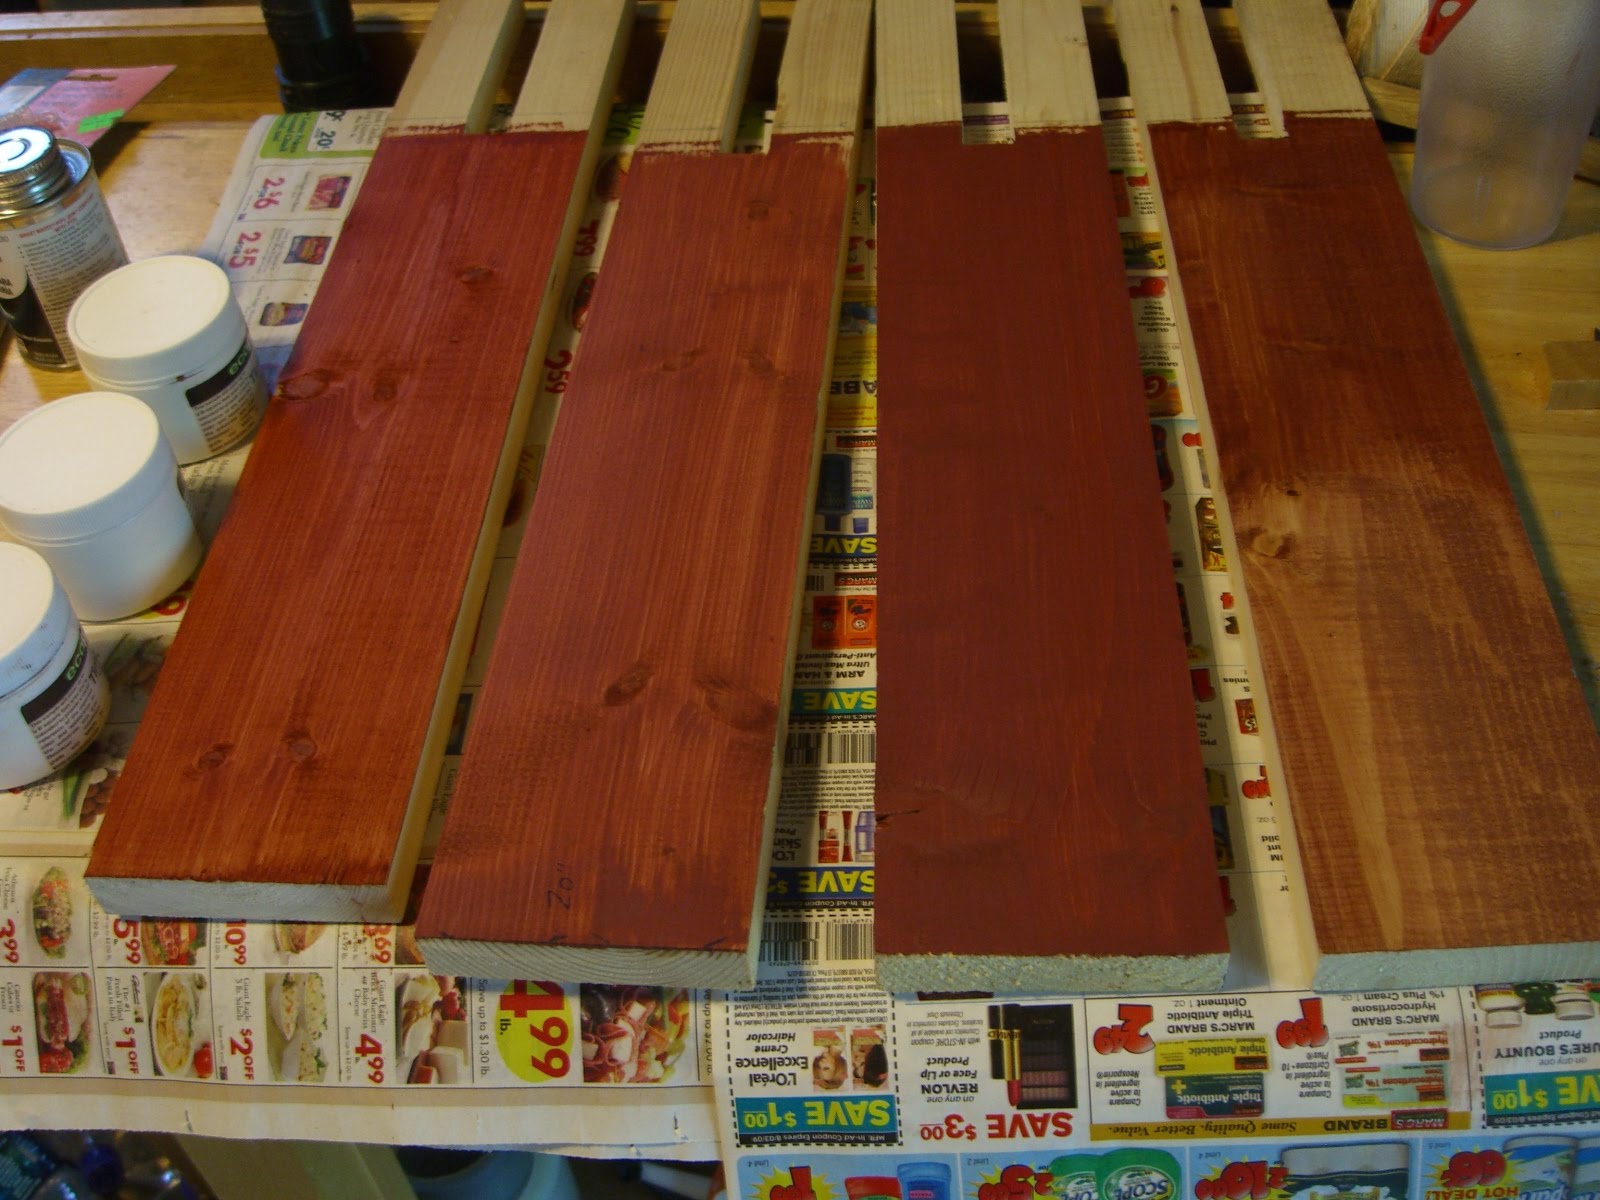
 Since this isn’t the ‘final’ porch swing for the house, I took the opportunity to test out some all-natural stain samples to see how they look, and how they weather:
 Reassembly:
 And a porch swing chain set from Lowes:
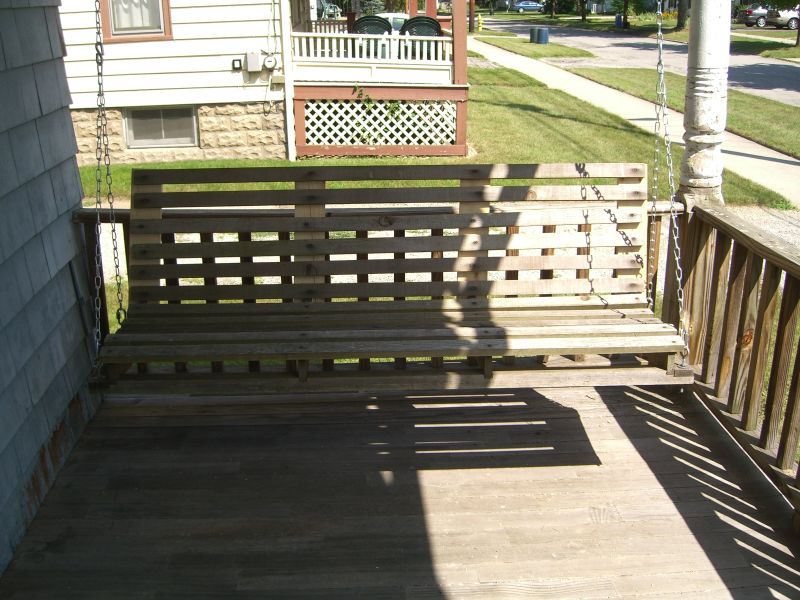 Now to paint the porch.
Hard and deeply buried targets
That’s not an innuendo, just a reference to my days working for DoD. It’s also an appropriate title for this post about pulling a set of old pilings that had once supported a deck in my backyard. The deck is long gone and the thick pilings are now just in the way of various plans for the space.
Incidentally, these pics were taken over the span of at least a month. Plenty of things have been happening at the house, but since June 2 plenty more have been happening with the theater festival I’m in this summer. My days have been a combination of rehearsals/performances, housework, client work, eating, and sleeping. No time for reportage.
Back to the reportage:
 This is one of five pilings that need to be pulled this summer. Thick, heavy, sturdy wood that’s been sunk in the ground for a number of decades now. I asked the previous owner how deep they were and if there was any concrete. To the best of his recollection, they’re buried about three feet down, and there was no concrete. You can see where this is going.
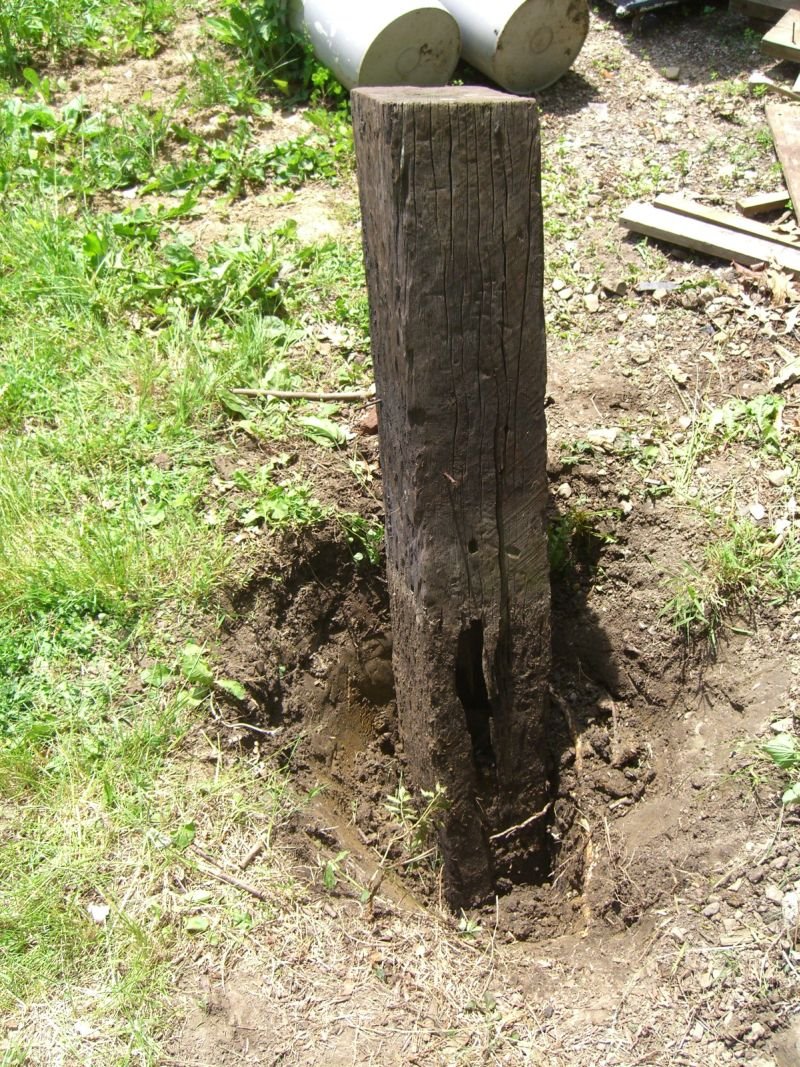 They are buried three feet deep.
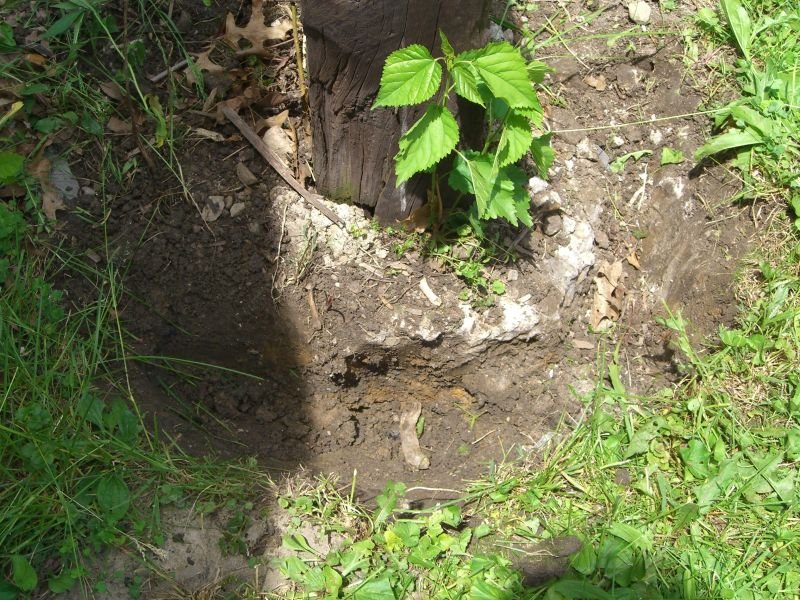 There is a ring of concrete a few inches down, about 4-6″ deep. Fortunately I’d recently bought a three-pound sledge. Remember to wear safety goggles when taking out your aggression on some harmless (but very in the way) concrete. Also, dig out underneath the concrete as much as you can with either a shovel or spade before wacking the rocks.
Pulling an old piling isn’t that difficult a process, just time and labor intensive. Dig, break up any concrete, pull any rocks right by the base, keep digging…
 If they’re buried three feet deep these things’ll be pretty hard to pull straight up (although far from impossible – see the last pic in this series). I found the best way to remove them was to rock them back and forth (it also loosens some of the dirt at the base, although if you rock it too hard you’ll start compacting the dirt), digging out more of an oval to allow the piling to ‘fall’ further with each shove. Eventually you should be able to do one of two things – either get a 2×4 under the buried end and just lever the piling out:
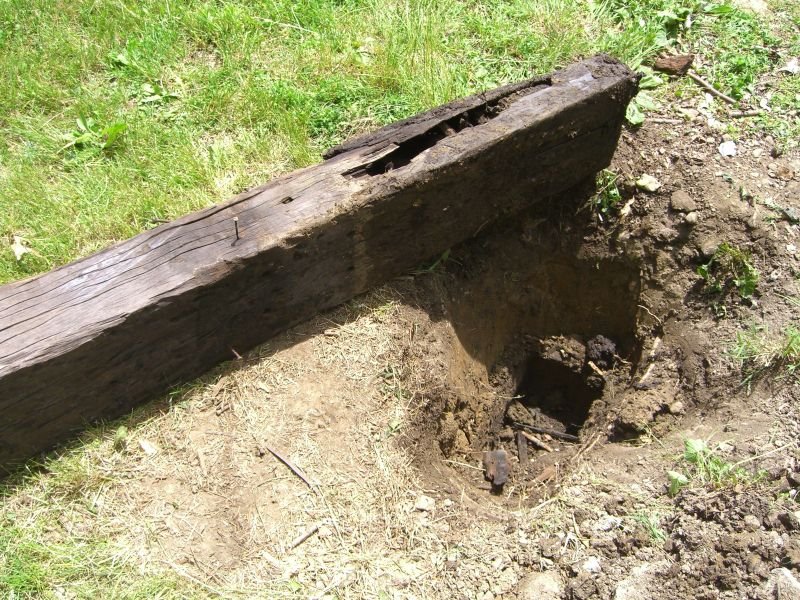
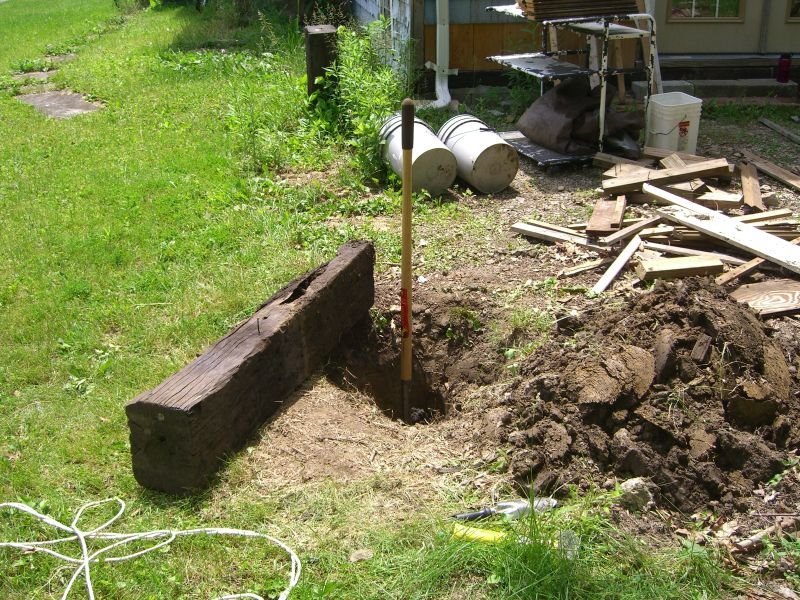
 Or, if you really loosen all the dirt around the base enough, and there’s something to grab onto, you can lean the piling against the side of the hole and drag it up and out:
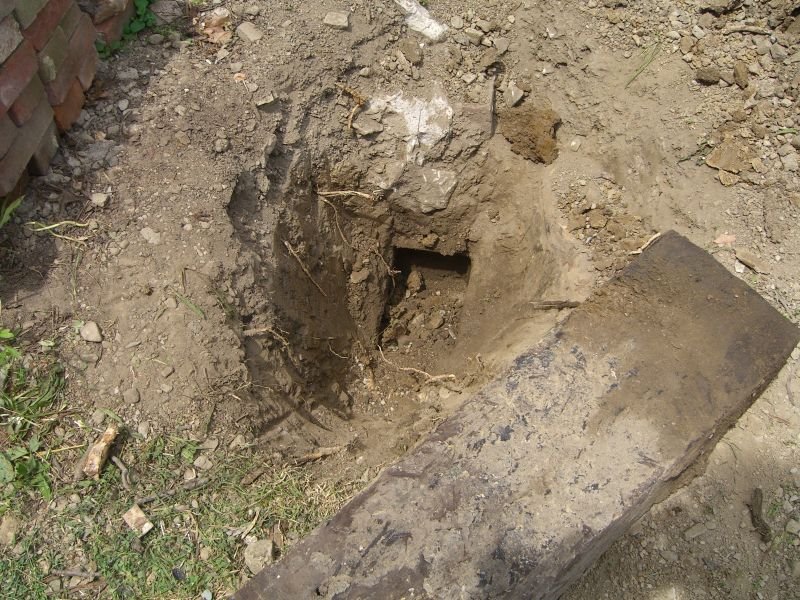 This third one was a real problem. Aside from the bricks I’d stacked right next to it before the winter that had to be moved, two sides of the piling had obstructions that made it very difficult to dig a full hole. On the right (not visible) are some old tree roots about as thick as your arm. On top is either an old cement/brick pour from who knows when, or some additional heavy fill put in when the piling was sunk. It just took a little longer to work around everything, but now it’s done. Hooray!
Oh, and fill the holes back in before you close up for the day. It’s always these little details that escape us after hours of manual labor.
Door!
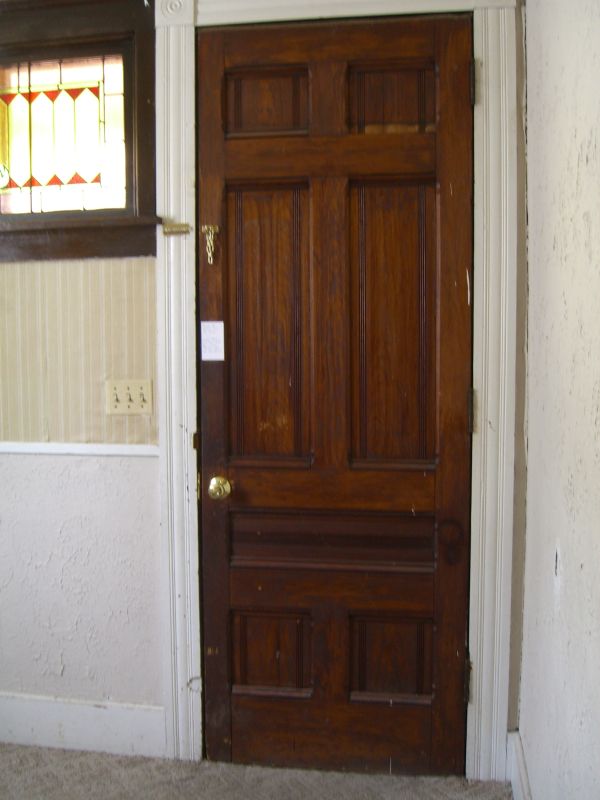
The house has a beautiful old (huge) front door that gets comments from many visitors. Not clearly visible in the pictures is that the door use to hang the other way and it was switched probably well over 60 years ago. It needs some refinishing and a couple of accent bits but those can come later. Meanwhile, functionality is obviously paramount.

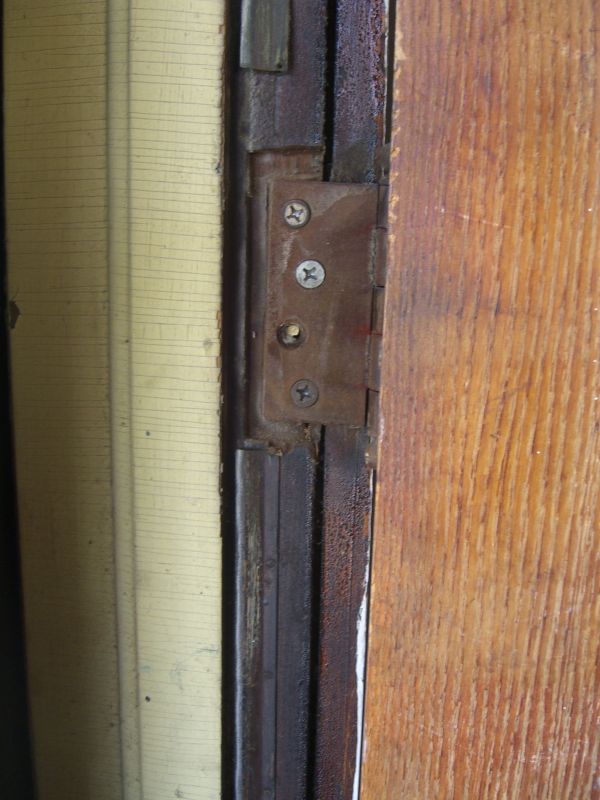
 A few months back, though, the door began rubbing in its frame more and more. Mishandling (slamming) didn’t help things and the situation got worse. I took a look at the frame and found a couple of things. First, there are at least three different types of screws in the hinges, indicating it was patched over time and probably not in the best way.
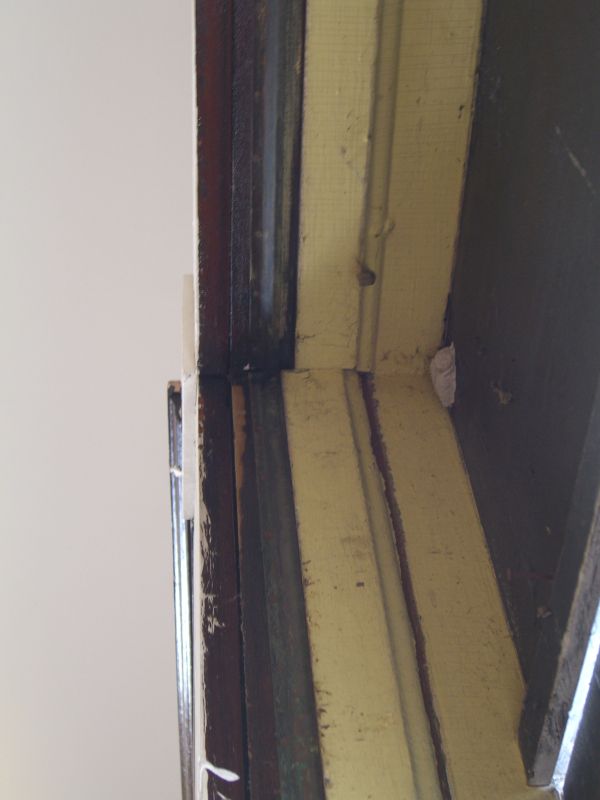
Second, the door stop was adjusted at some point and when it was reattached to the frame – with just a screw or two – it wasn’t properly lined up.
 Straightening the stop was an easy fix, and it made it a bit easier to close the door. But it was still rubbing, and getting worse. The top hinge was the worst culprit, and I tried a temporary solution of tightening the screws as far as they’d go. This helped, but was definitely temporary – and more slamming worsened the problem quickly. Soon, the screw holes – already over-wide and partly stripped from the patch jobs – weren’t holding the threads and the door was essentially leaning on two hinges.
Talking with several friends and carpenters the diagnosis wasn’t great – while some were more than willing to help make it happen, we were talking about replacing an entire side of the door frame. It would be time intensive. With expert friends, it might not cost too much, but it would still be a pretty big project.
Fortunately I emailed one other friend to confirm the diagnosis – O.T. emailed right back with a quick, simple, cheap fix he’s found extremely effective: chopsticks. Worth a try, he said, before getting into a costly, big repair.
 Rather than pack the old screw holes with putty or replace the entire frame side to give the screws something to sink into, all that might be needed is enough strong wood to surround most of the threads. Typical takeout chopsticks are still bamboo, which is very strong.
A few quick steps and this job is done:
1) Pull one screw at a time. Push in a chopstick as far as it’ll go, mark off.
2) Cut the stick – heavy kitchen shears worked for me. Because of the thickness of the hinges, I clipped at least 1/4″ shorter than my mark – cutting short in this situation is fine – cutting too long will just screw you over since it’ll be hard to pull the chopstick back out.
3) O.T. said wood glue couldn’t hurt – I used it on about half of the sticks, just a quick coat on two sides.
4) Put the shortened stick all the way in (use another chopstick to firmly seat it). If you used wood glue, you might as well wait a little while for the glue to dry. Otherwise, just put the screw back in – I felt immediate results with the hinge tightening back into place.
5) For really drilled out holes or thick diameter screws, multiple chopstick pieces can be necessary.
Doing this repair is pretty easy, but it only works if the screw holes are at least the diameter of the chopstick. Doors are often hung with heavier screws, so you’ll probably be fine – I would have been very reticent to drill out the holes if the chopsticks didn’t fit.
Getting rediculous…
Still having clog problems. To recap – there’s a clog somewhere in the standpipe below the four drains that feed to the main line (see pic here). It has to be below, down where they all come together, because pouring water down any of the lines – shower, toilet, sink – results in bubbles and gurgling noises in the others.
I relented and used a sulfuric acid drain opener yesterday. This seemed to work initially, but I may just have not put enough water into the pipes last night to know for sure. Further testing this morning reveals that the clog (well, a clog; it’s possible this one is further down the line) is still there.
So. The drain auger didn’t work – the clog is probably a hair clog (it’s quite solid when I do hit it) and I’m not pulling anything out when I do get the snake jammed into it. Enzymes didn’t work, which furthers the theory that it’s a hair clog. The sulfuric acid may have become too dilute, or there may not have been enough of it, or it may not have worked for some other reason. I’m inclined to think it’s the first option – read the directions on drain cleaners and it’s clear they are generally made to attack clogs in the trap of a drain, i.e. fairly close to the drain opening. To get the cleaner down to where this clog is means pushing water behind it.
I’ve also been unable to budge the standpipe cover even with some super penetrating oil loaned to me by Nate. That last one is frustrating because you just know the clog is probably right there…
My options right now seem to be thus:
– keep trying on the stand pipe cover; maybe use a blowtorch (after wiping away any excess penetrating oil) and use vise grips as opposed to a wrench
– find a way to get drain cleaner to the clog in an undiluted form. I’m thinking I could drill a hole in the PVC pipe from the sink and pour the cleaner into a run that heads downwards, as opposed to dealing with the various horizontal runs on the drains. I would then cover the hole with one of those rubber sleeves tightened by pipe clamps.
– call a plumber. I’m leaving this one until I have to – if I can’t open the stand pipe, get the thing to move with a snake, or get the drain cleaner to the clog undiluted, I suspect a plumber will have to do some significant labor to have any more luck. In the interest of not spending hundreds of dollars when I could spend several hours of my own time, I’ll keep at this until I’m heading beyond my abilities.
UPDATE (February ’09): Had to call a plumber and have the drain snaked. Even if I did get the cover off (he did it via vibration – hammer and chisel for a few moments, then it opened with ease) the clog – which he thinks was a bic pen or the like – was 5-10′ down the line. So I have a perfectly functioning drain now, which is great. But I did pay $165 for an hour’s work…
Plumbing the depths
Been quiet for a few days, I know, but not because nothing is going on. The shed is almost finished out back (some rain and snow (none that stuck) delayed things, but the builder is working hard at this moment in some near-freezing temperatures, and the thing should be finished, including roof shingles, tomorrow) just in time for it to be too cold for me to want to haul anything out there.
Meanwhile, I came home Saturday to find what looked like a minor mud explosion in my downstairs bathroom. Something had forced a lot of the gunk that built up in the pipes up out of the drain and splattered it around a bit. The cleanup was quick and easy but clearly there was a pipe problem. Still is, actually. As I write this, I’ve located several small leaks in the drainpipes (shower, sink, toilet), none of which should be too hard to fix – that’s another post. The bigger problem -and what likely caused the eruption – is a severe clog somewhere in the line.
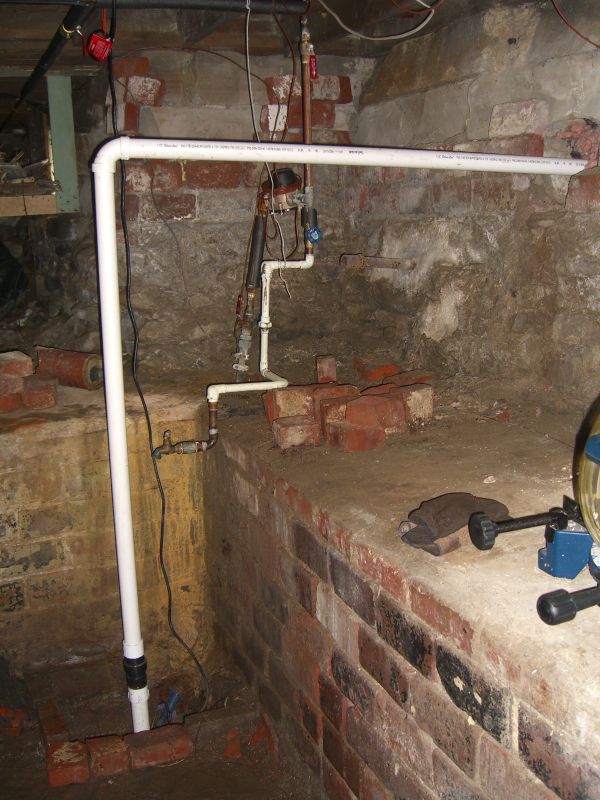
The water in the pipes is clear – run the shower and it runs down past the trap no problem, for example. But run any of the three long enough and you can hear burbling from at least one of the others; when I used a plunger to test the drains I’d often hear it in both the others. All three – plus the outflow from the washing machine upstairs, and an uncovered(!) vent outside which I’ve recently covered – feed into a main standpipe and I’m guessing that’s where the problem lies:
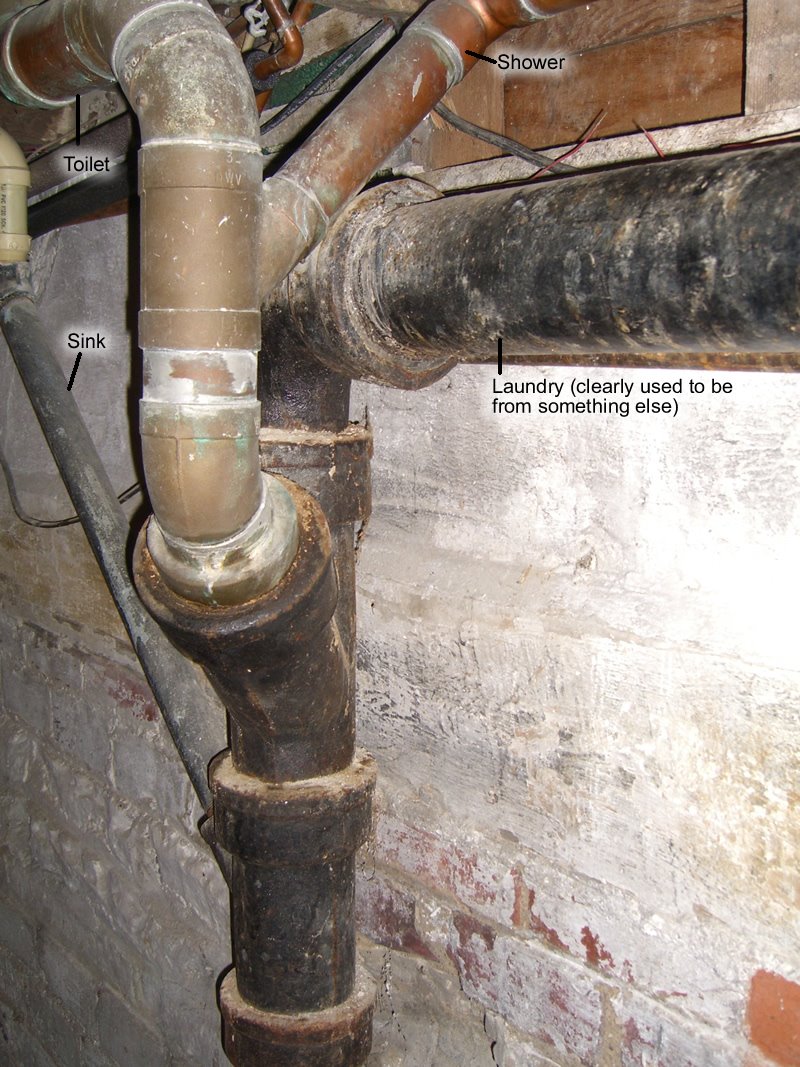 Trying to figure out what to apply to the clog, though, and how is the trick. With the traps on all three bathroom fixtures – and the clog looking like it’s past the traps – it seems like pouring something down the laundry pipe would be best. There’s a short run of PVC at the top, though, and the best cleanser I have is lye – I’m reading that lye is not good for PVC (and absolutely not good for aluminum, galvanized steel, and other specific metals with which it can react; fortunately I have none of that – just copper, cast iron, and pvc). I’ve ordered some enzyme cleaners which will be good for keeping the pipes clear in the long run, but I need to get this clog out soon if I want to actually use my bathroom again – 45 second showers don’t really work.
The sink is mostly PVC to the stand pipe. The shower looks like all copper from the drain down. But again both, and the toilet, have a full trap somewhere on the line so I think I’ll try the laundry pipe first – if a dose or two does damage the PVC it should be a lot easier to replace that where it connects to the cast iron on the second floor than any of the other lengths.